FreshRSS

Normální zobrazení

Jsou dostupné nové články, klikněte pro obnovení stránky.
PředevčíremCNX Software – Embedded Systems News

Beelink SEi12 i7-12650H mini PC review – Part 3: Ubuntu 22.04 Linux

Beelink SEi12 i7-12650H mini PC Review Ubuntu 22.04

After going through an unboxing and teardown of the Beelink SEi12 i7-12650H mini PC, and testing the 12th gen Intel Core i7-12650H mini PC in Windows 11 Pro, we’ll now report our experience with Ubuntu 22.04 in the third part of the review to show how the Beelink SEi12 performs in Linux.

We will perform feature testing, run some benchmarks to evaluate performance, test Ethernet, WiFi 6, and Bluetooth, submit the system to a stress test to check its cooling performance and measure fan noise and power consumption. We’ll also compare it to the GEEKOM Mini IT12 mini PC with the same Intel Core i7-12650H CPU.

Beelink SEi12 i7-12650H mini PC Review Ubuntu 22.04

Ubuntu 22.04 installation

We shrank the Windows partition is about half to install Ubuntu 22.04 in dual boot configuration along with Windows 11 Pro.

Beelink SEi12 Disk Management Dual Boot Windows Linux
We then installed Ubuntu 22.04.3 ISO from a USB flash without any issues.

Ubuntu 22.04 system information

After a system update, going to Settings->About shows we have Ubuntu 22.04.4 running on an AZW SEi computer equipped with a 12th Gen Intel Core i7-12650H processor with 16 threads, 32GB RAM, and 626.8 GB of storage (the preinstalled 500GB M.2 SSD plus our own 128GB SATA drive).

Beelink SEi12 i7-12650H Ubuntu 22.04
We can find more details in a terminal:

aey@SEi12-cnx:~$ cat /etc/lsb-release
DISTRIB_ID=Ubuntu
DISTRIB_RELEASE=22.04
DISTRIB_CODENAME=jammy
DISTRIB_DESCRIPTION="Ubuntu 22.04.4 LTS"
aey@SEi12-cnx:~$ uname -a
Linux SEi12-cnx 6.5.0-21-generic #21~22.04.1-Ubuntu SMP PREEMPT_DYNAMIC Fri Feb  9 13:32:52 UTC 2 x86_64 x86_64 x86_64 GNU/Linux
aey@SEi12-cnx:~$ free -mh
               total        used        free      shared  buff/cache   available
Mem:            31Gi       1.6Gi        27Gi       539Mi       2.2Gi        28Gi
Swap:          2.0Gi          0B       2.0Gi
aey@SEi12-cnx:~$ df -mh
Filesystem      Size  Used Avail Use% Mounted on
tmpfs           3.2G  2.4M  3.2G   1% /run
/dev/nvme0n1p5  227G   15G  202G   7% /
tmpfs            16G   46M   16G   1% /dev/shm
tmpfs           5.0M  4.0K  5.0M   1% /run/lock
efivarfs        192K  110K   78K  59% /sys/firmware/efi/efivars
/dev/nvme0n1p1   96M   33M   64M  34% /boot/efi
tmpfs           3.2G  128K  3.2G   1% /run/user/1000

The inxi command provides more details:

aey@SEi12-cnx:~$ inxi -Fc0
System:
  Host: SEi12-cnx Kernel: 6.5.0-21-generic x86_64 bits: 64
    Desktop: GNOME 42.9 Distro: Ubuntu 22.04.4 LTS (Jammy Jellyfish)
Machine:
  Type: Desktop Mobo: AZW model: SEi serial: <superuser required>
    UEFI: American Megatrends LLC. v: ALDER112 date: 06/09/2023
CPU:
  Info: 10-core (6-mt/4-st) model: 12th Gen Intel Core i7-12650H bits: 64
    type: MST AMCP cache: L2: 9.5 MiB
  Speed (MHz): avg: 445 min/max: 400/4600:4700:3500 cores: 1: 400 2: 400
    3: 657 4: 400 5: 534 6: 400 7: 400 8: 400 9: 400 10: 521 11: 400 12: 609
    13: 400 14: 400 15: 400 16: 400
Graphics:
  Device-1: Intel Alder Lake-P GT1 [UHD Graphics] driver: i915 v: kernel
  Display: wayland server: X.Org v: 1.22.1.1 with: Xwayland v: 22.1.1
    compositor: gnome-shell driver: gpu: i915 resolution: 1600x900~60Hz
  OpenGL: renderer: Mesa Intel Graphics (ADL GT2)
    v: 4.6 Mesa 23.2.1-1ubuntu3.1~22.04.2
Audio:
  Device-1: Intel Alder Lake PCH-P High Definition Audio
    driver: snd_hda_intel
  Sound Server-1: ALSA v: k6.5.0-21-generic running: yes
  Sound Server-2: PulseAudio v: 15.99.1 running: yes
  Sound Server-3: PipeWire v: 0.3.48 running: yes
Network:
  Device-1: Realtek RTL8111/8168/8411 PCI Express Gigabit Ethernet
    driver: r8169
  IF: enp3s0 state: down mac: 7c:83:34:bf:01:c2
  Device-2: Intel Wi-Fi 6 AX200 driver: iwlwifi
  IF: wlp4s0 state: up mac: 70:d8:c2:14:a4:4c
Bluetooth:
  Device-1: Intel AX200 Bluetooth type: USB driver: btusb
  Report: hciconfig ID: hci0 state: up address: 70:D8:C2:14:A4:50 bt-v: 3.0
Drives:
  Local Storage: total: 583.76 GiB used: 13.39 GiB (2.3%)
  ID-1: /dev/nvme0n1 vendor: Crucial model: CT500P3PSSD8 size: 465.76 GiB
  ID-2: /dev/sda model: CJ225128TC size: 118 GiB
Partition:
  ID-1: / size: 226.75 GiB used: 13.36 GiB (5.9%) fs: ext4
    dev: /dev/nvme0n1p5
  ID-2: /boot/efi size: 96 MiB used: 32.6 MiB (33.9%) fs: vfat
    dev: /dev/nvme0n1p1
Swap:
  ID-1: swap-1 type: file size: 2 GiB used: 0 KiB (0.0%) file: /swapfile
Sensors:
  System Temperatures: cpu: 43.0 C mobo: N/A
  Fan Speeds (RPM): N/A
Info:
  Processes: 360 Uptime: 20m Memory: 31.11 GiB used: 2.94 GiB (9.5%)
  Shell: Bash inxi: 3.3.13

We have an Intel Core i7-12650H processor with 10-core (6-mt/4-st) and 16 threads closed up to 4700 MHz, a Crucial CT500P3PSSD8 with size 465.76 GB capacity, a CJ225128TC SATA SSD that we installed for testing, and an AX200 module for WiFi and Bluetooth. The CPU temperature is reported to be 43°C at idle which seems about right, but we’ll test that again.

Ubuntu 22.04 benchmarks on Beelink SEi12 i7-12650H mini PC

Let’s start with sbc-bench.sh:

aey@SEi12-cnx:~/Downloads/sbc-bench-master$ sudo ./sbc-bench.sh -r
Starting to examine hardware/software for review purposes...

sbc-bench v0.9.64

Installing needed tools: apt-get -f -qq -y install gcc make build-essential powercap-utils curl git sysstat links mmc-utils smartmontools stress-ng p7zip, tinymembench, ramlat, mhz, cpufetch, cpuminer. Done.
Checking cpufreq OPP. Done.
Executing tinymembench. Done.
Executing RAM latency tester. Done.
Executing OpenSSL benchmark. Done.
Executing 7-zip benchmark. Done.
Throttling test: heating up the device, 5 more minutes to wait. Done.
Checking cpufreq OPP again. Done (14 minutes elapsed).

Results validation:

  * Measured clockspeed not lower than advertised max CPU clockspeed
  * No swapping
  * Background activity (%system) OK
  * Powercap detected. Details: "sudo powercap-info -p intel-rapl" -> https://tinyurl.com/4jh9nevj


Full results uploaded to http://sprunge.us/KNs4cT


# AZW SEi  / i7-12650H

Tested with sbc-bench v0.9.64 on Wed, 28 Feb 2024 15:41:49 +0700. Full info: [http://sprunge.us/KNs4cT](http://sprunge.us/KNs4cT)

### General information:

    Information courtesy of cpufetch:
    
    Name:                12th Gen Intel(R) Core(TM) i7-12650H
    Microarchitecture:   Alder Lake
    Technology:          10nm
    P-cores:
      Max Frequency:     4.700 GHz
      Cores:             6 cores (12 threads)
      AVX:               AVX,AVX2
      FMA:               FMA3
      L1i Size:          32KB (192KB Total)
      L1d Size:          48KB (288KB Total)
      L2 Size:           1.25MB (7.5MB Total)
    E-cores:
      Max Frequency:     3.500 GHz
      Cores:             4 cores
      AVX:               AVX,AVX2
      FMA:               FMA3
      L1i Size:          64KB (256KB Total)
      L1d Size:          32KB (128KB Total)
      L2 Size:           2MB
    L3 Size:             24MB
    Peak Performance:    1.35 TFLOP/s
    
The CPU features 2 clusters of different core types:

    i7-12650H, Kernel: x86_64, Userland: amd64
    
    CPU sysfs topology (clusters, cpufreq members, clockspeeds)
                     cpufreq   min    max
     CPU    cluster  policy   speed  speed   core type
      0        0        0      400    4600   Golden Cove
      1        0        1      400    4600   Golden Cove
      2        0        2      400    4600   Golden Cove
      3        0        3      400    4600   Golden Cove
      4        0        4      400    4700   Golden Cove
      5        0        5      400    4700   Golden Cove
      6        0        6      400    4700   Golden Cove
      7        0        7      400    4700   Golden Cove
      8        0        8      400    4600   Golden Cove
      9        0        9      400    4600   Golden Cove
     10        0       10      400    4600   Golden Cove
     11        0       11      400    4600   Golden Cove
     12        0       12      400    3500   Gracemont
     13        0       13      400    3500   Gracemont
     14        0       14      400    3500   Gracemont
     15        0       15      400    3500   Gracemont

31855 KB available RAM

### Clockspeeds (idle vs. heated up):

Before at 51.0°C:

    cpu0-cpu11 (Golden Cove): OPP: 4600, Measured: 4585 
    cpu12-cpu15 (Gracemont): OPP: 3500, Measured: 3488 

After at 84.0°C:

    cpu0-cpu11 (Golden Cove): OPP: 4600, Measured: 4587 
    cpu12-cpu15 (Gracemont): OPP: 3500, Measured: 3490 

### Performance baseline

  * cpu0 (Golden Cove): memcpy: 22040.2 MB/s, memchr: 34825.5 MB/s, memset: 27417.4 MB/s
  * cpu12 (Gracemont): memcpy: 8546.0 MB/s, memchr: 19112.5 MB/s, memset: 14312.9 MB/s
  * cpu0 (Golden Cove) 16M latency: 29.04 19.67 21.91 19.10 20.29 19.43 19.30 20.31 
  * cpu12 (Gracemont) 16M latency: 41.20 32.55 37.93 33.07 34.33 30.04 30.17 36.84 
  * cpu0 (Golden Cove) 128M latency: 104.9 104.3 105.0 100.9 102.9 103.7 90.12 95.98 
  * cpu12 (Gracemont) 128M latency: 126.8 121.7 126.9 123.3 128.1 123.0 122.3 122.5 
  * 7-zip MIPS (3 consecutive runs): 45080, 41688, 41058 (42610 avg), single-threaded: 5420
  * `aes-256-cbc    1275788.40k  1575155.20k  1603204.35k  1607265.62k  1606284.63k  1587265.54k (Golden Cove)`
  * `aes-256-cbc     973922.28k  1213948.46k  1254906.45k  1265038.68k  1255445.85k  1265090.56k (Gracemont)`

### PCIe and storage devices:

  * Realtek RTL8111/8168/8211/8411 PCI Express Gigabit Ethernet: Speed 2.5GT/s (ok), Width x1 (ok), driver in use: r8169
  * Intel Wi-Fi 6 AX200: Speed 5GT/s (ok), Width x1 (ok), driver in use: iwlwifi
  * 465.8GB "Crucial CT500P3PSSD8" SSD as /dev/nvme0: Speed 16GT/s (ok), Width x4 (ok), 0% worn out, 213 error log entries, unhealthy drive temp: 68°C
  * 118GB "CJ225128TC" SSD as /dev/sda: SATA 2.6, 3.0 Gb/s (current: 3.0 Gb/s), drive temp: 40°C
  * Winbond W25Q128 16MB SPI NOR flash, drivers in use: spi-nor/intel-spi

"nvme error-log /dev/nvme0 ; smartctl -x /dev/nvme0" could be used to get further information about the reported issues.

### Challenging filesystems:

The following partitions are NTFS: nvme0n1p3,nvme0n1p4 -> https://tinyurl.com/mv7wvzct

### Swap configuration:

  * /swapfile on /dev/nvme0n1p5: 2.0G (0K used)

### Software versions:

  * Ubuntu 22.04.4 LTS (jammy)
  * Compiler: /usr/bin/gcc (Ubuntu 11.4.0-1ubuntu1~22.04) 11.4.0 / x86_64-linux-gnu
  * OpenSSL 3.0.2, built on 15 Mar 2022 (Library: OpenSSL 3.0.2 15 Mar 2022)    

### Kernel info:

  * `/proc/cmdline: BOOT_IMAGE=/boot/vmlinuz-6.5.0-21-generic root=UUID=18e952a3-4ef5-4c4d-8004-84f53b2e1f0d ro quiet splash vt.handoff=7`
  * Vulnerability Spec store bypass:    Mitigation; Speculative Store Bypass disabled via prctl
  * Vulnerability Spectre v1:           Mitigation; usercopy/swapgs barriers and __user pointer sanitization
  * Vulnerability Spectre v2:           Mitigation; Enhanced / Automatic IBRS, IBPB conditional, RSB filling, PBRSB-eIBRS SW sequence
  * Kernel 6.5.0-21-generic / CONFIG_HZ=250

Waiting for the device to cool down................................... 53.0°C^C

No thermal CPU throttling was detected, and the 7-zip benchmark score was 42,610 MIPS on average, with the first run as high as 45,080 MIPS (due to the initial burst in performance) and it then stabilizes at 41,688 and  41,058 MIPS in the second and third runs. That’s much higher than the score in the GEEKOM Mini IT12 (35,730 MIPS) and we initially thought this could be due to the default PL1 and PL2 power limits:

aey@SEi12-cnx:~$ sudo powercap-info -p intel-rapl
enabled: 1
Zone 0
  name: package-0
  enabled: 1
  max_energy_range_uj: 262143328850
  energy_uj: 28853949632
  Constraint 0
    name: long_term
    power_limit_uw: 35000000
    time_window_us: 55967744
    max_power_uw: 45000000
  Constraint 1
    name: short_term
    power_limit_uw: 55000000
    time_window_us: 2440
    max_power_uw: 0
  Constraint 2
    name: peak_power
    power_limit_uw: 80000000
    max_power_uw: 0
  Zone 0:0
    name: core
    enabled: 0
    max_energy_range_uj: 262143328850
    energy_uj: 14946156195
    Constraint 0
      name: long_term
      power_limit_uw: 0
      time_window_us: 976
  Zone 0:1
    name: uncore
    enabled: 0
    max_energy_range_uj: 262143328850
    energy_uj: 57907322
    Constraint 0
      name: long_term
      power_limit_uw: 0
      time_window_us: 976

PL1 is set to 35W, and PL2 to 55W in the Beelink mini PC, while the Mini IT12 had those set to 35W and 80W respectively.  So the power limits should not be involved here, and I’m guessing the thermal design is better in the Beelink mini PC so multi-core performance is better than in the GEEKOM Mini IT12, as we had already reported in the Windows 11 Pro review.

sbc-bench.sh also reports errors for the NVMe SSD drive as well as a high drive temperature:

aey@SEi12-cnx:~$ sudo nvme error-log /dev/nvme0
Error Log Entries for device:nvme0 entries:16
.................
 Entry[ 0]   
.................
error_count	: 215
sqid		: 0
cmdid		: 0x8
status_field	: 0x2002(INVALID_FIELD: A reserved coded value or an unsupported value in a defined field)
phase_tag	: 0x1
parm_err_loc	: 0x28
lba		: 0
nsid		: 0
vs		: 0
trtype		: The transport type is not indicated or the error is not transport related.
cs		: 0
trtype_spec_info: 0
.................

aey@SEi12-cnx:~$ sudo smartctl -x /dev/nvme0
smartctl 7.2 2020-12-30 r5155 [x86_64-linux-6.5.0-21-generic] (local build)
Copyright (C) 2002-20, Bruce Allen, Christian Franke, www.smartmontools.org

=== START OF INFORMATION SECTION ===
Model Number:                       CT500P3PSSD8
Serial Number:                      2330E8647A1B
Firmware Version:                   P9CR40A
PCI Vendor/Subsystem ID:            0xc0a9
IEEE OUI Identifier:                0x00a075
Controller ID:                      1
NVMe Version:                       1.4
Number of Namespaces:               1
Namespace 1 Size/Capacity:          500,107,862,016 [500 GB]
Namespace 1 Formatted LBA Size:     512
Namespace 1 IEEE EUI-64:            6479a7 7f3000005a
Local Time is:                      Sat Mar  2 16:12:08 2024 +07
Firmware Updates (0x12):            1 Slot, no Reset required
Optional Admin Commands (0x0017):   Security Format Frmw_DL Self_Test
Optional NVM Commands (0x005e):     Wr_Unc DS_Mngmt Wr_Zero Sav/Sel_Feat Timestmp
Log Page Attributes (0x06):         Cmd_Eff_Lg Ext_Get_Lg
Maximum Data Transfer Size:         64 Pages
Warning  Comp. Temp. Threshold:     85 Celsius
Critical Comp. Temp. Threshold:     95 Celsius

Supported Power States
St Op     Max   Active     Idle   RL RT WL WT  Ent_Lat  Ex_Lat
 0 +     6.00W  0.0000W       -    0  0  0  0        0       0
 1 +     3.00W  0.0000W       -    0  0  0  0        0       0
 2 +     1.50W  0.0000W       -    0  0  0  0        0       0
 3 -   0.0250W  0.0000W       -    3  3  3  3     5000    1900
 4 -   0.0030W       -        -    4  4  4  4    13000  100000

Supported LBA Sizes (NSID 0x1)
Id Fmt  Data  Metadt  Rel_Perf
 0 +     512       0         1
 1 -    4096       0         0

=== START OF SMART DATA SECTION ===
SMART overall-health self-assessment test result: PASSED

SMART/Health Information (NVMe Log 0x02)
Critical Warning:                   0x00
Temperature:                        48 Celsius
Available Spare:                    100%
Available Spare Threshold:          5%
Percentage Used:                    0%
Data Units Read:                    4,937,505 [2.52 TB]
Data Units Written:                 2,694,686 [1.37 TB]
Host Read Commands:                 46,223,348
Host Write Commands:                38,475,534
Controller Busy Time:               87
Power Cycles:                       27
Power On Hours:                     164
Unsafe Shutdowns:                   2
Media and Data Integrity Errors:    0
Error Information Log Entries:      215
Warning  Comp. Temperature Time:    0
Critical Comp. Temperature Time:    0
Temperature Sensor 1:               48 Celsius
Temperature Sensor 2:               55 Celsius
Temperature Sensor 8:               48 Celsius

Error Information (NVMe Log 0x01, 16 of 16 entries)
Num   ErrCount  SQId   CmdId  Status  PELoc          LBA  NSID    VS
  0        215     0  0x0008  0x4005  0x028            0     0

I’m not 100% sure what the error is, but it looks like the controller may just not support some commands, and it’s not a big issue.

We then tested the CPU single-core and multi-core performance with Geekbench 6.2.2.

Beelink SEi12 i7-12650H Geekbench 6.2.2 Ubuntu

That would be 2,589 points for the single-core benchmark and 10,208 points for the multi-core one. The single-core result is similar to the one in the GEEKOM Mini IT12 (2,575 points), but the multi-core result is better in the Beelink SEi12 i7-12650H mini PC (Mini IT12: 9,874 points) although not with a difference as great as in the 7-zip benchmark.

We’ll evaluate 3D graphics performance with Unigine Heaven Benchmark 4.0.

Beelink SEi12 i7-12650H Unigine Heaven Benchmark4.0

The Beelink SEi12 i7-12650H mini PC achieved 38.5 FPS on average and got a score of 969 points at 1920×1080 resolution.

Next up is YouTube video streaming at 4K and 8K resolution in the Chrome web browser.

Core i7-12650H Youtube 4k p30 Chrome Linux
8K 30 FPS played great with no frame dropped after watching the video for 9 minutes.

Core i7-12650H Youtube 8k 30 Chrome Linux
Same thing for 8K 30 FPS (4320p).
Beelink SEi12 i7-12650H Youtube 4k 60 Chrome Ubuntu
As usual, 60 FPS becomes more challenging, but the Beelink SEi12 mini PC handles that relatively well at 4K 60 FPS with only 92 frames dropped out of 54,226 after playing the video for 15 minutes.

Beelink SEi12 i7-12650H Youtube 8k 60 Chrome Ubuntu
Sadly, 8K 60 FPS is another story, and the video is unwatchable with 2045 frames dropped out of 5825 in a short test, and we can also see the loading wheel from time to time although the buffer has enough data for 20 seconds of playback.
Beelink SEi12 i7-12650H Youtube 8k 60 Firefox Ubuntu
We tried to play the video in Firefox just in case, but the result is even worse with 2,285 frames dropped out of 2,689. This issue did not occur in the Beelink SEi12 i7-12650H Windows 11 Pro review, and more surprisingly, the GEEKOM Mini IT12 could play 8K 60 FPS YouTube videos with AV1 codec just fine in Firefox… Not sure what happened here.

Speedometer 2.0 was used to estimate the web browsing performance in the latest version of Firefox.

Beelink SEi12 i7-12650H Speedometer2.0 Firefox Ubuntu 22.04
The system averages 291 runs per minute with the results varying between 277.7 and 295.4 runs per minute.

Beelink SEi12 i7-12650H Ubuntu benchmarks against other mini PCs

Now that we have Ubuntu 22.04 benchmark results for the Beelink SEi12 i7-12650H, let’s compare its performance against the GEEKOM Mini IT12 (with the same Intel Core i7-12650H), GEEKOM Mini IT13 (Intel Core i9-13900H), GEEKOM AS 6 (AMD Ryzen 9 6900HX), and Khadas Mind Premium (Intel Core i7-1360P).

Before looking a the results, we should probably check out the main specifications of the five mini PCs.

Beelink SEi12GEEKOM Mini IT12GEEKOM Mini IT13GEEKOM AS 6Khadas Mind Premium
SoCIntel Core i7-12650HIntel Core i7-12650HIntel Core i9-13900HAMD Ryzen 9 6900HXIntel Core i7-1360P
CPU10-cores/16-thread processor up to 4.70 GHz10-cores/16-thread processor up to 4.70 GHz14-core/20-core processor up to 5.4 GHz, 8-core/16-thread processor up to 4.9 GHz12-core/16-core processor up to 5.0 GHz
GPU64 EU Intel UHD Graphics (Alder Lake-P GT2)64 EU Intel UHD Graphics (Alder Lake-P GT2)96 EU Intel Iris Xe GraphicsAMD Radeon Graphics 680M96 EU Intel Iris Xe
Memory32GB DDR4-320032GB DDR4-320032GB DDR4-320032GB DDR5-480032GB LPDDR5-5200
Storage500 GB NVMe SSD1TB NVMe SSD2TB NVMe SSD1TB NVMe SSD51TB NVMe SSD
Default OSWindows 11 ProWindows 11 ProWindows 11 ProWindows 11 ProWindows 11 Home

Ubuntu 22.04 benchmark results comparison.

Beelink SEi12GEEKOM Mini IT12GEEKOM Mini IT13GEEKOM AS 6Khadas Mind Premium
sbc-bench.sh
- memcpy22,040.2 MB/s (P-Core)24,180.5 MB/s (P-Core)24,014.4 MB/s (P-core)19,131.7 MB/s25,389.5 MB/s (P-core)
- memset27,417.4 MB/s (P-Core)27,539.6 MB/s P-Core) 26,647.9 MB/s (P-Core)16,781.4 MB/s24,731.8MB/s (P-core)
- 7-zip (average)42,61035,73056,54054,59244,430
- 7-zip (top result)45,08041,36060,98156,25150,396
- OpenSSL AES-256 16K1,587,265.54k (P-Core)1,630,005.93k (P-Core)1,844,401.49k (P-Core)1,249,203.54k1,771,334.31k (P-Core)
Geekbench 6 Single2,5892,5752,7451,9922,093
Geekbench 6 Multi10,2089,87411,9749,5358,891
Unigine Heaven score9691,0021,3331,5531,349
Speedometer (Firefox)291302273202242

Just like the GEEKOM Mini IT12, the Beelink SEi12 i7-12650H mini PC has excellent single-core performance as illustrated in Geekbench 6 (single core) and Speedometer results, while the 64EU Intel iGPU is a weak point of the Core i7-12650H processor. Multi-core performance is however quite better in the Beelink mini PC than in the GEEKOM device as we can see from the 7-zip results, and to a much lesser extent in the GeekBench 6.2 multi-core benchmark.

Storage performance

iozone3 command line utility can help us evaluate the performance of the 500GB NVMe SSD that comes with the mini PC:

aey@SEi12-cnx:~$ sudo iozone -e -I -a -s 1000M -r 4k -r 16k -r 512k -r 1024k -r 16384k -i 0 -i 1 -i 2
	
                                                              random    random     bkwd    record    stride                                    
              kB  reclen    write  rewrite    read    reread    read     write     read   rewrite      read   fwrite frewrite    fread  freread
         1024000       4   494627   650667   178133   177569    72708   638548                                                                
         1024000      16  1386403  1692866   198590   187623   249485  1649280                                                                
         1024000     512  1850221  1847238  2039320  2047148  2032015  1837493                                                                
         1024000    1024  1825982  1884587  2737001  2759891  2754761  1845733                                                                
         1024000   16384  1820277  1843006  4431412  4468037  4464029  1837319                                                                

iozone test complete.

That’s a sequential read speed of about 4,431 MB/s and a sequential write speed of around 1820 MB/s which compares to 4,836 MB/s and 1,905 MB/s in Windows using CrystalDiskMark.

We also tested the SATA interface with an entry-level 128GB 2.5-inch SATA SSD using iozone3:

aey@SEi12-cnx:/media/aey/New Volume$ sudo iozone -e -I -a -s 100M -r 16384k -i 0 -i 1

                                                              random    random     bkwd    record    stride                                    
              kB  reclen    write  rewrite    read    reread    read     write     read   rewrite      read   fwrite frewrite    fread  freread
          102400   16384   144165   128322   252595   255083                                                                                  

iozone test complete.

That’s about 252 MB/s for reads and 144Mb/s for writes, or about the same as in Windows, and expected for this specific SATA SSD.

USB ports testing

The speed of the USB ports was tested with an ORICO M234C3-U4 M.2 NVMe SSD enclosure together with lsusb and iozone3 command line utilities. A Seagate USB HDD will be used for the USB 2.0 ports since the ORICO enclosure is not backward compatible.

For reference, here’s the output for the front left USB port (10 Gbps)…

aey@SEi12-cnx:~$ lsusb -t | grep uas
    |__ Port 2: Dev 2, If 0, Class=Mass Storage, Driver=uas, 10000M

aey@SEi12-cnx:/media/aey/EXT4-REVIEW$ sudo iozone -e -I -a -s 1000M -r 16384k -i 0 -i 1

                                                              random    random     bkwd    record    stride                                    
              kB  reclen    write  rewrite    read    reread    read     write     read   rewrite      read   fwrite frewrite    fread  freread
         1024000   16384   991006   992899   870106   872809                                                                                  

iozone test complete.

… and the results for the top USB 2.0 port on the rear panel:

aey@SEi12-cnx:~$ lsusb -t | grep uas
    |__ Port 5: Dev 10, If 0, Class=Mass Storage, Driver=uas, 480M
aey@SEi12-cnx:/media/aey/USB3_EXT4$ sudo iozone -e -I -a -s 100M -r 16384k -i 0 -i 1
 
                                                              random    random     bkwd    record    stride                                    
              kB  reclen    write  rewrite    read    reread    read     write     read   rewrite      read   fwrite frewrite    fread  freread
          102400   16384    40168    42192    39006    41072                                                                                  
 
iozone test complete.

Summary of the results for the five ports:

  • Front panel (left to right)
    • USB-A #1 – USB 3.2 – USB 3.1 SuperSpeedPlus (10 Gbps) – Read: 870 MB/s; write: 991 MB/s
    • USB-A #2 – USB 3.2 – USB 3.1 SuperSpeedPlus (10 Gbps) – Read: 854 MB/s; write: 958 MB/s
    • USB-C #1 – USB 3.2 – USB 3.1 SuperSpeedPlus (10 Gbps) – Read: 853 MB/s; write: 944 MB/s
  • Rear panel
    • USB-A #1 (top) – USB 2.0  – USB 2.0 Hight-Speed (480 Mbps) – Read: 39 MB/s; write: 40 MB/s
    • USB-A #2 (bottom) – USB 2.0 – USB 2.0 Hight-Speed (480 Mbps) – Read: 40 MB/s; write: 31 MB/s

Everything works as expected here.

Networking performance (Gigabit Ethernet and WiFi 6)

The Gigabit Ethernet port was tested with iperf3 using AAEON UP Xtreme 11 mini PC (192.168.31.12) on the other side.

  • Download

aey@SEi12-cnx:~$ iperf3 -t 60 -c 192.168.31.12 -i 10 -R
Connecting to host 192.168.31.12, port 5201
Reverse mode, remote host 192.168.31.12 is sending
[  5] local 192.168.31.74 port 58720 connected to 192.168.31.12 port 5201
[ ID] Interval           Transfer     Bitrate
[  5]   0.00-10.00  sec  1.10 GBytes   942 Mbits/sec                  
[  5]  10.00-20.00  sec  1.10 GBytes   942 Mbits/sec                  
[  5]  20.00-30.00  sec  1.10 GBytes   942 Mbits/sec                  
[  5]  30.00-40.00  sec  1.10 GBytes   942 Mbits/sec                  
[  5]  40.00-50.00  sec  1.10 GBytes   942 Mbits/sec                  
[  5]  50.00-60.00  sec  1.10 GBytes   942 Mbits/sec                  
- - - - - - - - - - - - - - - - - - - - - - - - -
[ ID] Interval           Transfer     Bitrate         Retr
[  5]   0.00-60.04  sec  6.58 GBytes   941 Mbits/sec    0             sender
[  5]   0.00-60.00  sec  6.58 GBytes   942 Mbits/sec                  receiver

iperf Done.

  • Upload

aey@SEi12-cnx:~$ iperf3 -t 60 -c 192.168.31.12 -i 10
Connecting to host 192.168.31.12, port 5201
[  5] local 192.168.31.74 port 56696 connected to 192.168.31.12 port 5201
[ ID] Interval           Transfer     Bitrate         Retr  Cwnd
[  5]   0.00-10.00  sec  1.10 GBytes   943 Mbits/sec    0    363 KBytes       
[  5]  10.00-20.00  sec  1.10 GBytes   942 Mbits/sec    0    795 KBytes       
[  5]  20.00-30.00  sec  1.10 GBytes   942 Mbits/sec    0    795 KBytes       
[  5]  30.00-40.00  sec  1.10 GBytes   942 Mbits/sec    0    795 KBytes       
[  5]  40.00-50.00  sec  1.10 GBytes   942 Mbits/sec    0    795 KBytes       
[  5]  50.00-60.00  sec  1.10 GBytes   942 Mbits/sec    0    795 KBytes       
- - - - - - - - - - - - - - - - - - - - - - - - -
[ ID] Interval           Transfer     Bitrate         Retr
[  5]   0.00-60.00  sec  6.58 GBytes   942 Mbits/sec    0             sender
[  5]   0.00-60.05  sec  6.58 GBytes   941 Mbits/sec                  receiver

iperf Done.

  • Full duplex

aey@SEi12-cnx:~$ iperf3 -t 60 -c 192.168.31.12 -i 10 -bidir
Connecting to host 192.168.31.12, port 5201
[  5] local 192.168.31.74 port 42466 connected to 192.168.31.12 port 5201
[ ID] Interval           Transfer     Bitrate         Retr  Cwnd
[  5]   0.00-10.00  sec  1.10 GBytes   943 Mbits/sec    0    468 KBytes       
[  5]  10.00-20.00  sec  1.10 GBytes   941 Mbits/sec    0    468 KBytes       
[  5]  20.00-30.00  sec  1.10 GBytes   941 Mbits/sec    0    468 KBytes       
[  5]  30.00-40.00  sec  1.10 GBytes   942 Mbits/sec   36    454 KBytes       
[  5]  40.00-50.00  sec  1.10 GBytes   942 Mbits/sec    0    454 KBytes       
[  5]  50.00-60.00  sec  1.10 GBytes   941 Mbits/sec    0    454 KBytes       
- - - - - - - - - - - - - - - - - - - - - - - - -
[ ID] Interval           Transfer     Bitrate         Retr
[  5]   0.00-60.00  sec  6.58 GBytes   942 Mbits/sec   36             sender
[  5]   0.00-60.04  sec  6.58 GBytes   941 Mbits/sec                  receiver

iperf Done.

All good here. It’s better than in Windows, where the data rate dropped to 883 Mbps in one direction (upload).

Time to test WiFi 6 through a Xiaomi Mi AX6000 router.

  • Download

aey@SEi12-cnx:~$ iperf3 -t 60 -c 192.168.31.12 -i 10 -R
Connecting to host 192.168.31.12, port 5201
Reverse mode, remote host 192.168.31.12 is sending
[  5] local 192.168.31.127 port 40354 connected to 192.168.31.12 port 5201
[ ID] Interval           Transfer     Bitrate
[  5]   0.00-10.00  sec  1.08 GBytes   927 Mbits/sec                  
[  5]  10.00-20.00  sec  1.09 GBytes   939 Mbits/sec                  
[  5]  20.00-30.00  sec  1.10 GBytes   941 Mbits/sec                  
[  5]  30.00-40.00  sec  1.09 GBytes   933 Mbits/sec                  
[  5]  40.00-50.00  sec  1.10 GBytes   942 Mbits/sec                  
[  5]  50.00-60.00  sec  1.10 GBytes   941 Mbits/sec                  
- - - - - - - - - - - - - - - - - - - - - - - - -
[ ID] Interval           Transfer     Bitrate         Retr
[  5]   0.00-60.04  sec  6.55 GBytes   937 Mbits/sec    0             sender
[  5]   0.00-60.00  sec  6.55 GBytes   937 Mbits/sec                  receiver

iperf Done.

  • Upload

aey@SEi12-cnx:~$ iperf3 -t 60 -c 192.168.31.12 -i 10
Connecting to host 192.168.31.12, port 5201
[  5] local 192.168.31.127 port 34882 connected to 192.168.31.12 port 5201
[ ID] Interval           Transfer     Bitrate         Retr  Cwnd
[  5]   0.00-10.00  sec  1.08 GBytes   928 Mbits/sec   65   1.59 MBytes       
[  5]  10.00-20.00  sec  1.10 GBytes   942 Mbits/sec    7   1.76 MBytes       
[  5]  20.00-30.00  sec  1.10 GBytes   942 Mbits/sec    2   1.70 MBytes       
[  5]  30.00-40.00  sec  1.10 GBytes   942 Mbits/sec    8   1.27 MBytes       
[  5]  40.00-50.00  sec  1.10 GBytes   942 Mbits/sec    1   1.26 MBytes       
[  5]  50.00-60.00  sec  1.10 GBytes   942 Mbits/sec    4   1.44 MBytes       
- - - - - - - - - - - - - - - - - - - - - - - - -
[ ID] Interval           Transfer     Bitrate         Retr
[  5]   0.00-60.00  sec  6.56 GBytes   939 Mbits/sec   87             sender
[  5]   0.00-60.05  sec  6.56 GBytes   938 Mbits/sec                  receiver

iperf Done.

The results – 937 Mbps download and 939 Mbps upload – are so similar to the Ethernet results that we had to double-check, and the IP address is indeed different. As usual, WiFi data transfer rates are better in Linux than in Windows 11, where the system achieved 768 Mbps (DL) and 778 Mbps (UL).

We also quickly tested Bluetooth 5.2 by successfully transferring a file from an Android smartphone.

Beelink SEi12 Bluetooth send File test

Stress test and CPU temperature

We’ll now run a stress test on all 16 threads of the Intel Core i7-12650H processor while monitoring the package temperature with Psensor and the CPU frequency with the sbc-bench.sh script.

Stress test psensor Core i7-12650H mini PC
Beelink SEi12 i7-12650H stress test

The screenshot above shows the CPU temperature stays around 87-89°C, with the P-cores running at around 2,800 – 2,900 MHz and the E-core at 2,400 – 2,500 MHz while running the same stress test on the GEEKOM Mini IT12 revealed a different temperature chart with the package temperature quickly jumping to 91°C for a few seconds before dropping and stabilizing at around 81°C over the long run as the Core i7-12650H cores were clocked at 2,600 MHz (P-Cores) and 2,400/2,500 MHz (E-Cores). See below.

GEEKOM Mini IT12 Ubuntu Stress Test CPU Temperature
GEEKOM Mini IT12 stress test

These different behaviors should explain the 7-zip benchmark results differences between the two mini PCs, and that means the Beelink SEi12 i7-12650H performs better with the CPU operating at higher frequencies and temperatures under sustained heavy workloads. What we (the team at CNX Software) don’t know is how this might impact the expected lifetime of the processor and mini PC.

Fan noise

The mini PC’s fan is relatively quiet at idle and under light loads but becomes noisier under heavy loads without becoming too annoying. We measured the fan noise with a sound level meter placed approximately 5 cm from the top of the case:

  • Idle and web surfing – 45 – 47 dBA
  • Stress test (on 16 threads) –  50 – 53 dBA

Note that’s quite noisier than the Mini IT12 which we measured at 39.0 – 41.6 dBA at idle. The sound level meter measures 38 dBA in a quiet room.

Beelink SEi12 i7-12650H power consumption in Ubuntu 22.04

We measured power consumption with a wall power meter as follows:

  • Power Off – 1.0 – 1.1 Watts
  • Idle – 10.7 – 10.9 Watts
  • Video playback – 57.0 – 63.5 Watts (YouTube 8K60fps in Firefox)
  • CPU stressed test (stress -c 16)
    • During the first 30 seconds 73.0 – 86.6 Watts
    • After 30 seconds 60.0 – 63.0 Watts

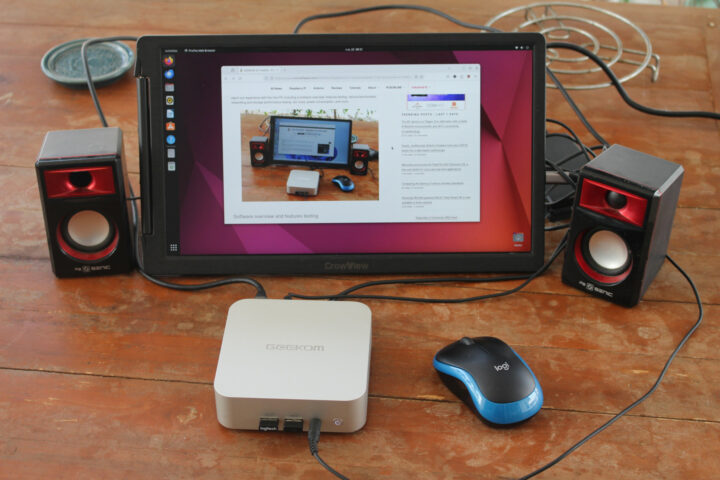
Note: The mini PC was connected over WiFi 6, one 2.4 GHz RF dongle for a wireless keyboard and mouse combo, and a 14-inch CrowView laptop monitor connected via HDMI port and its own power supply.

The stress test power consumption is higher than on the GEEKOM Mini IT12, but that’s normal because the Beelink SEi12 operates at a higher frequency. The big shocker is the power consumption while playing an 8K YouTube video as it’s about three times higher and points to software video decoding which would explain why the 8K 60 FPS video can’t be playing smoothly. Firefox’s compositing is set to “WebRender (Software)” and we tried to change a few settings, but did not manage to enable hardware video decoding.

Conclusion

The Beelink SEi12 i7-12650H mini PC performed well in Ubuntu 22.04 with all features working as expected including video output, gigabit Ethernet, WiFi 6, Bluetooth, and USB ports. YouTube video playback is working fine up to 4Kp60 and 8Kp30, but not 8Kp60 in either Chrome or Firefox.

The SEi12 performs similarly to the GEEKOM Mini IT12, except for multi-core workload where it is quite faster due to different behavior under loads where the Core i7-12650H operates at a higher frequency and temperature in the Beelink mini PC, but the Mini IT12 is configured in such a way to operate at a lower frequency and temperature under sustained multi-core loads. The main downsides compared to the Mini IT12 are the lack of USB4 ports, gigabit Ethernet networking instead of 2.5GbE, and a smaller and slower SSD for the models we tested. The latter also supported 8K 60FPS videos

We’d like to thank Shenzhen AZW Technology (aka Beelink) for sending a review sample of the Beelink SEi12 i7-12650H with 32GB DDR4 and a 500GB M.2 NVMe SSD. This model can be ordered for $439 on Amazon (after ticking on the $110 discount coupon), Aliexpress (some countries only), and on the company’s online store where you can get a $50 discount with the code 1265050 valid until March 31 (but they seem to extend it every month…). For reference, the GEEKOM Mini IT12 (32GB/1TB) typically sells for a little under $520, so the SEi12 model we tested is a cheaper device albeit with a smaller 500GB SSD and fewer ports.

CNXSoft: This review is a translation – with a few additional insights – of the original article on CNX Software Thailand by Suthinee Kerdkaew.

The post Beelink SEi12 i7-12650H mini PC review – Part 3: Ubuntu 22.04 Linux appeared first on CNX Software - Embedded Systems News.

  • ✇CNX Software – Embedded Systems News
  • Scaleway launches hosted RISC-V servers for 15.99 Euros per monthJean-Luc Aufranc (CNXSoft)
    French company Scaleway has just launched the “Elastic Metal RV1” bare metal servers which it claims to be the world’s first RISC-V servers available in the cloud with pricing at 0.042 Euros per hour, or 15.99 Euros a month excluding VAT. Scaleway launched some Arm servers based on Marvell Armada 370/XP quad-core Cortex A9 processor in 2015 before phasing those out a few years ago, and they are now just offering AMD and Intel-based servers and hosted Apple Mac computers based on the M1 Arm chip.
     

Scaleway launches hosted RISC-V servers for 15.99 Euros per month

Scaleaway Elastic Metal RISC-V servers

French company Scaleway has just launched the “Elastic Metal RV1” bare metal servers which it claims to be the world’s first RISC-V servers available in the cloud with pricing at 0.042 Euros per hour, or 15.99 Euros a month excluding VAT.

Scaleway launched some Arm servers based on Marvell Armada 370/XP quad-core Cortex A9 processor in 2015 before phasing those out a few years ago, and they are now just offering AMD and Intel-based servers and hosted Apple Mac computers based on the M1 Arm chip. But the company has decided to try something new again with the EM-RV1 servers based on Alibaba T-Head TH1520 quad-core RISC-V processor, 16GB RAM, and 128GB eMMC flash and running Debian, Ubuntu, or Alpine.

Scaleaway Elastic Metal RISC-V servers
672 RISC-V servers per 52U rack – Source: Twitter/X

EM-RV1-C4M16S128-A instance key features and specifications:

  • SoC – Alibaba T-Head TH1520
    • CPU – Quad-core RISC-V Xuantie C910 (RV64GCV) processor @ 1.85 GHz
    • GPU – Imagination BXM-4-64 with support for OpenCL 1.1/1.2/2.0, OpenGL ES 3.0/3.1/3.2, Vulkan 1.1/1.2, Android NN HAL
    • VPU  – H.265/H.264/VP9 video encoding/decoding
    • NPU – 4 TOPS @ INT8 with support for TensorFlow, ONNX, Caffe
  • System Memory – 16GB LPDDR4
  • Storage – 128GB eMMC flash
  • Networking – 100 Mbit/s Ethernet network card with public IPv4 and IPv6 addresses included
  • Power Consumption – 0.96W to 1.9W per core @ ~1.8GHz; average: 1.3W per core
  • Custom design with laser-cut chassis, 3D-printed blades
  • Pricing  – 0,042 € per hour, 15,99 € per month
Scaleaway RISC-V server benchmark GeekBench 6 CPU
Geekbench 6 CPU benchmark results

Scaleway also shared some benchmark results showing the performance of the EM-RV1 RISC-V server against the StarFive VisionFive 2 RISC-V SBC and some of their x86 instances. In Geekbench 6, it’s faster than a server based on an Intel C2350 dual-core processor (Dedibox Start-3-S), but still ways off the octa-core Intel C2750-based Dedibox Start-1-M.

Note the EM-RV1 instances are part of Scaleway Labs so it’s mostly for evaluation, but the company also says the RISC-V server can be useful for testing RISC-V applications, CI/CD, and AI applications thanks to the 4 TOPS NPU found in each TH1520 SoC. You can get started on the product page where you’ll also find additional information and extra benchmarks.

I didn’t try the Scaleway RISC-V server myself, but Bret Weber did and he reported his experience setting up an instance with Ubuntu 23.10 (GNU/Linux 5.10.113+ riscv64) and ran several benchmarks. Scaleway says the EM-RV1 servers have been designed in-house with “the soldering of electronic components, the development of specific firmware, and the manufacture of the enclosures using 3D printing”, but Bret also noted the arrangement of the ports on the first photo in this post looks very similar to the Sipeed Lichee Cluster 4A box.

Sipeed Cluster 4A Box ports

So it looks like they used the Sipeed Cluster 4A box’s motherboard fitted with Sipeed LM4A modules, and customized the mechanical design so that they can fit several such boards into a rack.

The post Scaleway launches hosted RISC-V servers for 15.99 Euros per month appeared first on CNX Software - Embedded Systems News.

Embedded Open Source Summit 2024 schedule – Embedded Linux, Zephyr OS, and Real-time Linux

The Embedded Open Source Summit 2024 (EOSS 2024) will take place on April 16-18 and the Linux Foundation has already announced the schedule with conference sessions, lightning talks, and birds of a feather (BoF) sessions covering embedded Linux, Zephyr OS, and real-time (RT) Linux.

While I won’t be attending in person, I still find it interesting to check out the schedule as we may learn more about the current status of embedded Linux. So I’ve created my own little virtual schedule out of the available talks.

Tuesday, April 16 – Day 1, Embedded Open Source Summit 2024

  • 9:05 – 9:45 – No, It’s (Still) Never Too Late to Upstream Your Legacy Linux-Based Platforms by Neil Armstrong, Linaro

Nearly 7 years ago, Neil already spoke about this subject in Berlin, and it’s still very true. Do you maintain or used to maintain a Linux-based board or SoC off-tree? Then there are plenty of reasons for you to push your changes to the mainline Linux. Some will say it’s too late, too complex, or too expensive but the long-term benefits of regular upstreaming truly outweigh these constraints especially if you have the right methods. In this presentation, Neil will elaborate on this question. Neil will then expose the various challenges of code upstreaming, like time constraints, copyright issues, and the community aspect of the work. For example, vendor GPL code is generally lying on an obscure GitHub repo, or in a hardly reachable tarball. In parallel, Neil will present practical tips to ease your day-to-day upstream work and this simple rule: the faster the maximum patches are upstreamed, the less work you’ll have to actually maintain the port in the future.

  • 10:00 – 10:40 – Enabling Real-Time Secure Connectivity to the Industrial Edge with Single-Pair Ethernet and Zephyr by Jason Murphy, Analog Devices

Single-Pair Ethernet (10BASE-T1L SPE) is transforming low-speed, insecure fieldbus installations into flexible, higher data rate links with modern cybersecurity. SPE enables IP connectivity to field devices over twisted pair cabling, reducing installation costs while eliminating data islands that exist between OT and IT systems. Extending IP connectivity to the edge requires the integration of Ethernet connectivity into resource-constrained embedded devices around factories and buildings. This paper explores the use of Zephyr OS as an embedded software ecosystem for Ethernet-connected industrial devices. Zephyr provides a comprehensive networking software stack that supports protocols such as TCP/IP, MQTT, and TLS that are crucial in developing industrial IoT applications. We present an overview of SPE technology for IIoT applications, followed by a discussion on how Zephyr’s software ecosystem can be harnessed to drive rapid development of secure, real-time, Ethernet-connected industrial edge devices. The discussion aims to underscore the potential of SPE in combination with Zephyr OS, to drive smaller, smarter, and lower-cost intelligent nodes deeper into the built environment.

  • 14:15 – 14:55 – Enabling Linux Support with Upstream Kernel on Snapdragon X1 Elite SoCs by Sibi Sankar & Rajendra Nayak, Qualcomm Innovation Center Inc

The session details how the upstream kernel was used during the Snapdragon X1 Elite SoC Linux bring-up, how it was used to obtain the reported ST and MT benchmark Geekbench scores, and the current upstream status of the patches. It also includes a demo booting the upstream kernel with a Debian/Ubuntu userspace on a Snapdragon X1 Elite QRD (Qualcomm Reference Device). The patches to enable basic console support along with a public branch with Display/GPU enabled were posted when the Snapdragon X1 Elite SoC was publicly announced. Boot-to-console support has already landed on kernel version v6.7 and is on track to have remaining kernel support land by the time the first commercial device with X1 Elite SoC comes out on the market.

  • 15:25 – 16:05 – Raspberry Pi 5: Challenges and Solutions in Bringing up an OpenGL/Vulkan Driver for a New GPU by Alejandro Piñeiro Iglesias, Igalia

The Raspberry Pi 5 was announced in October 2023. This new version of the popular embedded device comes with a new iteration of Broadcom’s VideoCore GPU platform and was released with a fully open-source driver stack, developed by Igalia. The presentation will discuss some of the major changes required to support this new Video Core iteration, the challenges we faced in the process, and the solutions we provided in order to deliver conformant OpenGL ES and Vulkan drivers. The talk will also cover the next steps for the open-source Raspberry Pi 5 graphics stack.

  • 16:20 – 17:00 – Comparing Linux OS Image Update Models by Drew Moseley, Toradex

Today’s connected Embedded Linux devices increasingly rely on over-the-air updates to deliver security patches and new functionality. These updates can be challenging due to their substantial size. Delivering them can place a burden on mobile network connections. This session will compare several models for providing OS updates to remote devices focusing on their bandwidth reduction characteristics. We will dig into the architecture of each of the model’s approaches to size reduction including details such as storage formats, update generation, and implementation impact on target systems.

We will then benchmark them against a common set of input images to quantify the size reduction. Reducing the total amount of data transferred is obviously a cost savings, but it can also increase reliability; less data to transfer means there is less time for things to go wrong, resulting in fewer retries and an overall smoother experience. We will wrap up with a discussion of common OTA update systems focusing on the update model(s) supported by each. Armed with this information, attendees will be better equipped to decide which model, and ultimately which solution is appropriate.

Wednesday, April 17 – Day 2, Embedded Open Source Summit 2024

  • 9:00 – 9:40 – Accelerated Porting of Linux, U-Boot and Yocto for Production Ready Embedded Systems by Vaishnav Mohandas Achath & Keerthy Jagadeesh, Texas Instruments

Embarking on the journey of bringing SPL/U-Bootc, Linux, and Yocto on a freshly minted System on Chip and a new hardware platform can be a daunting task. Based on the experience of porting multiple ARM-based SoCs to work with mainline Linux/U-Boot/Yocto and also the multiple custom hardware platform bring-up experiences, We discuss strategies to get Linux, U-Boot bootloader, and Yocto-based filesystem functional and product-ready on your system in a very short time, sharing insights, practical experiences, and tools to streamline the process.

While getting your system booting Linux and U-Boot quickly once the silicon/boards arrive is important, it is more important to have a clean production-ready system that can be maintained over the Long term, we also discuss best practices to ensure minimal effort long-term support for your systems as well in this session. By the end of this session, you will be equipped with the knowledge and resources to embark on your journey to bring up Linux, U-Boot, and Yocto porting adventure for your custom embedded platform whether you are a seasoned embedded developer or a Linux enthusiast ready for a challenge.

  • 9:55 – 10:35 – Rethinking U-Boot Devicetree Story by Sumit Garg

The maintenance of device trees (DT) for embedded systems often appears to be fragmented with different DT sources appearing in different projects. The DT specification provides a base vocabulary to describe hardware but it is augmented by bindings documentation. Currently, the device bindings are maintained as part of the Linux source tree. This often leads to confusion in the embedded community, especially whether U-Boot should maintain its own DT. Many of the DT boot standards (EBBR, SystemReady, etc) require firmware to provide a DT that the bootloader and kernel can consume. Things get difficult when U-Boot and Linux contain different DT sources or disagree on preferred bindings… and doubly so when U-Boot is being used as part of the firmware implementation!

This session will focus on the journey to change the way we sync DT sources from Linux to U-Boot. In particular how we can switch away from ad-hoc syncs by board maintainers to regular full-tree alignment. This also includes bringing DT bindings checks into the U-Boot build system. We’ll wrap up by looking at how the DT contribution model can become more friendly for contributors/maintainers coming from different projects.

  • 11:00 – 11:40 – Optimizing BLE for Throughput-Oriented Applications by Luis Ubieda, Croxel, Inc.

Even though BLE is known for being low power, its presence and accessibility in existing devices are ubiquitous; which enables it to be used for other applications where its throughput capabilities are critical for success. This session goes over the technical details of BLE with a focus on relevant aspects towards improving BLE data-throughput; including tools and tips for improving your BLE connection, and covers an example of optimizing a Zephyr-based application for BLE data-throughput.

This presentation is for you if:

  1. You struggle to use BLE for anything more than a Low-Power & Low Data-Rate sensor.
  2. Usually BLE either “just works“ or “is broken“. When is not working, you don’t know where to look.
  3. You don’t know if BLE is fast enough for your application.

Content will include an overview of BLE from a throughput perspective, factors affecting its performance, throughput expectations, tools and tips, a live demo, and a comparison of BLE-throughput optimized devices vs non-optimized devices.

  • 11:55 – 12:35 – Adding Support for Power Over Ethernet (PoE or IEEE Clause 33) to Linux Network Stack by Köry Maincent, Bootlin

Power over Ethernet (PoE) is a technology that combines electrical power and data transmission over a single Ethernet cable. It eliminates the need for separate power sources, simplifying installations for devices like IP cameras, and VoIP phones. In this presentation, we’ll initially delve into Power over Ethernet (PoE), It debuted in IEEE Clause 33 without explicit reference to the PoE nomenclature. We will look at what currently exists in the Linux kernel and user space to support PoE. We’ll continue our discussion with some details of the Linux implementation currently in development and the PSE core changes brought by this new support. The PSE framework core and bindings happen to need modification as it was not prepared for the PoE specificities. In parallel to these extensions of the PSE framework, we developed Linux kernel drivers for two distinct PoE controllers: the Microchip PD692x0 and the Texas Instruments TPS23881. Finally, we will look into the mainline status, the things that still need to be merged, and the future features that need development. This PoE Linux support is sponsored and funded by DENT Project.

  • 14:00 – 14:40 – Beefy ML: Ultra-Low Power Algorithms on Cattle by Jordan Yates, CSIRO

Machine learning may conjure images of GPU clusters in a datacenter, but robust algorithms can actually be run in microseconds on a basic Cortex-M4F. Combined with thoughtful hardware design, this enables systems that can run ML algorithms indefinitely on the ear of an animal. In this session, Jordan will provide an overview of the journey to a real-world algorithm designed to monitor cattle feed intake from accelerometer data. The focus will be on the system design, algorithm implementation and validation, but data acquisition, annotation and training will also be touched on. The whole system is built upon multiple open-source components: Zephyr as the underlying OS, Zephyr Power Management for low-power operation, PyTorch for algorithm training, and CMSIS DSP for embedded implementation.

  • 14:55 – 15:35 – Tuning RT Kernel to Improve Schedule Performance with Intel Platform by Junxiao Chang, Intel

This work focuses on Linux RT kernel thread scheduling latency performance improvement on the Intel ADL/RPL platform. Linux real-time performance is more and more important for industry, medical, and other domains. This work tunes RT kernel command line parameters, kernel options, and BIOS settings to get the best thread scheduling latency performance on Intel platforms. RT Linux kernel has a lot of kernel options which might impact thread scheduling. For example, adding “idle=poll” makes the CPU wake up faster. The latest generation Intel processors have a lot of features that might be related to RT kernel scheduling performance. Intel ADL and later generations processors have big/small cores. RT thread could have better performance if it is set to big core. With optimizations in BIOS, kernel options and kernel command line parameters, thread schedule latency is much better than it is in the original default kernel. Without these optimizations, scheduling latency might be > 1000us. With optimization, the latency is around 5 to 10 microseconds with the Intel ADL/RPL platform.

  • 16:00 – 16:40 – Bluetooth on Embedded Linux Systems Deep Dive by Marcel Ziswiler, Toradex Inc.

Bluetooth is one of the most dominant wireless connection technologies. USB Bluetooth dongles are very common in the consumer world, but many modern embedded systems also contain directly designed-in Bluetooth solutions using interfaces like PCIe, SDIO, or UART. Often as part of a wireless solution with Wi-Fi and/or other wireless technologies like 5G, IEEE 802.15.4, etc. Marcel was tasked to evaluate various Bluetooth solutions and tested all major vendors that have upstream driver support.

This talk introduces the Bluetooth specification and discusses how it may be used on embedded systems from the Linux kernel, accompanying user space, BlueZ Bluetooth stack, and further application-level integration (e.g. home assistant). USB profiles are covered including audio interaction with PipeWire/WirePlumber. The last part concentrates on how to debug various Bluetooth-related issues one may encounter. The powerful BlueZ btmon and hcidump facilities are introduced which may be used to collect traces of Bluetooth communication and in combination with Wireshark allows easy visualization and Bluetooth protocol analysis. A live demonstration of some real-world Bluetooth use cases will also be presented.

  • 16:55 – 17:35 – RISC-V and RISE Project BoF by Jeffrey Osier-Mixon, Red Hat

RISC-V is an open instruction set that is taking the world by storm, enabling new and creative hardware designs across the spectrum of computing devices – many of which are themselves open. This BoF is a meeting place at EOSS to discuss the current state of RISC-V as well as the RISE Project, an open-source initiative under LF Europe to support the RISC-V software ecosystem.

Thursday, April 18 – Day 3

  • 9:00 – 9:40 – The State of Hardware Video Codecs in Linux by Andrzej Pietrasiewicz & Nicolas Dufresne, Collabora

The need for video codecs on embedded Linux is forever growing. Whether you make security cameras, in-flight entertainment, infotainment, digital signage, or even robots, it’s likely that you will need a video codec of some sort. While compression ratios have massively increased over the years, encoding and decoding complexity have exploded. Due to this expansion, some help from dedicated hardware is needed. In this talk, you will learn how the Linux Media subsystem have gained driver interfaces for various types of hardware codecs and numerous encoding formats such as H.264, HEVC, AV1, VP9, VP8, MPEG-2, and more. You’ll get an insight into the work that is currently underway and a plausible future plan.

  • 9:55 – 10:35 – Rust for Linux – What Is Possible and What Is Still Work in Progress by Christina Quast, Independent

Rust has been the up-and-coming new programming language that will remove whole categories of bugs like memory leaks and race conditions from code forever. For a few years, step by step more Rust code has been added to mainline. This talk gives an overview of what kernel modules you can already write, and which functionality is still only to be found in the Rust for Linux project. Furthermore, it outlines how a person new to this topic could get started writing their first kernel module in Rust!

  • 11:00 – 11:40 – SoC Development: From ROM to Application by Nadav Cohen Zukerman, Autotalks

This session will unfold a journey of developing a SoC from scratch using Zephyr. Zephyr is present all along our bootflow, from ROM to a bootloader to a fully operational application image. In the session, we will detail the development process, the challenges we had, and the lessons we learned throughout over 2 years of development with Zephyr, two tapeouts (and two upcoming), and two SoC bringups.

  • 11:55 – 12:35 – Testing Rotation Sensor Drivers with LEGO Robots and Other Adventures in the Linux IIO Subsystem by David Lechner, BayLibre

Is it possible for a mostly remote team to develop Linux drivers for IIO hardware while not actually putting their hands on it? We’ve been giving it a go and would like to share why we are doing it, how it is going, what works, what doesn’t work, and hear from others who are doing the same. We will share how we’ve managed to update kernels, and use signal generators, logic analyzers, and even LEGO robots remotely in the course of development, testing & validation. We would also like to share some new developments in the IIO subsystem related to the work we are doing. There have been several efforts working towards enabling higher throughput and higher sample rates for IIO devices in several different areas.

  • 14:00 – 14:40 – Maximizing SD Card Life, Performance, and Monitoring with KrillKounter by Andrew Murray, The Good Penguin

The underlying storage of an SD card is NAND flash, which is inherently unreliable, has a limited number of program/erase cycles, and has constraints on how data is written. Fortunately, the firmware in an SD card overcomes these challenges well enough to provide a cost-effective and reliable block-based storage medium; though, this is not without side effects that can impact performance and endurance. In this talk, we’ll delve into the ‘write to destruction’ testing that we’ve performed, which illustrates how access patterns and write amplification can significantly impact the lifespan of an SD card. We’ll show you what happens when an SD card fails and provide actionable steps to maximize the lifespan of an SD card in Linux. We will also examine the performance characteristics of SD cards and explore how access patterns can impact write performance. We’ll present methods for analyzing performance and provide practical steps for improving throughput. Finally, we will introduce Krill Kounter, an open-source daemon and library for embedded devices for monitoring SD card wear and indicators of write amplification over its lifetime.

  • 15:15 – 15:55 – Using Picolibc in Embedded Systems by Keith Packard, Amazon

Picolibc is a C library designed for embedded environments. Providing a complete C17 library interface along with much of the POSIX 2008 additions, Picolibc offers standards conformance, broad architecture support, and integrated testing performed under emulation on the target architectures. This talk will start by providing an overview of Picolibc, including API support, standards conformance, and memory usage. Then, a description of the testing infrastructure, including the bare-metal test frameworks, emulator bugs fixed, and guidance on supporting new targets will be provided. Next, some specific examples of integrating Picolibc into various embedded RTOSes, including FreeRTOS, Zephyr, and RIOT will be presented. The talk will finish with the current status of Picolibc along with future plans.

  • 16:10 – 16:50 – Compound Interest – Dealing with Two Decades of Technical Debt in Embedded Linux by Bartosz Golaszewski, Linaro

The GPIO subsystem is one of the oldest driver abstraction layers in the Linux kernel. First, somewhat unified GPIO interfaces appeared around 20 years ago. Over the years it has become one of the most ubiquitous subsystems in embedded Linux as GPIOs are used universally by all kinds of devices for a multitude of more, less, or not-at-all standardized functions. Over the years GPIOLIB has become its own, self-contained library, was integrated into the driver model, and acquired many new features (device-tree and ACPI support, GPIO irqchips, plug-and-play) but it came at a cost. The subsystem was hit especially hard by Arm fragmentation, the fallout of which is still visible in countless board files containing suboptimal code we need to maintain. We eventually ended up with two in-kernel APIs, two uAPI variants, complex glue code to pinctrl and interrupt subsystems as well as piles upon piles of quirks and corner cases. Efforts to improve the situation have been ongoing and have picked up in 2023/2024. This talk will cover how we try to improve serialization, hot-pluggability, and reduce the API abuse treewide while dancing carefully around existing legacy users.


You’ll find the complete schedule for the Embedded Open Source Summit 2024 on the Linux Foundation website. If you are interested in attending in person, you can register with the following rates:

  • Standard – Feb 25 – Apr 7, 2024
    • Attendee – USD 799
    • Academic – USD 275
    • Government – USD 275
    • Hobbyist – USD 275
    • Small Business – USD 500
  • Late – Apr 8–18, 2024
    • Attendee – USD 949
    • Academic – USD 275
    • Government – USD 275
    • Hobbyist – USD 275
    • Small Business – USD 500

A small business is a company that has less than $5 million in annual revenue and less than 30 employees.

The post Embedded Open Source Summit 2024 schedule – Embedded Linux, Zephyr OS, and Real-time Linux appeared first on CNX Software - Embedded Systems News.

WeAct STM32G4 is a tiny board based on STMicro STM32G4 mixed-signal microcontroller

WeAct STM32G4 mixed-signal board

WeAct STM32G4 is a tiny development board based on a 170 MHz STMicro STM32G4 Arm Cortex-M4F mixed-signal microcontroller with DSP instructions and suitable for applications such as motor control, building automation, lighting, digital power meters, and more.

Two versions of the board are offered one with an STM32G474CEU6 “Hi-resolution line” microcontroller equipped with 128KB RAM and 512KB flash, and the other with the lower-end STM32G431CBU6 “Access Line” MCU with just 32KB RAM and 128KB flash. The board also comes with a USB-C port for power and programming, three buttons, and two 24-pin headers.

WeAct STM32G4 mixed-signal board

WeAct STM32G4 specifications:

  • Microcontroller (one or the other)
    • STMicro STM32G431CBU6 – Arm Cortex-M4F MCU @ 170 MHz with DSP instructions, 32KB RAM, 128KB flash, and math accelerator
    • STMicro STM32G474CEU6 – Arm Cortex-M4F MCU @ 170 MHz with DSP instructions, 128KB RAM, 512KB flash, and math accelerator; high-resolution timer and complex waveform builder plus event handler (HRTIM) for digital power conversion useful for the design of digital switched-mode power supplies, lighting, welding equipment, solar and wireless charging
  • USB – 1x USB Type-C port for power and programming
  • Expansion – 2x 24-pin headers with GPIOs, ADC, DAC, I2C, USART, LPUART, OAmp, CAN Bus, timer outputs, etc…
  • Debugging – 4-pin SWD header
  • Misc
    • Reset and Boot keys, 1x user key
    • Power LED, 1x user LED
  • Power Supply
    • 3.3V to 20V DC input via USB-C port (Note: the STM32G4 MCU supports USB PD)
    • MicrOne ME6216A33XG voltage regulator with 3.3V output
  • Dimensions – 36.28 x 28.14 mm

WeAct Studio development board headers

Getting started with the board may be somewhat challenging, and the documentation could be worked on. For instance, WeAct Studio did not provide any pinout diagram, so you’d have to look up the pin functions matching the pin names from the schematics or the silkscreen markings with the information from the datasheet or technical reference manual, the good ol’ way…

WeAct Studio does provide the PDF schematics, the STM32G4 datasheet and TRM, some code samples (Blink, ADC, RTC, MSC, SPI flash), and the WeAct Studio Download Tool (Windows only) to flash the firmware via USB or UART. You’ll find those resources on GitHub for both the value line board and the hi-resolution line board, but most people will need to check the tools and documentation on the STMicro website as well.

WeAct STM32G4 schematics
Schematics for the STM32G431 variant

Besides their tiny size, the other key benefit of those boards is their price as the WeAct STM32G4 board goes for $2.92 and $5.79 for the STM32G431CBU6 and STM32G474CEU6 models respectively, including GPIO and SWD headers, but not shipping that adds about $1 in my case. For reference, the official STMicro NUCLEO-G491RE board is sold for $15.

The post WeAct STM32G4 is a tiny board based on STMicro STM32G4 mixed-signal microcontroller appeared first on CNX Software - Embedded Systems News.

CTL Chromebook NL73 Series to support 5G RedCap with a Snapdragon X35 modem

CTL Chromebook NL73 Series based on Intel Processor N100 or N200 SoC will be offered with a Snapdragon X35 modem to support the new 5G RedCap (Reduced Capability) standard.

5G RedCap – also known as 5G NR-Light – keeps some 5G features such as low latency, low power consumption, enhanced security, and network slicing while limiting the bandwidth to around a few hundred Mbps. It was initially designed to target industrial IoT applications, but Qualcomm also mentioned its Snapdragon X35 modem could be used in smartwatches and XR glasses when it was first announced, and it might be used in other cost-sensitive devices such as Chromebooks.


Chromebook NL73 “5G RedCap” key specifications:

  • Alder Lake N-Series SoC (one or the other)
    • Intel Processor N100 quad-core processor up to 3.4 GHz (Turbo) with 6MB cache, 24EU Intel HD graphics; TDP: 6W
    • Intel Processor N200 quad-core processor up to 3.7 GHz (Turbo) with 6MB cache, 32EU Intel HD graphics; TDP: 6W
  • System Memory – 4GB, 8GB, or 16 GB DDR5/5X RAM
  • Storage – 128 GB UFS storage (I think it’s the first time I see UFS storage on Alder Lake-N hardware, but it’s indeed supported)
  • Display – 11.6- HD touchscreen or non-touch display with 1366 x 768 resolution; 180 or 360° hinge depending on model
  • Camera – 720p webcam
  • Connectivity
    • WiFi 6E and Bluetooth 5.3 via Intel AX211 wireless module
    • Qualcomm Snapdragon X35 Modem-RF System with support for 5G-RedCap up to 220 Mbps download speeds, up to 110 Mbps upload speeds
  • USB – 2x USB-A ports, 2x USB-C ports
  • Durability – MIL-STD-810H certification, drop testing from 75 cm, hardened glass, and built-in carry handles

The ML73 Series runs Chrome OS with automatic updates guaranteed until June 2033.

The 5G RedCap Chromebooks from CTL are not available just yet, instead, the company demonstrated a prototype at MWC 2024. Besides the lower cost, using 5G RedCap instead of 4G LTE will also enable private cellular networks. Further information about the existing CTL Chromebook ML73 series can be found on the product page, and the press release has a few more details about the 5G RedCap demo.

Thanks to TLS for the tip.

The post CTL Chromebook NL73 Series to support 5G RedCap with a Snapdragon X35 modem appeared first on CNX Software - Embedded Systems News.

MINIX Z100-AERO is an Intel N100 mini PC with triple 4K display support, dual Ethernet

MINIX Z100-AERO mini PC

The MINIX Z100-AERO is an actively-cooled Intel Processor N100 mini PC with a form factor similar to the company’s Z100-0dB fanless mini PC but offered with a different choice of interfaces including dual Ethernet (1Gbps + 2.5 Gbps), and three video outputs through HDMI 2.1, DisplayPort, and USB-C connectors.

The mini PC supports up to 32GB DDR4 memory via a single SO-DIMM slot and M.2 NVMe SSD storage,  and features four USB 3.2 Gen 1 ports (5Gbps), plus one full-featured USB-C 3.2 port, and a 3.5mm headphone jack.

MINIX Z100-AERO mini PC

MINIX Z100-AERO specifications:

  • SoC – Intel Processor N100 quad-core Alder Lake-N processor @ up to 3.4 GHz (Turbo) with 6MB cache, 24EU Intel HD graphics @ 750 MHz; TDP: 6W
  • System Memory – 4GB, 8GB, or 16GB DDDR4-3200 via 1x SO-DIMM socket, upgradable to 32GB
  • Storage
    • 128GB, 256GB, or 512GB M.2 SSD (PCIe Gen3 x1?), upgradable up to 4TB
    • MicroSD card slot
  • Video Output
    • 1x HDMI 2.1 port up to 4Kp60
    • 1x DisplayPort up to 4Kp60
    • 1x DisplayPort via USB 3.2 Gen 2 port up to 4Kp60
    • Up to 3x independent displays supported
  • Audio – 3.5mm headphone+mic jack, digital audio output via HDMI
  • Connectivity
    • 2.5GbE RJ45 port via Realtek RTL8125BG-CG controller
    • Gigabit Ethernet RJ45 port via Realtek RTL8111H controller
    • Dual-band 802.11b/g/n/ac WiFi 5 and Bluetooth 5.1 via Intel Wireless-AC 9560 module and 2x external WiFi antennas
  • USB – 4x USB 3.2 Gen 1 ports (5 Gbps), 1x USB 3.2 (5 Gbps) Type-C port with DisplayPort Alt mode, USB PD support
  • Misc
    • Power Button
    • LEDs for Power, LAN (Active, Status)
    • CMOS reset pinhole
    • AMI EFI X64 BIOS
  • Power Supply – 12V/3A power supply
  • Power Consumption – 10-12W (Typical); 25-27W (Turbo)
  • Dimensions – 12.7 x 12.7 x 4.3 cm
  • Weight – 800 grams
  • Certifications – CE, FCC, RCM, RoHS

MINIX Z100-AERO specifications

The MINIX Z100-AERO comes preloaded with Windows 11 Pro, and ships with a 12V/3A power supply and accessories such as an HDMI cable, antennas, a VESA mount, and a user’s manual. As we’ve seen in the Windows 11 review of the MINIX Z100-0dB, a fanless design may not always extract the full performance of the processor, and it was a bit slower in benchmarks than actively cooled designs, so I’d expect the Z100-AERO to perform at a higher level.

Having said that, while the MINIX Z100-AERO provides some improvements with three independent displays and four USB 3.2 ports, there aren’t any 10 Gbps capable USB ports, only WiFi 5 is supported, and having two HDMI ports like on the fanless mini PC may have been more suitable to most people. I can also see the NVMe SSD is supposedly connected to a PCIe Gen 3.0 x1 interface which could negatively impact storage performance and as a result, overall system performance. Maybe it’s just an error in the specs.

The MINIX Z100-AERO mini PC is also cheaper than the Z100-0dB model with a starting price of $219 on the company’s store, and it should soon show up on the MINIX Amazon store as well.

Via AndroidPC.es

The post MINIX Z100-AERO is an Intel N100 mini PC with triple 4K display support, dual Ethernet appeared first on CNX Software - Embedded Systems News.

Waveshare ESP32-H2-DEV-KIT-N4-M – A Low-cost ESP32-H2 development board going for $6.65

Waveshare ESP32 H2 DEV KIT N4 M Dev Board

The Waveshare ESP32-H2-DEV-KIT-N4-M is a development board based on the ESP32-H2, available for only $6.65 on Aliexpress, but you’ll also find it on Amazon and Waveshare’s official store. This is a significant price drop compared to last year’s official Espressif ESP32-H2-DevKitM-1 board, which was priced at $10 without including shipping costs and with a similar design.

In 2021, Espressif Systems introduced the ESP32-H2 to the world. However, it wasn’t until 2023 that they released their first development board. Since then, there haven’t been many products built around this new module. Some exceptions include the Olimex ESP32-H2-DevKit-LiPo, LILYGO T-Panel, and the ESP Thread Border Router/Zigbee Gateway board, all of which feature the ESP32-H2 chip.

Waveshare ESP32 H2 DEV KIT N4 M Dev Board

Waveshare ESP32-H2-DEV-KIT-N4-M specifications:

  • Wireless module – ESP32-H2-MINI-1
    • MCU – Espressif Systems ESP32-H2 32-bit RISC-V microcontroller at up to 96 MHz with 320 KB SRAM, 128 KB ROM, 4 KB LP memory, Bluetooth 5.2 LE/Mesh, and 802.15.4 (Zigbee/Thread/Matter) radios.
    • Storage – 4MB flash storage
    • PCB antenna
    • Dimensions – 13.2×16.6×2.4 mm
  • USB – 1x USB Type-C ports with CH334 USB HUB controller and CH343 USB to UART converter
  • I/Os
    • 2x 15-pin headers with 19 programmable GPIOs, 2x UART, 3x SPI, I2C, I2S, Remote Control Peripheral, LED PWM, Full-speed USB Serial/JTAG Controller, GDMA, MCPWM…
    • Compatible with the pinout of the ESP32-H2-DevKitM-1 development board
  • Misc – Power LED, RGB LED, Boot and Reset buttons
  • Power Supply
    • 5V via USB Type-C port
    • 5V to 3.3V LDO
  • Dimensions – 51.60 x 25.40 mm

Waveshare ESP32 H2 DEV KIT N4 M Onboard Resources and Outline Dimensions

The official ESP32-H2 devkit from Espressif features two USB-C ports: one port connects to the ESP’s full-speed USB 2.0 Host port, and the other connects to a USB to UART converter. Waveshare simplified this setup by including a USB HUB controller IC on the board, effectively combining the two USB connections into one.

ESP32-H2-DEV-KIT-N4 pinout diagram
Waveshare ESP32-H2-DEV-KIT-N4-M pinout diagram
ESP32-H2-DEV-KIT-N4 details
Block diagram showing how the HUB is connected to the USB Host and the USB to UART converter IC

You can check out Espressif’s documentation to find more hardware details and get started guide with the ESP-IDF framework.  Waveshare also provides its own Wiki page to get you started with the ESP-IDF using VS-Code and ESP32 Arduino Core 3.0.0 using the Arduino IDE.

The module comes in two variants one with soldered headers and another without soldered headers. As mentioned at the start of the article, the module can be purchased on Aliexpress, Amazon, and Waveshare for $6.65 and up.

The post Waveshare ESP32-H2-DEV-KIT-N4-M – A Low-cost ESP32-H2 development board going for $6.65 appeared first on CNX Software - Embedded Systems News.

LuckFox Pico Pro and Pico Max – Rockchip RV1106 powered boards with 10/100M Ethernet and camera support

LuckFox Pico Pro and Pro Max Rockchip RV1106 Powred Dev Board

The LuckFox LuckFox Pico Pro and Pico Max are two new Rockchip RV1106-powered development boards that offer a Linux-based development platform for IoT applications. The boards feature 10/100M Ethernet, up to 256MB DDR2 memory, and a 0.5TOPS NPU for AI tasks. With support for Buildroot and Ubuntu 22.04, this board can be used for smart homes, remote monitoring, and other AI-enhanced projects.

Last year, we covered the LuckFox Core3566, a Raspberry Pi Compute Module 4 alternative, and the LuckFox Pico with its RV1103 SoC which has a similar form factor and similar features to these new modules. But the new modules are built around the RV1106 SoC which features an Arm Cortex-A7 processor (up to 1.2GHz),  a RISC-V co-processor, a 0.5 TOPS NPU for AI tasks, and a 4M @ 30fps ISP for high-quality image processing.

LuckFox Pico Pro and Pico Max Rockchip RV1106 Powred Dev Board

LuckFox Pico Pro and Pico Max Specifications

  • SoC – Rockchip RV1106G2
    • CPU – Arm Cortex A7 @ 1.2GHz with an integrated RISC-V co-processor.
    • NPU– 0.5 TOPS, supports INT4/INT8/INT16, TensorFlow/MXNet/PyTorch/Caffe/Onnx NN
    • ISP – 5MP high-performance, HDR, WDR, 3DNR, 2DNR, sharpening, defogging, fisheye and gamma correction, feature detection
    • VPU – 3072×1728 (5M) @ 30fps H.265/H.264 encoding, 16M @ 60FPS JPEG snapshot
  • System Memory
    • LuckFox Pico Pro – 128MB DDR2
    • LuckFox Pico Max – 256MB DDR2
  • Storage – 256MB SPI NAND flash, microSD card slot
  • Connectivity – 10/100M Ethernet RJ45 port
  • Camera Interface – MIPI CSI 2-lane support for camera modules.
  • Default camera specifications
    • Type – Color Camera
    • Image Sensor– SC3336
    • CMOS Size– 1/2.8″
    • Resolution– 3 MP (2304×1296)
    • Aperture – F2.0
    • Field of View – 98.3°
    • Focal Length – 3.95mm
    • Distortion – < 33%
    • Max Frame Rate 2304×1296 @ 30fps
    • Focus Mode Manual focus
  • USB – USB 2.0 Host/Device Type-C port
  • GPIO – 2x 20-pin headers with 26x GPIO pins
  • Misc – ACT-LED; BOOT and RESET buttons
  • Power Supply – 5V via USB-C port
  • Dimensions – 72 x 21 mm

LuckFox provides two versions of their device: the Pico Pro, equipped with 128MB DDR2 memory, and the Pico Max, which comes with 256MB of memory. Both models feature 256MB of SPI NAND flash for storage.

LuckFox Pico Pro and Pico Max details inter
LuckFox Pico Pro / Pico Max pinout diagram

LuckFox Pico Pro and Pico Max All Interfaces and Dimensions

The board offers various interfaces such as MIPI CSI, up to 26 GPIOs, UART, SPI, I2C, and USB. It also includes a 10/100M Ethernet controller with MAC PHY, a MicroSD card slot, a USB Type-C connector, and a 2-lane MIPI CSI camera interface.LuckFox Pico Pro and Pico Max Supported Camera Module

The company says that the LuckFox Pico Pro and Pico Max module supports the SC3336 3MP Camera, featuring a SmartSens SC3336 sensor. This 3M MIPI CSI module is said to deliver “superior low-light capabilities, thanks to its high sensitivity and excellent signal-to-noise ratio”. We have also seen this camera used in the Firefly CT36L AI Smart Camera which we wrote about just last month.

In terms of software, LuckFox Pico Pro and Pico Max support Buildroot and Ubuntu 22.04 (server), and you’ll find the instructions to get started on the Wiki.

The Luckfox Pico Pro and Pico Max can be purchased on Aliexpress starting at $12.71 and on Amazon for $22.90 (Pico Max only) The SC3336 3MP camera module can be purchased separately on Aliexpress or Amazon for about $10 and up.

The post LuckFox Pico Pro and Pico Max – Rockchip RV1106 powered boards with 10/100M Ethernet and camera support appeared first on CNX Software - Embedded Systems News.

Arduino Nano 33 BLE Rev2 board features BMI270 six-axis IMU and BMM150 magnetometer

Arduino Nano 33 BLE Rev2

Arduino Nano 33 BLE Rev2 is an update to the Arduino Nano 33 BLE board launched in 2019 that features two IMU sensors instead of one with the BMI270 6-axis accelerometer and gyroscope and the BMM150 3-axis magnetometer and also comes with a few changes made after feedback from users.

The new board is still powered by an nRF52840 Bluetooth LE module (u-Blox NINA B306) and remains Arduino Nano compatibility with two rows of 15-pin headers, but replaces the 9-axis IMU with the BMI270 and BMM150 chips, adds new pads and test points for USB, SWDIO, and SWCLK, a new VUSB soldering jumper, and brings changes to the power circuitry.

Arduino Nano 33 BLE Rev2

Arduino Nano 33 BLE Rev2 specifications:

  • Wireless Module – U-blox NINA B306 module
    • SoC – Nordic Semi nRF52840
      • MCU Core – Arm Cortex-M4F microcontroller @ 64MHz
      • Memory and storage – 1MB Flash, 256KB RAM
      • Bluetooth 5.0 LE
        • Up to 2 Mbps link rate, long-range support
        • +8 dBm TX power
        • -95 dBm sensitivity
        • Power consumption (@ 3.3V?)
          • 4.8 mA in TX (0 dBm)
          • 4.6 mA in RX (1 Mbps)
      • 802.15.4 radio – Thread, Zigbee support
  • Expansion
    • 2x 15-pin expansion headers with GPIO, SPI, I2C, USART, PWM, ADC, DAC, reset, and power signals (+3.3V, GND, Vin, AREF, …)
    • The board only supports 3.3 V I/Os and is NOT 5V tolerant
  • Sensors
    • BMI270 6-axis accelerometer and gyroscope
    • BMM150 3-axis magnetometer with 0.3μT resolution
  • Debugging
    • Via micro USB port, and 6-pin solder pads (SWD)
    • New pads and test points for USB, SWDIO, and SWCLK
  • Misc
    • Reset push-button
    • Green power LED, SPI SCK LED, user RGB LED
  • Power Supply
    • 5V via micro USB port or VUSB pin (with soldering jumper) on header
    • 5V to 18V via Vin pin
    • MP2322 DC-DC step-down converter – Regulates input voltage from up to 21V with a minimum of 65% efficiency @ minimum load; more than 85% efficiency @12V
  • Dimensions – 45 x 18 mm (compatible with Arduino Nano)
  • Weight – 5 grams
Arduino Power Tree
Power Tree
Arduino Nano 33 BLE Rev2 block diagram
Arduino Nano 33 BLE Rev2 block diagram with main components and connectors

The Arduino Nano 33 BLE Rev2 remains compatible with the first generation of the board and you can program it with Arduino or MicroPython. Just make sure to update board support and libraries to the latest version. Further technical details, instructions to get started, and some tutorials can be found on the documentation website.

At first, I was a little confused, as it’s not the first “Nano 33 Rev2” board we’ve covered, and last year, the Arduino Nano 33 BLE Sense Rev2 was introduced with the same BMI270 and BMM150 chips as found in the board covered today, plus extra sensors namely the MP34DT06JTR microphone, APDS9960 gesture, light, proximity sensor, LPS22HB barometric pressure sensor, and Renesas HS3003 temperature & humidity sensor.

Arduino Nano 33 BLE Rev2 additional test pins
Additional test pins can be seen on the bottom side of the board

The new Arduino Nano 33 BLE Rev2 can be purchased for$24.17 / 22.80 Euros without headers or $26.92 / 25.40 Euros with headers on the Arduino store. A few additional details may also be found in the announcement.

The post Arduino Nano 33 BLE Rev2 board features BMI270 six-axis IMU and BMM150 magnetometer appeared first on CNX Software - Embedded Systems News.

STMicro VL53L9 is a high-resolution, direct Time-of-Flight 3D LiDAR sensor module

STMicro VL53L9 ToF LiDAR sensor

The STMicro VL53L9 sensor is the latest addition to the company’s FlightSense product family. The direct Time-of-Flight (ToF) 3D LIDAR (light detection and ranging) sensor offers a resolution of up to 2,300 zones. The module is described as all-in-one and easy to integrate. It comes in a small, reflowable package that contains all the necessary components for sensing objects and processing images.

STMicro VL53L9 ToF LiDAR sensor

The sensor features an array of single photon avalanche diodes (SPADs) for photon detection, a post-processing SoC, and two vertical surface emitting lasers (VCSELs) powered by a dedicated bipolar-CMOS-DMOS (BCD) VCSEL. The VL53L9 is a multi-zone ToF sensor similar to the VL53L7CX and the VL53L8, meaning that it offers multi-zone distance measurements up to 54 x 42 zones with a wide 54° x 42° field-of-view.

Unlike most IR sensors, the VL53L9 sensor uses backside illumination direct ToF technology to ensure absolute distance measurement, regardless of the target color and reflectance. It captures 2D IR images and 3D depth map information at <5cm up to 10m using dual-scan flood illumination, a unique system according to the company. It can then stream the 2D image, depth information, and a confidence map at a 60Hz frame rate (which the company claims is the fastest on the market).

STMicro VL53L9 key features and specifications:

  • Wide field of view
    • Emitter: 940 nm invisible light vertical cavity surface emitting laser (VCSEL) and integrated analog driver
    • 71° diagonal field-of-view (FoV) using metasurface optical elements (MOE) on both transmitter and receiver
    • Receiving array of single photon avalanche diodes (SPADs)
  • Speed and accuracy
    • Resolution: up to 54 x 42 (2,268) separate zones and binning options
    • Post-processing SoC can stream a 2D infrared (IR) image with a depth and confidence map
    • Range: <5 cm up to 10 m
    • Frame rate: 60Hz
    • Scan by two vertical-cavity surface-emitting lasers (VCSEL) flood illumination
    • Histogram processing and algorithmic compensation
  • All-in-one module with integrated SPAD sensor and VCSEL power management integrated circuit (PMIC)
  • Power – Dual power supply operation: 1.2V and 3.3V
  • Compatible with a wide range of cover glass materials
  • Dimensions – 12.8 x 6.1 x 4.6 mm (miniature reflowable package)
  • Safety – Class 1 certification for eye-safe operation and additional skin protection in normal use

The company expects the VL53L9 sensor to find applications in:

  • Telephoto zoom camera assist.
  • Augmented reality/virtual reality (AR/VR) enhancement.
  • Laser-assisted autofocus (LAF).
  • 3D room mapping and obstacle detection or SLAM (simultaneous localization and mapping) for robotics applications
  • Content management (liquid level control, load in trucks, tanks, waste bins)
  • Gesture recognition
  • Smart buildings and smart lighting (user detection to wake up devices)
  • Internet of Things (user and object detection)

STMicroelectronics VD55H1 iToF Sensor

In other news, ST has also announced a design win for the earlier-released VD551, a low-power, indirect Time-of-Flight (iToF) sensor. A design win means that a company has ordered 500 or more units of the sensor to integrate into their product. In this case, that company is Lanxin Technology, a Chinese company with a focus on mobile robot deep vision systems. MDDVS, a subsidiary of Lanxin, has selected the VD551 to bring high-accuracy depth-sensing to its 3D camera.

Mass production of the STMicro VL53L9 sensor is scheduled for early 2025 and samples are currently available for select customers. Pricing details and samples can be requested at local ST sales offices. You can find more information in the press release and the VL53L9 product page.

The post STMicro VL53L9 is a high-resolution, direct Time-of-Flight 3D LiDAR sensor module appeared first on CNX Software - Embedded Systems News.

Intel Core Ultra 5 134U and Core Ultra 7 164U are 9W Meteor Lake processors

Intel Core Ultra 9W processors

Intel Core Ultra 5 134U and Core Ultra 7 164U are new 12-core Meteor Lake processors with 9W PBP (Processor Base Power) and 30W Max Turbo Power (MTP) that appear to have recently been added to Intel Ark.

Intel just announced Intel vPro Platform support for the Core Ultra Meteor Lake processors to make those more suitable to business customers with improved security through AI-powered Intel Threat Detection Technology, better manageability with the Intel Device Discovery comprised of cloud-based tools for managing PCs remotely, and enhanced stability thanks to Intel’s Stable IT Program aiming to validate and ensure Windows 10 and Windows 11 compatibility.

Intel Core Ultra 9W processors

But Liliputing also notes that Intel has added some 9W parts besides the existing 15W parts such as the Intel Core Ultra 5 125U or Core Ultra 7 165U, namely the Core Ultra 5 134U and Core Ultra 7 164U. They are quite similar to the other 15W Meteor Lake-U parts with 12 cores in 2 P-Core+8 E-Core+2 LP-Core configuration, 14 threads, 12MB cache, and Intel UHD graphics with 4 Intel Xe GPU cores, but there are some differences as shown in the table below.

Core Ultra 5 134U
Core Ultra 7 164U
Core Ultra 5 125U
Core Ultra 5 135U
Core Ultra 7 155U
Core Ultra 7 165U
PBP/MTP
9W/30W
15W/57W
Base frequency (P/E/LP)
700 MHz / 500 MHz / 400 MHz
1.1 GHz / 700 MHz / 400 MHz
1.3 GHz / 800 MHz / 700 MHz
1.6 GHz / 1.1 GHz / 700 MHz
1.7 GHz / 1.2 GHz / 700 MHz
Max Turbo Freq. (P/E/LP)
4.4 GHz / 3.6 GHz / 2.1 GHz
4.8 GHz / 3.8 GHz / 2.1 GHz
4.3 GHz / 3.6 GHz / 2.1 GHz
4.4 GHz / 3.6 GHz / 2.1 GHz
4.8 GHz / 3.8 GHz / 2.1 GHz
4.9 GHz / 3.8 GHz / 2.1 GHz
Max GPU frequency
1.75 GHz
1.80 GHz
1.85 GHz
1.9 GHz
1.95 GHz
2.00 GHz
RAM
64GB Up to LPDDR5/x 6400 MT/s
96GB Up to LPDDR5/x 7467 MT/s, up to DDR5 5600 MT/s
PCIe
12-lane PCIe 4.0 and 3.0
1 (x4) Gen4 + 4 (x1,x2,x4) Gen4 + 4 (x1,x2,x4) Gen3
20-lane PCIe 4.0
3 (x4) Gen4 + 8 (x1,x2,x4) Gen4
Package
FCBGA2551 (23 x 19 mm)
FCBGA2049 (50 x 25 mm)

The new 9W Meteor Lake U-series Type4 processors come in a smaller package, offer fewer PCIe 4.0/3.0 lanes, and support (only) up to 64GB LPDDR5 RAM, while the 15W SKUs can handle up to 96GB. They’ll likely be found in thinner laptops and mini PCs be it actively cooled or fanless. Other notable features include Intel AI Boost NPU for AI acceleration, Thunderbolt 4 interfaces, and support for WiFi 7 and Bluetooth LE audio which are common to all Meteor Lake processors.

Intel vPro Meteor Lake WiFi 7

The post Intel Core Ultra 5 134U and Core Ultra 7 164U are 9W Meteor Lake processors appeared first on CNX Software - Embedded Systems News.

Inventia MT-058 cellular IoT telemetry module is powered by Nordic Semi nRF9160 SiP

MT 058 – battery powered telemetry module

A few days back, Inventia introduced the MT-058 cellular IoT telemetry module built around Nordic Semiconductor’s nRF9160 System in Package (SiP) module with support for LTE-M/NB-IoT connectivity with GNSS. The device is designed for low-power, battery-operated industrial applications such as water metering and environmental monitoring.

The module is IP68-rated and offers a combination of digital and analog inputs. It also comes with a battery that can last up to 5 years and there is also support for external sensor attachment for data logging applications.

Inventia MT-058 Cellular IoT Telemetry Module features LTE-M/NB-IoT, GNSS, IP68, and a 5-year battery life for water metering and monitoring

MT-058 Cellular IoT telemetry module specification:

  • Nordic nRF9160 SiP with
    • 64 MHz Arm Cortex-M33 application processor with 1 MB flash, and 256 KB RAM
    • Connectivity – LTE Cat M1 and NB-IoT
  • SIM card options – Standard 2FF SIM card slot, with an option for a soldered Machine Identification Module (MIM).
  • Antenna – SMA connector for attaching an external antenna.
  • Inputs – 5 inputs for counters, up to 250 Hz, min 2ms pulse.
  • Sensors
    • Temperature and humidity sensor mounted outside the housing
    • 1-wire interface for connecting an external temperature sensor
  • Misc features
    • Alarm – Inputs can also be configured as alarm inputs to signal events such as the opening of a cabinet door.
    • Data Logging – Built-in Flash memory for data logging, allowing for effective energy management and data recording even without a radio signal.
    • Diagnostics and Configuration – Remote configuration, updates, and diagnostics; The device also includes diagnostic LEDs and a USB-C port for local setup.
  • Battery – Up to 5 years of operation with the built-in battery pack depending on device configuration.
  • Dimensions – 151 x 80 x 60 mm
  • Durability – IP68-rated housing, making it waterproof down to 2 meters for 24 hours.
  • Warranty – Comes with a 3-year warranty, ensuring reliability and customer satisfaction.

MT 058 Cellular IoT Telemetry Module Dimensions

As we mentioned earlier the device has five binary inputs that can be configured as counter inputs, counting pulses with a frequency of up to 250 Hz, perfect for reading water and flow meters. These inputs can also be configured as alarm inputs to trigger alarms, like if a cabinet door opens. The device has one analog input which can be used to measure temperature and humidity if required.

On the software side of things, the module utilizes Nordic’s nRF Connect SDK, providing developers with pre-certified, precompiled downloads for rapid application development, and connects to the Dataportal.pl IoT platform that offers a cloud-based SCADA solution for data visualization and analysis, along with alarm notifications.

Dataportal.pl sample system

In our previous posts, we have seen the nRF9160 (part of the nRF91 series) used in various projects like the Actinius Icarus SoM DKConexio Stratus, nRF9160 Feather LTE IoT and GPS Board,  Ruuvi Node, and others. Feel free to check those out if interested.

At the time of writing the company has not revealed any pricing information. You can find more information about the device on inventia’s products page or in Nordic’s press release.

The post Inventia MT-058 cellular IoT telemetry module is powered by Nordic Semi nRF9160 SiP appeared first on CNX Software - Embedded Systems News.

Waveshare RP2040-BLE is a Raspberry Pi RP2040 module with Bluetooth LE connectivity

RP2040-BLE

If you could not care less about WiFi, the Waveshare RP2040-BLE module combines a Raspberry Pi RP2040 microcontroller with an unnamed Bluetooth 5.1 dual-mode chip, and supports a USB-C add-on board useful during development.

There are several Raspberry Pi RP2040 boards with a WiFi and Bluetooth module including the Raspberry Pi Pico W, but if you are only interested in using Bluetooth, the RP2040-BLE board from Waveshare may be more power-efficient and its design may be more suitable for integration into products.

RP2040-BLE

Waveshare RP2040-BLE specifications:

  • MCU – Raspberry Pi RP2040 dual-core Arm Cortex M0+ microcontroller up to 133 MHz with 264KB of SRAM
  • Storage – 2MB of onboard Flash memory.
  • Connectivity
    • Bluetooth 5.1 dual-mode function (BLE and classic)
    • Controlled by serial AT commands
    • Ceramic antenna
  • Expansion
    • 24x through and castellated holes with 14x multi-function GPIO pins. 2x SPI, 2x I2C, 2x UART, 3x 12-bit ADC, 14 x PWM
    • FPC connector for board with USB-C port, Reset and Boot buttons
  • Misc – Temperature sensor.
  • Power Supply – 5V via VBUS pin or FPC connector
  • Dimensions
    • RP2040-BLE board – 33.5 x 21 mm
    • USB-C board – 18 x18 mm

Raspberry Pi RP2040 Bluetooth Module and USB-C boardThe RP2040-BLE module supports drag-and-drop programming using mass storage over USB and the MicroPython and C/C++ SDKs like the original Raspberry Pi Pico (W), as well as Arduino programming. You’ll find resources to get started in the wiki including details about the Bluetooth APIs as well as resources such as (partial) schematics since we’re not told which Bluetooth chip the module is using…  It’s unclear whether it’s compatible with the Raspberry Pi Pico Bluetooth implementation.


Waveshare RP2040-BLE pinout diagram

Waveshare RP2040-BLE module can be purchased for about $11 on Aliexpress or Amazon with free shipping, and the kit with the USB-C board and FPC cable goes for 90 cents extra on Aliexpress. So depending on your location, it may be more expensive than the Raspberry Pi Pico W, but it’s quite smaller. You’ll also find the module and kit on the Waveshare shop for $6.49 and $7.49, but those prices do not include shipping.

The post Waveshare RP2040-BLE is a Raspberry Pi RP2040 module with Bluetooth LE connectivity appeared first on CNX Software - Embedded Systems News.

Testing AI and LLM on Rockchip RK3588 using Mixtile Blade 3 SBC with 32GB RAM

mixtile blade 3 review RK3588 AI LLM

We were interested in testing artificial intelligence (AI) and specifically large language models (LLM) on Rockchip RK3588 to see how the GPU and NPU could be leveraged to accelerate those and what kind of performance to expect. We had read that LLMs may be computing and memory-intensive, so we looked for a Rockchip RK3588 SBC with 32GB of RAM, and Mixtile – a company that develops hardware solutions for various applications including IoT, AI, and industrial gateways – kindly offered us a sample of their Mixtile Blade 3 pico-ITX SBC with 32 GB of RAM for this purpose.

While the review focuses on using the RKNPU2 SDK with computer vision samples running on the 6 TOPS NPU, and a GPU-accelerated LLM test (since the NPU implementation is not ready yet), we also went through an unboxing to check out the hardware and a quick guide showing how to get started with Ubuntu 22.04 on the Mixtile Blade 3.

Mixtile Blade 3 unboxing

The package that Mixtile sent contained two boxes. The first box was for the Mixtile Blade 3 single computer board and the second box was for the Mixtile Blade 3 Case.

mixtile blade 3 and case unboxing

Let’s have a look at the Mixtile Blade 3 SBC box first. We found the board quite heavy the very first time we picked it up. That’s because there’s a heatsink that completely covers the bottom of the PCB to ensure fanless operation by dissipating the heat from the RK3588 SoC.

mixtile blade 3 and case package

mixtile blade 3 heatsink

The Mixtile Blade 3’s rear panel features two 2.5Gbps Ethernet ports, two HDMI ports one for output and the other for input, as well as two USB Type-C ports. The board also comes with a 30-pin GPIO header, a mini PCIe connector, a MIPI-CSI camera connector, a microSD card socket, a fan connector, and a debug header for a USB to TTL board. There’s also a U.2 edge connector (SFF-8639) with 4-lane PCIe Gen3 and SATA 3.0 signals used to connect PCIe/NVMe devices or multiple Blade 3 boards together to form a cluster.

mixtile blade 3 Ethernet HDMI USB connectors

Let’s now check out the Mixtile Blade 3 case. It is a CNC aluminum enclosure that also ships with a U.2 to M.2 adapter for connecting an NVMe SSD or other PCIe device (like an AI accelerator), a power button, an LED to indicate the working status, a screw set, and a screwdriver.

mixtile blade 3 case assembly U2 connector

Mixtile Blade 3 case assembly

We will now assemble the Mixtile Blade 3 board into the case. The first step is to remove the original heatsink, then attach the U.2 to M.2 adapter to the board and insert it into the case, and finish off the assembly by closing the cover with a silicon thermal pad as the metal case itself will act the heatsink cooling the Rockchip RK3588 CPU.

mixtile blade 3 m u.2 to m.2 adapter

Rockchip RK3588 SBC enclosure
Heatsink that ships with the board (left), Blade 3 installed in the enclosure (middle), and top cover with thermal pad (right)

The kit does not include a power adapter, so you’ll have to bring your own to power up the Mixtile Blade 3 board. It requires a USB-C power adapter compatible with the PD 2.0/PD 3.0 standard. Read our previous article about the Mixtle Blade 3 SBC to get the full specifications of the board.

Ubuntu 22.04 on the Mixtile Blade 3

The Mixtile Blade 3 ships with a Ubuntu 22.04 image,  so it can boot to Linux right out of the box. But if you want to install a new operating system or update the current image, it can be done using the same methods as used with other single board computers based on Rockchip SoCs, namely the RKDevTool program, or via a microSD card.

Since the Mixtile Blade 3 only comes with two USB ports, and one is already connected to the power supply, we had to insert a USB-C dock to connect to a keyboard and a mouse to the board.

mixtile blade 3 review RK3588 AI LLM

After this first boot, we’ll go through the Ubuntu OEM setup wizard, and once complete, we can access the usual Ubuntu 22.04 Desktop.

You can find the 128GB eMMC flash and the additional 256GB NVMe SSD we added through the U.2 to M.2 adapter with fdisk:

arnon@arnon-desktop:~$ sudo fdisk -l
Disk /dev/ram0: 4 MiB, 4194304 bytes, 8192 sectors
Units: sectors of 1 * 512 = 512 bytes
Sector size (logical/physical): 512 bytes / 4096 bytes
I/O size (minimum/optimal): 4096 bytes / 4096 bytes


Disk /dev/mmcblk0: 116.48 GiB, 125069950976 bytes, 244277248 sectors
Units: sectors of 1 * 512 = 512 bytes
Sector size (logical/physical): 512 bytes / 512 bytes
I/O size (minimum/optimal): 512 bytes / 512 bytes
Disklabel type: gpt
Disk identifier: AE8C1F40-2C40-4F65-AD1F-F7DD7D785383

Device           Start       End   Sectors  Size Type
/dev/mmcblk0p1   32768   1081343   1048576  512M Linux extended boot
/dev/mmcblk0p2 1081344 244277214 243195871  116G Linux filesystem


Disk /dev/nvme0n1: 232.89 GiB, 250059350016 bytes, 488397168 sectors
Disk model: WD_BLACK SN770 250GB
Units: sectors of 1 * 512 = 512 bytes
Sector size (logical/physical): 512 bytes / 512 bytes
I/O size (minimum/optimal): 512 bytes / 512 bytes
Disklabel type: dos
Disk identifier: 0x71d948da

Device         Boot Start       End   Sectors   Size Id Type
/dev/nvme0n1p1       2048 488397167 488395120 232.9G 83 Linux

Our SBC does indeed come with 32GB of RAM:

arnon@arnon-desktop:~$ free -m
               total        used        free      shared  buff/cache   available
Mem:           31787         604       30595           5         587       30891
Swap:           2047           0        2047

Testing AI performance via RK3588’s NPU using the RKNPU2 toolkit

We will be testing Mixtile Blade 3’s AI performance using the Yolo v5 sample and RKNN benchmark found in the RKNPU2 as we did with the Youyeeyoo YY3568 SBC powered by a Rockchip RK3568 with an entry-level 0.8 TOPS NPU.

After installing the RKNN 2 toolkit from Github, we can compile the YOLO5 example:

arnon@arnon-desktop:~$ cd rknn-toolkit2/rknpu2/examples/rknn_yolov5_demo/
arnon@arnon-desktop:~/rknn-toolkit2/rknpu2/examples/rknn_yolov5_demo$ ./build-linux_RK3588.sh clean
-- The C compiler identification is GNU 11.4.0
-- The CXX compiler identification is GNU 11.4.0
-- Detecting C compiler ABI info
-- Detecting C compiler ABI info - done
-- Check for working C compiler: /usr/bin/aarch64-linux-gnu-gcc - skipped
-- Detecting C compile features
-- Detecting C compile features - done
-- Detecting CXX compiler ABI info
-- Detecting CXX compiler ABI info - done
-- Check for working CXX compiler: /usr/bin/aarch64-linux-gnu-g++ - skipped
-- Detecting CXX compile features
-- Detecting CXX compile features - done
-- Found OpenCV: /home/arnon/rknn-toolkit2/rknpu2/examples/3rdparty/opencv/opencv-linux-aarch64 (found version "3.4.5")
-- Configuring done
-- Generating done
-- Build files have been written to: /home/arnon/rknn-toolkit2/rknpu2/examples/rknn_yolov5_demo/build/build_linux_aarch64
[ 20%] Building CXX object CMakeFiles/rknn_yolov5_demo.dir/src/preprocess.cc.o
[ 20%] Building CXX object CMakeFiles/rknn_yolov5_video_demo.dir/src/main_video.cc.o
[ 40%] Building CXX object CMakeFiles/rknn_yolov5_demo.dir/src/main.cc.o
[ 40%] Building CXX object CMakeFiles/rknn_yolov5_demo.dir/src/postprocess.cc.o
[ 50%] Building CXX object CMakeFiles/rknn_yolov5_video_demo.dir/src/postprocess.cc.o
[ 60%] Building CXX object CMakeFiles/rknn_yolov5_video_demo.dir/utils/mpp_decoder.cpp.o
[ 70%] Building CXX object CMakeFiles/rknn_yolov5_video_demo.dir/utils/mpp_encoder.cpp.o
[ 80%] Building CXX object CMakeFiles/rknn_yolov5_video_demo.dir/utils/drawing.cpp.o
[ 90%] Linking CXX executable rknn_yolov5_video_demo
[ 90%] Built target rknn_yolov5_video_demo
[100%] Linking CXX executable rknn_yolov5_demo
[100%] Built target rknn_yolov5_demo
Consolidate compiler generated dependencies of target rknn_yolov5_demo
[ 40%] Built target rknn_yolov5_demo
Consolidate compiler generated dependencies of target rknn_yolov5_video_demo
[100%] Built target rknn_yolov5_video_demo
Install the project...
-- Install configuration: ""
-- Installing: /home/arnon/rknn-toolkit2/rknpu2/examples/rknn_yolov5_demo/install/rknn_yolov5_demo_Linux/./rknn_yolov5_demo
-- Up-to-date: /home/arnon/rknn-toolkit2/rknpu2/examples/rknn_yolov5_demo/install/rknn_yolov5_demo_Linux/lib/librknnrt.so
-- Up-to-date: /home/arnon/rknn-toolkit2/rknpu2/examples/rknn_yolov5_demo/install/rknn_yolov5_demo_Linux/lib/librga.so
-- Up-to-date: /home/arnon/rknn-toolkit2/rknpu2/examples/rknn_yolov5_demo/install/rknn_yolov5_demo_Linux/./model/RK3588
-- Up-to-date: /home/arnon/rknn-toolkit2/rknpu2/examples/rknn_yolov5_demo/install/rknn_yolov5_demo_Linux/./model/RK3588/yolov5s-640-640.rknn
-- Up-to-date: /home/arnon/rknn-toolkit2/rknpu2/examples/rknn_yolov5_demo/install/rknn_yolov5_demo_Linux/./model/bus.jpg-- Up-to-date: /home/arnon/rknn-toolkit2/rknpu2/examples/rknn_yolov5_demo/install/rknn_yolov5_demo_Linux/./model/coco_80_labels_list.txt
-- Installing: /home/arnon/rknn-toolkit2/rknpu2/examples/rknn_yolov5_demo/install/rknn_yolov5_demo_Linux/./rknn_yolov5_video_demo
-- Up-to-date: /home/arnon/rknn-toolkit2/rknpu2/examples/rknn_yolov5_demo/install/rknn_yolov5_demo_Linux/lib/librockchip_mpp.so
-- Up-to-date: /home/arnon/rknn-toolkit2/rknpu2/examples/rknn_yolov5_demo/install/rknn_yolov5_demo_Linux/lib/libmk_api.so
/home/arnon/rknn-toolkit2/rknpu2/examples/rknn_yolov5_demo
arnon@arnon-desktop:~/rknn-toolkit2/rknpu2/examples/rknn_yolov5_demo$

Then we can run the YOLO5 samples with a test image:

arnon@arnon-desktop:~/rknn-toolkit2/rknpu2/examples/rknn_yolov5_demo/install/rknn_yolov5_demo_Linux$ ./rknn_yolov5_demo model/RK3588/yolov5s-640-640.rknn model/man.jpg
post process config: box_conf_threshold = 0.25, nms_threshold = 0.45
Loading mode...
sdk version: 1.6.0 (9a7b5d24c@2023-12-13T17:31:11) driver version: 0.9.2
model input num: 1, output num: 3
  index=0, name=images, n_dims=4, dims=[1, 640, 640, 3], n_elems=1228800, size=1228800, w_stride = 640, size_with_stride=1228800, fmt=NHWC, type=INT8, qnt_type=AFFINE, zp=-128, scale=0.003922
  index=0, name=output, n_dims=4, dims=[1, 255, 80, 80], n_elems=1632000, size=1632000, w_stride = 0, size_with_stride=1638400, fmt=NCHW, type=INT8, qnt_type=AFFINE, zp=-128, scale=0.003860
  index=1, name=283, n_dims=4, dims=[1, 255, 40, 40], n_elems=408000, size=408000, w_stride = 0, size_with_stride=491520, fmt=NCHW, type=INT8, qnt_type=AFFINE, zp=-128, scale=0.003922
  index=2, name=285, n_dims=4, dims=[1, 255, 20, 20], n_elems=102000, size=102000, w_stride = 0, size_with_stride=163840, fmt=NCHW, type=INT8, qnt_type=AFFINE, zp=-128, scale=0.003915
model is NHWC input fmt
model input height=640, width=640, channel=3
Read model/man.jpg ...
img width = 640, img height = 640
once run use 25.523000 ms
loadLabelName ./model/coco_80_labels_list.txt
person @ (89 157 258 631) 0.895037
bowl @ (483 221 506 240) 0.679969
bowl @ (395 322 444 343) 0.659576
wine glass @ (570 200 588 241) 0.544585
bowl @ (505 221 527 239) 0.477606
bowl @ (482 322 532 338) 0.458121
wine glass @ (543 199 564 239) 0.452579
cup @ (418 215 437 238) 0.410092
cup @ (385 204 402 240) 0.374592
cup @ (435 212 451 238) 0.371657
bowl @ (613 215 639 239) 0.359605
wine glass @ (557 200 575 240) 0.359143
cup @ (446 211 461 238) 0.358369
spoon @ (255 257 271 313) 0.340807
bottle @ (412 84 432 119) 0.338540
spoon @ (307 267 322 326) 0.318563
spoon @ (324 265 340 332) 0.315867
bottle @ (453 305 466 340) 0.308927
cup @ (526 210 544 239) 0.290318
bottle @ (389 83 411 119) 0.277804
wine glass @ (583 198 602 239) 0.277093
bowl @ (24 359 101 383) 0.275663
oven @ (4 370 168 632) 0.256395
spoon @ (268 262 282 322) 0.252866
bottle @ (434 85 454 118) 0.250721
save detect result to ./out.jpg
loop count = 10 , average run  18.620700 ms
arnon@arnon-desktop:~/rknn-toolkit2/rknpu2/examples/rknn_yolov5_demo/install/rknn_yolov5_demo_Linux$

YOLO5 output rknn rk3588

As expected, the Rockchip RK3588’s AI performance is much better than the one of the Rockchip RK3568 as shown in the table below.

Board/CPUFirst runAverage of 10 runs
Mixtile Blade 3 (RK3588)25.523000 ms18.620700 ms
YY3568 (RK3568)78.917000 ms69.709700 ms

The Mixtile Blade 3 board is about three times faster than a board based on Rockchip RK3568. Converting ms to FPS shows the Mixtile Blade 3 can run Yolo v5 at 54 FPS, which can be considered very fast processing and good enough for real-time applications.

Here are the results from the RKNN Benchmark run 10 times on the Mixtile Blade 3:

arnon@arnon-desktop:~/rknn-toolkit2/rknpu2/examples/rknn_benchmark/install/rknn_benchmark_Linux$ ./rknn_benchmark /home/arnon/rknn-toolkit2/rknpu2/examples/rknn_yolov5_demo/install/rknn_yolov5_demo_Linux/model/RK3588/yolov5s-640-640.rknn  /home/arnon/rknn-toolkit2/rknpu2/examples/rknn_yolov5_demo/install/rknn_yolov5_demo_Linux/model/man.jpg
rknn_api/rknnrt version: 1.6.0 (9a7b5d24c@2023-12-13T17:31:11), driver version: 0.9.2
total weight size: 7312128, total internal size: 7782400
total dma used size: 24784896
model input num: 1, output num: 3
input tensors:
  index=0, name=images, n_dims=4, dims=[1, 640, 640, 3], n_elems=1228800, size=1228800, w_stride = 640, size_with_stride=1228800, fmt=NHWC, type=INT8, qnt_type=AFFINE, zp=-128, scale=0.003922
output tensors:
  index=0, name=output, n_dims=4, dims=[1, 255, 80, 80], n_elems=1632000, size=1632000, w_stride = 0, size_with_stride=1638400, fmt=NCHW, type=INT8, qnt_type=AFFINE, zp=-128, scale=0.003860
  index=1, name=283, n_dims=4, dims=[1, 255, 40, 40], n_elems=408000, size=408000, w_stride = 0, size_with_stride=491520, fmt=NCHW, type=INT8, qnt_type=AFFINE, zp=-128, scale=0.003922
  index=2, name=285, n_dims=4, dims=[1, 255, 20, 20], n_elems=102000, size=102000, w_stride = 0, size_with_stride=163840, fmt=NCHW, type=INT8, qnt_type=AFFINE, zp=-128, scale=0.003915
custom string:
Warmup ...
   0: Elapse Time = 21.00ms, FPS = 47.63
   1: Elapse Time = 20.88ms, FPS = 47.89
   2: Elapse Time = 20.89ms, FPS = 47.87
   3: Elapse Time = 20.11ms, FPS = 49.71
   4: Elapse Time = 15.84ms, FPS = 63.14
Begin perf ...
   0: Elapse Time = 15.82ms, FPS = 63.23
   1: Elapse Time = 15.87ms, FPS = 63.01
   2: Elapse Time = 15.87ms, FPS = 63.00
   3: Elapse Time = 15.69ms, FPS = 63.72
   4: Elapse Time = 15.89ms, FPS = 62.95
   5: Elapse Time = 15.78ms, FPS = 63.36
   6: Elapse Time = 15.92ms, FPS = 62.83
   7: Elapse Time = 15.83ms, FPS = 63.17
   8: Elapse Time = 15.88ms, FPS = 62.98
   9: Elapse Time = 15.88ms, FPS = 62.98

Avg Time 15.84ms, Avg FPS = 63.123

Save output to rt_output0.npy
Save output to rt_output1.npy
Save output to rt_output2.npy
---- Top5 ----
0.984223 - 16052
0.984223 - 16132
0.984223 - 16212
0.984223 - 560644
0.984223 - 560724
---- Top5 ----
0.996078 - 280970
0.996078 - 281010
0.996078 - 281011
0.992157 - 280769
0.992157 - 280770
---- Top5 ----
0.998327 - 70225
0.998327 - 70244
0.998327 - 70245
0.994412 - 36225
0.994412 - 36244

The benchmark results show an average inference at 63.123 FPS value is 63.123 frames per second and confirms the Mixtile Blade 3 board is suitable as an Edge AI computer.

Testing images is OK, but since the Mixtile Blade 3 is capable of real-time AI processing, we also decided to test the Yolo5 with a USB camera and stream the results over RTSP.  The first step was to install the MediaMTX RTSP server on the Mixtile Blade 3 following the instructions on GitHub.

We also edited the mediamtx.yml configuration file to encode the webcam video output with H.264 and stream it at 640 x 640 resolution.

paths:
  cam:
        runOnInit: ffmpeg -f v4l2 -framerate 24 -video_size 640x640  -i /dev/video1 -vcodec h264 -f rtsp rtsp://localhost:$RTSP_PORT/$MTX_PATH
        runOnInitRestart: yes

We can test the RTSP streaming on the board with the following command:

./rknn_yolov5_video_demo model/RK3588/yolov5s-640-640.rknn rtsp://127.0.0.1:8554/cam 264

The detected objects are saved in the log file since OpenCV is not used in the test, and the video will just show boxes around the detected objects as you’ll see in the video below.

resize with RGA!
once run use 18.728000 ms
post process config: box_conf_threshold = 0.25, nms_threshold = 0.45
cat @ (515 420 640 479) 0.692027
person @ (26 5 520 469) 0.661832
cup @ (375 199 456 272) 0.629220
laptop @ (277 333 424 405) 0.405269
knife @ (438 159 510 267) 0.156645
chn 0  size 5389    qp 27
time_gap=9on_track_frame_out ctx=0xffffc6769500
decoder=0xaaaade2ab060
receive packet size=27460 on_track_frame_out ctx=0xffffc6769500
decoder=0xaaaade2ab060
receive packet size=36555 decoder require buffer w:h [640:480] stride [640:480] buf_size 614400 pts=0 dts=0 get one frame 1708769692278 data_vir=0xffff88022000 fd=66 input image 640x480 stride 640x480 format=2560
resize with RGA!
once run use 23.140000 ms
post process config: box_conf_threshold = 0.25, nms_threshold = 0.45
person @ (18 9 519 468) 0.647593
cat @ (518 417 640 479) 0.612846
cup @ (371 201 455 271) 0.451749
spoon @ (445 162 509 246) 0.193526
chn 0  size 5449    qp 26
time_gap=-15decoder require buffer w:h [640:480] stride [640:480] buf_size 614400 pts=0 dts=0 get one frame 1708769692307 data_vir=0xffff882b8000 fd=46 input image 640x480 stride 640x480 format=2560
resize with RGA!
once run use 18.781000 ms
post process config: box_conf_threshold = 0.25, nms_threshold = 0.45
cat @ (518 415 640 479) 0.775714
person @ (24 3 512 473) 0.634580
cup @ (370 201 453 272) 0.592880
knife @ (439 159 507 267) 0.154147
chn 0  size 5585    qp 26
time_gap=9on_track_frame_out ctx=0xffffc6769500

The video clip above shows good AI processing performance with a high frame rate for object detection and tracking.

Testing LLM performance on Rockchip RK3588 (GPU)

The initial idea was to test large language models leveraging the 6 TOPS NPU on Rockchip RK3588 like we just did with the RKNPU2 above. But it turns out this is not implemented yet, and instead, people have been using the Arm Mali G610 GPU built into the Rockchip RK3588 SoC for this purpose.

We started with Haolin Zhang’s llm-rk3588 project on GitHub, but despite our efforts, we never managed to make it work on the Mixtile Blade 3 board. Eventually, we found instructions to run an LLM on RK3588 using docker that worked for us. The blog post shows how to use the models RedPajama-INCITE-Chat-3B-v1-q4f16_1 with 3 billion parameters and Llama-2-7b-chat-hf-q4f16_1 with 7 billion parameters, but we also tried the Llama-2-13b-chat-hf-q4f16_1 model with 13 billion parameters to test the performance and try to fully make use of the 32GB of RAM at our disposition.

RedPajama-INCITE-Chat-3B-v1-q4f16_1 LLM model test

We ran the following command to start docker with the 3B LLM model:

docker run --rm -it --privileged docker.io/milas/mlc-llm:redpajama-3b

We used the prompt “Explain why free electrons in an insulator cannot jump over the energy gap to the conduction band”:

arnon@arnon-desktop:~$ docker run --rm -it --privileged docker.io/milas/mlc-llm:redpajama-3b
Use MLC config: "/mlc-llm/dist/prebuilt/RedPajama-INCITE-Chat-3B-v1-q4f16_1/mlc-chat-config.json"
Use model weights: "/mlc-llm/dist/prebuilt/RedPajama-INCITE-Chat-3B-v1-q4f16_1/ndarray-cache.json"
Use model library: "/mlc-llm/dist/prebuilt/lib/RedPajama-INCITE-Chat-3B-v1-q4f16_1-mali.so"
You can use the following special commands:
  /help               print the special commands
  /exit               quit the cli
  /stats              print out the latest stats (token/sec)
  /reset              restart a fresh chat
  /reload [local_id]  reload model `local_id` from disk, or reload the current model if `local_id` is not specified

Loading model...
arm_release_ver of this libmali is 'g6p0-01eac0', rk_so_ver is '7'.
Loading finished
Running system prompts...
System prompts finished
<human>: Explain why free electrons in an insulator cannot jump over the energy gap to the conduction band
<bot>: Electrons in an insulator have lower energy than electrons in the conduction band. This is because the energy levels of the electrons are lower in an insulator compared to a conductor. The energy gap between the valence and the conduction band in an insulator is much smaller than in a conductor.

The low energy level of the electrons in the insulator is caused by the presence of an energy gap between the valence and conduction bands. Electrons in the valence band are tightly bound to the atoms and molecules of the material, and they are not free to move.

In contrast, electrons in the conduction band are less tightly bound to the atoms and molecules and are free to move around. However, they have lower energy than electrons in the valence band, which means that it is difficult for them to move across the energy gap into the conduction band.

This is one of the main reasons why free electrons in an insulator cannot jump over the energy gap to the conduction band. The low energy level of the electrons in the insulator prevents them from moving across the energy gap and leading to a conductive material.

<human>: /stats
prefill: 4.6 tok/s, decode: 5.1 tok/s

The performance is good and the top command shows the memory usage used by the system when running the RedPajama-INCITE-Chat-3B-v1-q4f16_1 model is around 3.9GB of RAM.

CPU memory usage llm model3b mixtile blade 3 rk3588

Testing Llama-2-7b-chat-hf-q4f16_1 model

We restarted docker with the Llama 2 model with 7B parameters …

docker run --rm -it --privileged docker.io/milas/mlc-llm:llama2-7b

… and used the same prompt as above:

arnon@arnon-desktop:~$ docker run --rm -it --privileged docker.io/milas/mlc-llm:llama2-7b
Use MLC config: "/mlc-llm/dist/prebuilt/Llama-2-7b-chat-hf-q4f16_1/mlc-chat-config.json"
Use model weights: "/mlc-llm/dist/prebuilt/Llama-2-7b-chat-hf-q4f16_1/ndarray-cache.json"
Use model library: "/mlc-llm/dist/prebuilt/lib/Llama-2-7b-chat-hf-q4f16_1-mali.so"
You can use the following special commands:
  /help               print the special commands
  /exit               quit the cli
  /stats              print out the latest stats (token/sec)
  /reset              restart a fresh chat
  /reload [local_id]  reload model `local_id` from disk, or reload the current model if `local_id` is not specified

Loading model...
arm_release_ver of this libmali is 'g6p0-01eac0', rk_so_ver is '7'.
Loading finished
Running system prompts...
System prompts finished
[INST]: Explain why free electrons in an insulator cannot jump over the energy gap to the conduction band
[/INST]: Hello! I'm here to help you with your question. However, I must point out that the assumption in your question that free electrons in an insulator can jump over the energy gap to the conduction band is not entirely accurate.
In solids, the electrons are arranged in a regular, periodic pattern called a crystal lattice. The energy gap, also known as the bandgap, is the energy difference between the valence band and the conduction band. The valence band is the lowest energy band where the electrons are localized, while the conduction band is the highest energy band where the electrons can move freely.
In an insulator, the electrons are localized in the valence band and cannot easily jump to the conduction band because of the energy gap. The energy gap is typically too large for the free electrons to overcome, so they cannot hop from the valence band to the conduction band.
I hope this clears up any confusion! If you have any further questions or need more clarification, please feel free to ask.
[INST]: /stats
prefill: 4.8 tok/s, decode: 2.8 tok/s

The performance is still good, and the system memory usage is now around 6.7GB.

CPU memory usage llm model7b mixtile blade 3 rk3588

Testing Llama-2-13b-chat-hf-q4f16_113B model on RK3588

For this test, we will use the docker.io/milas/mlc-llm:redpajama-3b image, and import the files related to the Llama-2-13b-chat-hf-q4f16_1 model in docker before reloading the model and runing the prompt “Explain why free electrons in an insulator cannot jump over the energy gap to the conduction band”:

arnon@arnon-desktop:~/mlc-llm$ docker attach 4695123cf100
hello
<bot>: Hello! How may I help you?

<human>: /help
You can use the following special commands:
  /help               print the special commands
  /exit               quit the cli
  /stats              print out the latest stats (token/sec)
  /reset              restart a fresh chat
  /reload [local_id]  reload model `local_id` from disk, or reload the current model if `local_id` is not specified

<human>: /reload Llama-2-13b-chat-hf-q4f16_1
Use MLC config: "/mlc-llm/dist/prebuilt/Llama-2-13b-chat-hf-q4f16_1/mlc-chat-config.json"
Use model weights: "/mlc-llm/dist/prebuilt/Llama-2-13b-chat-hf-q4f16_1/ndarray-cache.json"
Use model library: "/mlc-llm/dist/prebuilt/lib/Llama-2-13b-chat-hf-q4f16_1-mali.so"
Loading model...
Loading finished
[INST]: Explain why free electrons in an insulator cannot jump over the energy gap to the conduction band
[/INST]: Free electrons in an insulator cannot jump over the energy gap to the conduction band because of the energy barrier that exists between the valence and conduction bands.

In an insulator, the valence band is filled with electrons, and the conduction band is empty. The energy difference between the valence and conduction bands is known as the bandgap. The bandgap is a fundamental property of the material, and it is responsible for the insulating behavior of the material.

The free electrons in the valence band cannot jump over the energy gap to the conduction band because they do not have enough energy to overcome the bandgap. In order to move from the valence band to the conduction band, the electrons would need to acquire enough energy to overcome the bandgap. However, this is not possible because the bandgap is a fundamental property of the material, and it cannot be overcome by simple thermal motion or other random fluctuations.

Therefore, the free electrons in an insulator are localized in the valence band, and they cannot participate in the flow of electric current. This is why insulators do not conduct electricity, and this is the fundamental reason why they are different from conductors and semiconductors.

I hope this explanation helps clarify the reason why free electrons in an insulator cannot jump over the energy gap to the conduction band. If you have any further questions or need additional clarification, please don't hesitate to ask.
[INST]: /stats
prefill: 2.4 tok/s, decode: 1.2 tok/s

The performance is really slow with the text being slowly printed out in the terminal, and we noticed that one of the GPU-related lines shown in the other models is gone:

arm_release_ver of this libmali is 'g6p0-01eac0', rk_so_ver is '7'.

So it’s not 100% clear whether the GPU is used although it loaded the file “/mlc-llm/dist/prebuilt/lib/Llama-2-13b-chat-hf-q4f16_1-mali.so”. Having said that it does work, and there’s about 10.6GB of memory used when running the 13B parameter model in docker which would imply 16GB RAM might be enough…

CPU memory usage llm model13b mixtile blade 3 rk3588

We have been told Rockchip is working on a LLM implementation leveraging the NPU and it will be significantly faster than the GPU implemented. We’ll try to write another quick review once it is released.

Summary of LLM results on RK3588

We used the same prompt for each of the models, namely “Explain why free electrons in an insulator cannot jump over the energy gap to the conduction band”, and all could answer this question, but each with performed at different speeds. The table below summarizes how fast the decode and prefill were in tok/s (token/s) to how many words or subunits of words were processed per second for a specific model.

ModelPrefill (tok/s)Decode (tok/s)
RedPajama-INCITE-Chat-3B-v1-q4f16_14.65.1
Llama-2-7b-chat-hf-q4f16_14.82.8
Llama-2-13b-chat-hf-q4f16_12.41.2

Finally, we used Google Gemini to evaluate the answers from the models tested above to help us decide which answer is the best:

Here's my evaluation of the three answers you provided:

Answer 1:

Strengths:
Accurately describes the concept of the energy gap and its role in conductivity.
Mentions the difference between valence and conduction bands.
Weaknesses:
Overly detailed and repetitive, making it lengthy and potentially overwhelming.
Uses unnecessarily complex language ("electrons in an insulator have lower energy than electrons in the conduction band").
Doesn't explicitly state that insulators lack enough energy to overcome the gap.

Answer 2:

Strengths:
Polite and friendly introduction.
Clearly points out the misconception in the question.
Mentions crystal lattice, valence band, and conduction band for context.
Weaknesses:
Slightly indirect approach to answering the question.
Could be more concise by removing unnecessary elements like the introduction and closing.

Answer 3:

Strengths:
Well-structured and concise explanation.
Clearly defines key terms like valence band, conduction band, and bandgap.
Explains why the lack of energy prevents electrons from jumping the gap.
Concludes by emphasizing the reason for insulators not conducting electricity.
Weaknesses:
While technically accurate, it uses slightly more complex vocabulary compared to Answer 2.

Overall Ranking:

Answer 3: This answer is the most concise, clear, and informative, effectively addressing the core question without unnecessary details.
Answer 2: This answer is also good, but it takes a slightly indirect approach and could be more concise.
Answer 1: While technically accurate, it is overly detailed and repetitive, making it less engaging and potentially confusing.

Unsurprisingly, the quality of the answer improves are more parameters are included in the model.

Conclusion

After testing AI and LLM on the Rockchip RK3588-powered Mixtile Blade 3 board with 32GB RAM we can conclude it performs well on workloads such as YoloV5 object detection with real-time performance, and LLM models can also be successfully run on the Arm Mali-610 GPU, but larger models would benefit from NPU-acceleration coming later this year.

The Mixtile Blade 3 SBC itself is offered with up to 256GB eMMC flash, supports NVMe support, and is one of the rare RK3588 boards actually available with 32GB RAM suitable to run LLMs. The build quality of the metal case is excellent, and it is designed to support wireless use without signal degradation thanks to areas with plastic covers, but we found the fan to be quite noisy.

The documentation is well done, arranged in various sections, and fairly complete which allows users to get started without much hassle. Depending on your use case, the board can be a bit cumbersome to use, for example, you’d need an mPCIe module for WiFi and a USB-C dock is needed to connect a USB keyboard and mouse combo. But its low-profile design with heatsink and U.2 connector make it ideal for clusters of boards, especially for applications needing a lot of memory with each board supporting up to 32GB RAM. The company also provides software drivers to get started with cluster computing.

We’d like to thank Mixtile for sending the Blade 3 Rockchip RK3588 SBC with 32GB RAM for our AI and LLM experimentation. The board can be purchased on the Mixtile shop for $229 with 4GB RAM and 32GB flash up to $439 in the 32GB/256GB configuration tested here. You’ll also find it on Aliexpress, but the price is quite high, and the 32GB RAM model is not available there. Besides the Mixtile shop, you might be able to find the 32GB RAM model on other distributors.

CNXSoft: This article is a translation – with some edits – of the review on CNX Software Thailand by Arnon Thongtem and edited by Suthinee Kerdkaew.

The post Testing AI and LLM on Rockchip RK3588 using Mixtile Blade 3 SBC with 32GB RAM appeared first on CNX Software - Embedded Systems News.

$20 coupon codes for the GEEKOM Mini IT13 mini PC with Core i7-13620H, 32GB RAM, 1TB NVMe SSD (Sponsored)

GEEKOM Mini IT13 20 dollar coupon codes

GEEKOM is offering a $20 discount for the powerful GEEKOM Mini IT13 mini PC with coupon codes for Amazon (code CNXSWIT13) and the official GEEKOM store (code cnxsoftware) bringing the price down to just $609.

The mini PC features an Intel Core i7-13620H 10-core/16-thread Raptor Lake processor, 32GB DDR4 RAM, and a 1TB NVMe SSD for storage. It can drive up to four 4K displays through HDMI and USB4 ports, supports 2.5GbE and WiFi 6E networking, and comes with a total of six USB ports for expansion.

GEEKOM Mini IT13 20 dollar coupon codes

GEEKOM Mini IT13 specifications:

  • SoC – Intel Core i7-13620H 13th Gen Raptor Lake processor with 10 cores, 16 threads up to 4.90 GHz, 24MB Cache, Iris Xe graphics; PBP: 45W
  • System Memory – 32GB dual-channel DDR4-3200 via 2x SODIMM sockets
  • Storage
    • 1TB M.2 2280 PCIe Gen 4 x4 SSD
    • M.2 2242 SATA SSD slot, expandable up to 1TB
    • 2.5-inch SATA HDD (7mm) slot, expandable up to 2TB
    • Full-size SD card reader
  • Video Output – 2x HDMI 2.0 ports, DisplayPort via USB4 ports
  • Audio – 3.5mm audio jack, digital audio via HDMI
  • Networking
    • 2.5GbE RJ45 port
    • Wi-Fi 6E and Bluetooth 5.2 via Intel AX211 module
  • USB
    • 2x USB4 ports (40 Gbps)
    • 3x USB 3.2 Gen 2 ports (10 Gbps)
    • 1x USB 2.0 port
  • Misc – Power button, Kensington lock slot
  • Power Supply – 19V, 6.32A via DC jack
  • Dimensions – 117 x 112 x 49.2mm
  • Weight – 652 grams

GEEKOM Mini IT13 specifications

The Mini IT13 mini PC ships with a 120W power brick, a power cord, an HDMI cable, a Thank You card, a user guide, a VESA mount, and a set of screws. It comes preloaded with an activated version of Windows 11 Pro.

We reviewed the Mini IT13 model with an Intel Core i9-13900H 14-core/20-core processor, 32GB DDR4 RAM, a 2TB SSD, and the same interfaces on CNX Software with both Windows 11 Pro and Ubuntu 22.04. The Mini IT13 worked great with either operating system delivering excellent performance, smooth video playback up to 8K 60 FPS, and great I/Os with 2.5GbE, WiFi 6, and USB4 all working to expectations.

The two small downsides were the fan noise, but that’s not a big issue most of the time, except when the system starts and draws close to 80W during short peaks, and since the system is compact, the power limits had to be lowered to enable efficient cooling, so the Core i9-13900H CPU will not perform as fast as on a larger system with more room for cooling. The Core i7-13620H model will have slightly lower CPU and GPU performance, but we’d expect most features and the interfaces to perform just as well since it’s based on the same motherboard and wireless module.

If you think it’s an interesting proposition, you can get the Mini IT13 (Core i7-13620H, 32GB, 1TB) mini PC for just $609 by using one of the two coupon codes available: CNXWSIT13 on Amazon or cnxsoftware on the GEEKOM US store

The post $20 coupon codes for the GEEKOM Mini IT13 mini PC with Core i7-13620H, 32GB RAM, 1TB NVMe SSD (Sponsored) appeared first on CNX Software - Embedded Systems News.

Blues Starnote – An affordable satellite IIoT module with 18 KB of data for Skylo service

Blues Satellite IIoT Module

Last month, we wrote about the new Quectel CC660D-LS IoT-NTN module, built in collaboration with Quectel and Skylo. before that, we wrote about Qualcomm 212S and 9205S satellite modems which were also developed in collaboration with Skylo. Those modules support IoT NTN (Non-Terrestrial Networks) which makes them very useful for a variety of applications including sending texts, making voice calls, and providing emergency services, particularly in remote areas.

But in a recent development, Skylo partnered with Blues to launch Starnote, a complete backup satellite module that just cost $49. It provides a backup satellite connection for times when cellular or Wi-Fi isn’t available, designed to work seamlessly with the Notecard API. The module features an M.2 E-Key edge connector and a six-pin JST connector (on the backside of the PCB) for easy setup, plus options for external antennas through u.FL connectors. It includes 18KB of Skylo satellite data without any monthly charges, according to Blues calculation it will last a year for a 50-byte message sent every day.

Blues Starnote Satellite IIoT module

Starnote Satellite IIoT module specifications:

  • Integrated satellite and GPS antennas.
  • External antenna compatibility via u.FL connectors.
  • JSON API for Notecard integration.
  • M.2 Key E and six-pin JST connectors for versatile connections.
  • NTN modem with zero-touch setup.
  • Includes 18KB Skylo satellite data; no extra fees or subscriptions.

Starnote Module with Differnt Antenna Setup

The Starnote offers two variations for connectivity: one with onboard satellite and GPS ceramic antennas for immediate use, and another smaller option that allows for external antennas via u.FL connectors, catering to different installation needs and preferences.

The Starnote module uses Skylo Satellite Coverage and supports 3GPP Rel-17 connectivity. However, after intense googling, I was unable to find technical information, like the processor type, and clear details on software and hardware support. While there is an API reference available, it doesn’t have a specific section for this module.

Notecarrier A,B,F and Pi Hat boards
Notecarrier A, B, F, and Pi Hat Boards

There are four different types of Notecarrier boards namely the Notecarrier A, Notecarrier B, Notecarrier F, and Notecarrier Pi Hat and all four boards can support the Notecard modules like Cellular, Cell+Wifi, LoRa, and Starnote models as they all support the M.2 E-Key.

The newly announced Starnote Satellite IIoT module has already sold out, but Blues has created a waitlist on their website for those interested in purchasing at the $49 introductory price. For more details, you can check the press release on their website.

The post Blues Starnote – An affordable satellite IIoT module with 18 KB of data for Skylo service appeared first on CNX Software - Embedded Systems News.

Qualcomm unveils Snapdragon X80 5G modem with NB-NTN satellite connectivity, AI Hub, and FastConnect 7900 WiFi 7 chip

Snapdragon X80 5G modem satellite

Mobile World Congress 2024 (MWC 2024) has just started, and Qualcomm had three major announcements with the introduction of the Snapdragon X80 5G modem with NB-NTN satellite connectivity, the Qualcomm AI Hub with over 75 AI models optimized for Snapdragon processors, and the FastConnect 7900 WiFi 7, Bluetooth, and Ultra Wideband (UWB) chip.

Snapdragon X80 5G modem-RF system

Snapdragon X80 5G modem satellite

Snapdragon X80 5G modem specifications:

  • Peak download speed – 10 Gbps
  • Peak upload speed – 3.5 Gbps
  • Cellular Modem-RF Specs – 10CC aggregation in mmWave, 5CC aggregation in 5G sub-6GHz
  • Cellular Technology
    • 5G NR, sub-6 GHz
    • Dynamic Spectrum Sharing (DSS)
    • LTE, WCDMA, LAA, TD-SCDMA, GSM/EDGE, CBRS
    • mmWave, sub-6 carrier aggregation (FDD-FDD) sub-6 carrier aggregation (TDD-TDD), 5G FDD, 5G TDD, sub-6 carrier aggregation (FDD-TDD)
    • 5G SA (standalone), 5G NSA (non-standalone)
    • F + F ULCA, FDD UL MIMO, Switched Uplink, 3GPP R18-ready (5G Advanced-ready), 6x CA sub-6 downlink carrier aggregation, 1024-QAM sub-6, FR1 + FR2 CA
    • Supports all global 5G bands, from 0.6 to 41 GHz
  • Multi SIM: Dual SIM support Qualcomm® DSDA Gen 2 (Dual Data)
  • Performance Enhancement Technologies
    • Qualcomm 5G Ultra-Low Latency Suite
    • Qualcomm Smart Transmit Gen 5 technology supporting NB-NTN and Supplemental Uplink
    • Qualcomm 5G AI Processor Gen 2 with dedicated tensor accelerator Qualcomm 5G AI Suite Gen 3 enabling AI-enhanced performance improvements in power handling, coverage, latency, & QoS, AI-assisted mmWave beam management (mmWave (SA) range extension for CPE, and AI-based GNSS Location Gen 3
    • Qualcomm Advanced Modem-RF Software Suite
    • Qualcomm RF Downlink Boost
    • Snapdragon Satellite
    • Qualcomm RF Uplink Optimization
    • Qualcomm 5G PowerSave Gen 5 with support for Rel 17 PDCCH Skip and Qualcomm Power RF Efficiency Suite
  • Qualcomm Advanced Modem-RF Software Suite with
    • Qualcomm Smart Network Selection Gen 3 enables context-based performance enhancements for user scenarios and on-device, learning-based network selection
    • Non-Linear Interference Cancellation
    • Qualcomm DSDA Gen 2 – Dual Data with support on global bands
    • Qualcomm Smart Transmit Gen 5
    • Switched Uplink (FDD-TDD) – Globally
    • Supplemental Uplink – China
Snapdragon X80 mmWave Sub 6 GHz RF Satellite block diagram
Snapdragon X80 block diagram

Last year, Qualcomm introduced “Snapdragon Satellite” two-way communication based on Iridium services, but it was eventually dropped. Instead, the company started offering standardized 5G NTN satellite solutions for the IoT market with the Qualcomm 212S and 9205S Satellite IoT modems, and now the technology has found its way into the Snapdragon X80 5G modem designed for smartphones and laptops, as well as XR, automotive, industrial IoT, private networks, and fixed wireless access applications.

Commercial devices powered by Snapdragon X80 are expected to launch in the H2 2024. More details may be found on the product page.

Qualcomm AI Hub

Qualcomm on device AI models hub

Qualcomm Snapdragon processors have been supporting AI acceleration for a few years, but in order to simplify the implementation of on-device AI in mobile apps, Qualcomm has launched the AI Hub that features a library of over 75 pre-optimized AI models.

Models include Segment-Anything, stable diffusion text-based AI image generation, Whisper Base automatic speech recognition (ASR) model for multilingual transcription as well as translation, TrOCR for optical character recognition (OCR) on both printed and handwritten text, MediaPipe face detection, Yolo v7 real-time object detection, Open AI clip for vision and language tasks like image/text similarity and image classification, and Baichuan 7B Large language model (LLM) working with Chinese and English languages among many others.

Qualcomm pre optimized AI models

The models are said to work on a range of Snapdragon and Qualcomm platforms namely Snapdragon 8 Gen 3/2/1 Mobile, Snapdragon 888, Snapdragon 865, Snapdragon 855, Snapdragon 845, Snapdragon 778, Snapdragon XR2+ Gen 2/1, Snapdragon XR1+ Gen 2/1, and Qualcomm Robotics RB5. You’ll find the AI models on the Qualcomm AI Hub, Hugging Face, and GitHub and developers can also run the models themselves with a few lines of code on cloud-hosted devices powered by Qualcomm platforms.

FastConnect 7900 WiFi 7, Bluetooth 5.4, and UWB chip

Qualcomm FastConnect 7900 WiFI 7 Bluetooth 5.4 UWB

Qualcomm introduced the FastConnect 7800 WiFi 7 and Bluetooth 5.3 chip in 2022, and the FastConnect 7900 builds on that with a WiFi 7 radio optimized for low power, Bluetooth 5.4, and various UWB standards adding support for proximity and indoor location support.

FastConnect 7900 specifications:

  • WiFi 7
    • Generations – Wi-Fi 6, Wi-Fi 6E, Wi-Fi 7
    • Standards – 802.11b, 802.11g, 802.11n, 802.11ac, 802.11a, 802.11ax, 802.11be
    • 6GHz, 5GHz, and 2.4GHz support
    • Up to 5.8 Gbps data rate using 4K QAM modulation and 320MHz channel bandwidth (single channel or 160 + 160 with High Band Simultaneous)
    • Up to 4.3 Gbps with 4K QAM and 240MHz combined channel bandwidth using multiple streams of globally available 5GHz spectrum
    • Features – Passpoint, TDLS, OFDMA (UL/DL), Wi-Fi QoS Management, MU-MIMO (UL/DL), Wi-Fi Optimized Connectivity, Wi-Fi Aware R3, Wi-Fi Location, Miracast, Voice-Enterprise, High Band Simultaneous (HBS) Multi-Link, Target Wake Time, XPAN Technology
    • Security
      • WPA3 Enhanced Open, FIPS 140-2, TLS, WPA2, AES-CCMP, PAP, MS-CHAP, PEAP, EAP-TLS, 128-bit WEP, MS-CHAPv2, WPA2-PSK, EAP-TTLS, 64-bit WEP, 256-bit AES-GCMP,
      • Encryption: 256-bit AES-GCMP, 128-bit AES-CCMP
      • Protected Management Frames, WPA3 Personal, WPA3 Enterprise, WPA3 Easy Connect, 128-bit AES-GCMP
    • HBS (High Band Simultaneous) technology delivers multiple links of 5 and/or 6GHz performance
    • 40% lower power usage than the previous generation (FastConnect 7800)
  • Bluetooth 5.4
    • Audio  codecs – Qualcomm aptX, aptX Adaptive, aptX Voice, aptX Lossless
    • Audio technologies
      • Snapdragon Sound technology and Qualcomm XPAN (Expanded Personal Area Network)
      • Low latency Gaming mode with Voice back-channel
      • LE Audio
      • Spatial Audio
      • Stereo Recording
      • Multi-stream audio support for true wireless earbuds
  • UWB
    • Standards – IEEE 802.15.4z, Fine Ranging (FiRa), Car Connectivity Consortium (CCC)
    • Transmit Chain – 1
    • Receive Chains – 3
    • Features – Time of Flight (ToF) and Angle of Arrival (AoA) to enable “proximity experiences” such as digital keys, object finding, and indoor navigation.
  • Part Number – WCN7880 and WCN7881 (It’s unclear what the differences are between the two SKUs)
  • Process – 6nm

The FastConnect 7900 should be found in products such as smartphones, mobile PCs, and VR/XR headsets starting in H2 2024. Further information may be found on the product page.

Qualcomm’s announcement may also provide additional details and links about the new Snapdragon X80, FastConnect 7900, and Qualcomm AI Hub.

The post Qualcomm unveils Snapdragon X80 5G modem with NB-NTN satellite connectivity, AI Hub, and FastConnect 7900 WiFi 7 chip appeared first on CNX Software - Embedded Systems News.

Nordic nRF9151 – A smaller LTE-M/NB-IoT and DECT NR+ SiP with enhanced power efficiency and security

Nordic’s New nRF9151 DECT NR+ SiP Module

Nordic Semiconductor has announced the availability of its new nRF9151 SiP module adding to the nRF91 cellular IoT lineup. This new module includes a 64MHz Arm Cortex-M33 SoC, LTE-M/NB-IoT connectivity with a radio-frequency front-end (RFE) for cellular support, and DECT NR+ connectivity.

All this comes with a 20% smaller footprint and additional support for Power Class 5 20 dBm alongside Class 3 (23 dBm) compared to the Nordic nRF9161 SiP module also designed to power cellular IoT and non-cellular 5G solutions that was introduced just last month.

Nordic nRF9151 SiP: a low-power module with Arm Cortex-M33, LTE-M/NB-IoT, DECT NR+, 20% smaller footprint, and Power Class 5 20dBm support.

Nordic nRF9151 SiP module specification:

  • Processor and Memory – 64 MHz Arm Cortex-M33, 1 MB flash, and 256 KB SRAM.
  • Modem – Integrated LTE-M/NB-IoT and DECT NR+ with support for 3GPP Release 14 LTE-M/NB-IoT.
  • Location Tracking – Built-in GNSS receiver and support for cellular-based location features.
  • Security – Arm TrustZone, CryptoCell for cryptographic operations, true random number generator (TRNG).
  • Power Options – Supports Power Class 5 (20 dBm) in addition to the existing Power Class 3 (23 dBm), offering greater flexibility for battery-powered devices.
  • Compact Design – 20% smaller footprint compared to its predecessor, the nRF9161, enabling more compact and space-efficient product designs.
  • Firmware and software tools
    • Firmware Updates – Secure Firmware Over The Air (FOTA) updates.
    • DECT NR+ Stack – Enables massive mesh applications with reliability and scalability.
    • Development Tools – nRF Connect SDK and nRF Connect for Desktop for diverse development needs.

As we noted during the launch of the nRF9161 last month, DECT NR+ is a new technology using 5G’s core features for local wireless connectivity at 1.9GHz. It provides low-latency, reliable connections, and supports large mesh networks with up to one million nodes.

In terms of software support, the nRF9151 is fully compatible with the nRF9161 and nRF9131, sharing modem firmware. Developers can use the nRF Connect SDK in VS Code for essential tools and the nRF Connect for Desktop for network tasks. There’s also an online course at the Nordic Developer Academy for quick cellular IoT learning with the nRF9161 DK.

nordic nRF9161 DK development kit

At the time of writing, there’s no specific development board for the nRF9151 SiP module, but Nordic plans to release one when the product is widely available. That being said the nRF9151 is available for sampling now, but pricing and general availability details haven’t been shared yet. For more information, visit Nordic’s product and press release pages.

The post Nordic nRF9151 – A smaller LTE-M/NB-IoT and DECT NR+ SiP with enhanced power efficiency and security appeared first on CNX Software - Embedded Systems News.

CWWK “Magic Computer” is a fanless Alder Lake-N mini PC with a PCIe x8 slot

magic computer

CWWK Magic Computer is an unusual fanless mini PC offered with a range of Alder Lake-N processors from the Intel Processor N95 to the Core i3-N305 and a PCIe x8 slot allowing users to connect all sorts of PCIe boards on the side of the device for example for networking and/or storage.

The mini PC supports up to 32GB DDR5, an M.2 NVMe (PCIe 3.0 x1) SSD, two SATA drives, and up to four 4K capable monitors through HDMI, DisplayPort, and USB-C interfaces. It is also equipped with two 2.5GbE RJ45 ports, four USB 2.0 ports, and a range of internal headers for a COM port, USB 2.0, a TPM, and optional fans.

magic computer

CWWK Magic Computer specifications:

  • Alder Lake-N SoC (one or the other)
    • Intel Processor N95 quad-core processor @ up to 3.4 GHz (Turbo) with 6MB cache, 16EU Intel HD graphics; TDP: 15W
    • Intel Processor N97 quad-core processor @ up to 3.6 GHz (Turbo) with 6MB cache, 24EU Intel UHD Graphics; TDP: 12W
    • Intel Processor N100 quad-core processor @ up to 3.4 GHz (Turbo) with 6MB cache, 24EU Intel HD graphics; TDP: 6W
    • Intel Processor N200 quad-core processor @ up to 3.7 GHz (Turbo) with 6MB cache, 32EU Intel HD graphics; TDP: 6W
    • Intel Core i3-N305 octa-core processor @ up to 3.8 GHz (Turbo) with 6MB cache, 32EU Intel UHD Graphics; TDP: 15W
  • System Memory – Up to 32GB DDR5 RAM (4800/5200/5600Mhz) via a single SO-DIMM socket
  • Storage
    • M.2 (PCIe 3.0 x1) socket for 2242/2280 NVMe SSD
    • 2x SATA ports
    • MicroSD card slot
  • Video Output – 2x HDMI 1.4 ports (odd that it is not HDMI 2.0…), 1x DisplayPort output, 1x USB-C port with DisplayPort Alt. mode; quad-independent display support
  • Networking – 2x 2.5GbE Ethernet RJ45 ports via Intel i226-V controllers
  • USB – 4x USB 2.0 ports, 1x USB Type-C port with DisplayPort Alt. mode
  • Expansion – PCIe x8 slot (PCIe 3.0 x4) for storage, networking, etc…
  • Internal headers
    • USB 2.0 header
    • COM port header
    • TPM header
    • 4-pin fan header
    • 3-pin fan header
  • Misc
    • Power button, BIOS reset button
    • Power and HDD LED indicators
    • BIOS with support for Wake-on-LAN (WoL), GPIO, watchdog, PXE
    • Aluminum alloy shell for passive cooling with mounting points for two optional fans
  • Power Supply – 12V to 19V via DC jack (5.5/2.5mm) or 4-pin connector
  • Power Consumption – 6 to 15 Watts
  • Dimensions – Mini PC: 144 x 100 x 48 mm; motherboard: 140 x 90 mm
  • Weight – TBD
  • Temperature Range – 0 to 70°C
  • Humidity – 5 to 85% RH

Magic Computer motherboard

ALder Lake-N motherboard with PCIe x8 slot

There are some downsides to the design. First, the mini PC does not provide an enclosure that would protect it from dust, then it lacks an M.2 socket for wireless connectivity, so it would have to be added through one of the USB 2.0 ports (limited to 480 Mbps) since there aren’t any USB 3.0 ports, and finally, the HDMI 1.4 ports would limit video output to 4Kp30 if the specifications are indeed correct.

The mini PC’s PCIe x8 slot – connected to a PCIe Gen 3.0 x4 interface – can be used to add up to four 2.5GbE ports, two 10GbE SFP cages, four additional NVMe drives, or an SFF-8643 adapter to connect multiple storage devices as shown in the illustration below.

Alder Lake-N mini PC with PCIe x8 slot

I guess the “magic” in CWWK’s Magic Computer comes from the self-levitating PCIe card that is truly an amazing feat and technology breakthrough of sorts. More seriously, that means some standoffs would be required to hold the PCIe in place, except for the desktop mess that the SFF-8643 adapter, drives, and cables would bring to the table…

I could not find the N95 and N97 models for sale yet, but the others can be purchased now on Aliexpress:

It’s unclear whether the models with memory and storage also come with Windows or another OS as it’s not mentioned at all. I’d assume you may get an unactivated version of Windows.

Via Liliputing

The post CWWK “Magic Computer” is a fanless Alder Lake-N mini PC with a PCIe x8 slot appeared first on CNX Software - Embedded Systems News.

Particle’s M-series multi-radio devices connect anywhere with WiFi, cellular, NTN satellite, and LoRaWAN connectivity

Particle M-series M-SoM versions

Particle Industries Inc., an IoT Platform-as-a-Service company, has announced a new line of multi-radio boards and modules that offer multiple connectivity options in a single product. Particle is a complete edge-to-cloud IoT development platform that offers hardware products and software tools for creating IoT solutions. The company’s latest product, the M-series, has a bold tagline: connect anywhere.

Particle M-series M-SoM versions

Although wireless connectivity has come a long way, there is no single wireless technology that works everywhere. Particle’s M-series aims to address that problem by bundling multiple radios – Wi-Fi, cellular, satellite, and LoRaWAN – into one product.

Particle is looking to expand from its two primary wireless technologies: Wi-Fi and cellular, and add two more radios, satellite and LoRaWAN, for broader coverage. These two radios will cover devices in areas such as enclosed spaces (boiler rooms, elevator shafts, basements, and mines) and remote locations (methane sensors in oil and gas plants, boats, and environmental sensors in wooded areas)

Multi-radio networking offers two major advantages, according to Particle:

  1. Network diversity: This removes the need for multiple devices with different radios for operation in varying environments. The device will connect to any wireless network available to it and the user doesn’t need prior knowledge of available networks.
  2. Network redundancy and failover: The devices can connect to multiple networks simultaneously, and the Particle platform will ensure that events are published, regardless of the connection. If the preferred network fails to connect, the device will try another and then another, until the data is transferred to the cloud.

Particle’s M-series will be released in three form factors, a multi-radio system-on-module (M-SoM), a multi-radio development board (Muon) for rapid prototyping, and a multi-radio industrial gateway (Monitor M).

M-SoM specifications:

  • Microcontroller – RealTek RTL8722DM Arm Cortex-M33 @ 200 MHz; 16MB flash and 4.5MB RAM
  • Connectivity – Quectel connectivity module (EG91, BG95, and “unnamed” depending on model)
  • Security – Arm Trustzone, Secure Boot
  • Form Factor – M.2 form factor
  • Versions
    • M404: LTE-M + 2G fallback + dual-band Wi-Fi
    • M524: LTE Cat 1 + dual-band Wi-Fi
    • M635: LTE-M + 2G fallback + dual-band Wi-Fi + NTN satellite

Particle M-series Muon dev board

Muon specifications:

  • Connectivity
    • Expansion Card interface for general-purpose input/output (GPIO) connectivity
    • Qwiic connector
    • LoRa module
  • Power via
    • USB-C with Power Delivery (PD),
    • Screw block for direct power source connections (5-12V), or
    • Lithium-polymer (LiPo) battery
  • Form Factor – Credit-card-sized carrier board with onboard M-SoM

Particle’s customizable industrial IoT gateway, Monitor One, will be upgraded to support the Muon development board. According to Particle, this will facilitate development for its industrial customers and reduce time to market.

The Muon development board is available for pre-order at $49. Wi-Fi + cellular + LoRaWAN Muons are projected to ship by the second quarter of 2024, while Wi-Fi + cellular + satellite + LoRaWAN models will ship by the third quarter. Engineering samples of the M-SoM chips will be made available for evaluation by filling out a contact form.

The post Particle’s M-series multi-radio devices connect anywhere with WiFi, cellular, NTN satellite, and LoRaWAN connectivity appeared first on CNX Software - Embedded Systems News.

BrainChip’s Neuromorphic Akida Edge AI Box is now available for pre-orders at $799

BrainChip Neuromorphic Akida Edge AI Box

BrainChip has recently opened preorders for their Akida Edge AI Box, built in partnership with VVDN Technologies. This box features an NXP i.MX 8M Plus SoC and two Akida AKD1000 neuromorphic processors for low-latency, high-throughput AI processing at the edge.

The system features USB 3.0 and micro-USB ports, HDMI, 4GB LPDDR4 memory, 32GB eMMC with up to 1TB micro-SDXC expansion, dual-band Wi-Fi, and two gigabit Ethernet ports for external camera connections, all within a compact, passively-cooled chassis, powered by 12V DC.

BrainChip Neuromorphic Akida Edge AI Box

BrainChip Akida Edge AI Box Specifications:

  • Host CPU – NXP i.MX 8M Plus Quad SOC with 64-bit Arm Cortex-A53 processor running at up to 1.8GHz
  • AI/ML Accelerator – Dual Brainchip AKD1000 (Akida Chip) over PCIe for efficient AI processing
  • Memory – 4GB LPDDR4
  • Storage
    • 32GB eMMC flash
    • MicroSD card slot for additional storage options
  • Display Output – HDMI output supporting up to 3840 x 2160p30 resolutions with a pixel clock up to 297MHz
  • Network Connectivity
    • Wi-Fi: 802.11 ac/b/g/n/ac (2.4GHz/5GHz) for wireless connectivity
    • Ethernet – Two ports with 10/100/1000Mbps, also supports external camera interfaces
  • Video Processing Capabilities
    • Max Encode – 1x 1080p60 (H.265 & H.264) / 2x 1080p30 (H.265 & H.264) / 4x 720p30 (H.265 & H.264)
    • Max Decode – 1x 1080p60 (H.265 & H.264) / 2x 1080p30 (H.265 & H.264) / 4x 720p30 (H.265 & H.264)
  • USB
    • USB 3.0 Type-A port for high-speed data transfer
    • USB 2.0 Micro-B port for flashing and debugging
  • Indicators and Buttons
    • Power/Reset button
    • 2x RGB LED for status indication
    • Power ON/OFF indication LED (Green)
  • Power – 12VDC input using an external AC-DC adapter
  • Environmental Conditions
    • Operating temperature – 0°C to 50°C
    • Operating humidity – 5% to 95% non-condensing
  • Dimensions – 110 x 110 x 56mm (L x W x H)
  • Operating System – Linux Embedded OS Version 6.1

The AI Box includes a GPU delivering 6 GFLOPS of compute power and uses a dual-chip PCIe AKD1000 neuromorphic processor. However, it does not support temporal event-based neural nets (TENNs) or vision transformer (ViT) features.

In 2022, Intel introduced its Neuromorphic AI accelerator, Loihi 2, and we also saw Raspberry Pi-based development kits with BrainChip AKD1000 SoC. Both technologies rely on spiking neural networks (SNN) to achieve high-performance, real-time inference with significantly lower power consumption compared to traditional AI chips that use CNN (convolutional neural network) technology.

Neuromorphic Akida Edge AI Box

On the software side of things, BrainChip is working on a Linux 6.1-based operating system and a collection of ready-to-use edge AI applications to showcase the capabilities of its Akida technology. The final details of these applications are still being worked out in collaboration with VVDN. Though they specifically did not talk about the software side of things some examples on BrainChip Akida Chip can be found on their GitHub account.

You can pre-order the Akida Edge AI Box from BrainChip’s online store for $799. It’s set to ship around the middle of 2024. Additional details about the product can also be found in the press release.

The post BrainChip’s Neuromorphic Akida Edge AI Box is now available for pre-orders at $799 appeared first on CNX Software - Embedded Systems News.

MINIX Z100-0dB review – Part 2: A fanless Intel Processor N100 mini PC tested with Windows 11

MINIX Z100-0dB review Windows11

We’ve already done an unboxing and a teardown of the MINIX NEO Z100-0dB fanless mini PC powered by an Intel Processor N100 CPU, and equipped with a 16GB DDR4-3200 RAM and a 512GB M.2 SSD before quickly trying the preinstalled Windows 11 Pro operating system in the first part of the review.

We’ve now had time to test Windows 11 in the MINIX Z100-0dB fanless mini PC in more detail. So we’ll report our experience in the second part of the review with features testing, benchmarks, some storage and networking performance tests, measurements of fan noise and power consumption, and more. We’ll also compare the MINIX NEO Z100-0dB against other Alder Lake-N mini PCs such as the actively-cooled GEEKOM Mini Air12 that we reviewed at the end of last year.

MINIX Z100-0dB review Windows11

Software overview and features testing

The System->About window confirms the Z100-0dB mini PC features an Intel N100 processor at 800 MHz (base frequency), 16 GB of RAM, and comes with the Windows 11 Pro Version 23H2, after we did the update from the 22H2 version it shipped with. Note that we have to install the “windows11.0-kb5027397-x64.msu ” file to complete the update to Windows 11 Pro 23H2 as we did for the GEEKOM Mini IT12.

MINIX Z100-0dB Windows 11 About

HWiNFO64 provides more details about the quad-core Intel Processor N100 CPU, the motherboard, and Intel UHD Graphics found in the N100 SoC.

MINIX Z100-0dB Intel Processor N100 HWiNFO64

GPU-Z provides further information about the Intel UHD graphics, and it is almost exactly the same as the data for the GEEKOM Mini Air12 except we have a newer GPU driver, and the Z100-0dB uses DDR4 memory while the Mini Air12 comes with faster DDR5 which may impact graphics performance to the benefit of the latter.

MINIX Z100-0dB GPU-Z

The PL1 and PL2 power limits are set to 6W (PBP) and 12W (MTP), quite lower than the 15W and 20W seen in the Mini Air12, so it might also impact the overall system performance as well. We’ll find out with the benchmarks.
Intel Processor N100 Power Limit 1 2

HWiNFO64 lists a single 16GB DDR4-3200 SO-DIMM module, but it’s unable to decode the manufacturer of the MINIX-branded RAM stick or the chips used.

MINIX Z100-0dB RAM speed

Windows Task Manager confirms we have one 16GB SO-DIMM RAM module clocked at 3200 MHz, of which 228MB is hardware reserved (for things like the GPU).

Task Manager Speed 16GB DDR4-3200 RAM

Let’s open the Device Manager to check the Network adapters, and we can see Bluetooth, WiFi 6 (AX201), and a 2.5GbE RealTek controller.

MINIX Z100-0dB network adapters device manager

HWiNFO64 shows it’s the usual RealTek RTL8125 2.5GbE controller.

MINIX Z100-0dB 2.5GbE HWiNFO64

The Intel WiFi 6 AX201 module is said to support up to a 1729 Mbps link, and we’d expect it to work well in both Windows and Linux as per our experience with other mini PCs fitted with this model.

WiFi 6 AX201 Windows 11

We can go back to the Device Manager to check the firmware version of the Intel Wireless Bluetooth device.

MINIX Z100-0dB Bluetooth 5.2 version
The “LMP11” string looks up to Bluetooth 5.2. We also successfully tested Bluetooth by transferring a file from an Android smartphone.

MINIX Z100-0dB Bluetooth received file

The MINIX Z100-0dB specifications list two 10 Gbps USB 3.2 Type-A ports, one 10 Gbps USB 3.2 Type-C port, and two USB 2.0 ports. The company decided not to put any logo on the enclosure to indicate the speed and capabilities of each of the ports. I guess that’s OK since the blue ports plus the USB-C port are all 10 Gbps capable and the black ones support 480 Mbps. But we’ve still tested the speed of the USB 3.2 ports using an ORICO M234C3-U4 M.2 NVMe SSD enclosure and a USB 3.0 hard drive for the USB 2.0 ports, as well as the HWiNFO64 program to verify the version and speed and CrystalDiskMark to confirm the transfer speed.

MINIX Z100-0dB USB 3.2 speed CrystalDiskMark
Top USB 3.2 port on the “front panel”


MINIX Z100-0dB USB 2.0 speed CrystalDiskMark
Left USB 2.0 on the “rear panel”

The results of all 5 ports can be summarized as follows:

  • “Front panel” with power button
    • USB-C – USB 3.2 – USB 3.1 SuperSpeedPlus (10 Gbps) – 1,045 MB/s read speed
    • USB-A (Top) – USB 3.2 – USB 3.1 SuperSpeed (10 Gbps) – 1,058 MB/s read speed
    • USB-A (Bottom) – USB 3.2 – USB 3.1 SuperSpeed (10 Gbps) – 1,059 MB/s read speed
  • “Rear panel” with DC jack
    • USB-A  (top) – USB 2.0 – USB 2.0 High-Speed (480 Mbps) – 44.60 MB/s read speed
    • USB-A (bottom) – USB 2.0 – USB 2.0 High-Speed (480 Mbps) – 44.37 MB/s read speed

All ports work as advertised. I wrote “front panel” and “rear panel” in quotes because it’s difficult to assign a rear and front panel the way the mini PC was designed.

The MINIX Z100-dB comes with two HDMI 2.0 ports and we could easily arrange a dual-display setup in Windows 11 Pro with an RPI All-in-One HDMI display and an older VGA display connected through an HDMI to VGA adapter.

MINIX Z100 0dB two displays

Windows 11 benchmarks on MINIX Z100-0dB

Time for some benchmarks. We changed the Power mode in Windows 11 to Best Performance before running any benchmarks. Note the room temperature was around 28°C during the tests.

Windows 11 Power mode Best performance
We started with PCMark 10.

MINIX Z100-0dB PCMark 10
The Intel N100 fanless mini PC achieved 3,009 points in PCMark 10, not too bad.

MINIX Z100-0dB 3Dmark Fire Strike
In 3DMark Fire Strike, the result was 1,125 points, only marginally lower than the 1,188 points for the Mini Air12.

MINIX Z100-0dB PassMark PerformanceTest 11
The MINIX NEO Z100-0dB managed to get 1,512 points in PassMark PerformanceTest 11, similar to the GEEKOM mini PC, although the Disk Mark score is almost cut in half.

Since we mention storage here, the CrystalDiskMark was used to evaluate the performance of the 512GB SSD with 2066 MB/s sequential read speeds, 1,585 MB/s sequential write speeds, and decent random I/Os.

MINIX Z100-0dB 512GB SSD CrystalDiskMark benchmark
Cinebench R23 was used to test single-core and multi-core performance.

MINIX Z100-0dB Cinebench R23
That would be 789 points for the single-core benchmark and 2,541 points for the multi-core benchmark with an MP radio of 3.22x. The latter is virtually the same as on the Mini Air12 (3.19x), but the GEEKOM mini PC offers better results at 918 and 2,927 points likely due to the higher power limits made possible by the built-in fan.

We started testing the iGPU performance with Unigine Heaven Benchmark 4.0 which rendered at 12.7 fps on average and yielded a score of 320 points at the standard 1920×180 resolution.

MINIX Z100-0dB unigine heaven benchmark 4.0
We then tested YouTube video playback at 4K and 8K resolution in Google Chrome.

MINIX NEO Z100-0dB Youtube 4K 30fps Windows 11
A YouTube 4K 30 FPS video played fine for over 6 minutes without any dropped frames.

MINIX NEO-Z100 0dB Youtube 8K 30fps Windows 11
Switching to 8K at 30 FPS yielded the same result.

Fanless Intel Processor N100 mini PC Youtube 4K 60fps Windows 11
Dropped frames started to appear at 4K 60 FPS with 1,526 points dropped out of 22,898 when playing the video for almost 7 minutes, or a 6.6% rate. The video was still perfectly watchable with no obvious issues.

Fanless Intel Processor N100 mini PC Youtube 8K 60fps Windows 11
It was the same story at 8K 60 FPS with 1,401 frames lost out of 20,634, or a 6.7% rate. The results were comparable to our experience with the GEEKOM Mini Air12 at 30 FPS, but at 60 FPS, the GEEKOM Mini Air12 had fewer lost frames than the MINIX Z100-0dB. YouTube video streaming tends to not always be reproducible, so your mileage may vary.

Comparison of MINIX Z100-0dB benchmarks against other mini PCs

Let’s now compare Windows 11 benchmark results for the MINIX Z100-0dB against other mini PCs with Alder Lake-N processors including the GEEKOM Mini Air12 with the same Processor N100 CPU, the Blackview MP80 (Processor N97), the Blackview MP80 (Processor N95) and the Weibu N10 with a more powerful Core i3-N305 octa-core processor.

Here are the key features and specifications for the five mini PCs first.

MINIX Z100-0dBGEEKOM Mini Air12Blackview MP80 (N97)Blackview MP80 (N95)Weibu N10
SoCIntel Alder Lake-N Processor N100Intel Alder Lake-N Processor N100Intel Alder Lake-N Processor N97Intel Alder Lake-N Processor N95Intel Core i3-N305
CPU4-core processor up to 3.4 GHz4-core processor up to 3.4 GHz4-core processor up to 3.6 GHz4-core processor up to 3.4 GHz8-core processor up to 3.80 GHz
GPU24EU Intel HD Graphics24EU Intel HD GraphicsIntel UHD Graphics 24 EUIntel UHD Graphics 24 EU32EU Intel HD Graphics
Memory16 GB DDDR4-320016GB DDR5-480016GB LPDDR5 SDRAM 16GB LPDDR5 SDRAM 8GB DDR4-3200
Storage512GB NVMe SSD512GB NVMe SSD512GB M.2 SATA SSD512GB M.2 SATA SSD512GB NVMe SSD
Default OSWindows 11 ProWindows 11 ProWindows 11 ProWindows 11 ProWindows 11 Pro

And now, the benchmark results.

MINIX Z100-0dBGEEKOM Mini Air12Blackview MP80 (Processor N97)Blackview MP80 (Processor N95)Weibu N10 Core i3-N305
PCMark 103,0093,1503,3883,196-
- Essentials7,2407,4677,0267,213-
- Productivity4,2854,5985,1044,884-
- Digital content creation2,3862,4712,9452,515-
3DMark (Fire Strike)1,1251,1881,5271,0381,534
PerformanceTest 11.01,5121,5801,6061,2862,358
- CPU Mark6,0036,1806,0894,6499,734
- 2D Graphics Mark227248459281253
- 3D Graphics Mark8848881,1709011,172
- Memory Mark2,3092,4922,2302,1412,379
- Disk Mark11,88620,9844,3053,84312,806
Cinebench R23
- Single Core7899189269131,030
- Multi Core2,5412,9272,7412,6734,505

The performance of the MINIX Z100-0dB fanless mini PC is lower than the actively cooled GEEKOM Mini Air12 mini PC in most benchmarks, but the difference is not that great in most cases, so it’s a small tradeoff to get a fully silent system. While the Core i3-N305 processor is the fastest of the lot, the Intel Processor N97 CPU is not too bad either thanks to its faster GPU.

Networking (2.5GbE and WiFi 6) performance

We’ll test the 2.5GbE port on the MINIX Z100-0dB with iperf3 and UP Xtreme i11 Edge mini PC on the other side

  • Download

PS C:\Users\aey\downloads\iperf-3.1.3-win64\iperf-3.1.3-win64> .\iperf3.exe -t 60 -c 192.168.31.12 -i 10 -R
Connecting to host 192.168.31.12, port 5201
Reverse mode, remote host 192.168.31.12 is sending
[  4] local 192.168.31.41 port 49951 connected to 192.168.31.12 port 5201
[ ID] Interval           Transfer     Bandwidth
[  4]   0.00-10.00  sec  2.76 GBytes  2.37 Gbits/sec
[  4]  10.00-20.00  sec  2.76 GBytes  2.37 Gbits/sec
[  4]  20.00-30.00  sec  2.76 GBytes  2.37 Gbits/sec
[  4]  30.00-40.00  sec  2.76 GBytes  2.37 Gbits/sec
[  4]  40.00-50.00  sec  2.76 GBytes  2.37 Gbits/sec
[  4]  50.00-60.00  sec  2.76 GBytes  2.37 Gbits/sec
- - - - - - - - - - - - - - - - - - - - - - - - -
[ ID] Interval           Transfer     Bandwidth       Retr
[  4]   0.00-60.00  sec  16.6 GBytes  2.37 Gbits/sec    0             sender
[  4]   0.00-60.00  sec  16.6 GBytes  2.37 Gbits/sec                  receiver

iperf Done.

  • Upload

PS C:\Users\aey\downloads\iperf-3.1.3-win64\iperf-3.1.3-win64> .\iperf3.exe -t 60 -c 192.168.31.12 -i 10
Connecting to host 192.168.31.12, port 5201
[  4] local 192.168.31.41 port 49941 connected to 192.168.31.12 port 5201
[ ID] Interval           Transfer     Bandwidth
[  4]   0.00-10.00  sec  2.76 GBytes  2.37 Gbits/sec
[  4]  10.00-20.00  sec  2.76 GBytes  2.37 Gbits/sec
[  4]  20.00-30.00  sec  2.76 GBytes  2.37 Gbits/sec
[  4]  30.00-40.00  sec  2.76 GBytes  2.37 Gbits/sec
[  4]  40.00-50.00  sec  2.76 GBytes  2.37 Gbits/sec
[  4]  50.00-60.00  sec  2.76 GBytes  2.37 Gbits/sec
- - - - - - - - - - - - - - - - - - - - - - - - -
[ ID] Interval           Transfer     Bandwidth
[  4]   0.00-60.00  sec  16.6 GBytes  2.37 Gbits/sec                  sender
[  4]   0.00-60.00  sec  16.6 GBytes  2.37 Gbits/sec                  receiver

iperf Done.

No problem here.

Let’s do the same with WiFi 6 through the Xiaomi Mi AX6000 router.

  • Download

PS C:\Users\aey\downloads\iperf-3.1.3-win64\iperf-3.1.3-win64> .\iperf3.exe -t 60 -c 192.168.31.12 -i 10 -R
Connecting to host 192.168.31.12, port 5201
Reverse mode, remote host 192.168.31.12 is sending
[  4] local 192.168.31.208 port 50068 connected to 192.168.31.12 port 5201
[ ID] Interval           Transfer     Bandwidth
[  4]   0.00-10.00  sec   689 MBytes   578 Mbits/sec
[  4]  10.00-20.00  sec   689 MBytes   578 Mbits/sec
[  4]  20.00-30.00  sec   693 MBytes   581 Mbits/sec
[  4]  30.00-40.00  sec   693 MBytes   581 Mbits/sec
[  4]  40.00-50.00  sec   698 MBytes   585 Mbits/sec
[  4]  50.00-60.00  sec   690 MBytes   579 Mbits/sec
- - - - - - - - - - - - - - - - - - - - - - - - -
[ ID] Interval           Transfer     Bandwidth       Retr
[  4]   0.00-60.00  sec  4.06 GBytes   581 Mbits/sec    1             sender
[  4]   0.00-60.00  sec  4.05 GBytes   581 Mbits/sec                  receiver

iperf Done.

  • Upload

PS C:\Users\aey\downloads\iperf-3.1.3-win64\iperf-3.1.3-win64> .\iperf3.exe -t 60 -c 192.168.31.12 -i 10
Connecting to host 192.168.31.12, port 5201
[  4] local 192.168.31.208 port 50059 connected to 192.168.31.12 port 5201
[ ID] Interval           Transfer     Bandwidth
[  4]   0.00-10.00  sec   825 MBytes   692 Mbits/sec
[  4]  10.00-20.00  sec   817 MBytes   685 Mbits/sec
[  4]  20.00-30.00  sec   822 MBytes   690 Mbits/sec
[  4]  30.00-40.00  sec   820 MBytes   687 Mbits/sec
[  4]  40.00-50.00  sec   810 MBytes   680 Mbits/sec
[  4]  50.00-60.00  sec   813 MBytes   682 Mbits/sec
- - - - - - - - - - - - - - - - - - - - - - - - -
[ ID] Interval           Transfer     Bandwidth
[  4]   0.00-60.00  sec  4.79 GBytes   686 Mbits/sec                  sender
[  4]   0.00-60.00  sec  4.79 GBytes   686 Mbits/sec                  receiver

iperf Done.

The MINIX NEO Z100-0dB can deliver a download speed of 686 Mbps and a 581 Mbps upload speed. That’s quite faster than the GEEKOM Mini Air12 (220 Mbps for uploads and 463 Mbps for downloads) with a RealTek RTL8852BE wireless module. The Intel AX201 module might be delivering better performance here, and the external Wi-Fi antennas might be of help as well.

Thermal performance

We ran the 3Dmark Fire Strike benchmark test while monitoring the CPU temperature with HWinFO64 to check whether CPU throttling did occur in Windows 11. The maximum temperature was only 78°C and CPU throttling was not detected. The CPU temperature was similar to the 77°C measured with the GEEKOM Mini Air12 mini PC in the same test implying it may be possible to tweak the power limits to extract a bit more performance from the fanless mini PC.

MINIX Z100-0dB 3Dmark CPU Temperature

MINIX Z100-0dB power consumption in Windows 11

We measured power consumption with a wall power meter as follows

  • Power off – 1.4-1.5 Watts
  • Idle – 8.9 – 9.2 Watts
  • Web browsing – 9.2 – 12.1 Watts
  • 3Dmark Fire Strike – 15.5 – 18.4 Watts
  • Video playback – 14.7 – 17.9 Watts (Youtube in Chrome 8K60fps)

Note: The mini PC was connected to WiFi 6, an RF dongle for a wireless keyboard and mouse combo, and a VGA screen through an HDMI to VGA adapter.

Conclusion

MINIX Z100-0dB fanless Intel Processor N100 mini PC works great in Windows 11 Pro. Its performance is slightly lower than the actively-cooled GEEKOM Mini Air12, but most users won’t notice. 2.5GbE networking is working great, and the Intel AX201 WiFi module is quite faster than the RealTek module found in the GEEKOM mini PC. The main downside compared to the Mini Air12 is the slower NVMe SSD.

We did not encounter any major issues with the MINIX Z100-0dB mini PC  in Windows 11 Pro with all features working as expected. The system can play YouTube videos up to 8K 30 FPS without any issue, but some more frames are dropped at 4K/8K 60 FPS although the videos still seemed smooth to us. The fanless design is perfectly suitable with no throttling occuring even in a room at 28°C.

We’d like to thank MINIX for sending us a sample of the NEO Z100-0dB mini PC for review. The model showcased here with 16GB RAM and 512GB SSD is sold for $ on Amazon (lighting deal), but the MSRP price is $275.90. You’ll also find it on the MINIX online store along with the cheaper 8GB/256GB model going for $239.

CNXSoft: This article is a translation – with some additional insights – of the original review on CNX Software Thailand by Suthinee Kerdkaew.

The post MINIX Z100-0dB review – Part 2: A fanless Intel Processor N100 mini PC tested with Windows 11 appeared first on CNX Software - Embedded Systems News.

GEEKOM A7 mini PC review – Part 3: Ubuntu 22.04 (and Ubuntu 24.04)

GEEKOM A7 Ubuntu 22.04 Linux review

After a GEEKOM A7 mini PC unboxing and teardown, I tested the AMD Ryzen 9 7940HS mini PC in Windows 11 Pro, but I’ll now report my experience with the GEEKOM A7 running Ubuntu 22.04.4 to see our well the AMD Ryzen 9 7940HS system performs in Linux. I also had to install Ubuntu 24.04 to check the wireless module further, so I’ll report on that too.

The Ubuntu 22.04 review will include features testing, several benchmarks, storage, 2.5GbE, and WiFi 6 networking performance testing, a stress test to check thermal performance, as well as fan noise and power consumption measurements.

GEEKOM A7 Ubuntu 22.04 Linux review

Ubuntu 22.04 installation

I resized the Windows 11 partition to get an unused 500GB partition to install Ubuntu 22.04 from a USB drive. But the first time, it did not work as I was asked to disable BitLocker disk encryption in Windows 11 just like I did for the GEEKOM AS 6 mini PC.

The installation went smoothly once we disable BitLocker. For this model, I did not have to go to the BIOS to change the boot priorities after installation, and GRUB showed up normally for me to select Ubuntu or Windows.

Ubuntu 22.04.4 system information on GEEKOM A7

Going to Settings->About confirms we have the latest Ubuntu 22.04.4 64-bit running on the GEEKOM A7 mini PC with 32GB RAM and an AMD Ryzen 9 7940HS 16-thread CPU with AMD Radeon 780M Graphics, and 2TB of storage.

GEEKOM A7 Ubuntu 22.04.4

We can get some more details from the command line:

jaufranc@GEEKOM-A7-CNX:~$ cat /etc/lsb-release
DISTRIB_ID=Ubuntu
DISTRIB_RELEASE=22.04
DISTRIB_CODENAME=jammy
DISTRIB_DESCRIPTION="Ubuntu 22.04.4 LTS"
jaufranc@GEEKOM-A7-CNX:~$ uname -a
Linux GEEKOM-A7-CNX 6.5.0-18-generic #18~22.04.1-Ubuntu SMP PREEMPT_DYNAMIC Wed Feb  7 11:40:03 UTC 2 x86_64 x86_64 x86_64 GNU/Linux
jaufranc@GEEKOM-A7-CNX:~$ free -mh
               total        used        free      shared  buff/cache   available
Mem:            30Gi       918Mi        28Gi        13Mi       1.5Gi        29Gi
Swap:          2.0Gi          0B       2.0Gi
jaufranc@GEEKOM-A7-CNX:~$ df -mh
Filesystem      Size  Used Avail Use% Mounted on
tmpfs           3.1G  2.2M  3.1G   1% /run
/dev/nvme0n1p5  492G   15G  452G   4% /
tmpfs            16G     0   16G   0% /dev/shm
tmpfs           5.0M  4.0K  5.0M   1% /run/lock
efivarfs        128K   46K   78K  37% /sys/firmware/efi/efivars
/dev/nvme0n1p1   96M   79M   18M  82% /boot/efi
tmpfs           3.1G   76K  3.1G   1% /run/user/128
tmpfs           3.1G   68K  3.1G   1% /run/user/1000

The Inxi utility lists all the main components in the system:

jaufranc@GEEKOM-A7-CNX:~$ sudo inxi -Fc0
System:
  Host: GEEKOM-A7-CNX Kernel: 6.5.0-18-generic x86_64 bits: 64
    Console: pty pts/2 Distro: Ubuntu 22.04.4 LTS (Jammy Jellyfish)
Machine:
  Type: Desktop System: GEEKOM product: A7 v: N/A serial: 5196306C23510433
  Mobo: N/A model: A7 serial: NUCRB02A151NNNNTA3Z1501228
    UEFI: American Megatrends LLC. v: 0.39 date: 01/03/2024
CPU:
  Info: 8-core model: AMD Ryzen 9 7940HS w/ Radeon 780M Graphics bits: 64
    type: MT MCP cache: L2: 8 MiB
  Speed (MHz): avg: 618 min/max: 400/5263:5423:5583:6228:5743:6067:5903
    cores: 1: 400 2: 400 3: 400 4: 400 5: 400 6: 400 7: 400 8: 3892 9: 400
    10: 400 11: 400 12: 400 13: 400 14: 400 15: 400 16: 400
Graphics:
  Device-1: AMD Phoenix1 driver: amdgpu v: kernel
  Display: server: X.org v: 1.21.1.4 with: Xwayland v: 22.1.1 driver:
    gpu: amdgpu note:  X driver n/a tty: 80x24 resolution: 1920x1080
  Message: GL data unavailable in console for root.
Audio:
  Device-1: AMD Rembrandt Radeon High Definition Audio driver: snd_hda_intel
  Device-2: AMD Family 17h HD Audio driver: snd_hda_intel
  Sound Server-1: ALSA v: k6.5.0-18-generic running: yes
  Sound Server-2: PulseAudio v: 15.99.1 running: yes
  Sound Server-3: PipeWire v: 0.3.48 running: yes
Network:
  Device-1: Realtek RTL8125 2.5GbE driver: r8169
  IF: enp1s0 state: up speed: 2500 Mbps duplex: full mac: 38:f7:cd:c7:03:b9
  Device-2: MEDIATEK MT7922 802.11ax PCI Express Wireless Network Adapter
    driver: mt7921e
  IF: wlp2s0 state: down mac: a8:41:f4:3f:ca:26
Bluetooth:
  Device-1: IMC Networks Wireless_Device type: USB driver: btusb
  Report: hciconfig ID: hci0 rfk-id: 0 state: down
    bt-service: enabled,running rfk-block: hardware: no software: no
    address: 00:00:00:00:00:00
Drives:
  Local Storage: total: 1.86 TiB used: 12.46 GiB (0.7%)
  ID-1: /dev/nvme0n1 vendor: Acer model: SSD N5000 2TB size: 1.86 TiB
Partition:
  ID-1: / size: 491.08 GiB used: 12.39 GiB (2.5%) fs: ext4
    dev: /dev/nvme0n1p5
  ID-2: /boot/efi size: 96 MiB used: 78.1 MiB (81.3%) fs: vfat
    dev: /dev/nvme0n1p1
Swap:
  ID-1: swap-1 type: file size: 2 GiB used: 0 KiB (0.0%) file: /swapfile
Sensors:
  System Temperatures: cpu: 20.0 C mobo: N/A gpu: amdgpu temp: 35.0 C
  Fan Speeds (RPM): N/A
Info:
  Processes: 349 Uptime: 21m Memory: 30.63 GiB used: 1.19 GiB (3.9%)
  Init: systemd runlevel: 5 Shell: Sudo inxi: 3.3.13

The AMD Ryzen 9 7940HS 8-core/16-thread processor is advertised as having a 5.2 GHz maximum boost frequency, but Linux somehow reports up to 6228 MHz for a specific core. The RealTek RTL8125 2.5GbE controller is detected, as is the MediaTek MT7922 Wifi 6 network adapter. The reported CPU temperature (20°C) is bogus…

Ubuntu 22.04 benchmarks on GEEKOM A7 mini PC

We’ll start Ubuntu 22.04 benchmarks on the GEEKOM A7 mini PC with Thomas Kaiser’s sbc-bench.sh script:

jaufranc@GEEKOM-A7-CNX:~$ sudo ./sbc-bench.sh -r
Starting to examine hardware/software for review purposes...

sbc-bench v0.9.64

Installing needed tools: distro packages already installed, cpuminer. Done.
Checking cpufreq OPP. Done.
Executing tinymembench. Done.
Executing RAM latency tester. Done.
Executing OpenSSL benchmark. Done.
Executing 7-zip benchmark. Done.
Throttling test: heating up the device, 5 more minutes to wait. Done.
Checking cpufreq OPP again. Done (10 minutes elapsed).

Results validation:

  * Measured clockspeed not lower than advertised max CPU clockspeed
  * No swapping
  * Background activity (%system) OK


Full results uploaded to http://sprunge.us/a5dXSk

# GEEKOM A7  / Ryzen 9 7940HS w/ Radeon 780M Graphics

Tested with sbc-bench v0.9.64 on Mon, 19 Feb 2024 17:16:07 +0700. Full info: [http://sprunge.us/a5dXSk](http://sprunge.us/a5dXSk)

### General information:

    Information courtesy of cpufetch:
    
    Name:                AMD Ryzen 9 7940HS w/ Radeon 780M Graphics 
    Microarchitecture:   Zen 4
    Technology:          4nm
    Max Frequency:       5.263 GHz
    Cores:               8 cores (16 threads)
    AVX:                 AVX,AVX2,AVX512
    FMA:                 FMA3
    L1i Size:            32KB (256KB Total)
    L1d Size:            32KB (256KB Total)
    L2 Size:             1MB (8MB Total)
    L3 Size:             16MB
    Peak Performance:    1.35 TFLOP/s
    
    Ryzen 9 7940HS w/ Radeon 780M Graphics, Kernel: x86_64, Userland: amd64
    
    CPU sysfs topology (clusters, cpufreq members, clockspeeds)
                     cpufreq   min    max
     CPU    cluster  policy   speed  speed   core type
      0        0        0      400    5263   Zen 4
      1        0        1      400    5423   Zen 4
      2        0        2      400    5583   Zen 4
      3        0        3      400    6228   Zen 4
      4        0        4      400    5743   Zen 4
      5        0        5      400    6228   Zen 4
      6        0        6      400    6067   Zen 4
      7        0        7      400    5903   Zen 4
      8        0        8      400    5263   Zen 4
      9        0        9      400    5423   Zen 4
     10        0       10      400    5583   Zen 4
     11        0       11      400    6228   Zen 4
     12        0       12      400    5743   Zen 4
     13        0       13      400    6228   Zen 4
     14        0       14      400    6067   Zen 4
     15        0       15      400    5903   Zen 4

31367 KB available RAM

### Policies (performance vs. idle consumption):

Status of performance related policies found below /sys:

    /sys/module/pcie_aspm/parameters/policy: default [performance] powersave powersupersave

### Clockspeeds (idle vs. heated up):

Before at 43.9°C:

    cpu0: OPP: 5263, Measured: 5112      (-2.9%)

After at 94.9°C:

    cpu0: OPP: 5263, Measured: 5062      (-3.8%)

### Performance baseline

  * memcpy: 20406.0 MB/s, memchr: 79815.9 MB/s, memset: 62491.7 MB/s
  * 16M latency: 29.64 20.66 29.88 20.56 29.07 31.98 37.15 42.66 
  * 128M latency: 98.51 97.78 98.48 98.10 98.54 98.99 104.4 108.0 
  * 7-zip MIPS (3 consecutive runs): 72496, 70697, 70126 (71110 avg), single-threaded: 6670
  * `aes-256-cbc    1215689.33k  1388022.31k  1434895.10k  1452241.58k  1455647.40k  1455767.55k`
  * `aes-256-cbc    1203485.75k  1363794.73k  1413405.53k  1424417.45k  1428089.51k  1428559.19k`

### PCIe and storage devices:

  * Realtek RTL8125 2.5GbE: Speed 5GT/s (ok), Width x1 (ok), driver in use: r8169
  * MEDIATEK MT7922 802.11ax PCI Express Wireless Network Adapter: Speed 5GT/s (ok), Width x1 (ok), driver in use: mt7921e
  * O2 SD/MMC Card Reader: Speed 2.5GT/s (ok), Width x1 (ok), driver in use: sdhci-pci
  * AMD Device 15b9: Speed 16GT/s (ok), Width x16 (ok), driver in use: xhci_hcd
  * AMD Device 15ba: Speed 16GT/s (ok), Width x16 (ok), driver in use: xhci_hcd
  * AMD Device 15c0: Speed 16GT/s (ok), Width x16 (ok), driver in use: xhci_hcd
  * AMD Device 15c1: Speed 16GT/s (ok), Width x16 (ok), driver in use: xhci_hcd
  * AMD Pink Sardine USB4/Thunderbolt NHI controller #1: Speed 16GT/s (ok), Width x16 (ok), driver in use: thunderbolt
  * 1.9TB "Acer SSD N5000 2TB" SSD as /dev/nvme0: Speed 16GT/s (ok), Width x4 (ok), 0% worn out, drive temp: 44°C

### Challenging filesystems:

The following partitions are NTFS: nvme0n1p3,nvme0n1p4 -> https://tinyurl.com/mv7wvzct

### Swap configuration:

  * /swapfile on /dev/nvme0n1p5: 2.0G (0K used)

### Software versions:

  * Ubuntu 22.04.4 LTS (jammy)
  * Compiler: /usr/bin/gcc (Ubuntu 11.4.0-1ubuntu1~22.04) 11.4.0 / x86_64-linux-gnu
  * OpenSSL 3.0.2, built on 15 Mar 2022 (Library: OpenSSL 3.0.2 15 Mar 2022)    

### Kernel info:

  * `/proc/cmdline: BOOT_IMAGE=/boot/vmlinuz-6.5.0-18-generic root=UUID=b5f529e1-64e9-4187-aa31-cb7ac089a04a ro quiet splash vt.handoff=7`
  * Vulnerability Spec rstack overflow: Mitigation; safe RET
  * Vulnerability Spec store bypass:    Mitigation; Speculative Store Bypass disabled via prctl
  * Vulnerability Spectre v1:           Mitigation; usercopy/swapgs barriers and __user pointer sanitization
  * Kernel 6.5.0-18-generic / CONFIG_HZ=250

Waiting for the device to cool down............................................. 36.9°C^C

The maximum CPU temperature was 95°C during the cpuminer test. It also reached 95C during 7-zip multi-core but only temporarily. The 7-zip benchmark score was the highest we’ve seen in the mini PCs we’ve reviewed so far with 71,110 points on average. Note the first test was a little higher at 72,496, and then it stabilized lower at 70,697 and 70,126. But that’s normal on modern x86 as there’s a large performance boost in the first few seconds.

Let’s check out the power limits with Ryzenadj:

jaufranc@GEEKOM-A7-CNX:~/RyzenAdj/build$ sudo ./ryzenadj -i
pcilib: sysfs_write: write failed: Operation not permitted
PCI Bus is not writeable, check secure boot
Unable to get MP1 SMU Obj
Unable to init ryzenadj

Oops… Not quite working as expected, but after I went to the BIOS and disabled secure boot, I could get the data:

jaufranc@GEEKOM-A7-CNX:~/RyzenAdj/build$ sudo ./ryzenadj -i
CPU Family: Phoenix Point
SMU BIOS Interface Version: 14
Version: v0.14.0 
PM Table Version: 4c0008
|        Name         |   Value   |     Parameter      |
|---------------------|-----------|--------------------|
| STAPM LIMIT         |    35.000 | stapm-limit        |
| STAPM VALUE         |     2.372 |                    |
| PPT LIMIT FAST      |    60.000 | fast-limit         |
| PPT VALUE FAST      |     6.284 |                    |
| PPT LIMIT SLOW      |    45.000 | slow-limit         |
| PPT VALUE SLOW      |     2.622 |                    |
| StapmTimeConst      |       nan | stapm-time         |
| SlowPPTTimeConst    |       nan | slow-time          |
| PPT LIMIT APU       |       nan | apu-slow-limit     |
| PPT VALUE APU       |       nan |                    |
| TDC LIMIT VDD       |       nan | vrm-current        |
| TDC VALUE VDD       |       nan |                    |
| TDC LIMIT SOC       |       nan | vrmsoc-current     |
| TDC VALUE SOC       |       nan |                    |
| EDC LIMIT VDD       |       nan | vrmmax-current     |
| EDC VALUE VDD       |       nan |                    |
| EDC LIMIT SOC       |       nan | vrmsocmax-current  |
| EDC VALUE SOC       |       nan |                    |
| THM LIMIT CORE      |       nan | tctl-temp          |
| THM VALUE CORE      |       nan |                    |
| STT LIMIT APU       |       nan | apu-skin-temp      |
| STT VALUE APU       |       nan |                    |
| STT LIMIT dGPU      |       nan | dgpu-skin-temp     |
| STT VALUE dGPU      |       nan |                    |
| CCLK Boost SETPOINT |       nan | power-saving /     |
| CCLK BUSY VALUE     |       nan | max-performance    |

All main power limits are as follows:

  • Sustained Power Limit (STAPM LIMIT) – 35 Watts
  • Actual Power Limit (PPT LIMIT FAST) – 60 watts
  • Average Power Limit (PPT LIMIT SLOW) – 45 watts

I’ll now run Geekbench 6.2.2 to evaluate the single and multi-core performance of the AMD Ryzen 9 7940HS in Linux.

GEEKOM A7 Geekbench 6.2.2 Linux

The single-core score is 2,535 points, and the multi-core one is 12,914 points. Check out the results on the Geekbench website for the full details.

Let’s start GPU testing with Unigine Heaven Benchmark 4.0 where the GEEKOM A7 mini PC achieved 80.6 fps on average and a score of 2,032 points at the usual 1920×1080 resolution.

AMD Ryzen 9 7940HS Unigine Heaven Benchmark 4.0 Ubuntu Linux

Next up is YouTube 4K and 8K video playback in Firefox.

GEEKOM A7 YouTube 4K 60FPS Ubuntu Firefox

I skipped the 30 FPS test and tried to stream a 4K 60 FPS video. The video was smooth, and no big problem here with 81 frames dropped out of 15,013 when I played the video a few minutes.

GEEKOM A7 YouTube 8K 60FPS Ubuntu Firefox 30 seconds

Switching to an 8K 30 FPS in Firefox looked OK for the first 30 seconds or so, albeit a frame was dropped each second.

GEEKOM A7 YouTube 8K 60FPS Ubuntu Firefox frozen frame

But the video became unwatchable after a while with 15 to 20 frames dropped per second, and around the 5-minute mark, we had 11,548 frames dropped out of 27,264.

GEEKOM A7 YouTube 8K 30FPS Ubuntu Chrome

I decided to switch to Chrome and try an 8K 30 FPS video. It played just fine with only one frame dropped after watching the video for a little over 5 minutes.

GEEKOM A7 YouTube 8K 60FPS Ubuntu Chrome

An 8K 60 FPS video played relatively smoothly in the Google browser for the first two minutes, although one or two frames were dropped per second, but after that, the video became unwatchable with around 20 frames dropped by second and the loading icon showing frequently despite having no issues with the buffer health.

Since we can play the video fine for a while, cooling looks to be the issue here, and an ambient temperature of 28°C may be too much to ask in order to stream an 8K YouTube video at 60 FPS smoothly. It might work better in cooler climates/rooms. I also took the occasion to test the audio with HDMI audio and the 3.5mm audio jack, both of which work fine, but Bluetooth did not work at all. More on that later.

Speedometer 2.0 web-based benchmark was loaded in Firefox to evaluate web browsing performance.

AMD Ryzen 9 7940HS Speedometer 2.0 Firefox

The score was 249 runs per minute and matches the score of several other systems.

AMD Ryzen 9 7940HS Speedometer 2.0 Chrome

The same benchmark was faster in Google Chrome at 353 runs per minute.

GEEKOM A7’s Ubuntu 22.04 performance compared to other mini PCs

Let’s compare some of Ubuntu 22.04 benchmark results for the GEEKOM A7 (AMD Ryzen 9 7940HS) mini PC against other high-end mini PCs including the Chatreey AM08 Pro based on the same processor, the GEEKOM Mini IT13 (13th gen Core i9-13900H Raptor Lake), the Khadas Mind Premium (13th Gen Core i7-1360P Raptor Lake), and the GEEKOM AS 6 (AMD Ryzen 9 6900HX) in similar environmental conditions (28-30°C room temperature).

Here’s a summary of the main features of the five mini PCs first.

GEEKOM A7Chatreey AM08 Pro
GEEKOM Mini IT13Khadas Mind PremiumGEEKOM AS 6
SoCAMD Ryzen 9 7840HS
AMD Ryzen 9 7840HSIntel Core i9-13900HIntel Core i7-1360PAMD Ryzen 9 6900HX
CPU8-core/16-thread processor up to 4.0GHz8-core/16-thread processor up to 4.0GHz14-core/20-thread up to 5.4 GHz12-core/16-core up to 5.0 GHz8-core/16-thread up to 4.9 GHz
GPUAMD Radeon 780M GraphicsAMD Radeon 780M Graphics96 EU Intel Iris Xe Graphics96 EU Intel Iris Xe GraphicsAMD Radeon Graphics 680M
Memory32GB DDR5-560016GB DDR5-480032GB DDR4-320032GB LPDDR5-520032GB DDR5-4800
Storage2TB NVMe SSD1TB NVMe SSD*2TB NVMe SSD1TB NVMe SSD1TB NVMe SSD
Default OSWindows 11 ProWindows 11 ProWindows 11 ProWindows 11 HomeWindows 11 Pro

* The Chatreey AM08 Pro mini PC shipped with a 512GB (PCIe Gen 3) SSD, but was replaced by a 1TB Samsung 990 Pro NVMe (PCIe Gen4 x4) SSD for review.

And now the benchmark results

GEEKOM A7Chatreey AM08 ProGEEKOM Mini IT13Khadas Mind PremiumGEEKOM AS 6
sbc-bench.sh
- memcpy20,406.019,457.624,014.4 (P-core)25,389.5 MB/s (P-core)19,131.7 MB/s
- memset62491.761,783.926,647.9 (P-Core)24,731.8MB/s (P-core)16,781.4 MB/s
- 7-zip (average)71,11067,93056,54044,43054,592
- 7-zip (top result)72,49668,21160,98150,39656,251
- OpenSSL AES-256 16K1428559.19k1,442,376.36k1,844,401.49k (P-Core)1,771,334.31k (P-Core)1,249,203.54k
Geekbench 6 Single2,5352,7232,74520931,992
Geekbench 6 Multi12,91412,10811,9748,8919,535
Unigine Heaven score2,032-1,3331,3491,553
Speedometer (Firefox)249-273242202

The GEEKOM A7 is the fastest mini PC we’ve reviewed when it comes to multi-threaded and 3D graphics performance thanks to the AMD Ryzen 9 7940HS processor, but the Intel Core i9-13900H found in the GEEKOM Mini IT13 still delivers higher single-core performance. The GEEKOM A7 also looks slightly faster than the Chatreey AM08 Pro with the same processor.

Storage and USB ports

We tested the performance of the 2TB NVMe SSD that ships with the mini PC using  iozone3:

jaufranc@GEEKOM-A7-CNX:~$ sudo iozone -e -I -a -s 1000M -r 4k -r 16k -r 512k -r 1024k -r 16384k -i 0 -i 1 -i 2
	Iozone: Performance Test of File I/O
	        Version $Revision: 3.489 $
		Compiled for 64 bit mode.
		Build: linux-AMD64 

                                                              random    random     bkwd    record    stride                                    
              kB  reclen    write  rewrite    read    reread    read     write     read   rewrite      read   fwrite frewrite    fread  freread
         1024000       4   228520   313164   362531   362476    70556   299625                                                                
         1024000      16   759034   984855  1020207  1027915   226659   904731                                                                
         1024000     512  4275165  4575637  4239008  4277805  2610905  3731749                                                                
         1024000    1024  4502086  4659797  4172829  4212066  3192667  4531431                                                                
         1024000   16384  4451567  4073122  3872857  3991232  3879215  4039433

That would be about 3.87GB/s sequential read speeds and 4.45 GB/s sequential write speeds in Linux. This compares to 4906.30 MB/s and 4710.80 MB/s sequential read and write speeds in Windows 11 Pro using CrystalDiskMark.

An EXT-4 partition from ORICO M234C3-U4 “USB4” M.2 NVMe SSD enclosure was used to check the speed of each USB port along with lsusb and iozone3 command line utilities. Here’s the output from the front left USB port:

jaufranc@GEEKOM-A7-CNX:~$ lsusb -t | grep uas
        |__ Port 2: Dev 3, If 0, Class=Mass Storage, Driver=uas, 10000M
jaufranc@GEEKOM-A7-CNX:~$ cd /media/jaufranc/EXT4-REVIEW/
jaufranc@GEEKOM-A7-CNX:/media/jaufranc/EXT4-REVIEW$ sudo iozone -e -I -a -s 1000M -r 16384k -i 0 -i 1
                                                              random    random     bkwd    record    stride                                    
              kB  reclen    write  rewrite    read    reread    read     write     read   rewrite      read   fwrite frewrite    fread  freread
         1024000   16384   923954   911696   788468   788679                                                                                  

iozone test complete.

The 40 Gbps USB4 port on the left side of the rear panel requires us to use boltctl utility instead of lsusb since the drive is detected as an NVMe drive:

jaufranc@GEEKOM-A7-CNX:/media/nvme1n1p1$ boltctl 
 ● Intel USB4.0 SSD
   ├─ type:          peripheral
   ├─ name:          USB4.0 SSD
   ├─ vendor:        Intel
   ├─ uuid:          ba010000-0052-541e-03d5-47dc2cd4b008
   ├─ generation:    Thunderbolt 3
   ├─ status:        authorized
   │  ├─ domain:     51d13804-903f-a351-ffff-ffffffffffff
   │  ├─ rx speed:   40 Gb/s = 2 lanes * 20 Gb/s
   │  ├─ tx speed:   40 Gb/s = 2 lanes * 20 Gb/s
   │  └─ authflags:  none
Segmentation fault (core dumped)
jaufranc@GEEKOM-A7-CNX:/media/nvme1n1p1$ sudo iozone -e -I -a -s 1000M -r 16384k -i 0 -i 1
                                                              random    random     bkwd    record    stride                                    
              kB  reclen    write  rewrite    read    reread    read     write     read   rewrite      read   fwrite frewrite    fread  freread
         1024000   16384  2389202  2297096  2346604  2367293                                                                                  

iozone test complete.

Note that I had to manually authorize the drive in Ubuntu 22.04 desktop before being able to access it.  It’s the first time I have to do this…

Results for the USB ports on GEEKOM A7’s front panel (left to right) in Ubuntu 22.04:

  • USB-A #1 – USB 3.2 – 10 Gbps – 923.9 MB/s write speed, 788.4 MB/s read speed
  • USB-A #2 – USB 3.2 – 10 Gbps – 923.6 MB/s write speed, 788.14 MB/s read speed

Same tests for the rear panel (left to right):

  • USB-C #1 – Thunderbolt 3 – 2,346 MB/s read speed
  • USB-A #1 (Top) – USB 3.2 – 10 Gbps – 944 MB/s write speed, 840.3 MB/s read speed
  • USB-A #2 (Bottom) – USB 2.0 – 480 Mbps – 30.87MB/s write speed, 41.99 MB/s read speed,  (Note: tested with another USB hard drive since the ORICO enclosure is not compatible with USB 2.0)
  • USB-C #2 – USB 3.2 – 10 Gbps – 944.6 MB/s write speed, 827.9 MB/s read speed

All USB ports are performing as advertised, but – just like in Windows 11 – the front USB 3.2 ports are somewhat slower because they are behind a Genesys Logic USB 3.2 hub chip.

Networking (2.5GbE and WiFi 6) and Bluetooth

I tested 2.5GbE network performance with iperf3 and UP Xtreme i11 Edge mini PC on the other side:

  • Upload

jaufranc@GEEKOM-A7-CNX:~/linux$ iperf3 -t 60 -c 192.168.31.12 -i 10
Connecting to host 192.168.31.12, port 5201
[  5] local 192.168.31.128 port 60584 connected to 192.168.31.12 port 5201
[ ID] Interval           Transfer     Bitrate         Retr  Cwnd
[  5]   0.00-10.00  sec  2.74 GBytes  2.36 Gbits/sec    0    666 KBytes       
[  5]  10.00-20.00  sec  2.74 GBytes  2.35 Gbits/sec    0   1.47 MBytes       
[  5]  20.00-30.00  sec  2.74 GBytes  2.35 Gbits/sec    0   1.47 MBytes       
[  5]  30.00-40.00  sec  2.74 GBytes  2.35 Gbits/sec    0   1.47 MBytes       
[  5]  40.00-50.00  sec  2.74 GBytes  2.35 Gbits/sec    0   2.19 MBytes       
[  5]  50.00-60.00  sec  2.74 GBytes  2.35 Gbits/sec    0   2.19 MBytes       
- - - - - - - - - - - - - - - - - - - - - - - - -
[ ID] Interval           Transfer     Bitrate         Retr
[  5]   0.00-60.00  sec  16.4 GBytes  2.35 Gbits/sec    0             sender
[  5]   0.00-60.04  sec  16.4 GBytes  2.35 Gbits/sec                  receiver

iperf Done.

  • Download

jaufranc@GEEKOM-A7-CNX:~/linux$ iperf3 -t 60 -c 192.168.31.12 -i 10 -R
Connecting to host 192.168.31.12, port 5201
Reverse mode, remote host 192.168.31.12 is sending
[  5] local 192.168.31.128 port 35372 connected to 192.168.31.12 port 5201
[ ID] Interval           Transfer     Bitrate
[  5]   0.00-10.00  sec  2.74 GBytes  2.35 Gbits/sec                  
[  5]  10.00-20.00  sec  2.74 GBytes  2.35 Gbits/sec                  
[  5]  20.00-30.00  sec  2.74 GBytes  2.35 Gbits/sec                  
[  5]  30.00-40.00  sec  2.74 GBytes  2.35 Gbits/sec                  
[  5]  40.00-50.00  sec  2.74 GBytes  2.35 Gbits/sec                  
[  5]  50.00-60.00  sec  2.74 GBytes  2.35 Gbits/sec                  
- - - - - - - - - - - - - - - - - - - - - - - - -
[ ID] Interval           Transfer     Bitrate         Retr
[  5]   0.00-60.04  sec  16.4 GBytes  2.35 Gbits/sec    0             sender
[  5]   0.00-60.00  sec  16.4 GBytes  2.35 Gbits/sec                  receiver

iperf Done.

  • Full duplex (bidirectional)

jaufranc@GEEKOM-A7-CNX:~/linux$ iperf3 -t 60 -c 192.168.31.12 -i 10 --bidir
Connecting to host 192.168.31.12, port 5201
[  5] local 192.168.31.128 port 40848 connected to 192.168.31.12 port 5201
[  7] local 192.168.31.128 port 40852 connected to 192.168.31.12 port 5201
[ ID][Role] Interval           Transfer     Bitrate         Retr  Cwnd
[  5][TX-C]   0.00-10.00  sec  2.74 GBytes  2.35 Gbits/sec    0    908 KBytes       
[  7][RX-C]   0.00-10.00  sec  2.73 GBytes  2.35 Gbits/sec                  
[  5][TX-C]  10.00-20.00  sec  2.74 GBytes  2.35 Gbits/sec    0   1.32 MBytes       
[  7][RX-C]  10.00-20.00  sec  2.73 GBytes  2.35 Gbits/sec                  
[  5][TX-C]  20.00-30.00  sec  2.74 GBytes  2.35 Gbits/sec    0   1.98 MBytes       
[  7][RX-C]  20.00-30.00  sec  2.73 GBytes  2.35 Gbits/sec                  
[  5][TX-C]  30.00-40.00  sec  2.74 GBytes  2.35 Gbits/sec    0   1.98 MBytes       
[  7][RX-C]  30.00-40.00  sec  2.73 GBytes  2.35 Gbits/sec                  
[  5][TX-C]  40.00-50.00  sec  2.74 GBytes  2.35 Gbits/sec    0   1.98 MBytes       
[  7][RX-C]  40.00-50.00  sec  2.73 GBytes  2.35 Gbits/sec                  
[  5][TX-C]  50.00-60.00  sec  2.74 GBytes  2.35 Gbits/sec    0   1.98 MBytes       
[  7][RX-C]  50.00-60.00  sec  2.73 GBytes  2.35 Gbits/sec                  
- - - - - - - - - - - - - - - - - - - - - - - - -
[ ID][Role] Interval           Transfer     Bitrate         Retr
[  5][TX-C]   0.00-60.00  sec  16.4 GBytes  2.35 Gbits/sec    0             sender
[  5][TX-C]   0.00-60.04  sec  16.4 GBytes  2.35 Gbits/sec                  receiver
[  7][RX-C]   0.00-60.00  sec  16.4 GBytes  2.35 Gbits/sec    0             sender
[  7][RX-C]   0.00-60.04  sec  16.4 GBytes  2.35 Gbits/sec                  receiver

iperf Done.

Perfect results, nothing else to say here.

Now let’s try WiFi 6 in Ubuntu 22.04 while connected to Xiaomi Mi AX6000 router:

  • Upload

jaufranc@GEEKOM-A7-CNX:~/Desktop$ iperf3 -t 60 -c 192.168.31.12 -i 10
Connecting to host 192.168.31.12, port 5201
[  5] local 192.168.31.9 port 52228 connected to 192.168.31.12 port 5201
[ ID] Interval           Transfer     Bitrate         Retr  Cwnd
[  5]   0.00-10.00  sec  1.09 GBytes   936 Mbits/sec   69   1.55 MBytes       
[  5]  10.00-20.00  sec  1.09 GBytes   941 Mbits/sec    2   1.72 MBytes       
[  5]  20.00-30.00  sec  1.09 GBytes   940 Mbits/sec    1   1.69 MBytes       
[  5]  30.00-40.00  sec  1.09 GBytes   940 Mbits/sec   11   1.34 MBytes       
[  5]  40.00-50.00  sec  1.09 GBytes   938 Mbits/sec   76   1.47 MBytes       
[  5]  50.00-60.00  sec  1.09 GBytes   941 Mbits/sec    2   1.56 MBytes       
- - - - - - - - - - - - - - - - - - - - - - - - -
[ ID] Interval           Transfer     Bitrate         Retr
[  5]   0.00-60.00  sec  6.56 GBytes   939 Mbits/sec  161             sender
[  5]   0.00-60.05  sec  6.56 GBytes   938 Mbits/sec                  receiver

iperf Done.

  • Download

jaufranc@GEEKOM-A7-CNX:~/Desktop$ iperf3 -t 60 -c 192.168.31.12 -i 10 -R
Connecting to host 192.168.31.12, port 5201
Reverse mode, remote host 192.168.31.12 is sending
[  5] local 192.168.31.9 port 35100 connected to 192.168.31.12 port 5201
[ ID] Interval           Transfer     Bitrate
[  5]   0.00-10.00  sec  1.08 GBytes   932 Mbits/sec                  
[  5]  10.00-20.00  sec  1.10 GBytes   942 Mbits/sec                  
[  5]  20.00-30.00  sec  1.10 GBytes   942 Mbits/sec                  
[  5]  30.00-40.00  sec  1.10 GBytes   942 Mbits/sec                  
[  5]  40.00-50.00  sec  1.10 GBytes   941 Mbits/sec                  
[  5]  50.00-60.00  sec  1.10 GBytes   941 Mbits/sec                  
- - - - - - - - - - - - - - - - - - - - - - - - -
[ ID] Interval           Transfer     Bitrate         Retr
[  5]   0.00-60.05  sec  6.57 GBytes   940 Mbits/sec    1             sender
[  5]   0.00-60.00  sec  6.56 GBytes   940 Mbits/sec                  receiver

iperf Done.

The results look good here, but it does not tell the whole story. I had trouble reliably accessing some websites in Firefox or Chrome, and connecting over SSH was sluggish and unstable too. What that means is that it may take a lot of time to log in successfully (sometimes it fails), and once I’m in the terminal, there’s a massive lag to input text from the keyboard. This only happens with WiFi and I did not experience the same problem with Ethernet.

As noted above, I was unable to use a Bluetooth audio headset. That’s because Bluetooth is not working at all.

Bluetooth Fail Ubuntu 22.04We can also see an error in the kernel log indicating there may be an issue with the firmware:

jaufranc@GEEKOM-A7-CNX:~$ dmesg | grep -i bluetooth
[    6.513119] Bluetooth: Core ver 2.22
[    6.513168] NET: Registered PF_BLUETOOTH protocol family
[    6.513171] Bluetooth: HCI device and connection manager initialized
[    6.513183] Bluetooth: HCI socket layer initialized
[    6.513188] Bluetooth: L2CAP socket layer initialized
[    6.513196] Bluetooth: SCO socket layer initialized
[    7.503331] Bluetooth: BNEP (Ethernet Emulation) ver 1.3
[    7.503334] Bluetooth: BNEP filters: protocol multicast
[    7.503337] Bluetooth: BNEP socket layer initialized
[    8.170144] Modules linked in: bnep intel_rapl_msr intel_rapl_common snd_hda_codec_realtek snd_hda_codec_generic ledtrig_audio snd_hda_codec_hdmi snd_hda_intel edac_mce_amd snd_intel_dspcfg snd_intel_sdw_acpi snd_hda_codec amdgpu(+) kvm_amd snd_hda_core binfmt_misc snd_hwdep mt7921e snd_pcm kvm mt7921_common amdxcp mt76_connac_lib btusb iommu_v2 drm_buddy snd_seq_midi btrtl irqbypass snd_seq_midi_event mt76 btbcm gpu_sched crct10dif_pclmul btintel drm_suballoc_helper polyval_clmulni btmtk polyval_generic nls_iso8859_1 snd_rawmidi drm_ttm_helper ghash_clmulni_intel mac80211 bluetooth aesni_intel ttm snd_seq joydev drm_display_helper crypto_simd snd_seq_device cryptd ecdh_generic rapl ecc cec snd_timer input_leds wmi_bmof rc_core cfg80211 k10temp snd drm_kms_helper i2c_algo_bit soundcore ccp libarc4 mac_hid amd_pmc sch_fq_codel msr parport_pc ppdev lp drm parport efi_pstore ip_tables x_tables autofs4 hid_logitech_hidpp hid_logitech_dj hid_generic usbhid crc32_pclmul nvme sdhci_pci amd_sfh thunderbolt i2c_piix4 nvme_core
[    8.576349] Bluetooth: hci0: Opcode 0x c03 failed: -110

I tried various methods found on the Internet, but nothing worked. I thought I might update the kernel to Linux 6.7 from Linux 6.5 using the official Ubuntu PPA, but this did not work due to a libc6 version mismatch. I could have tried a third-party Linux kernel, but since the Ubuntu 24.04 release is only two months away, I decided to use a daily build of the upcoming operating system to find out whether it would fix anything.

MediaTek MT7922 wireless module tested in Ubuntu 24.04

I prepared a USB flash drive with noble-desktop-amd64.iso (February 22, 2024), went back to Windows to resize the Windows partition and create a spare 224 GB partition, and started installing Ubuntu 24.04.

Ubuntu 24.04 installation no WiFi

No Wi-Fi devices were detected in the installation wizard, so I used Ethernet.

Ubuntu 24.04 installation third party software

I ticked “install third-party software for graphics and WiFi” and “Download and install support for additional…” in the “other options” to make sure any proprietary drivers or firmware that may be needed are installed too.

Ubuntu 24.04 triple boot Windows 11 Ubuntu 22.04

Ubuntu 24.04 was installed in a triple boot configuration with Windows 11 Pro and Ubuntu 22.04. Apart from the missing wireless support, the installation went smoothly and I could complete the installation without any issues.

But even after a reboot neither WiFi nor Bluetooth worked:

[    8.768904] [drm] DSC precompute is not needed.
[    8.772340] Bluetooth: hci0: Opcode 0x0c03 failed: -110
[    8.815504] loop9: detected capacity change from 0 to 8
[    9.388998] pipewire[1382]: memfd_create() called without MFD_EXEC or MFD_NOEXEC_SEAL set
[   10.033265] rfkill: input handler disabled
[   11.797172] r8169 0000:01:00.0 enp1s0: Link is Up - 2.5Gbps/Full - flow control rx/tx
[   14.549888] kauditd_printk_skb: 119 callbacks suppressed
[   14.549892] audit: type=1400 audit(1708676133.556:131): apparmor="DENIED" operation="open" class="file" profile="/usr/sbin/cups-browsed" name="/etc/gnutls/config" pid=2014 comm="cups-browsed" requested_mask="r" denied_mask="r" fsuid=116 ouid=0
[   18.687976] systemd-journald[373]: /var/log/journal/52deed7007544029b1a4c7adc59a553d/user-1000.journal: Journal file uses a different sequence number ID, rotating.
[   18.727680] audit: type=1400 audit(1708676137.732:132): apparmor="DENIED" operation="capable" class="cap" profile="/snap/snapd/20671/usr/lib/snapd/snap-confine" pid=2067 comm="snap-confine" capability=12  capname="net_admin"
[   18.727685] audit: type=1400 audit(1708676137.732:133): apparmor="DENIED" operation="capable" class="cap" profile="/snap/snapd/20671/usr/lib/snapd/snap-confine" pid=2067 comm="snap-confine" capability=38  capname="perfmon"
[  146.172783] mt7921e 0000:02:00.0: firmware own failed
[  146.172909] mt7921e: probe of 0000:02:00.0 failed with error -5
[  252.864820] mt7921e 0000:02:00.0: firmware own failed
[  252.864949] mt7921e: probe of 0000:02:00.0 failed with error -5

I read somewhere that I should turn my computer off and on again… That sounded silly, but it ended up being a smart move!

jaufranc@GEEKOM-A7-CNX:~$ dmesg | grep mt7921e
[    6.561790] mt7921e 0000:02:00.0: enabling device (0000 -> 0002)
[    6.566383] mt7921e 0000:02:00.0: ASIC revision: 79220010
[    6.654119] mt7921e 0000:02:00.0: HW/SW Version: 0x8a108a10, Build Time: 20231120183400a
[    7.024331] mt7921e 0000:02:00.0: WM Firmware Version: ____000000, Build Time: 20231120183441
[    8.116397] mt7921e 0000:02:00.0 wlp2s0: renamed from wlan0
[    8.317735] Modules linked in: qrtr bnep binfmt_misc intel_rapl_msr intel_rapl_common nls_iso8859_1 snd_hda_codec_realtek snd_hda_codec_generic ledtrig_audio snd_hda_codec_hdmi edac_mce_amd snd_hda_intel snd_intel_dspcfg snd_intel_sdw_acpi amdgpu(+) kvm_amd snd_hda_codec snd_hda_core snd_hwdep mt7921e kvm mt7921_common snd_pcm mt792x_lib btusb irqbypass mt76_connac_lib drm_exec btrtl amdxcp crct10dif_pclmul btintel polyval_clmulni drm_buddy snd_seq_midi polyval_generic mt76 btbcm gpu_sched snd_seq_midi_event ghash_clmulni_intel btmtk sha256_ssse3 drm_suballoc_helper bluetooth snd_rawmidi sha1_ssse3 drm_ttm_helper aesni_intel ttm ecdh_generic crypto_simd mac80211 snd_seq ecc drm_display_helper cryptd snd_seq_device cec snd_timer rapl wmi_bmof rc_core cfg80211 snd drm_kms_helper libarc4 k10temp joydev i2c_algo_bit i2c_piix4 soundcore ccp input_leds amd_pmc mac_hid msr parport_pc ppdev lp parport drm efi_pstore nfnetlink dmi_sysfs ip_tables x_tables autofs4 hid_logitech_hidpp hid_logitech_dj hid_generic usbhid nvme

Sadly Bluetooth still not working:

jaufranc@GEEKOM-A7-CNX:~$ dmesg | grep -i bluetooth
[    6.548661] Bluetooth: Core ver 2.22
[    6.548683] NET: Registered PF_BLUETOOTH protocol family
[    6.548684] Bluetooth: HCI device and connection manager initialized
[    6.548688] Bluetooth: HCI socket layer initialized
[    6.548690] Bluetooth: L2CAP socket layer initialized
[    6.548693] Bluetooth: SCO socket layer initialized
[    8.157259] Bluetooth: BNEP (Ethernet Emulation) ver 1.3
[    8.157263] Bluetooth: BNEP filters: protocol multicast
[    8.157267] Bluetooth: BNEP socket layer initialized
[    8.317735] Modules linked in: qrtr bnep binfmt_misc intel_rapl_msr intel_rapl_common nls_iso8859_1 snd_hda_codec_realtek snd_hda_codec_generic ledtrig_audio snd_hda_codec_hdmi edac_mce_amd snd_hda_intel snd_intel_dspcfg snd_intel_sdw_acpi amdgpu(+) kvm_amd snd_hda_codec snd_hda_core snd_hwdep mt7921e kvm mt7921_common snd_pcm mt792x_lib btusb irqbypass mt76_connac_lib drm_exec btrtl amdxcp crct10dif_pclmul btintel polyval_clmulni drm_buddy snd_seq_midi polyval_generic mt76 btbcm gpu_sched snd_seq_midi_event ghash_clmulni_intel btmtk sha256_ssse3 drm_suballoc_helper bluetooth snd_rawmidi sha1_ssse3 drm_ttm_helper aesni_intel ttm ecdh_generic crypto_simd mac80211 snd_seq ecc drm_display_helper cryptd snd_seq_device cec snd_timer rapl wmi_bmof rc_core cfg80211 snd drm_kms_helper libarc4 k10temp joydev i2c_algo_bit i2c_piix4 soundcore ccp input_leds amd_pmc mac_hid msr parport_pc ppdev lp parport drm efi_pstore nfnetlink dmi_sysfs ip_tables x_tables autofs4 hid_logitech_hidpp hid_logitech_dj hid_generic usbhid nvme
[    8.580339] Bluetooth: hci0: Opcode 0x0c03 failed: -110

Ubuntu 24.04 will ship with Linux 6.8 at release, but my nightly build was based on Linux 6.6

jaufranc@GEEKOM-A7-CNX:~$ sudo inxi -Fc0
System:
  Host: GEEKOM-A7-CNX Kernel: 6.6.0-14-generic arch: x86_64 bits: 64
  Console: pty pts/1 Distro: Ubuntu 24.04 (Noble Numbat)
Machine:
  Type: Desktop System: GEEKOM product: A7 v: N/A serial: 5196306C23510433
  Mobo: N/A model: A7 serial: NUCRB02A151NNNNTA3Z1501228 UEFI: American Megatrends LLC. v: 0.39
    date: 01/03/2024
CPU:
  Info: 8-core model: AMD Ryzen 9 7940HS w/ Radeon 780M Graphics bits: 64 type: MT MCP cache:
    L2: 8 MiB
  Speed (MHz): avg: 533 min/max: 400/5263:5423:5583:6228:5743:6067:5903 cores: 1: 400 2: 400
    3: 400 4: 400 5: 400 6: 1586 7: 400 8: 400 9: 400 10: 400 11: 1356 12: 400 13: 400 14: 400
    15: 400 16: 400
Graphics:
  Device-1: AMD Phoenix1 driver: amdgpu v: kernel
  Display: server: X.org v: 1.21.1.11 with: Xwayland v: 23.2.4 driver: gpu: amdgpu tty: 113x24
    resolution: 1920x1080
  API: EGL v: 1.5 drivers: radeonsi,swrast platforms: gbm,surfaceless,device
  API: OpenGL v: 4.6 compat-v: 4.5 vendor: mesa v: 24.0.1-1ubuntu1 note: console (EGL sourced)
    renderer: AMD Radeon Graphics (radeonsi gfx1103_r1 LLVM 17.0.6 DRM 3.54 6.6.0-14-generic),
    llvmpipe (LLVM 17.0.6 256 bits)
Audio:
  Device-1: AMD Rembrandt Radeon High Definition Audio driver: snd_hda_intel
  Device-2: AMD Family 17h/19h HD Audio driver: snd_hda_intel
  API: ALSA v: k6.6.0-14-generic status: kernel-api
Network:
  Device-1: Realtek RTL8125 2.5GbE driver: r8169
  IF: enp1s0 state: up speed: 2500 Mbps duplex: full mac: 38:f7:cd:c7:03:b9
  Device-2: MEDIATEK MT7922 802.11ax PCI Express Wireless Network Adapter driver: mt7921e
  IF: wlp2s0 state: down mac: a8:41:f4:3f:ca:26
Bluetooth:
  Device-1: IMC Networks Wireless_Device driver: btusb type: USB
  Report: hciconfig ID: hci0 rfk-id: 0 state: down bt-service: enabled,running rfk-block:
    hardware: no software: no address: 00:00:00:00:00:00
Drives:
  Local Storage: total: 1.86 TiB used: 15.07 GiB (0.8%)
  ID-1: /dev/nvme0n1 vendor: Acer model: SSD N5000 2TB size: 1.86 TiB
Partition:
  ID-1: / size: 239.25 GiB used: 14.99 GiB (6.3%) fs: ext4 dev: /dev/nvme0n1p6
  ID-2: /boot/efi size: 96 MiB used: 78.1 MiB (81.4%) fs: vfat dev: /dev/nvme0n1p1
Swap:
  ID-1: swap-1 type: file size: 8 GiB used: 0 KiB (0.0%) file: /swap.img
Sensors:
  System Temperatures: cpu: 39.4 C mobo: 36.0 C gpu: amdgpu temp: 36.0 C
  Fan Speeds (rpm): N/A
Info:
  Memory: total: 32 GiB note: est. available: 30.64 GiB used: 1.13 GiB (3.7%)
  Processes: 351 Uptime: 2m Init: systemd target: graphical (5) Shell: Sudo inxi: 3.3.33

Next, I disconnected the Ethernet cable and connected the mini PC to my router’s 5 GHz SSID. I could browse the web and access the mini PC over SSH without any issues. So WiFi looks to be more stable in Ubuntu 24.04 once/if it works. I was unable to reproduce the bug with “firmware own failed” subsequently with a few reboots and power cycles, so it might have been a one-off problem.

I tested WiFi 6 with iperf3 again to see if the performance had changed:

  • Upload

jaufranc@GEEKOM-A7-CNX:~$ iperf3 -t 60 -c 192.168.31.12 -i 10

Connecting to host 192.168.31.12, port 5201
[  5] local 192.168.31.9 port 49100 connected to 192.168.31.12 port 5201
[ ID] Interval           Transfer     Bitrate         Retr  Cwnd
[  5]   0.00-10.01  sec  1.10 GBytes   940 Mbits/sec   65   1.56 MBytes       
[  5]  10.01-20.01  sec  1.10 GBytes   942 Mbits/sec    1   1.73 MBytes       
[  5]  20.01-30.01  sec  1.10 GBytes   941 Mbits/sec    1   1.71 MBytes       
[  5]  30.01-40.01  sec  1.10 GBytes   941 Mbits/sec  110   1.73 MBytes       
[  5]  40.01-50.01  sec  1.09 GBytes   940 Mbits/sec    3   1.36 MBytes       
[  5]  50.01-60.00  sec  1.09 GBytes   941 Mbits/sec    1   1.48 MBytes       
- - - - - - - - - - - - - - - - - - - - - - - - -
[ ID] Interval           Transfer     Bitrate         Retr
[  5]   0.00-60.00  sec  6.57 GBytes   941 Mbits/sec  181             sender
[  5]   0.00-60.03  sec  6.57 GBytes   940 Mbits/sec                  receiver

iperf Done.

  • Download

jaufranc@GEEKOM-A7-CNX:~$ iperf3 -t 60 -c 192.168.31.12 -i 10 -R
Connecting to host 192.168.31.12, port 5201
Reverse mode, remote host 192.168.31.12 is sending
[  5] local 192.168.31.9 port 35062 connected to 192.168.31.12 port 5201
[ ID] Interval           Transfer     Bitrate
[  5]   0.00-10.01  sec  1.09 GBytes   936 Mbits/sec                  
[  5]  10.01-20.01  sec  1.10 GBytes   941 Mbits/sec                  
[  5]  20.01-30.01  sec  1.10 GBytes   941 Mbits/sec                  
[  5]  30.01-40.01  sec  1.10 GBytes   941 Mbits/sec                  
[  5]  40.01-50.01  sec  1.10 GBytes   941 Mbits/sec                  
[  5]  50.01-60.01  sec  1.10 GBytes   941 Mbits/sec                  
- - - - - - - - - - - - - - - - - - - - - - - - -
[ ID] Interval           Transfer     Bitrate         Retr
[  5]   0.00-60.02  sec  6.57 GBytes   940 Mbits/sec    0             sender
[  5]   0.00-60.01  sec  6.57 GBytes   940 Mbits/sec                  receiver

iperf Done.

940 Mbps in either direction is pretty good, actually similar to a gigabit Ethernet connection, and about the same as in Ubuntu 22.04. Using WiFi 6 in Ubuntu 24.04 looks more stable, so I’m hopeful that part will work fine once the stable Ubuntu 24.04 image is released.

Bluetooth is still not working, so I updated the system to Linux 6.7 using the files provided by Canonical, but it did not help:

jaufranc@GEEKOM-A7-CNX:~$ dmesg | grep -i bluetooth
[    6.535176] Bluetooth: Core ver 2.22
[    6.535194] NET: Registered PF_BLUETOOTH protocol family
[    6.535196] Bluetooth: HCI device and connection manager initialized
[    6.535200] Bluetooth: HCI socket layer initialized
[    6.535201] Bluetooth: L2CAP socket layer initialized
[    6.535205] Bluetooth: SCO socket layer initialized
[    8.593940] Modules linked in: binfmt_misc intel_rapl_msr nls_iso8859_1 intel_rapl_common snd_hda_codec_realtek snd_hda_codec_generic ledtrig_audio snd_hda_codec_hdmi mt7921e snd_hda_intel edac_mce_amd mt7921_common snd_intel_dspcfg snd_intel_sdw_acpi mt792x_lib amdgpu(+) btusb snd_hda_codec mt76_connac_lib btrtl kvm_amd btintel mt76 snd_hda_core btbcm snd_hwdep btmtk amdxcp kvm snd_pcm mac80211 drm_exec irqbypass gpu_sched snd_seq_midi crct10dif_pclmul snd_seq_midi_event drm_buddy polyval_clmulni bluetooth drm_suballoc_helper polyval_generic drm_ttm_helper ghash_clmulni_intel snd_rawmidi sha512_ssse3 ttm sha256_ssse3 sha1_ssse3 aesni_intel snd_seq crypto_simd drm_display_helper cryptd ecdh_generic cec snd_seq_device ecc rapl wmi_bmof rc_core cfg80211 snd_timer joydev drm_kms_helper k10temp snd libarc4 i2c_piix4 ccp input_leds soundcore i2c_algo_bit amd_pmc mac_hid msr parport_pc ppdev lp drm parport efi_pstore nfnetlink dmi_sysfs ip_tables x_tables autofs4 hid_logitech_hidpp hid_logitech_dj hid_generic usbhid nvme
[    8.704365] Bluetooth: hci0: Opcode 0x0c03 failed: -110
[    9.863453] Bluetooth: BNEP (Ethernet Emulation) ver 1.3
[    9.863457] Bluetooth: BNEP filters: protocol multicast
[    9.863461] Bluetooth: BNEP socket layer initialized
jaufranc@GEEKOM-A7-CNX:~$ uname -a
Linux GEEKOM-A7-CNX 6.7.0-060700-generic #202401072033 SMP PREEMPT_DYNAMIC Sun Jan  7 20:43:59 UTC 2024 x86_64 x86_64 x86_64 GNU/Linux

GEEKOM A7 Stress test and CPU temperature in Ubuntu 22.04.

Back to Ubuntu 22.04, I ran a stress test on the 16 threads of the AMD Ryzen 9 7940HS processor to evaluate thermal performance by monitoring the CPU temperature with psensor and the CPU frequency with the sbc-bench.sh script.

GEEKOM A7 Ubuntu Stress Test

The CPU temperature jumps from 36°C at idle to around 95°C, before going down a bit, and then up again and stabilizes at 95°C for about 10 minutes, before dropping to 89°C after that… Throttling clearly occurs here but it’s somehow controlled. At the start, the CPU frequency jumps to 4.5 GHz for a few seconds, then around 4.0 GHz, and during the longer 95°C period it ranges between 3801 MHz and 4116 MHz, but mostly in the 38xx MHz range. After around 12 minutes, the CPU frequency drops to 3743 MHz and this small drop seems to have a big impact on the CPU temperature since it drops to 89°C in our environment (room at about 28°C) and stabilizes there. That may also explain why 8K 60 YouTube videos are playing fine in the first few minutes before becoming unwatchable.

Fan noise

GEEKOM A7’s fan is not too noisy at idle or under light loads but becomes noisier under a stress test and to a lesser extent when playing a YouTube video. I don’t personally find the noise too annoying. As usual, I measured the fan noise with a sound level meter placed at around 5 centimeters from the top of the enclosure:

  • Idle – 45.3 – 45.7 dBA
  • YouTube 4K 60 video in Firefox (volume off) – 47.4 – 48 dBA
  • Stress test on all 16 threads – 49.8 – 50.1 dBA

For reference, the meter measures around 38 dBA in a quiet room.

GEEKOM A7 power consumption in Ubuntu 22.04

We measured the power consumption with a wall power meter:

  • Power off – 1.3 Watt
  • Idle – 5.0 – 5.8 Watts
  • Video playback
    • 25.9 – 33.3 Watts (Youtube 4K 60fps in Firefox – Note: VP9 codec)
    • 62.9 – 78.4 Watts (Youtube 8K 60fps in Firefox – Note: AV1 code)
  • CPU stress test (stress -c 16)
    • First couple of seconds – 79 – 84.4 Watts
    • After around 20 seconds – 64.2 – 64.5 Watts
    • Longer run – 57.7 – 57.8 Watts
    • Even longer run (12+ minutes) – 52.1 – 52.3 Watts

During the measurements, the mini PC was connected to a 2.5GbE switch and an HDMI display with its own power consumption, and two USB RF dongles were used for a mouse and a keyboard.

Conclusion

The GEEKOM A7 is the most powerful mini PC we’ve tested so far and works well in Ubuntu 22.04 as long as we ignore the MediaTek MT7922 wireless module (Azurewave AW-XB591NF) with fast but unstable/unreliable WiFi and Bluetooth not working. Switching to a daily built Ubuntu 24.04 image improves the stability of WiFi 6, so I’m confident this should be fine once Ubuntu 24.04 is officially released in April. I was unable to make Bluetooth work.

2.5GbE works perfectly however, so if you don’t need WiFi or Bluetooth, this AMD Ryzen 9 7940HS mini PC is great in Linux with fast NVMe storage, excellent multi-core performance, and YouTube video playback works well up to 4K 60 FPS and 8K 30 FPS. The system struggles at 8K 60 FPS but only after a while, so it may be a victim of the tropical climate in Thailand and may work better in more moderate climates or cooler rooms. The mini PC’s fan is fairly quiet most of the time, and not too annoying when more demanding tasks are running.

I’d like to thank GEEKOM for sending the A7 mini PC for review. The model reviewed here with 32GB of DDR5 RAM and a 2TB SSD can be purchased on Amazon for $829 with the coupon code CNXSW3A7 as well as on the GEEKOM store. with the discount code cnxsoftwarea7, which also works on the GEEKOM UK store.

The post GEEKOM A7 mini PC review – Part 3: Ubuntu 22.04 (and Ubuntu 24.04) appeared first on CNX Software - Embedded Systems News.

  • ✇CNX Software – Embedded Systems News
  • Semtech AirLink XR60 is the world’s smallest rugged 5G routerJean-Luc Aufranc (CNXSoft)
    Semtech AirLink XR60 is a tiny 5G router powered by a quad-core Cortex-A53 processor with up to two Ethernet ports (1Gbps and 5 Gbps), WiFi 6 connectivity, GNSS navigation, and an optional RJ45 serial port. Semtech is better known for its LoRa low-power transceivers, but the company acquired Sierra Wireless last year, so they’ll now have a wider range of wireless products to offer, and the AirLink XR60 5G gateway is the first we cover here on CNX Software since the merger between the two compani
     

Semtech AirLink XR60 is the world’s smallest rugged 5G router

Airlink XR60 world smallest rugged 5G router

Semtech AirLink XR60 is a tiny 5G router powered by a quad-core Cortex-A53 processor with up to two Ethernet ports (1Gbps and 5 Gbps), WiFi 6 connectivity, GNSS navigation, and an optional RJ45 serial port.

Semtech is better known for its LoRa low-power transceivers, but the company acquired Sierra Wireless last year, so they’ll now have a wider range of wireless products to offer, and the AirLink XR60 5G gateway is the first we cover here on CNX Software since the merger between the two companies.

Airlink XR60 world smallest rugged 5G router

Semtech Airlink XR60 specifications:

  • SoC – Quad-core Arm Cortex-A53 processor
  • Memory – 1.2 GB RAM (that should be the free memory)
  • Storage –  1.7 GB (available storage)
  • Networking
    • 5G cellular
      • Sierra Wireless EM9291 5G NR Sub-6 M.2 module
      • Peak downlink – 2800 Mbps
      • Peak uplink – 300 Mbps
      • 4×4 MIMO
      • 4x SMA antenna connectors
      • Dual SIM (Nano-4FF)
      • Carrier – AT&T, FirstNet 4G, T-Mobile, Verizon, CBRS. C-Band (Pending); Planned: Rogers, Telus, Bell, Telstra
      • Public Safety – FirstNet 4G
    • Optional 2×2 MIMO Wi-Fi 6
      • Peak throughput – 1200 Mbps
      • Up to 32x clients
      • Client and AP modes
      • 2x SMA antenna connectors
    • Ethernet
      • 1x Gigabit Ethernet RJ45 port for the single serial + single Ethernet variant
      • 2x RJ45 ports (Gigabit Ethernet + 5 Gbps Ethernet)  for the dual Ethernet variant
    • Performance
      • 175 Mbps IPSec VPN TCP throughput
      • 800 Mbps Firewall TCP throughput
  • GNSS – Dual-band 48-channel GNSS, 1x SMA connector
  • Serial –  1x RS-232 RJ45 port for the single serial + single Ethernet variant
  • USB – 1x USB 3.2 Gen 1 Type-C port with power delivery and 5 Gbps LAN networking
  • Expansion – 1x GPIO (not quite sure where…)
  • Input voltage – 7 to 36 VDC redundant power input via 4-pin connector and USB-C (45W)
  • Power consumption
    • Idle: 3.5W (290 mA @ 12VDC) – Serial/Ethernet variant​
    • Standby Mode Power – 55 mW (4.6 mA @ 12 VDC) triggered on low voltage, I/O, or periodic timer
  • Dimensions – 98 x 39 x 18 mm
  • Weight – 522 grams with Wi-Fi 6 module
  • Temperature Range
    • Operating
      • -40°C to +70°C
      • -30°C to +65°C  (Wi-Fi variant)
    • Storage – -40°C to +85°C
  • Humidity – 95% RH @ 60°C
  • Military Specification – MIL-STD-810H (Shock, Vibration, Thermal Shock, Humidity)
  • IP Rating – IP64 (sealed aluminum housing)
  • Regulatory – FCC, IC/ISED, PTCRB​

Configurable 5G router

The 5G router runs AirLink OS enabling management through a local web user interface, AirLink Management Service (ALMS), or a REST API licensed via ALMS. The company also offers one year of AirLink Complete with “advanced remote device and security management via the AirLink Management Service (ALMS) platform”, 24/7 technical support, and a hardware warranty.

Four different SKUs are available for the tiny rugged 5G router:

  • 1105099 XR60 Dual Ethernet (1 Gbps + 5 Gbps)
  • 1105159 XR60 Dual Ethernet (1 Gbps + 5 Gbps) with Wi-Fi
  • 1105160 XR60 Single Serial, Single Ethernet (1 Gbps)
  • 1105161 XR60 Single Serial, Single Ethernet (1 Gbps) with Wi-Fi

Semtech says the 5G router is specifically suitable for utilities, public safety, video surveillance, manufacturing, critical infrastructure, smart cities, fixed wireless access, and vehicle fleets. The AirLink XR60 5G cellular router is available now, but you’d need to contact the company to get pricing. More details may be found on the product page and in the press release.

Thanks to TLS for the tip.

The post Semtech AirLink XR60 is the world’s smallest rugged 5G router appeared first on CNX Software - Embedded Systems News.

Spark Analyzer is a USB-C PD analyzer and power supply based on ESP32-C3 (Crowdfunding)

spark analyzer front back

Spark Analyzer is an ESP32-C3-powered device built to streamline the process of developing and debugging USB-C Power Delivery (UCPD) solutions. The board’s design is simple, compact, and includes helpful power delivery and analysis functionality, at an affordable price.

spark analyzer front back

Spark Analyzer runs on an ESP32-C3FH4 microcontroller, a low-power SoC with a single-core RISC-V CPU with onboard 2.4 GHz Wi-Fi and Bluetooth 5 (Low Energy) connectivity. The wireless chip lets users control the Spark Analyzer and monitor its operation remotely. It also supports integration with other smart devices via Matter.

The device allows you to adjust voltage output from 5V to 20V, depending on your project requirements. Power is sent to a connected device via the two-pin screw terminal block on the device, and a Cross Chip sensor measures the electrical current sent through the device using Hall effect. It includes a software safety feature that turns off the output field-effect transistor (FET) when the current is too high. The current draw can be monitored in real time via a mobile app.

Spark Analyzer specifications:

  • Microcontroller – ESP32-C3FH4 RISC-V MCU with 4 MB flash memory
  • Wireless – Wi-Fi 802.11b/g/n, Bluetooth 5 (LE) on ESP32-C3
  • USB – USB Type-C port for programming and power delivery
  • Misc – 3x LED indicators (power on, output enable, programmable LED/debug), 2x buttons (reset, programmable button/debug)
  • Power Supply via USB-C port
    • Negotiable Power Delivery: 5 VDC, 9 VDC, 12 VDC, 15 VDC, 20 VDC; max 5 A (100 W at 20 VDC)
    • ON Semiconductor FUSB302MPX: Programmable USB Type-C control and USB PD communication
    • Electrostatic Discharge Protection: On D+/D-/CC1/CC2 pins
    • Texas Instruments TPS62175DQCT: 3.3 VDC 0.5 A max output DC-DC Step-Down Converter
    • Power Output: 3.5 mm, 2-position terminal block
  • I/O
    • GPIO – 4x GPIOs (I2C, UART, SPI compatible)
    • Power Pins – 5 VDC and GND
  • Programming – Built-in USB JTAG programmer (ESP32-C3) via USB-C port, compatible with Arduino.
  • Output
    • Current Output: CC6904SO-10A (Hall Effect Current Sensor)
    • Output Enable: DMP3017SFG-7 MOSFET

spark analyzer mobile app

The Spark Analyzer Mobile App is available for download on Android, while iOS support is available via the RemoteXY app. The app displays data from the Spark Analyzer and allows you to control the device in real time. You can save the current draw as a .csv file and set the current limit using your phone.

The project is open-source and the GitHub repository contains detailed project documentation: code, hardware schematics, 3D enclosure files, and usage instructions. The Spark Analyzer compares favorably with alternatives on the market, with wireless connectivity being its most remarkable feature.

spark analyzer comparisons

The Spark Analyzer is currently live on Crowd Supply with a $1500 funding goal. It is priced at $49, with free shipping within the United States and a $12 shipping fee to the rest of the world. Orders are expected to ship by August 4, 2024.

The post Spark Analyzer is a USB-C PD analyzer and power supply based on ESP32-C3 (Crowdfunding) appeared first on CNX Software - Embedded Systems News.

  • ✇CNX Software – Embedded Systems News
  • 52Pi P02 PCIe expansion board for Raspberry Pi 5 features a PCIe x1 slotDebashis Das
    The 52Pi P02 is an expansion board for the Raspberry Pi 5 that converts the Pi’s PCIe into a PCIe x1 slot. The board gets connected to the bottom of the Pi and taps into the Pi’s power with the help of onboard pogo pins. It supports PCIe Gen2/Gen3 speeds and features a JST connector for external power input. While writing about the 52Pi NVdigi Expansion Board, I found the P02 PCIe expansion board for Raspberry Pi 5 interesting. It features a PCIe x1 slot, allowing you to install various off-the-
     

52Pi P02 PCIe expansion board for Raspberry Pi 5 features a PCIe x1 slot

P02 PCIe Slot For Raspberry Pi 5

The 52Pi P02 is an expansion board for the Raspberry Pi 5 that converts the Pi’s PCIe into a PCIe x1 slot. The board gets connected to the bottom of the Pi and taps into the Pi’s power with the help of onboard pogo pins. It supports PCIe Gen2/Gen3 speeds and features a JST connector for external power input.

While writing about the 52Pi NVdigi Expansion Board, I found the P02 PCIe expansion board for Raspberry Pi 5 interesting. It features a PCIe x1 slot, allowing you to install various off-the-shelf accessories like network cards, USB expansions, and more. You can even use a PCIe riser to connect a GPU with standard PC products. This isn’t the only 52Pi product we’ve covered; we’ve also looked at the 52Pi water cooling kit and the 52Pi CM4 Router Board. Feel free to check those out if you’re interested in the topic.

P02 PCIe Slot For Raspberry Pi 5

52Pi P02 PCIe Expansion Board Specification:

  • Compatibility – Made for Raspberry Pi 5.
  • Open slot design – Works with PCIe cards (x1, x2, x4, x8, x16).
  • PCIe x1 support – Compatible with Gen2 and Gen3 PCIe x1 interfaces.
  • Integrated Power Supply – 12V power supply supporting up to 1A, plus an external 12V input.
  • PCIe Ultra-short Signal Lines – Uses short paths for PCIe for stable and fast communication, meeting PCIe 3.0 standard requirements.
  • Power Outputs – +12V/1A and +3.3V/3A to the PCIe x1 slot.
  • Dimensions – 85x80mm.

 52Pi P02 PCIe Slot for RPI5 Frontal Face

The company says this board is good for anyone wanting to get more out of their Raspberry Pi. In simple terms, if you’re looking to add a large GPU, fast 10GbE networking, or turn your Pi into a home server, this little board will be very helpful. The company also provides a wiki page with further hardware details and instructions on how to enable PCIe x1 on the Pi, the company also provides assembly instructions on the same page.

 52Pi P02 PCIe Slot for RPI5 Install Instruction

Inside the box, you’ll find one P02 PCIe slot specifically designed for the Raspberry Pi 5, one custom PCIe FFC cable for connections, four M2.5 x 6mm coupler pillars for mounting, eight M2.5 x 4mm flat head screws for assembly, M2.5 screwdriver for installation. This kit provides everything needed to set up and start using the expansion board with your Raspberry Pi 5.

The 52Pi P02 PCIe expansion board is priced at $24.99 and it’s available for pre-sale on the 52Pi online store.

52Pi P02 PCIe Expansion Board with Network Card

The post 52Pi P02 PCIe expansion board for Raspberry Pi 5 features a PCIe x1 slot appeared first on CNX Software - Embedded Systems News.

LibreVNA open-source USB vector network analyzer (VNA) works in the 100kHz to 6GHz range

LibreVNA Open source hardware vector network analyzer vna

Jan Käberich’s LibreVNA is an open-source hardware USB vector network analyzer (VNA) based on a Spartan-6 FPGA, an STM32 microcontroller, and RF circuitry with MAX2871 and Si5351C chips. The open-source VNA supports two channels and works in the 100kHz to 6GHz frequency range.

Vector network analyzers are expensive pieces of electronic test equipment used to measure the magnitude and phase of high-frequency electrical networks costing several thousand dollars. They are commonly used in radio frequency (RF) and microwave engineering applications. Last year, we wrote that Pico Technology released PicoVNA 5 software for Linux, Raspberry Pi, and macOS instead of only providing a Windows program for their commercial PicoVNA devices. I thought it was already a good development even if it was closed-sourced, but LibreVNA goes all the way with an open-source hardware design with hardware design files, the FPGA code, STM32 firmware, and PC software (GUI) all open-source.

LibreVNA Open source hardware vector network analyzer vnaLivreVNA hardware specifications:

  • FPGA – Spartan6 FPGA handles communication with the RF blocks and samples the ADCs.
  • MCU – STM32G431 microcontroller handles the setup of the sweep in the FPGA, extracts and preprocesses the measurements, and passes them on through USB.
  • Storage – Flash for the FPGA bitstream. The microcontroller can also access the flash, so no FPGA-related hardware tools (such as JTAG programmers) are needed and everything can be updated via USB
  • Clock sources
    • A Skyworks Si5351C clock generator provides all the required clocks and serves as the stimulus source for frequencies below 25MHz. Its reference clock is either a 26MHz crystal or an external 10MHz signal.
    • Analog Device MAX2871 is the stimulus source for frequencies above 25MHz, its output signal is slightly filtered to reduce the number of harmonics and can be adjusted between approximately -42 and -10dbm with a digital attenuator (RFSA3714).
  • After the TR37A73 amplifier, the signal is split
    • The weaker part of it is fed into the reference receiver.
    • The stronger part of the signal can be routed to either port, each having 2x RF switches used in series to achieve higher isolation between the ports.
  • Both ports have completely separated receive paths to measure two parameters at once (S11 and S21 or S22 and S12).
  • Each receiver consists of two down-convert mixers. The 1.IF sits at 60MHz, the 2.IF 250kHz.
  • ADCs are sampling the final IF with 16-bit @ 800kHz.
  • Power Supply – 5V via USB-C port or external 5V DC
Open source VNA Digital Block diagram
Block diagram
LibreVNA RF Block diagram
Close-up on LibreVNA RF block diagram

Jan explains the LibreVNA PCB is just an RF frontend with some processing power used to capture the data and send it to the host over USB. Actual data processing is done in the LibreVNA-GUI PC application with pre-built binaries available for Windows, Ubuntu, macOS, and even the Raspberry Pi 5. That means you can try it out without the PCB simply importing example measurements.

I tried that on a Ubuntu 22.04 laptop, and after installing some extra dependencies, the program could start.

sudo apt install libqt6widgets6 libqt6svg6 libqt6network6 qt6-wayland
unzip LibreVNA-GUI-Ubuntu-v1.5.0.zip 
./LibreVNA

I could also import measurement examples (Documentation/Measurements folder) in LibreVNA-GUI, but somehow the data would not show… Here’s one of the sample measurement from a screenshot provided by the developer.

LibreVNA GUI screenshot

It can also serve as a signal generator or spectrum analyzer. RF engineers may find the solution interesting and can access all resources to get started or build their own on GitHub. The project is not entirely new, so the hardware can be purchased on Amazon or Aliexpress for around $500 and up with an enclosure and accessories.

LibreVNA hardware

Via Hacker News

The post LibreVNA open-source USB vector network analyzer (VNA) works in the 100kHz to 6GHz range appeared first on CNX Software - Embedded Systems News.

  • ✇CNX Software – Embedded Systems News
  • $166 Mustool MT13S thermal imager doubles as multimeterJean-Luc Aufranc (CNXSoft)
    Mustool MT13S is a relatively inexpensive 2-in-1 thermal imager and multimeter with a 2.8-inch touchscreen display and an IR camera with a 192×192 resolution. Thermal cameras used to be quite expensive, but in recent years, we’ve seen cheaper models such as the HT-102 thermal camera for Android smartphones and M5Stack T-Lite Wi-Fi thermal camera, but those integrate fairly small 32×32 and 32×24 pixels IR arrays, The Mustool MT13S provides a higher resolution 192×192 thermal camera and doubles a
     

$166 Mustool MT13S thermal imager doubles as multimeter

Mustool MT13S 2-In-1 Thermal Imager Multimeter

Mustool MT13S is a relatively inexpensive 2-in-1 thermal imager and multimeter with a 2.8-inch touchscreen display and an IR camera with a 192×192 resolution.

Thermal cameras used to be quite expensive, but in recent years, we’ve seen cheaper models such as the HT-102 thermal camera for Android smartphones and M5Stack T-Lite Wi-Fi thermal camera, but those integrate fairly small 32×32 and 32×24 pixels IR arrays, The Mustool MT13S provides a higher resolution 192×192 thermal camera and doubles as a 10,000-count multimeter for about $166 plus shipping on Banggood or around $177 including shipping on Aliexpress.

Mustool MT13S 2-In-1 Thermal Imager Multimeter

Mustool MT13S specifications:

  • Thermal imaging
    • Sensor – Uncooled focal plane
    • Image capture frequency – 20Hz
    • Thermal imaging resolution – 192 x 192
    • Display image resolution – 240 x 240
    • Field of view (FoV) – 50.0(H) × 50(V)/72.1(D)
    • Emissivity – 0.1-0.99 is tunable and 0.95 is the default
    • Temperature Range – -20°C to +550°C
    • Accuracy – 0.1°C/0.1F
    • Measurement error
      • > 0°C +/- 2°C or +/- 2%
      • <= 0°C +/- 5°C or +/-5 %
    • Mode – Automatic gain
    • Color palettes –  Iron Red, Rainbow, Fusion, White Heat, White Heat Highlights
  • Multimeter
    • Input – DC up to 1000V, AC up to 750V
    • Resistance up to 99.99MΩ
    • Capacitance up to 99.99mF
    • Duty cycle measurement range – 0.1% ~ 99.9%
    • Diode measurement range – 0V ~ 3V
    • On-off test maximum resistance – 999.9Ω
    • 4-digit shown, updated about 3 times per second
  • Data Storage – 3.5MB for BMP files
  • Display – 2.8-inch resistive touchscreen display with 480 x 320 resolution
  • USB – 1x USB Type-C port for charging and data transmission to the host
  • Power Supply – 3.7V/850 mAh built-in lithium battery; support for auto screen off and auto power off
  • Dimensions – 134 x 69 x 25 mm
  • Weight – 130 grams
  • Temperature Range – Operating: 0 to 50°C; storage: -20 to 60°C
  • Humidity – < 85%RH (non-condensing)

MT13S interface description

The thermal imager and multimeter ships with a USB Type-C cable and a user manual. At first, I was confused since I could not see the leads and connectors, but those are also included in the package and connected to the bottom side of the device based on an unboxing from one customer on Banggood. I was unable to find a detailed review for the tool, but feedback from users looks genuine and they all seem to appreciate the thermal imager function. User photos also show the device is smaller than I would have expected.

Mustool MT13S unboxing quick review

The MT13S is at least the second generation model improving on the earlier MT12S model with higher thermal imaging resolution, wider temperature measurement range, and better multimeter function with 10,000 counts instead of 4,000 counts.

It’s unclear how the USB data transmission to the host works, as I could not find any download link for a PC program. Maybe the MT13S shows as a USB drive allowing the user to download BMP files and CSV data for further processing.

The Mustool MT13S can be purchased for about $165.99 plus shipping on Banggood and  $177.23 including shipping on Aliexpress.

The post $166 Mustool MT13S thermal imager doubles as multimeter appeared first on CNX Software - Embedded Systems News.

STMicro ST60A3H0 and ST60A3H1 60 GHz transceiver ICs aim to replace USB cables

ST60A3H0 ST60A3H1 60 GHz transceivers

STMicro ST60A3H0 and ST60A3H1 are short-range 60 GHz transceiver ICs that tunnel eUSB2, I2C, SPI, UART, and GPIO signals and aim to replace USB and other cables in consumer devices such as digital cameras, wearables, portable hard drives, and small gaming terminals. They should also find their way into industrial applications such as rotating machinery where cable use may be challenging.

The smaller ST60A3H0 chip provides more flexibility and requires an external antenna, while the ST60A3H1 chip is a fully integrated solution with a built-in linear antenna. Both are capable of USB 2.0 speeds of up to 480 Mbps and support UART, GPIO, and/or I2C signals so they are not limited to USB cables and can be used in a range of applications.

ST60A3H0 ST60A3H1 60 GHz transceivers

ST60A3H0 and ST60A3H1 key features and specifications:

  • 60 GHz V-Band transceiver for short-range contactless connectivity up to 480 Mbit/s
  • eUSB2, UART, GPIO, or I2C RF tunneling
  • Low power consumption (typical values with a single 1.8 V supply):
    • eUSB2 Rx/Tx – 110/130 mW
    • UART/GPIO/I2C – 90 mW
    • Standby – 23 μW
  • Optimized BOM without external matching network and clock references. A reference clock may be used at one end of the RF link to comply with specific regional regulation
  • ST60A3H0 features
    • Integrated full RF transceiver operating in Half-Duplex mode
    • 34 dB typical total link budget
    • 50 Ω single-ended nominal RF input/output impedance with recommended PCB transition
    • Single 1.8 V supply or dual supply 1.8 V (analog/RF) and 1.2 V (digital/GPIO)
    • Package – VFBGA 2.2 x 2.6 x 0.8 mm, 30 balls, 5×6 array, 0.4 mm
  • ST60A3H1
    • Integrated full RF transceiver and linear polarization antenna, operating in Half-Duplex mode
    • 42 dB typical total link budget, up to 5 cm free-space propagation loss
    • Single 1.8 V supply
    • Package – VFBGA 2.9 x 4.1 x 0.8 mm, 23 balls, 0.4 mm pitch
  • Temperature Range – -20 to +85°C
STMicro 60 GHz contactless USB 2.0 devices
Potential use case: waterproof watch

Detailed technical data and evaluation kits are available but as explained in the press release getting access to those requires signing a non-disclosure agreement, so there’s limited public information. As I understand it there should be one transceiver in the device and another one connected to the host and data transfer can occur over a few centimeters distance. Charging does not seem to be handled by the solution.

The ST60A3H0 and ST60A3H1 60 GHz transceivers look to be especially useful for waterproof devices since they remove the need for cabling while keeping USB 2.0 compatibility, but should also enable thinner devices and support for rotating devices as illustrated in the video demo below with the earlier ST60A2 industrial-grade transceiver supporting SLVS or GPIO tunneling.

STMicro says the ST60A3H0 and ST60A3H1 are in mass production with a life-cycle of at least 10 years. Samples are available now at $5.00 and up. A few more details may be found on the respective product pages.

The post STMicro ST60A3H0 and ST60A3H1 60 GHz transceiver ICs aim to replace USB cables appeared first on CNX Software - Embedded Systems News.

Waveshare R7FA4 PLUS A and B boards are clones of the Arduino UNO R4 Minima and WiFi

Arduino UNO R4 WiFi clone

Arduino board clones have been around for many years, but I don’t think I have ever seen clones of the new Renesas-based Arduino boards so far. Waveshare changes that with the R7FA4 PLUS A that clones with Arduino UNO R4 Minima, and the R7FA4 PLUS B board duplicating the Arduino UNO R4 WiFi.

The Waveshare boards are not 100% clones with some small differences in the PCB layout, support for 5V and 3.3V shields, an additional 6-pin “power output header” with 5V, 3.3V, and GND signals, and a USB communication jumper to select between the Espressif ESP32-S3 and Renesas RA4M1 microcontrollers.

Arduino UNO R4 WiFi clone
Waveshare R7FA4 PLUS B

Waveshare R7FA4 PLUS A and B specifications:

  • Microcontroller – Renesas RA4M1 Arm Cortex-M4F MCU @ 48 MHz with 32KB SRAM, 256KB flash
  • Wireless (B model only) – ESP32-S3-MINI-1 module based on ESP32-S3 dual-core Xtensa LX7 microcontroller with 512KB SRAM, 384KB ROM, WiFi 4 and Bluetooth 5.0 connectivity, PCB antenna
  • Display (B model only) –  12×8 LED matrix (red)
  • USB – 1 x USB Type-C port for power and programming
  • Expansions
    • Arduino UNO headers with Pins
      • 14x digital I/Os
      • 13x LED pins
      • Analog – 6x analog input pin, 2x 12-bit analog DAC
      • 6x PWM
      • 1x UART, 1x I2C, 1x SPI
      • CAN Bus support
      • I/O Voltage – 5V and 3.3V (Not available on Arduino boards, but works on Waveshare board – TBC)
      • I/O current – 8 mA
    • R7FA4 PLUS B only
      • Qwiic I2C connector for expansion modules.
      • 3-pin header with an “OFF” pin to turn off the board and a “VRTC” pin to keep the internal Real-Time Clock powered and running.
  • Debugging and programming – 6-pin ICSP header; R7FA4 PLUS A only: 10-pin SWD header
  • Misc – Reset button, Power LED, USB communication jumper
  • Power Supply
    • Input voltage – 6 to 24V via a power barrel jack or Vin, 5V via USB-C port
    • Output header – 6-pin header with 5.5V and 3.3V (not found on the original Arduino UNO R4 boards)
  • Dimensions – 68.6 x 53.4mm
Waveshare R7FA4 Plus A Development Board Arduino UNO R4 Minima clone
Waveshare R7FA4 Plus A

Both the Waveshare R7FA4 Plus A and B boards are functionally equivalent to the Arduino UNO R4 Minima and WiFi boards, except for the additional support for 3.3V Arduino shields (on top of 5V ones) and the extra power output header. That means software for the official Arduino boards will run on the “clones”, but Waveshare still provides a wiki for each board with further hardware documentation, the PDF schematics, and a guide showing how to get started with the Arduino IDE.

Pricing for the Arduino UNO R4 “clones” is not that different from the original boards with the Waveshare R7FA4 Plus A going for $21.59 including shipping on Aliexpress and the Waveshare R7FA4 Plus B selling for $27.89 shipped. Both boards are also available on Amazon for respectively $21.99 (Model A) and $29.99 (Model B).

Waveshare R7FA4 Plus B Development Board

The post Waveshare R7FA4 PLUS A and B boards are clones of the Arduino UNO R4 Minima and WiFi appeared first on CNX Software - Embedded Systems News.

52Pi NVdigi Expansion Board for Raspberry Pi 5 combines HiFiBerry Digi+ audio output with M.2 PCIe x1 slot

52Pi NVDigi Extension Adapter Board

The 52Pi NVdigi is another PCIe expansion board for the Raspberry Pi 5 which integrates HiFiBerry Digi+ to provide high-quality S/PDIF output. It also features an M.2 PCIe x1 slot that supports NVMe 2242/2230 SSDs. Furthermore, it offers an optical output (TOSLink) and an RCA output for versatile audio connections.

The HiFiBerry Digi+ is a high-quality S/PDIF output for the Raspberry Pi. It uses the I2S sound port that connects directly to the CPU without the need for an additional USB conversion. It supports sample rates up to 192kHz/24bit.

52Pi NVDigi Extension Adapter Board

52Pi NVdigi Expansion Board Specification:

  • HiFiBerry Digi+ Integration – Provides high-quality S/PDIF output for Raspberry Pi 5.
  • Direct I2S Connection – Connects directly to the CPU via the I2S sound port for optimal audio.
  • High-Resolution Audio – Supports sample rates up to 192kHz and 24-bit depth for immersive audio.
  • Multiple Audio Outputs – Features both optical (TOSLink) and electrical (RCA) outputs.
  • M.2 PCIe x1 Slot – For NVMe 2242/2230 SSDs, with PCIe 3.0 support.
  • Applications – Ideal for audio enthusiasts and users seeking expanded storage for projects.
  • Weight and Dimensions – 20 grams, 65mm x 56mm.

Previously we’ve seen HATs for SSDs like the Mcuzone MPS2280 M.2 NVMe HATMcuzone MP4GM 4G LTE HAT, and the Sixfab 5G Modem Kit along with HATs for Wi-Fi 7 and Google TPU. However, this is the first time we have seen a HAT that combines audio support with M.2 storage.

52Pi NVdigi Expansion Board Dimensions

The company mentions that this device is perfect for those who love high-quality sound and need more storage for their Raspberry Pi 5 projects. Mostly, this little HAT targets those who want to build their own online media center. The company also provides a wiki page with further hardware details and instructions to enable it in Raspberry Pi Official OS.

52Pi NVDigi Extension Adapter Board Interfaces and Assambly Instruction

The package includes one 52Pi NVDigi board, a 40-pin PC104 header, a 40mm PCIe FFC cable, four M2.5 x 15mm copper pillars, eight M2.5 x 4mm flat head screws, and an M2.5 screwdriver, providing all necessary components for setup. The 52Pi NVdigi Extension Adapter Board is priced at $39.99 and it’s available for pre-sale on the 52Pi online store.

The post 52Pi NVdigi Expansion Board for Raspberry Pi 5 combines HiFiBerry Digi+ audio output with M.2 PCIe x1 slot appeared first on CNX Software - Embedded Systems News.

Banana Pi BPI-M6 SBC features SenaryTech SN3680 quad-core Cortex-A73 AI processor

Banana Pi BPI-M6

Banana Pi BPI-M6 is a credit-card single board computer based on SenaryTech SN3680 SoC comprised of a quad-core Arm Cortex-A73 processor, an Arm Cortex-M3 real-time core, an Imagination GE9920 GPU, and an NPU delivering up to 6.75 TOPS.

The board ships with 4GB LPDDR4 RAM and 16GB eMMC flash. Its layout is fairly similar to the one of the Raspberry Pi 4 with four USB ports, Gigabit Ethernet, a 40-pin GPIO header, a USB Type-C port for power, and two micro HDMI ports. However, only one of those is for HDMI output, as the second is for HDMI input, and there’s also an M.2 Key-E socket for expansion.

Banana Pi BPI-M6

Banana Pi BPI-M6 specifications:

  • SoC – SenaryTech SN3680 (also known as Synaptics VS680) with
    • CPU – Quad-core Arm Cortex-A73 processor up to 2.1GHz
    • MCU – Arm Cortex-M3 real-time security core @ 250MHz
    • GPU – Imagination PowerVR Series9XE GE9920 GPU
    • VPU –
      • 4Kp60 H265, H264, VP9, ​​VP8, AV1, MPEG-2 video decoding
      • Dual 1080p60 H.264/VP8 video encoding
    • NPU – Up to 6.75 TOPS
    • Package – FCBGA, 17mm x 17mm
    • 12nm manufacturing process
  • System Memory – 4 GB LPDDR4
  • Storage
    • 16GB eMMC flash (option up to 64GB)
    • MicroSD card slot
    • SPI flash
  • Video & Audio I/F
    • Micro HDMI 2.1 output up to 4Kp60 with HDR, CEC, EDID
    • MIPI DSI interface
    • Micro HDMI input
  •  Networking
    • Gigabit Ethernet RJ45 port
    • Optional WiFi via USB dongle
  • USB – 4x USB 3.0 ports
  • Expansion
    • M.2 Key E socket (PCIe + MIPI CSI)
    • 40-pin header with up to 28x GPIO, UART, I2C, SPI, PWM, and power signals (+5V, +3.3V and GND)
  • Misc
    • SPI BOOT, UBOOT, and Reset buttons
    • Power and Activity LEDs
  • Power Supply – 5V/3A via USB Type-C port
  • Dimensions –  92 x 60mm
  • Weight – 48grams

VS680 SBC

Banana Pi BPI-M6 specifications

Banana Pi provides Android and Ubuntu 20.04 images for the board which you’ll find in the wiki along with hardware documentation, a Linux SDK with Kernel 5.4 and Buildroot 2019.10, the config file for the Armbian build system, and instructions to use the SenarySocSystemTool flashing tool.

The VideoSmart VS680 is shown to score 29.90 points in the AI benchmark rankings for IoT processors which shows the NPU is a Vivante VIP9000. It has a higher score than the Amlogic A311D (21.9) and Rockchip RK3566 (14.1), but not quite as good as the better-supported Rockchip RK3588S (95.7) with a (slower in theory) 6 TOPS AI accelerator. For reference, the MediaTek Genio 1200 processor comes in third with 151 points in that list, only outperformed by Qualcomm Snapdragon SA8295P (161) and Mediatek MT8195 (Kompanio 1200) with 165 points.

Banana Pi shared some demo videos showing the AI capabilities of the board, but I was unable to find documentation and resources to make use of the Vivante VIP9000 NPU in the VS680 SoC. Synaptics mentions support for the Synap AI framework, but the company is not exactly known for releasing development tools publicly.  Note that the Vivante NPU in the Amlogic A331D SoC recently got Etnaviv open-source driver support, so the VS680 may end up being supported as well, although that will likely depend on the developer community interest rather than Banana Pi working on it…

The Banana Pi BPI-M6 is sold on Aliexpress for $74.74 plus shipping and on Amazon for $84.55 after ticking the box to get a 5% discount.

Updated: This post was initially published on November 22, 2022, when Banana Pi unveiled the board and updated following the availability of the BPI-M6 SBC on Amazon and Aliexpress

The post Banana Pi BPI-M6 SBC features SenaryTech SN3680 quad-core Cortex-A73 AI processor appeared first on CNX Software - Embedded Systems News.

❌
❌