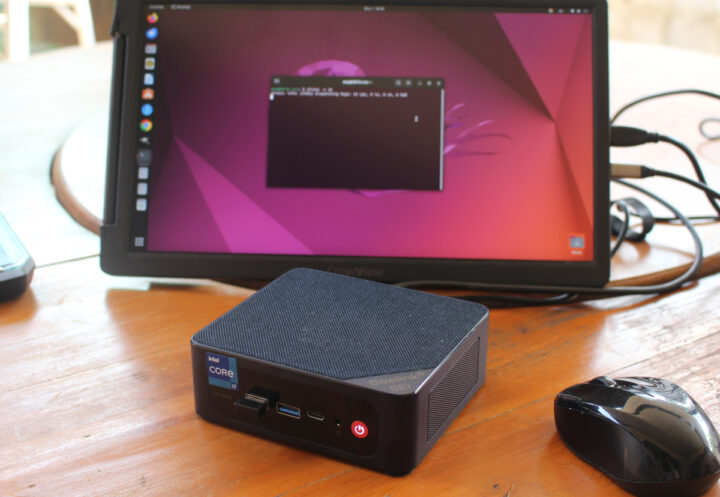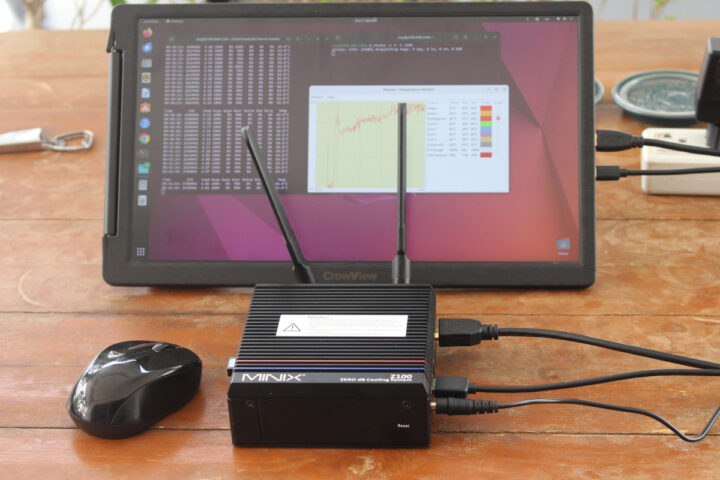
MINIX Z100-0dB review – Part 3: A fanless Intel N100 mini PC tested with Ubuntu 22.04
After the first part of the review with an unboxing and a teardown of the MINIX NEO Z100-0dB mini PC, we tested the fanless Intel N100 mini PC with Windows 11 Pro in the second part, and we are now ready to report our experience with Linux, and more specifically Ubuntu 22.04, on the MINIX Z100-0dB mini PC in the final and third part of the review.
We will go through features testing, run some benchmarks to evaluate the performance in Linux, perform storage and network performance tests, check the cooling ability of the mini with a stress test, and also check its power consumption under different scenarios. We will also compare the MINIX Z100-0dB to the actively cooled GEEKOM Mini Air12 mini PC that uses the same Intel Processor N100 CPU.

Ubuntu 22.04 installation
We will install Ubuntu 22.04 alongside Windows 11 Pro in dual boot configuration, so we first shrank the Windows partition to give space for Ubuntu, before installing the Linux distribution from a USB flash drive with a Ubuntu 22.04.4 ISO.

The installation went smoothly with WiFi properly detected. We had to press the Esc key to enter the BIOS and select the USB flash drive for the installation.
Ubuntu 22.04 system information
Going to the About section in the Settings shows we have a “MINIX Technology Limited MINIX NEO Z100-0dB” mini PC with a quad-core Intel N100 processor, 16GB of RAM, and a 512.1 GB M.2 running the latest Ubuntu 22.04.4 LTS.

We can get a few more details in a terminal window…
aey@Z100-0dB-CNX:~$ cat /etc/lsb-release
DISTRIB_ID=Ubuntu
DISTRIB_RELEASE=22.04
DISTRIB_CODENAME=jammy
DISTRIB_DESCRIPTION="Ubuntu 22.04.4 LTS"
aey@Z100-0dB-CNX:~$ uname -a
Linux Z100-0dB-CNX 6.5.0-21-generic #21~22.04.1-Ubuntu SMP PREEMPT_DYNAMIC Fri Feb  9 13:32:52 UTC 2 x86_64 x86_64 x86_64 GNU/Linux
aey@Z100-0dB-CNX:~$ free -mh
               total        used        free      shared  buff/cache   available
Mem:            15Gi       1.9Gi        10Gi       480Mi       3.4Gi        12Gi
Swap:          2.0Gi          0B       2.0Gi
aey@Z100-0dB-CNX:~$ df -mh
Filesystem      Size  Used Avail Use% Mounted on
tmpfs           1.6G  2.4M  1.6G   1% /run
/dev/nvme0n1p5  271G   14G  244G   6% /
tmpfs           7.7G   77M  7.7G   1% /dev/shm
tmpfs           5.0M  4.0K  5.0M   1% /run/lock
efivarfs        192K  119K   69K  64% /sys/firmware/efi/efivars
/dev/nvme0n1p1  1.5G   60M  1.5G   4% /boot/efi
tmpfs           1.6G  136K  1.6G   1% /run/user/1000
… and the inxi utility:
aey@Z100-0dB-CNX:~$ inxi -Fc0
System:
  Host: Z100-0dB-CNX Kernel: 6.5.0-21-generic x86_64 bits: 64
    Desktop: GNOME 42.9 Distro: Ubuntu 22.04.4 LTS (Jammy Jellyfish)
Machine:
  Type: Desktop System: MINIX product: MINIX NEO Z100-0dB v: N/A
    serial: <superuser required>
  Mobo: N/A model: N/A serial: <superuser required>
    UEFI: American Megatrends LLC. v: 5.27 date: 11/23/2023
CPU:
  Info: quad core model: Intel N100 bits: 64 type: MCP cache: L2: 2 MiB
  Speed (MHz): avg: 700 min/max: 700/3400 cores: 1: 700 2: 700 3: 700
    4: 700
Graphics:
  Device-1: Intel driver: i915 v: kernel
  Display: wayland server: X.Org v: 1.22.1.1 with: Xwayland v: 22.1.1
    compositor: gnome-shell driver: gpu: i915 resolution: 1600x900~60Hz
  OpenGL: renderer: Mesa Intel Graphics (ADL-N)
    v: 4.6 Mesa 23.2.1-1ubuntu3.1~22.04.2
Audio:
  Device-1: Intel driver: snd_hda_intel
  Sound Server-1: ALSA v: k6.5.0-21-generic running: yes
  Sound Server-2: PulseAudio v: 15.99.1 running: yes
  Sound Server-3: PipeWire v: 0.3.48 running: yes
Network:
  Device-1: Intel driver: iwlwifi
  IF: wlo1 state: up mac: e0:c2:64:ee:50:e3
  Device-2: Realtek RTL8125 2.5GbE driver: r8169
  IF: enp1s0 state: down mac: 8c:32:23:06:4b:fc
Bluetooth:
  Device-1: Intel AX201 Bluetooth type: USB driver: btusb
  Report: hciconfig ID: hci0 state: up address: E0:C2:64:EE:50:E7 bt-v: 3.0
Drives:
  Local Storage: total: 476.94 GiB used: 13.08 GiB (2.7%)
  ID-1: /dev/nvme0n1 model: NEO-J51-SSD-512GB size: 476.94 GiB
Partition:
  ID-1: / size: 270.46 GiB used: 13.02 GiB (4.8%) fs: ext4
    dev: /dev/nvme0n1p5
  ID-2: /boot/efi size: 1.5 GiB used: 59.5 MiB (3.9%) fs: vfat
    dev: /dev/nvme0n1p1
Swap:
  ID-1: swap-1 type: file size: 2 GiB used: 0 KiB (0.0%) file: /swapfile
Sensors:
  System Temperatures: cpu: 53.0 C mobo: N/A
  Fan Speeds (RPM): N/A
Info:
  Processes: 243 Uptime: 56m Memory: 15.39 GiB used: 2.66 GiB (17.3%)
  Shell: Bash inxi: 3.3.13
Inxi reports the system features a quad-core Intel Processor N100 CPU clocked up to 3,400 MHz with NEO-J51-SSD-512GB NVMe SSD, a Realtek RTL8125 2.5GbE controller, and an Intel AX201 wireless module for WiFi and Bluetooth. The CPU temperature at idle is shown to be 53°C.
Ubuntu 22.04 Benchmarks on the MINIX Z100-0dB mini PC
We’ll start Linux benchmarks with the sbc-bench.sh script:
aey@Z100-0dB-CNX:~/Downloads/sbc-bench-master$ sudo ./sbc-bench.sh -r
Starting to examine hardware/software for review purposes...

sbc-bench v0.9.64

Installing needed tools: apt-get -f -qq -y install gcc make build-essential powercap-utils curl git sysstat links mmc-utils smartmontools stress-ng p7zip, tinymembench, ramlat, mhz, cpufetch, cpuminer. Done.
Checking cpufreq OPP. Done.
Executing tinymembench. Done.
Executing RAM latency tester. Done.
Executing OpenSSL benchmark. Done.
Executing 7-zip benchmark. Done.
Throttling test: heating up the device, 5 more minutes to wait. Done.
Checking cpufreq OPP again. Done (11 minutes elapsed).

Results validation:

  * Measured clockspeed not lower than advertised max CPU clockspeed
  * No swapping
  * Background activity (%system) OK
  * Too much other background activity: 0% avg, 6% max -> https://tinyurl.com/mr2wy5uv
  * Powercap detected. Details: "sudo powercap-info -p intel-rapl" -> https://tinyurl.com/4jh9nevj

Full results uploaded to http://sprunge.us/dAZ2v0

# MINIX Technology Limited MINIX NEO Z100-0dB  / N100

Tested with sbc-bench v0.9.64 on Wed, 06 Mar 2024 14:43:35 +0700. Full info: [http://sprunge.us/dAZ2v0](http://sprunge.us/dAZ2v0)

### General information:

    Information courtesy of cpufetch:

    Name:                Intel(R) N100
    Microarchitecture:   Alder Lake
    Technology:          10nm
    Max Frequency:       3.400 GHz
    Cores:               4 cores
    AVX:                 AVX,AVX2
    FMA:                 FMA3
    L1i Size:            64KB (256KB Total)
    L1d Size:            32KB (128KB Total)
    L2 Size:             2MB
    L3 Size:             6MB
    Peak Performance:    435.20 GFLOP/s

    N100, Kernel: x86_64, Userland: amd64

    CPU sysfs topology (clusters, cpufreq members, clockspeeds)
                     cpufreq   min    max
     CPU    cluster  policy   speed  speed   core type
      0        0        0      700    3400       -
      1        0        1      700    3400       -
      2        0        2      700    3400       -
      3        0        3      700    3400       -

15759 KB available RAM

### Clockspeeds (idle vs. heated up):

Before at 63.0°C:

    cpu0: OPP: 3400, Measured: 3390

After at 71.0°C:

    cpu0: OPP: 3400, Measured: 3391

### Performance baseline

  * memcpy: 9572.6 MB/s, memchr: 15573.3 MB/s, memset: 8552.2 MB/s
  * 16M latency: 115.2 103.1 113.5 113.7 115.9 109.3 102.3 106.0
  * 128M latency: 128.4 119.8 128.5 120.8 128.1 125.2 118.2 121.0
  * 7-zip MIPS (3 consecutive runs): 12324, 9829, 9903 (10680 avg), single-threaded: 3938
  * `aes-256-cbc     940228.66k  1179035.97k  1218735.96k  1229265.58k  1231844.69k  1232142.34k`
  * `aes-256-cbc     919321.40k  1179155.71k  1218922.75k  1229503.49k  1232041.30k  1232743.08k`

### PCIe and storage devices:

  * Realtek RTL8125 2.5GbE: Speed 5GT/s (ok), Width x1 (ok), driver in use: r8169
  * 476.9GB "NEO-J51-SSD-512GB" SSD as /dev/nvme0: Speed 8GT/s (ok), Width x4 (ok), 0% worn out, drive temp: 54°C
  * 16MB SPI NOR flash, drivers in use: spi-nor/intel-spi

### Challenging filesystems:

The following partitions are NTFS: nvme0n1p3,nvme0n1p4 -> https://tinyurl.com/mv7wvzct

### Swap configuration:

  * /swapfile on /dev/nvme0n1p5: 2.0G (0K used)

### Software versions:

  * Ubuntu 22.04.4 LTS (jammy)
  * Compiler: /usr/bin/gcc (Ubuntu 11.4.0-1ubuntu1~22.04) 11.4.0 / x86_64-linux-gnu
  * OpenSSL 3.0.2, built on 15 Mar 2022 (Library: OpenSSL 3.0.2 15 Mar 2022)

### Kernel info:

  * `/proc/cmdline: BOOT_IMAGE=/boot/vmlinuz-6.5.0-21-generic root=UUID=29792f2d-4917-48a2-b3ac-d2f9d3c90049 ro quiet splash vt.handoff=7`
  * Vulnerability Spec store bypass:    Mitigation; Speculative Store Bypass disabled via prctl
  * Vulnerability Spectre v1:           Mitigation; usercopy/swapgs barriers and __user pointer sanitization
  * Kernel 6.5.0-21-generic / CONFIG_HZ=250

Waiting for the device to cool down...................................... 50.0°C
While the CPU temperature never exceeds 80°C, the performance is impacted after a while with the 7-zip benchmark starting at 12,324 MIPS, but eventually dropping to 9,829 and 9,903 MIPS for the second and third runs with an average of 10,680 MIPS.
Let’s check the power limits as recommended in the script:
aey@Z100-0dB-CNX:~$ sudo powercap-info -p intel-rapl
enabled: 1
Zone 0
  name: package-0
  enabled: 1
  max_energy_range_uj: 262143328850
  energy_uj: 7170855116
  Constraint 0
    name: long_term
    power_limit_uw: 6000000
    time_window_us: 27983872
    max_power_uw: 6000000
  Constraint 1
    name: short_term
    power_limit_uw: 12000000
    time_window_us: 2440
    max_power_uw: 0
  Constraint 2
    name: peak_power
    power_limit_uw: 78000000
    max_power_uw: 0
  Zone 0:0
    name: core
    enabled: 0
    max_energy_range_uj: 262143328850
    energy_uj: 5362964664
    Constraint 0
      name: long_term
      power_limit_uw: 0
      time_window_us: 976
  Zone 0:1
    name: uncore
    enabled: 0
    max_energy_range_uj: 262143328850
    energy_uj: 39667134
    Constraint 0
      name: long_term
      power_limit_uw: 0
      time_window_us: 976
PL1 is set to 6W and PL2 to 12W just as in Windows 11 Pro, and much lower than the power limits set in the Mini Air12 mini PC (15W/25W) which may impact the CPU performance somewhat.
Let’s carry on with Geekbench 6.2.2 single-core and multi-core tests

The MINIX Z100-0dB mini achieved 1,243 points in the single-core test and 3,189 points in the multi-core test.
The Intel iGPU was tested with Unigine Heaven Benchmark 4.0 at 1920×1080 resolution. The system rendered the scene at 11.7 FPS on average with a 294-point score.

Next up is YouTube 4K and 8K video playback in Firefox.

A 4K 30 FPS VP9 video played perfectly smoothly with no frame dropped after watching the video for 5 minutes.

8K 30 FPS was all good as well with just 9 frames dropped out of 11,352 during a 6-minute test.

The MINIX Z100-0dB mini PC has no problem playing a 4K 60 FPS YouTube video in Ubuntu 22.04, although the number of dropped frames went up to 203 out of 24,981.

Going up to 8K 60 FPS was another story with the system struggling to play the video that ended up being unwatchable with 8,289 frames dropped out of 18,288, or a 45% drop rate.
The YouTube streaming experience was similar in Windows and Linux for 2160p30, 2160p60, and 4320p30, but the 8K60 (4320p60) video was more or less watchable in Windows 11 with 6.7% dropped frames, while it was not in Ubuntu 22.04 with 45% of frames dropped.
We ran Speedometer 2.0 to evaluate the web browsing performance in the latest version of Firefox in Ubuntu 22.04.

The MINIX fanless mini PC rendered the test at 146 runs per minute with the 10 iterations of the test ranging between 136.5 and 152.8 runs/s.
Comparison of MINIX Z100-dB0 Ubuntu 22.04 benchmarks against other mini PCs
Let’s now compare the Ubuntu 22.04 benchmark results for the MINIX Z100-0dB fanless mini PC against other Alder Lake-N hardware platforms, namely the GEEKOM Mini Air12 (Intel Processor N100), Blackview MP80 (Processor N97) mini PC, Weibu N10 Core i3-N305 mini PC, and UP 7000 fanless single board computer (Intel Processor N100).
Here are the basic specifications of the five systems under test.
| MINIX Z100-0dB | GEEKOM Mini Air12 | Blackview MP80 | Weibu N10 | UP 7000 SBC | |
|---|---|---|---|---|---|
| SoC | Intel Alder Lake-N Processor N100 | Intel Alder Lake-N Processor N100 | Intel Alder Lake-N Processor N97 | Intel Core i3-N305 Alder Lake-N | Intel Processor N100 Alder Lake-N |
| CPU | 4 cores up to 3.4 GHz | 4 cores up to 3.4 GHz | 4 cores up to 3.6 GHz | 8 cores up to 3.80 GHz | 4 cores up to 3.4 GHz |
| GPU | 24EU Intel HD Graphics | 24EU Intel HD Graphics | 24 EU Intel UHD Graphics | 32EU Intel HD Graphics | 24EU Intel HD Graphics |
| Memory | 16 GB DDDR4-3200 | 16GB DDR5-4800 | 16GB LPDDR5 | 8GB DDR4-3200 | 8GB LPDDR5 |
| Storage | 512GB NVMe SSD | 512GB NVMe SSD | 512GB NVMe SSD | 512GB NVMe SSD | 64 GB eMMC flash |
| Default OS | Windows 11 Pro | Windows 11 Pro | Windows 11 Pro | Windows 11 Pro | None |
All benchmark results are in Ubuntu 22.04, except for the Blackview MP80 (N97) mini PC that was running Fedora 39.
| MINIX Z100-0dB | GEEKOM Mini Air12 | Blackview MP80 (N97) | Weibu N10 Core i3-N305 | UP 7000 SBC | |
|---|---|---|---|---|---|
| OS | Ubuntu 22.04 | Ubuntu 22.04 | Fedora 39 | Ubuntu 22.04 | Ubuntu 22.04 |
| sbc-bench.sh | |||||
| - memcpy | 9,572.6 MB/s, | 10,459.3 MB/s | 8989.0 MB/s | 9,949.4 MB/s | 8,277.6 MB/s |
| - memset | 8,552.2 MB/s | 10,665.4 MB/s | 12881.2 MB/s | 8,991.6 MB/s | 13,678.5 MB/s |
| - 7-zip (average) | 10,680 | 13,940 | 13,230 | 17,615 | 12,890 |
| - 7-zip (top result) | 12,324 | 13,976 | 13,270 | 20,002 | 13,178 |
| - OpenSSL AES-256 16K | 1,232,743.08k | 1,233,283.75k | 1302822.91k | 1,377,211.73k | 1,231,454.21k |
| Geekbench 6 Single | 1,243 | 1,213 | 1,251 | 1,177 (Geekbench 5) | - |
| Geekbench 6 Multi | 3,189 | 3,272 | 3,141 | 4,856 (Geekbench 5) | - |
| Unigine Heaven score | 294 | 303 | 404 | 451 | 258 |
| Speedometer (Firefox) | 146 | 149 | 152 | - | - |
The Geekbench 5 results for the Weinu N10 mini PC are just there for reference since Geekbench 5 and Geekbench 6 results can’t be compared directly. The MINIX NEO Z100-0dB has the lowest score in most of the tests, so there’s a cost to going fanless, although most users will probably not notice. All benchmarks were performed in a room with a 28C to 30C ambient temperature, so it might be a tougher test than for most users. Having said that the UP 7000 fanless SBC with the same Intel N100 SoC did perform somewhat better, except in the Unigine Heaven 4.0 benchmark (lower) and single-core benchmarks (about the same).
NVMe SSD storage and USB performance
Storage performance may be important to overall system performance, especially during boot and launching programs, so we also tested the 512GB M.2 NVMe SSD that ships with the mini PC using iozone3:
aey@Z100-0dB-CNX:~$ sudo iozone -e -I -a -s 1000M -r 4k -r 16k -r 512k -r 1024k -r 16384k -i 0 -i 1 -i 2

                                                              random    random     bkwd    record    stride
              kB  reclen    write  rewrite    read    reread    read     write     read   rewrite      read   fwrite frewrite    fread  freread
         1024000       4   147453   251479   348949   349401    51702   249240
         1024000      16   472785   696410   883857   885519   126532   656920
         1024000     512   657154   972524  1528673  1523950   939217  1354287
         1024000    1024  1459188  1510039  1529597  1532754  1207208  1350257
         1024000   16384  1545730  1541024  1593991  1597533  1618665  1516253

iozone test complete.
The sequential read speed was 1,593 MB/s, the sequential write speed was 1,545 MB/s, and the SSD also delivered decent random I/O performance, so it’s acceptable, but not quite to the level of higher-end SSDs found in more expensive mini PCs or even the SSD in the GEEKOM Mini Air12. For reference, the read speed was 2,066 MB/s and the write speed was 1,585 MB/s in Windows 11 using CrystalDiskMark.
To double-check the actual speed of the USB ports, we connected the ORICO M234C3-U4 USB 3.0 NVMe SSD enclosure to each of the USB 3.0 ports and a Seagate USB Expansion drive to the USB 2.0 ports while relying on lsusb and iozone3 command line utilities to confirm the speed.
Here’s the output for the USB-C port on the front panel:
aey@Z100-0dB-CNX:/media/aey/EXT4-REVIEW$ lsusb -t | grep uas
    |__ Port 1: Dev 2, If 0, Class=Mass Storage, Driver=uas, 10000M
aey@Z100-0dB-CNX:/media/aey/EXT4-REVIEW$ sudo iozone -e -I -a -s 1000M -r 16384k -i 0 -i 1

                                                              random    random     bkwd    record    stride
              kB  reclen    write  rewrite    read    reread    read     write     read   rewrite      read   fwrite frewrite    fread  freread
         1024000   16384   965648   976617   853478   856033

iozone test complete.
… and the top USB 2.0 port on the rear panel:
aey@Z100-0dB-CNX:/media/aey/USB3_EXT4$ lsusb -t | grep uas
    |__ Port 2: Dev 6, If 0, Class=Mass Storage, Driver=uas, 480M
aey@Z100-0dB-CNX:/media/aey/USB3_EXT4$ sudo iozone -e -I -a -s 1000M -r 16384k -i 0 -i 1

                                                              random    random     bkwd    record    stride
              kB  reclen    write  rewrite    read    reread    read     write     read   rewrite      read   fwrite frewrite    fread  freread
         1024000   16384    41796    42573    43116    43235

iozone test complete.
The results of all 5 ports can be summarized as follows:
- “Front panel” with power button
- USB-C – 10 Gbps – 853 MB/s read speed, 965 MB/s write speed
- USB-A (Top) – 10 Gbps – 867 MB/s read speed, 994 MB/s write speed
- USB-A (Bottom) – 10 Gbps – 851 MB/s read speed, 982 MB/s write speed
- “Rear panel” with DC jack
- USB-A (top) – 480 Mbps – 43 MB/s read speed, 41 MB/s write speed
- USB-A (bottom) – 480 Mbps – 42 MB/s read speed, 43 MB/s write speed
All ports work as advertised. I wrote “front panel” and “rear panel” in quotes because it’s difficult to assign a rear and front panel the way the mini PC was designed.
Networking (2.5GbE and WiFi 6)
Network throughput was measured with iperf3, and we started testing the 2.5GbE Ethernet port using UP Xtreme i11 Edge mini PC at the other end.
- Download
aey@Z100-0dB-CNX:~$ iperf3 -t 60 -c 192.168.31.12 -i 10 -R
Connecting to host 192.168.31.12, port 5201
Reverse mode, remote host 192.168.31.12 is sending
[  5] local 192.168.31.41 port 53734 connected to 192.168.31.12 port 5201
[ ID] Interval           Transfer     Bitrate
[  5]   0.00-10.00  sec  2.74 GBytes  2.35 Gbits/sec
[  5]  10.00-20.00  sec  2.74 GBytes  2.35 Gbits/sec
[  5]  20.00-30.00  sec  2.74 GBytes  2.35 Gbits/sec
[  5]  30.00-40.00  sec  2.74 GBytes  2.35 Gbits/sec
[  5]  40.00-50.00  sec  2.74 GBytes  2.35 Gbits/sec
[  5]  50.00-60.00  sec  2.74 GBytes  2.35 Gbits/sec
- - - - - - - - - - - - - - - - - - - - - - - - -
[ ID] Interval           Transfer     Bitrate         Retr
[  5]   0.00-60.03  sec  16.4 GBytes  2.35 Gbits/sec    0             sender
[  5]   0.00-60.00  sec  16.4 GBytes  2.35 Gbits/sec                  receiver

iperf Done.
- Upload
aey@Z100-0dB-CNX:~$ iperf3 -t 60 -c 192.168.31.12 -i 10
Connecting to host 192.168.31.12, port 5201
[  5] local 192.168.31.41 port 49706 connected to 192.168.31.12 port 5201
[ ID] Interval           Transfer     Bitrate         Retr  Cwnd
[  5]   0.00-10.00  sec  2.74 GBytes  2.35 Gbits/sec    0    663 KBytes
[  5]  10.00-20.00  sec  2.74 GBytes  2.35 Gbits/sec    0    663 KBytes
[  5]  20.00-30.00  sec  2.74 GBytes  2.35 Gbits/sec    0    988 KBytes
[  5]  30.00-40.00  sec  2.74 GBytes  2.35 Gbits/sec    0    988 KBytes
[  5]  40.00-50.00  sec  2.74 GBytes  2.35 Gbits/sec    0   1.45 MBytes
[  5]  50.00-60.00  sec  2.74 GBytes  2.35 Gbits/sec    0   1.45 MBytes
- - - - - - - - - - - - - - - - - - - - - - - - -
[ ID] Interval           Transfer     Bitrate         Retr
[  5]   0.00-60.00  sec  16.4 GBytes  2.35 Gbits/sec    0             sender
[  5]   0.00-60.04  sec  16.4 GBytes  2.35 Gbits/sec                  receiver

iperf Done.
- Full-duplex
aey@Z100-0dB-CNX:~$ iperf3 -t 60 -c 192.168.31.12 -i 10 –bidir
Connecting to host 192.168.31.12, port 5201
[  5] local 192.168.31.41 port 39506 connected to 192.168.31.12 port 5201
[ ID] Interval           Transfer     Bitrate         Retr  Cwnd
[  5]   0.00-10.00  sec  2.74 GBytes  2.35 Gbits/sec  183    641 KBytes
[  5]  10.00-20.00  sec  2.74 GBytes  2.35 Gbits/sec    0    641 KBytes
[  5]  20.00-30.00  sec  2.74 GBytes  2.35 Gbits/sec    0   2.12 MBytes
[  5]  30.00-40.00  sec  2.74 GBytes  2.35 Gbits/sec    0   2.12 MBytes
[  5]  40.00-50.00  sec  2.74 GBytes  2.35 Gbits/sec    0   2.12 MBytes
[  5]  50.00-60.00  sec  2.74 GBytes  2.35 Gbits/sec    0   2.12 MBytes
- - - - - - - - - - - - - - - - - - - - - - - - -
[ ID] Interval           Transfer     Bitrate         Retr
[  5]   0.00-60.00  sec  16.4 GBytes  2.35 Gbits/sec  183             sender
[  5]   0.00-60.04  sec  16.4 GBytes  2.35 Gbits/sec                  receiver

iperf Done.
Excellent performance, and here the MINIX Z100-0dB is quite better than the GEEKOM Mini Air12 which is limited by its gigabit Ethernet interface.
We then switched to WiFi 6 using Xiaomi Mi AX6000 router.
- Download
aey@Z100-0dB-CNX:~$ iperf3 -t 60 -c 192.168.31.12 -i 10 -R
Connecting to host 192.168.31.12, port 5201
Reverse mode, remote host 192.168.31.12 is sending
[  5] local 192.168.31.208 port 52208 connected to 192.168.31.12 port 5201
[ ID] Interval           Transfer     Bitrate
[  5]   0.00-10.00  sec  1.09 GBytes   937 Mbits/sec
[  5]  10.00-20.00  sec  1.10 GBytes   941 Mbits/sec
[  5]  20.00-30.00  sec  1.09 GBytes   940 Mbits/sec
[  5]  30.00-40.00  sec  1.10 GBytes   942 Mbits/sec
[  5]  40.00-50.00  sec  1.10 GBytes   941 Mbits/sec
[  5]  50.00-60.00  sec  1.10 GBytes   942 Mbits/sec
- - - - - - - - - - - - - - - - - - - - - - - - -
[ ID] Interval           Transfer     Bitrate         Retr
[  5]   0.00-60.04  sec  6.57 GBytes   940 Mbits/sec    0             sender
[  5]   0.00-60.00  sec  6.57 GBytes   940 Mbits/sec                  receiver

iperf Done.
- Upload
aey@Z100-0dB-CNX:~$ iperf3 -t 60 -c 192.168.31.12 -i 10
Connecting to host 192.168.31.12, port 5201
[  5] local 192.168.31.208 port 50828 connected to 192.168.31.12 port 5201
[ ID] Interval           Transfer     Bitrate         Retr  Cwnd
[  5]   0.00-10.00  sec  1.08 GBytes   931 Mbits/sec   83   1.59 MBytes
[  5]  10.00-20.00  sec  1.09 GBytes   940 Mbits/sec    3   1.75 MBytes
[  5]  20.00-30.00  sec  1.10 GBytes   942 Mbits/sec    3   1.74 MBytes
[  5]  30.00-40.00  sec  1.09 GBytes   941 Mbits/sec    5   1.66 MBytes
[  5]  40.00-50.00  sec  1.10 GBytes   942 Mbits/sec    1   1.77 MBytes
[  5]  50.00-60.00  sec  1.09 GBytes   941 Mbits/sec    6   1.77 MBytes
- - - - - - - - - - - - - - - - - - - - - - - - -
[ ID] Interval           Transfer     Bitrate         Retr
[  5]   0.00-60.00  sec  6.56 GBytes   939 Mbits/sec  101             sender
[  5]   0.00-60.05  sec  6.56 GBytes   938 Mbits/sec                  receiver

iperf Done.
Again, excellent performance with 940 Mbps and 938 Mbps download/upload speed, and faster than the already-impressive 800 Mbps we got with the GEEKOM Mini Air12. As usual, WiFi performance is quite better in Linux, as the Z100-0dB (only) delivered a download speed of 686 Mbps and a 581 Mbps upload speed in Windows 11 Pro.
We also successfully tested Bluetooth with a file transfer to an Android smartphone.

Thermal performance testing with a stress test
We ran a stress test while checking the CPU temperature to see how well the MINIX Z100-0dB fanless mini PC manages to cool the Intel Processor N100 quad-core CPU.

While testing in a room with a 28°C ambient temperature, the CPU temperature never exceeded 66°C while the CPU frequencies hovered around 2,600 to 2,665 MHz. That’s cooler than the actively-cooled GEEKOM Mini Air12 whose N100 CPU operated at around 77°C for the same test, but also slower since the CPU frequency was 2,900 MHz. This can be explained by the lower thermal limit set in the MINIX Z100-0dB mini PC and also shows up in slightly lower benchmark scores.
MINIX Z100-0dB power consumption in Ubuntu 22.04
The power consumption was measured with a wall power meter:
- Power off
- 0.9 – 1.0 Watt (shutdown command)
- 1.4 to 1.5 Watts (after removing and inserting the power plug)
- Idle – 7.5 to 7.6 Watts
- Web browsing – 8.2 to 13.9 Watts
- Video playback – 14.7 to 17.9 Watts (Youtube 8Kp60 in Firefox)
- Stress test on all four cores – 17.2 to 19.8 Watts
Note: The mini PC was connected to WiFi 6, two USB RF dongles for a wireless keyboard and mouse combo, and a VGA monitor (through an HDMI to VGA adapter) during measurements.
Conclusion
MINIX Z100-0dB fanless mini PC works great with Ubuntu 22.04 and we had no issues with any of the features. As we’ve seen in Windows, benchmark results are also a bit lower in Linux than the actively-cooled GEEKOM Mini Air12 mini PC with the same Intel Processor N100 CPU due to lower power limits, and the SSD is not quite as fast, but the MINIX Z100-0dB does have its advantages too (besides the fanless design) with better networking performance thanks to a 2.5GbE port and higher WiFi 6 throughput close to 1 Gbps thanks to the Intel AX201 wireless module.
YouTube video playback worked fine up to 4Kp60 and 8Kp30 in Firefox, but the video was unwatchable at 8Kp60 with close to half of the frames dropped. Cooling is adequate too with no CPU thermal throttling detected under a stress test with the maximum recorded temperature being 66°C in a room at 28°C. That’s because power limits come into play before the CPU thermal limits, and the CPU runs at 2.6 GHz under heavy loads.
We’d like to thank MINIX for sending us a sample of the NEO Z100-0dB mini PC for review. The model showcased here with 16GB RAM and 512GB SSD is sold for $ on Amazon and you’ll also find it on the MINIX online store along with the cheaper 8GB/256GB model going for $239.
CNXSoft: This article is a translation – with some additional insights – of the original review on CNX Software Thailand by Suthinee Kerdkaew.
The post MINIX Z100-0dB review – Part 3: A fanless Intel N100 mini PC tested with Ubuntu 22.04 appeared first on CNX Software - Embedded Systems News.