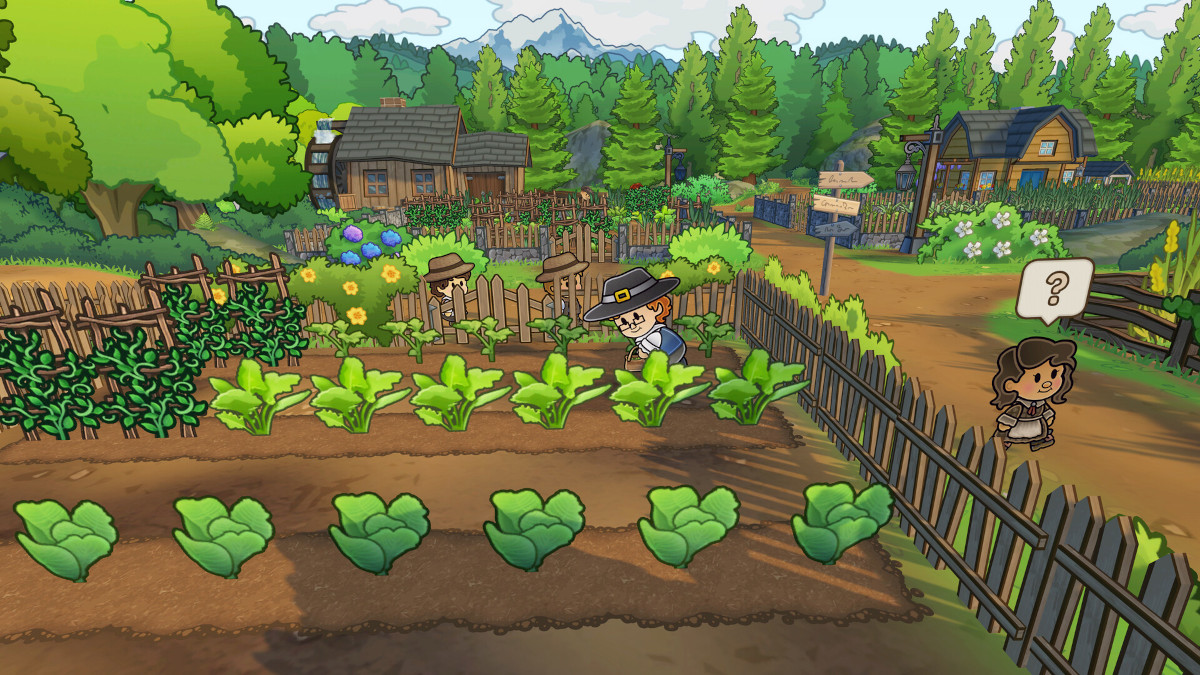
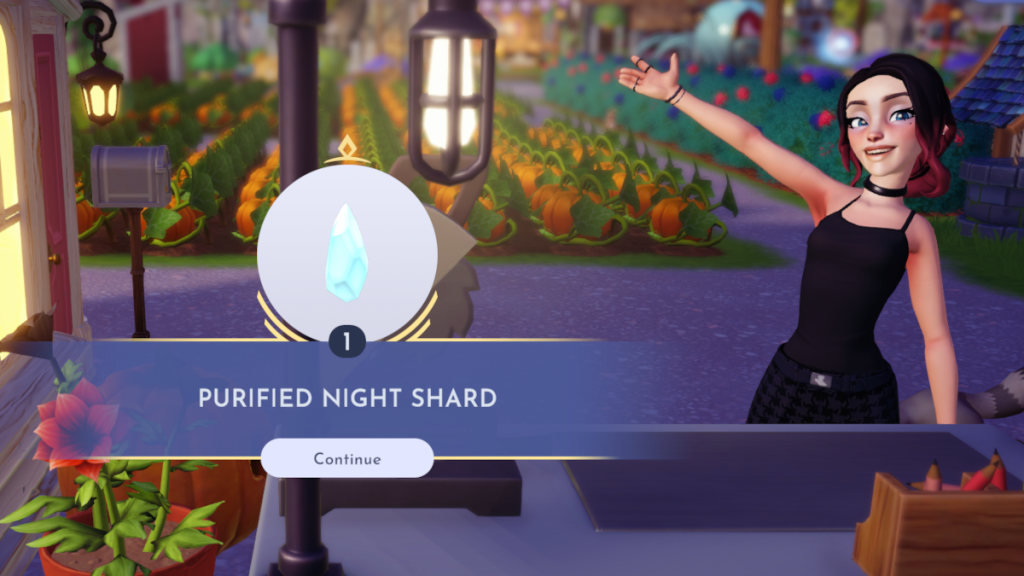
To celebrate the recent release of the Unholy Alliance update, Devolved Digital is giving Cult of the Lamb players the chance to get their hands on in-game items through Twitch drops. There are three décor items to gain through watching others play, and a set available for subbing.
All of the items up for grabs through this Twitch drop campaign will be officially released to players on all platforms further down the line, although there is currently no confirmation about when this will actually happen.
For now, if you’re playing through Steam and want to get yourself any of the following decorative pieces for your Cult of the Lamb playthrough, there are a number of different rewards on offer and you have until September 20 to claim yours.
In order to get any of the following drops, you’ll need to first link your Twitch account with the Devolver Digital codes site. To do this, just head to the website and click on the “Connect your Twitch Account” button at the top.
How long do you need to watch to get Cult of the Lamb Twitch drops?
Image via Devolver Digital
There are three items ready to be claimed by players who tune into any stream on Twitch with the “DropsEnabled” tag (you can find all of the currently live and eligible streams here). The items you stand to gain, and how long you need to watch to get each of them, are as follows:
Goat Effigy (1 hour of watch time)
Goat Statue (2 hours of watch time)
Goat Plant (3 hours of watch time)
In total, you’ll only need to watch someone play for three hours in order to get all of the Twitch drop items.
How to get the Cult of the Lamb Support a Streamer pack
Image via Devolver Digital
The Support a Streamer pack isn’t gained through watch time and instead requires you to do one of the following:
Subscribe to a Twitch streamer with the “DropsEnabled” tag active
Gift a subscription to someone else in a stream with the “DropsEnabled” tag active
For doing this, you’ll get not one, but four items for your playthrough:
The limited release of the inZOI Character Studio is just hours away and will run from August 21 to August 25. You’ll have the chance to make as many characters as you like, get to grips with the incredibly in-depth customization features, and share your creations through Canvas.
Before you can dive into the Character Studio, though, you’re going to need to set up a Krafton ID in order to log in toInzoi. This is a relatively straightforward process, and if you’ve ever played any other Krafton games (PUBG or Subnautica, for instance), you’ll likely already have one.
If you haven’t got a Krafton ID already, you’ll need to follow these steps:
Head over to the Krafton Accounts site and set up a Krafton ID using your email, Google account, Facebook account, or one of the many other options
Once signed up, go to Linked Accounts and link your Steam account to your Krafton ID
When you’ve downloaded the Inzoi Character Studio through Steam, you’ll be able to immediately log in with your Krafton ID and dive straight into making your ideas a reality.
Image via Krafton
If you’re hoping to upload your realized creations through Inzoi's built-in sharing platform, Canvas, you’ll need to select a separate nickname for the platform. This nickname will be unique to you, and you’ll be able to continue using it upon the full release of Inzoi later this year.
Inzoi will also hold an event during the time in which the Character Studio is available to play. To be in the running to win unspecified ‘special gifts’, you need to upload your customized Zois to social media using the following three hashtags:
#inZOI
#CAZ
#CreateAZoi
Once you’ve done that, you’ll need to fill out this google form, including a link to your social media post, to be entered with a chance to win.
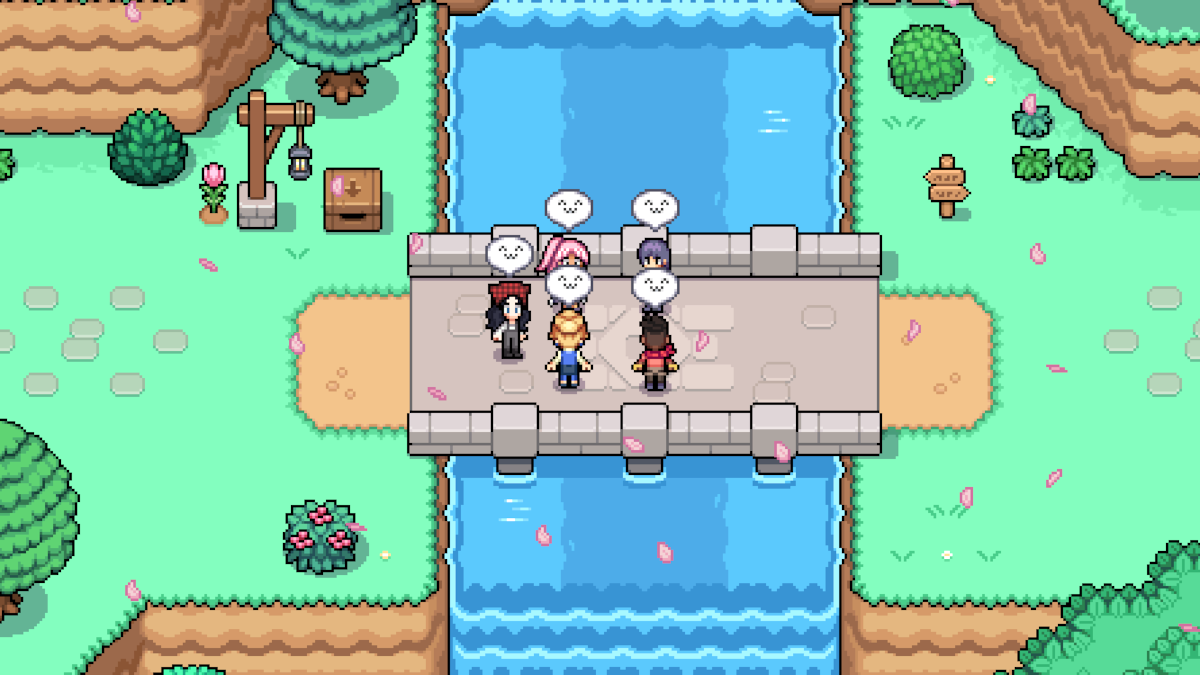
If you've just begun a new game of Fields of Mistria, you're going to have a lot of quests to complete in the coming in-game days. There's definitely no shortage of things for you to do, but first and foremost, the bridge needs to be fixed.
After Balor guides you over the broken bridge and into town as you first arrive, you'll have a few days to settle into your new farm home before the residents of Mistria arrive with their first big request. They need to repair the bridge in order to enable travel in and out of Mistria, and as a perk of this, the Saturday Market can begin being held again.
How to get a Pickaxe and repair the bridge in Fields of Mistria
Screenshot by Destructoid
At some point in the first week of your new life in Mistria, you'll receive a letter in the mail from Adeline, asking you to aid in repairing the bridge. After receiving this letter, head east to the bridge in order to trigger a cutscene.
After this cutscene, a donation box will appear next to the bridge, and you'll need to donate the following resources:
60 Wood
60 Stone
You should already have an Axe to gather the needed Wood, thanks to an early morning meeting with Eiland, when you discovered the statue of Caldarus behind a tree on your farm. He'll give you the Worn Axe as a reward, and you can then use it to gather the 60 required Wood.
To get a Pickaxe, you'll need to pick up a quest from the Request Board in town. The quest you need is called ‘Do a Bro a Favor’, and simply requires you to head to the Blacksmiths and talk to Olric. When you speak to him, he’ll give you an Worn Pickaxe which you can then use to mine any small rock and get between one and two Stone.
Once you've got 60 wood and 60 Stone, you can head back to the bridge and place the resources into the box. Then all that's left to do is head back to Adeline to hand in the quest, triggering another cutscene and successfully repairing the bridge.
One of the best ways to streamline your gameplay in Fields of Mistria is by unlocking new skills and perks. However, doing this requires you to earn an almost-currency outside of Tesserae — Essence.
Once you’ve removed the tree from in front of Caldarus’ statue and replaced his head, he’ll come to you in a dream and tell you about Essence and how to get it, but it may be a little unclear from his description, so I’ve got you covered.
How to get Essence in Fields of Mistria
Screenshot by Destructoid
Once you’ve unlocked the ability to get it, Essence can appear randomly from many daily activities, including:
Farming
Mining
Fishing
You’ll automatically absorb these Essences, so they’re easy to miss, but to see how many you have, simply check the UI. Essence appears just under your Tesserae, displayed in the top right corner of the screen.
How to spend Essence in Fields of Mistria
Once you’ve stacked up some Essence, you can spend it by approaching Caldarus’ statue and pressing Q. After doing this, you’ll be able to select one of the disciplines with skills and perks to unlock:
Screenshot by Destructoid
Select an area in which you’d like to improve, and you’ll be given a list of available skills and perks. Clicking on each of them will tell you what it does, and the amount of Essence it costs is shown underneath.
Screenshot by Destructoid
As you increase your level in each skill, you'll be able to unlock more useful perks and better skills to use.
There are a lot of fish to catch in Disney Dreamlight Valley, and each of them has their own specific methods. All of them have their own locations, ripple colors, and some even have weather conditions in which they’ll spawn.
Of all of the fish available in the Valley, the Here and There fish is somehow both one of the most awkward and one of the easiest DDLV fish to find.
How to catch a Here and There Fish in Disney Dreamlight Valley
Screenshot by Destructoid
You’ll only be able to catch the Here and There Fish once you’ve completed a couple of things:
Unlocked Nala through completing the steps in the Lion King Realm
Reached level 10 friendship with her
Now, you’ll need to catch a Here and There Fish in order to complete Nala’s level 10 friendship quest, ‘Here and There and Back Again’. After you’ve completed this quest, you’ll then be able to catch as many of the fish as you like, but there are specific conditions.
The Here and There Fish can be caught in any biome in Dreamlight Valley, in any water outside of present ripples, although they can occasionally be found in white ripples.
You can only catch a Here and There Fish between the hours of 6 a.m. and 10 p.m. or 6 p.m. and 10 p.m. As Disney Dreamlight Valley runs on actual time, you’ll need to be playing and actively fishing in one of these four hour time slots in order to catch a Here and There Fish.
How to use a Here and There Fish in Disney Dreamlight Valley
Image by Destructoid
If your aim is to complete Nala’s level 10 friendship quest, you’ll need to cook her a Lioness Feast, the recipe for which is as follows:
1 Mushroom
1 Tomato
1 Oregano
1 Here and There Fish
You can still cook this dish outside of Nala’s quest, and it will serve you pretty well. It sells for 3,108 Star Coins and will give 2,368 energy if consumed.
You can also make Ghostly Fish Steak using a Here and There Fish, which uses the following ingredients:
1 Here and There Fish
1 Lemon
1 Asparagus
1 Bell Pepper
1 Oregano
As a five star meal, Ghostly Fish Steak is useful for both selling and energy providing. It sells for 3,548 Star Coins and will provide 3,282 energy when consumed.
If you’ve unlocked Ginger Island in Stardew Valley, you’ve got a whole new bunch of fish waiting to be caught. These fish can be found all over the island and, like those in the Valley, come with time and weather restrictions, but they each have their uses.
One of these new fish is the Stingray, which may not be used in many quests or recipes, but it does serve an incredibly useful purpose. There’s an Island Trader who will sell you Mahogany Seeds for one Stingray each, and, in case you don’t know, Mahogany Trees drop Hardwood when chopped down.
How to catch a Stingray in Stardew Valley
Sreenshot by Destructoid
To catch a Stingray, you’ll need to head to the Pirate Cove area of Ginger Island. Thankfully, Stingrays can be caught at any time and in any weather, so you shouldn’t have too much of a hard time finding them.
When hooked, Stingrays will dart around the fishing minigame a bit, so you may find it difficult to keep the green section on them. To make this easier, you can use a Cork or Trap Bobber. If you want to see what you’ve hooked before reeling it in, you can use a Sonar Bobber.
How to use a Stingray in Stardew Valley
Screenshot by Destructoid
If you’re not planning to stock up on Mahogany Seeds using your newly caught Stingrays, there are still a few things that you can use them for. Predominantly, they actually sell for a relatively high price. Each Stingray will sell for at least 180 Gold, with this price rising to 540 Gold depending on the quality of the Stingray and whether you have the Fisher or Angler profession.
Crafting
Stingrays can be used in the following recipes:
Maki Roll
1 of any Fish
1 Seaweed
1 Rice
Quality Fertilizer
4 Sap
1 of any Fish
Sashimi
1 of any Fish
Tailoring
When a Stingray is used in the spool of a Sewing Machine, you’ll be able to create the dyeable Sailor Shirt. As well as this, a Stingray can be used in the dye pots at Emily and Haley’s house to create an orange dye.
Quests
The only quest which will require you to catch Stingrays is one of Willy’s Special Orders called ‘Tropical Fish’. This will only become available to complete once you’ve unlocked Ginger Island, and you’ll need to provide five Stingrays.
Fish Pond
When placed in a Fish Pond, Stingrays will reproduce every four days. A Stingray pond is capable of producing the following items on any day:
If you’re a fan of the cozy side of gaming, August is set to be a very good month. August 15 in particular should be a date you mark off in the calendar, but there are other games coming this month as well to give you all the cozy vibes.
On August 13, Tavern Manager Simulator finally gets its full release. This game sees you as, and I’m sure this will come as no surprise, the manager of a medieval tavern where you serve wanderers who come through the doors. You need to balance your stock levels, do the dishes, and gradually rebuild your tavern to what I’m sure was its former glory.
Screenshot by Destructoid
Love, Ghostie is fully releasing on August 14. This game, which had a demo available during the latest Steam Next Fest, has you playing as a dead cupid. In a house full of animals, it’s up to you to decide who will make the best couples, and use your ghostly abilities to set them up using a variety of methods. It’s very cute, and the stories which emerge are heartwarming.
Oddada is the first game releasing fully on August 15, and if you took part in Steam Next Fest then you likely already know what this is. There’s no real goals in Oddada, all you need to do is make music by playing with toys. At the end of the game, once you’ve constructed your melody, you have the option to download your own music as a .wav file. The visuals are simple yet oddly hypnotic, and I can’t wait to somehow lose hours to Oddada.
Screenshot by Destructoid
Next up on August 15 is the latest DLC for Sticky Business, Camp Zinnias. This is the only of these releases that I haven’t played a demo of, but I have spent far too many hours on Sticky Business so I can attest to the ease at which this game will steal away hours of your life. Camp Zinnias promises new interconnected stories and lots of new nature themed sticker elements.
And last, but absolutely not least, Just Crow Things is coming on August 15 to cause chaos and steal all the shinies. This is one of my most anticipated games of the Summer, and there’s something so appealing about wreaking havoc on unsuspecting people from above. Poop and fart on random members of the public while helping your animal friends with bizarre quests - doesn’t that sound like fun?
Image via Unbound Creations
These aren't the only cozy games launching in August, but they're a small selection of some solid-looking offerings. Got any you're keeping an eye on? Let us know down below.
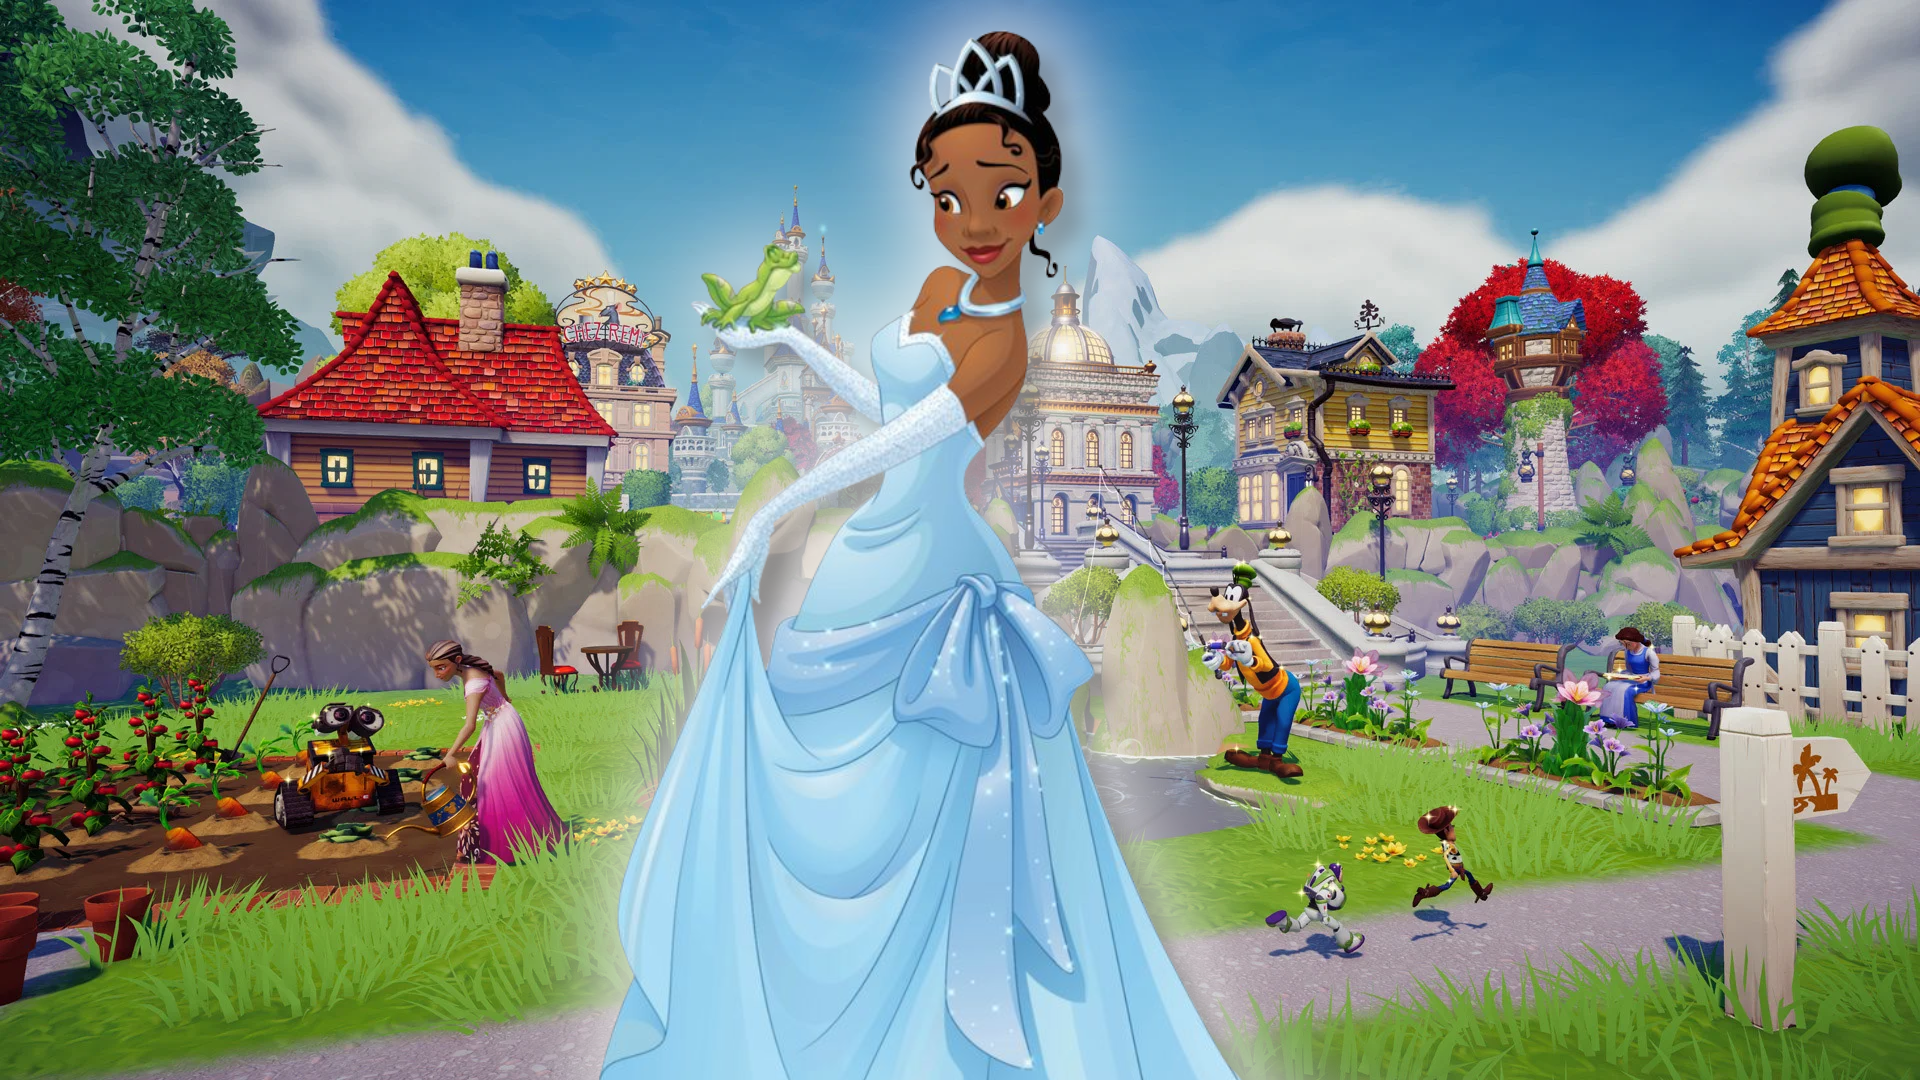
Disney Dreamlight Valley is pretty well known for having regular updates, new villagers arriving in the valley, and new quests to be undertaken. Late in 2023, Gameloft shared a roadmap for 2024, and according to them we’ve got another update coming very soon.
We're getting into August now, and according to the Disney Dreamlight Valley roadmap released in December 2023, we’re due another update, complete with Tiana from The Princess and the Frog as a new villager, before the summer ends.
Image via Gameloft
As well as Tiana and everything she could bring to the valley (I’m hoping for Naveen to arrive alongside her in frog form and desperate to have Ray as a companion, but I’m not holding my breath), those with the Rift in Time DLC are also due another update which will see the culmination of Jafar’s storyline along with the ability to finally fix the rift.
We’ve already seen everything else from the roadmap come to fruition, with Mike and Sulley having arrived in the valley with the Laugh Floor update in Feburary, Daisy Duck following in the Thrills & Frills update in May, and most recently Mulan and Mushu joining the ever expanding population in the Lucky Dragon update in June.
Screenshot by Destructoid
Of course, with summer technically lasting until September 22, we might be waiting a little longer for the next update, but it’s definitely coming soon. It’s unknown exactly what will be included in the next update, outside of Tiana of course, but the hint that she will “bring new culinary delights” heavily suggests that the already very long list of recipes is about to grow.
There are a lot of things to find in Stardew Valley. Unfortunately, many of these things are time-restricted, and if you don’t get them in the right season, you need to wait an entire year for the chance to get them again.
Rainbow Shells are one such forageable item in Stardew Valley. While these pretty little shells aren’t used for many quests or crafting, they’re a solid bet to be given as a gift to most villagers as a gift and can be used inside Fish Tanks as a decoration.
How to get Rainbow Shells in Stardew Valley
The foremost place to get Rainbow Shells is through foraging on the beach in the Summer. If you’re playing on a Beach Farm, you may find them on the ground at any time of the year.
Thankfully, there are a few other ways to find them outside of Summer:
In the mines, after activating the Shrine of Challenge
In the mines during the ‘Danger in the Deep’ quest
As a gift from Jas, Vincent, or Leo during the Feast of the Winter Star
As a gift from Demetrius, received via mail
2% chance of a Rainbow Trout Fish Pond producing 1 Rainbow Shell daily if the population reaches 9
As a gift from a pet Turtle with maximum friendship
May appear in the Traveling Cart for between 900 and 1,500 Gold
How to use a Rainbow Shell in Stardew Valley
Screenshot by Destructoid
Most villagers will like getting a Rainbow Shell as a gift. The only exceptions to this are Elliot, who feels neutral about it, or Harvey, who hates them.
Quests
The Mysterious QI quest, which will eventually open up the back door inside the Oasis and allow you access to the Casino, requires one Rainbow Shell to be placed inside the box at the train station.
If you have a Blobfish Pond, they may request a Rainbow Shell in order to increase the capacity of the pond from 7 to 10.
Tailoring
In order to create a dyeable Bikini Top, you can place a Rainbow Shell in the spool of a Sewing Machine. Otherwise, you can use a Rainbow Shell with the Sewing Machine to open up the dye menu, allowing you to dye an item any color using sliders.
Final Fantasy XIV FanFest China is currently underway, and there have been some new images revealed that provide hints for future content. With new sneak peeks into Cosmic Exploration, new large-scale field content, and the first glimpse of the new Ultimate Raid’s boss, there’s lots to get excited about.
These images were shared during what appears to be a keynote speech with Naoki Yoshida streamed on Bilibili, a China based video sharing site. Further news about this content is likely to come for us in the West during GamesCom (August 21 - August 25) or PAX West (August 30 - September 2), but that doesn’t stop us from looking at these images.
First up, some never-before-seen images from Cosmic Exploration, the new crafting and gathering content coming at some point in 7.X. For anyone who has ever spent time within The Diadem in The Firmament, these will be very familiar. I’m just hoping that we’ll get to see the return of the Auger.
Next, new images were shared of Shades’ Triangle, the upcoming large-scale field content for Dawntrail. According to the slides shown by Yoshida, the new content will be known as ‘Occult Crescent’ in China. Again, this will be hugely familiar to anyone who has ever taken part in Eureka or The Bozjan Southern Front.
Last but certainly not least, we were given a sneak peek of the next Ultimate Raid, Histories Rewritten. This battle screenshot shows some familiar mechanics and also a familiar boss — Fatebreaker.
As of now, that’s everything new that has been revealed during FanFest China. Of course, I’ve got my beady eye on all of the goings-on, so if anything new emerges, you’ll be the first to know.
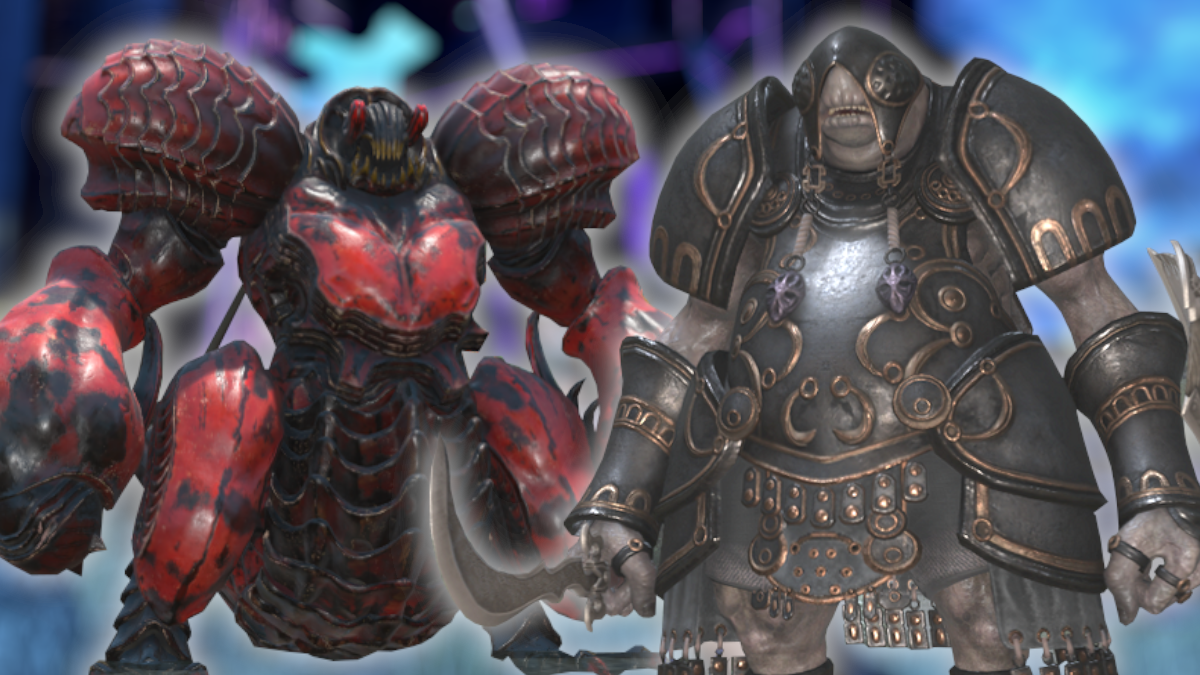
With patch 7.05, Final Fantasy XIV introduced two new S Rank Elite Marks into the fray. As with all S Ranks, these have their own spawn methods and locations which at first weren’t clear, but now they’ve been spawned.
There are two new S Rank Elite Marks to be fought, one in Urqopacha and another in Kozama’uka. One of them, the one that spawns in Urqopacha, is a direct reintroduction to a familiar foe to anyone who played Final Fantasy XI.
Just because these S Ranks are in lower-level areas, that doesn’t mean they’re easier to defeat than those in higher-level areas. S Ranks are all incredibly difficult to take down and require a large number of people to take on, especially this early into an expansion.
Urqopacha S Rank - Kirlirger the Abhorrent
Image by Destructoid
The S Rank in Urqopacha is Kirlirger the Abhorrent. Back in Final Fantasy XI, Kirlirger was a Notorious Monster who could be fought in order to reduce the Troll Mercenaries’ military force by one.
This one proved troublesome to those looking to fight him, who went through a lot to try and figure out his spawn conditions. However, it all boils down to time and weather. Kirlirger will spawn at midnight on a foggy night with a new moon.
Kozama’uka S Rank - Ihnuxokiy
Image by Destructoid
The new S Rank introduced to Kozama’uka has a much more controllable spawn condition. Ihnuxokiy can be found in any of the locations above, and the spawn conditions will be familiar to anyone who has tried to spawn Narrow Rift, the Endwalker S Rank in Ultima Thule.
To spawn Ihnuxokiy, you’ll need to have the Morpho minion, which is a possible drop from The Lost City of Amdapor (Hard). Once you’ve got it, summoning Morpho and flying low over Ihnuxokiy’s spawn points will possibly spawn the Kozama’uka S Rank.
Once you’ve restored the Greenhouse by completing the Pantry bundles in Stardew Valley, you’re able to plant anything you like inside the Greenhouse without seasons restricting you. Depending on what you want to grow, you may want to think about your layout.
There are a few different layout options for the Greenhouse, and which one is best for you will depend on what you’re hoping to grow. Regardless of your intended crops, let’s go through the best layouts.
Best layouts for sprinklers in the Greenhouse
Sprinklers are, in my opinion, vital to the successful growth of crops inside the Greenhouse. Once you’ve placed down Sprinklers, you only need to water any crop once, and then the Sprinklers will do all of the work for you, saving you both time and energy.
Image by DestructoidImage by Destructoid
Where you put Sprinklers will depend on which type of Sprinklers you want to use, and which upgrades you have available to you. It’s likely that, by the time you’ve unlocked the Greenhouse, you’ll at least have Quality Sprinklers available to you, and you’ll need 16 of these in order to fully water every square of the Greenhouses available space, leaving room for 108 plants.
However, if you have Iridium Sprinklers, you only need six in order to cover this space. This leaves room for 116 plants. Upgrading your Iridium Sprinklers to have Pressure Nozzles will allow you to only take up one space with a Sprinkler, but this only frees up three additional crop spaces.
Alternatively, if you don’t want to worry about Sprinklers at all, you can use Deluxe Retaining Soil to negate the need for watering entirely. This Soil has a 100% chance of retaining water overnight and after only a single watering, will retain water until you physically remove the crop.
Best layout for Fruit Trees in the Greenhouse
Image by Destructoid
Fruit Trees can be grown in the greenhouse in any of the spaces outside of the middle planting area. You don’t need a Garden Pot to do this, simply plant the Tree Sapling in the ground.
The best layout for this will allow you to have 18 Fruit Trees inside the greenhouse, with two spaces between each to allow for proper growth.
You don’t need to worry about watering the trees, they’ll grow in their own time and eventually provide you with all the fruit you need or could dream of.
Best layout for trellis plants in the Greenhouse
Image by Destructoid
Unlike other crops, anything that grows on a trellis (Grapes, Hops, or Green Beans) cannot be walked through. If you want to plant these in your Greenhouse, you’ll need to leave space between each crop to allow for harvesting.
Although this does leave a lot of empty space and creates a few dead ends, you can fill the space with other crops. This is definitely more adaptable to personal preference and depends on which sprinklers you’re using, but as long as you leave space to walk between your crops, you’re golden. The above image is my preferred trellis layout when using Deluxe Retaining Soil, with other crops, such as Ancient Fruit, filling out the empty space.
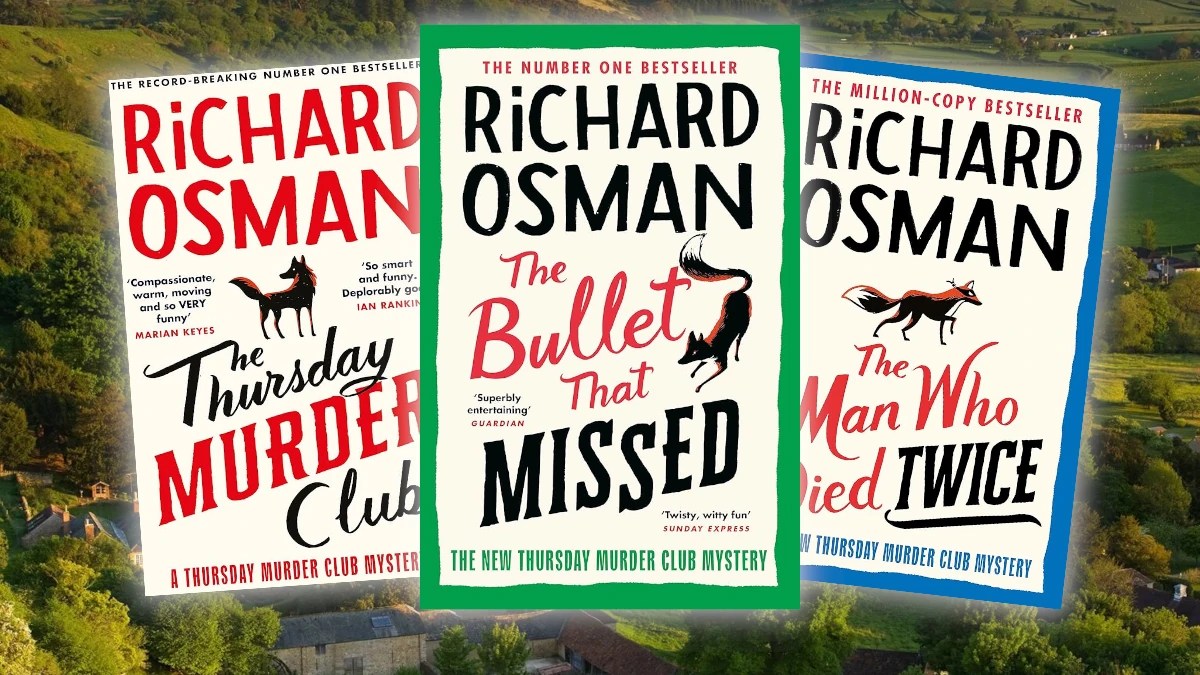
If you’re looking forward to the star-studded Thursday Murder Clubmovie adaptation, then it’s understandable that you might want to read the book series first. If that’s the case, you should probably read them in order, right?
Richard Osman went from a face you'd recognize on British TV to beloved author when he wrote the Thursday Murder Club books. He took a group of pensioners in a retirement home and turned them into crime-solving heroes, and the book series has so far sold over 10 million copies worldwide.
Currently, there are only four books in the Thursday Murder Club book series, although a fifth as-yet-unnamed book is set to be released in 2025. If you’re wondering which order you should read the books in, I’ve got you covered.
1. The Thursday Murder Club (2020)
Image via Pengiun Books
The first book released by Richard Osman, written entirely in secret and released in 2020. In this book, we’re introduced to Elizabeth, Joyce, Ibrahim, and Ron as they become embroiled in their first murder mystery.
2. The Man Who Died Twice (2021)
Image via Pengiun Books
Released in 2021, The Man Who Died Twice brings back Elizabeth and co. as they get caught up in a plot involving stolen diamonds, the mob, and a string of murders.
3. The Bullet That Missed (2022)
Image via Pengiun Books
With two murders taking place a decade apart, the retired gang of sleuths are on a mission to find a killer, of course. However, Elizabeth finds herself caught up in a whole side plot where she is asked to kill, or suffer being killed herself.
4. The Last Devil to Die (2023)
Image via Pengiun Books
You know the drill by now. Elizabeth, Joyce, Ibrahim, and Ron are on the hunt for a killer, except this tale involves a smuggled package, and the team can’t even catch a break over Christmas. It’s never a dull day at Cooper’s Chase.
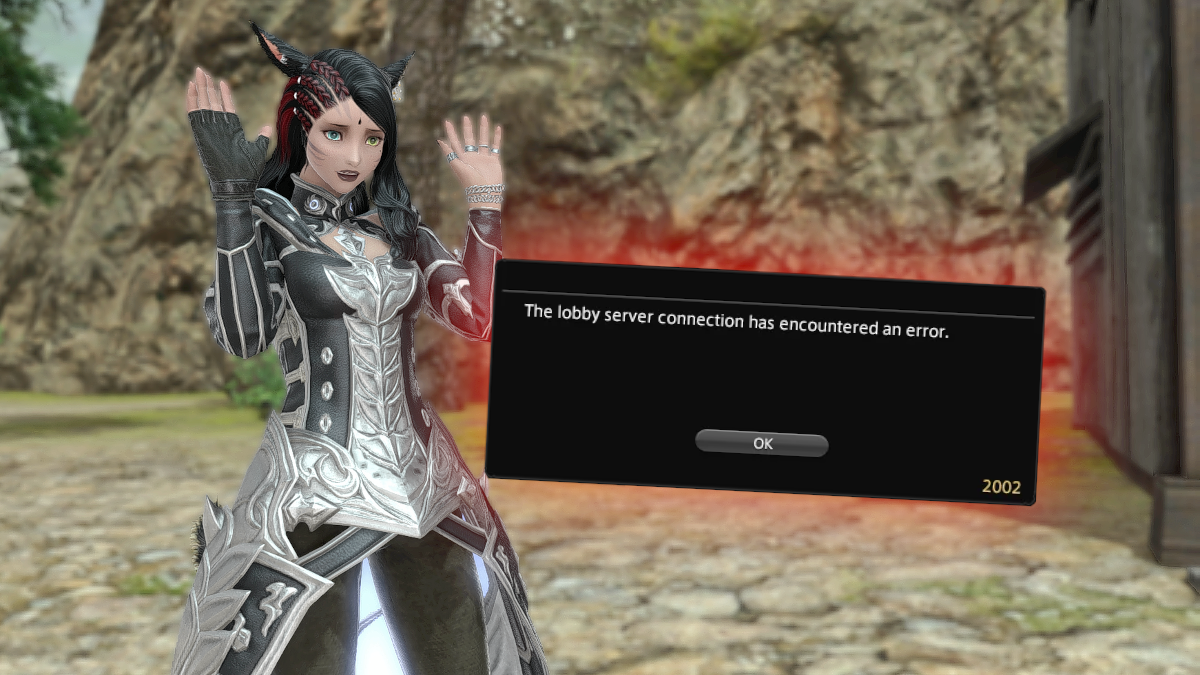
When any expansion of Final Fantasy XIV goes live, you can expect a staggeringly large number of players to come rushing back, and Dawntrail is no different. As such, you can also expect long queues to log in and, as a result of this, a hike in the number of errors you encounter.
Error Code 2002 is a particularly troublesome error, and while it can be encountered at any time, a massive number of people encounter this error during FFXIV queues around an expansion release.
What is Error 2002 in Final Fantasy XIV?
Screenshot by Destructoid
The FFXIV Error 2002 is caused by the lobby server connection, but whether or not that's on the MMO's server stability or a problem with your internet at home is where the troubleshooting begins.
So, that makes it one of two reasons you've encountered the 2002 Error. The first reason, in short, is that error 2002 occurs when there are too many people trying to log in to any one world and, in order to prevent the entire server from crashing, the system triggers 2002 in the lobby queue to reduce the massive number of people trying to gain access. This is unavoidable, so you can't fix it.
The second reason is much more controllable from the player side, simply by ensuring that you have a solid and consistent internet connection. This is because Error 2002 can also occur if your internet connection dips and causes you to disconnect from the server completely.
How to fix error 2002 in Final Fantasy XIV
Screenshot by Destructoid
There honestly isn’t much you can do to avoid Error 2002 outside of having a good connection. It’s a frustrating part of any expansion release, but it’s something most players have come to expect. However, FFXIV does have a few backup actions in place for users hit by it.
FFXIV saves your place in the queue, if you're fast enough
If you encounter Error 2002, there is some good news. The lobby server is supposed to save your place in line for roughly sixty seconds, giving you a short window to log back in and rejoin the queue right where you left it. However, this doesn't seem to always work, leaving you at the back of the queue waiting to log in all over again.
Try another, less-populated World to skip the queue
If you’re hoping to avoid Error 2002 during the launch of Dawntrail, you could try to log in on a less-populated World server. While no Worlds are likely to be what you could consider “quiet” during the first couple of weeks of Dawntrail, some will be more tame than others, such as the new and probationary worlds on NA and EU data centers.
The best piece of advice I can give you is to take some deep breaths, grab a snack and a cup of tea, and rest assured that there are millions of other players going through exactly the same thing. Don’t worry, Eorzea will still be there waiting when you finally get in to play.
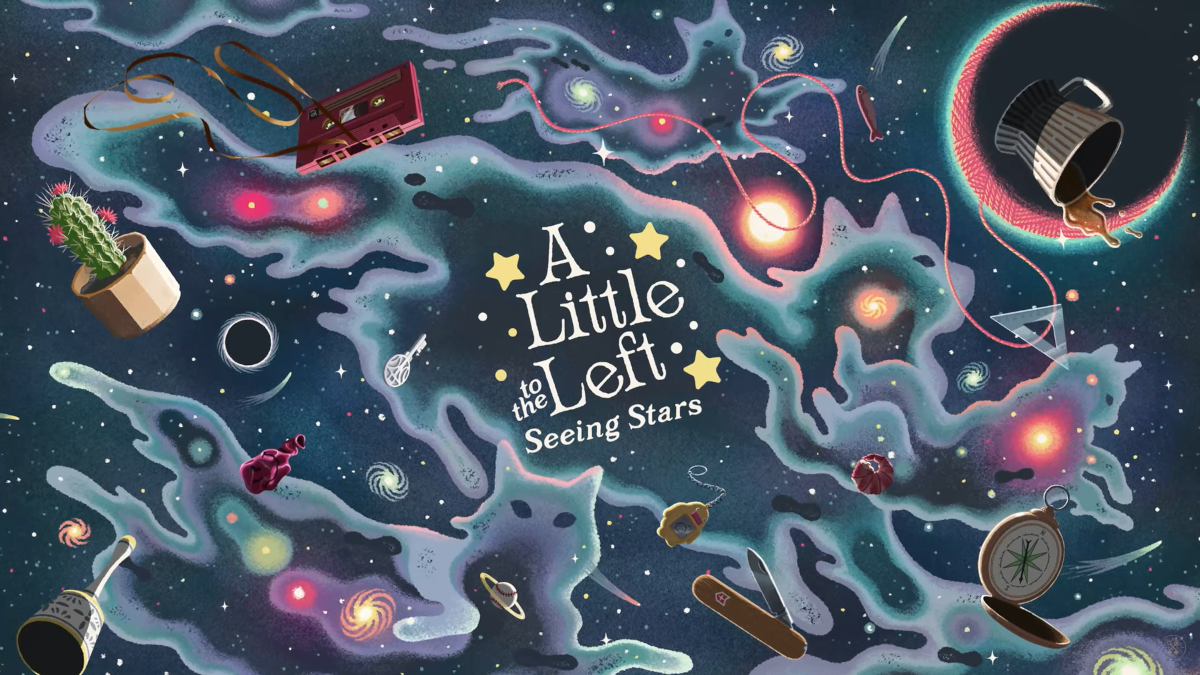
For fans of organization and fitting things into appropriately sized holes (mind out of the gutter, now), there is one game which scratches the sorting itch like no other — A Little to the Left. Now, the game is getting a DLC called Seeing Stars this week.
Announced earlier this month, the Seeing Stars DLC releases on all platforms on June 25 and will be coming with 33 new basic levels and 5 unlockable bonus levels, perfect for zoning out and ignoring the real-life organization that you should probably be doing instead.
https://www.youtube.com/watch?v=RALw9Lqfu-c
The concept of the Seeing Stars DLC is simple, and will appeal to any completionist. While the base game has multiple stars for each level, with each star being granted for finding a different organization method for the level, Seeing Stars goes even further, with many different solutions for each puzzle.
Image via Max Inferno
With some of the puzzles in the Seeing Stars DLC having five possible solutions, you’re certain to be occupied for plenty of time in your efforts to obtain all of the stars for each level. In total, there are over 100 stars up for grabs. While you don’t get anything physical for getting them all, you do get the satisfaction which only comes from opening a perfectly organized drawer or cupboard, albeit in virtual form.
Upping the difficulty compared to the base game, some of the items in the new Seeing Stars levels will be interactive, meaning that you’ll need to fold or retract items in order to make them fit into smaller spaces.
Image via Max Inferno
The best thing, though, for all feline lovers out there, is the fact that there will be more cats to disrupt your progress. Is it frustrating when a cat paw comes in and swipes at the things you’re trying to organize? Yes. Is it adorable? Also yes.
A Little to the Left: Seeing Stars will be out on June 25 for PC, Mac, Switch, PlayStation, and Xbox consoles.
If there was one thing that wasn’t on my bingo card for 2024, it was a makeup line inspired by what may very well be my favorite cartoon of all time — Avatar: The Last Airbender. So of course, as soon as I learned of Lethal Cosmetics’ newest line you can bet I metaphorically sprinted to the site.
Then I hit a bit of a roadblock when I was confronted by the “virtual waiting room” with 600 people ahead of me in the queue to even look at the goodies. That alone should tell you how incredibly popular this cosmetics line is proving to be. This collab is definitely bringing attention to Lethal Cosmetics, an ethical and vegan makeup company based in Berlin, Germany.
Screenshot by Destructoid
Included in the collection are the following perfectly on-point items:
Four eyeshadow palettes (Fire, Water, Air, and Earth)
$29.00 USD each or $110.20 USD for the bundle of four
Four liner sets (Katara, Toph, Aang, and Zuko)
$19.00 USD each or $72.20 USD for the bundle of four
Three lipsticks (Azula, Ty Lee, and Mai)
$15.00 USD each or $42.75 USD for the bundle of three
White Lotus Highlighter
$19.00 USD
Sokka Glitter Gel
$21.00 USD
However, while the makeup itself is absolutely stunning—I mean the highlighter alone is like crushed diamonds and the eyeshadow palettes are honestly just glorious—the true crowning pieces of this collection are the Appa Makeup Bag complete with Momo zipper detail ($23.00 USD) and the My Cabbages! Makeup Sponge ($7.00 USD), which every makeup loving fan of Avatar truly needs in their life.
Images via Lethal Cosmetics
Once I got past the queue I threw some items into my cart, before checking out as fast as I could. How could I not? I'm the proud owner of a pretty well established collection of Avatar: The Last Airbender-themed Loungefly bags and purses, so that should tell you everything you need to know here. Even if I rarely use the makeup, the packaging alone makes this something I want to add to my collection.
All of these items, including the entire set as a $291.65 USD bundle, are available for pre-order now with shipping expected to begin around July 17. If you’re wanting to get your hands on them, though, you’ll need to be patient and wait out the virtual waiting room.
There are countless LEGO sets available to purchase and, if you’re trying to keep to a certain budget, things can get a little complicated. With sets costing hundreds of dollars, it’s not always easy to find an affordable LEGO set to gift or hoard.
However, as a collector with a child who is also turning into something of a LEGO fan, I’ve had to get thrifty, and I’ve become pretty good at finding LEGO sets on the cheaper side. On this list, I’ve included something for all tastes and the best part? None of these sets sell for more than $50 USD.
Bonsai Tree
Price: $49.99 USD
Image via LEGO
The Bonsai TreeLEGO set allows you to create not just one tree, but two. Well, almost. You can build one trunk and then have the choice between greenery or Cherry Blossoms to complete the look. I love this set and have it in my bedroom, changing the leaves depending on the season.
Venomized Groot (Marvel)
Price: $49.99 USD
Image via LEGO
I can’t be the only person whose favorite character from the Marvel universe is Groot, and this set combines him with another favorite - Venom. You can build this set to be either half-venomized or completely venomized, allowing for some customization and variety if you decide to deconstruct and build the set again.
Dobby the House Elf (Harry Potter)
Price: $34.99 USD
Image via LEGO
One for the Harry Potter fans, Dobby the House Elf doesn’t come alone. You also get a LEGO version of Tom Riddle’s Diary from The Chamber of Secrets, complete with soggy sock, and the cake which results in bars being put on Harry’s window. Dobby’s giant green eyes and happy smile are just too cute.
Everyone is Awesome
Price: $34.99 USD
Image via LEGO
The Everyone is Awesome set is definitely a display piece, with its rainbow backing and solid color minifigs. Designed by Matthew Aston, it’s a celebration of inclusivity, positivity and kindness. Even if it’s not designed to be played with, this one’s still a pretty cool set to have. Bonus points if you can avoid getting the song stuck in your head.
Dinosaur Fossils: T. Rex Skull (Jurassic World)
Price: $39.99 USD
Image via LEGO
Even if you’re not that much of a fan of the Jurassic World franchise (though I’m unsure how you couldn’t be, at least when it comes to the original movie), this set looks really nice sitting on a shelf. You get both the T. Rex footprint and fossilized skull to display, as well as a small plaque relaying details about real-life T. Rex.
Isabelle’s House Visit (Animal Crossing)
Price: $39.99 USD
Image via LEGO
Part of the fairly recent inclusion of Animal Crossing as a LEGO collection, Isabelle’s House Visit includes not only the house and surrounding greenery, but also a floating present and two minifigs - Isabelle and Fauna - which complete the scene. The set has only 389 pieces, so it's one children can help with and enjoy dismantling just to put it back together again.
Orchid
Price: $49.99 USD
Image via LEGO
My fiancé purchased the Orchid set for me as a gift and we built it together, so I may be a little biased here, but I cannot overstate how good value this set is. It’s actually pretty big, standing at 15 inches tall, so it’s replaced the real plant on my dining table. I can attest that, as someone who is terrible at keeping houseplants alive, LEGO flowers are an excellent alternative!
Escape from the Lost Tomb (Indiana Jones)
Price: $39.99 USD
Image via LEGO
If you’re a fan of the Indiana Jones franchise, or Egyptian iconology, or just LEGO in general and hankering to build something, the Escape from the Lost Tomb set is good value for money. It has 600 pieces and, when built, has interactive parts which make it good for both kids and adults.
Spider Tank (Star Wars)
Price: $49.99 USD
Image via LEGO
This mechanical spider from the Mandalorian comes with three minifigs: The Mandalorian himself, Grogu, and Bo-Katan Kryze. The Spider Tank itself has a shooting function, designed to fling tiny bits of LEGO across the living room for you to find hours later once the kids are in bed, so I’d argue that this one should be kept out of small kids, lest your feet feel the force of the LEGO step.
The Sword Outpost (Minecraft)
Price: $44.99 USD
Image via LEGO
I have to admit, my first thought when the Minecraft collection of LEGO was announced was, “What took them so long?”. I mean, it’s a world built entirely from blocks so it just makes sense to make things from the game out of LEGO. Well, this is one of the sets now available from the Minecraft LEGO collection, including an oversized version of a Diamond Sword and multiple minifigs, like the adorably blocky pig.
If you’ve been waiting impatiently for the updated Final Fantasy XIV Dawntrail Benchmark, I’ve got good news for you. The new version finally has a release date of June 3, and we’ve also got new information about what to expect when it’s here.
While the release date for the updated Benchmark software has been up in the air for a while, we do at least have some evidence of the hard work put in to get Dawntrail looking as it should, and the June 3 release date means players still have plenty of time to make sure their setups can handle Dawntrail.
The further delay can be at least partly attributed to the fact that routine building inspections at the development offices will result in 'full power outages' on June 1 and 2, meaning that any issues that arose during an earlier release would be left two days without attention. I wouldn't want to be that building inspector.
Image via Square Enix
The biggest change in the updated software is to the lighting conditions in Character Creation. Previously, the blue aetherical background threw a lot of blue light onto characters while in Character Creation, but the updated version of the Benchmark (as well as FFXIV itself when Dawntrail releases) will include an option to turn this blue light off, allowing players to better visualise skin tones when creating or modifying a character.
The vignette effect on the Character Creation screen has also been removed, due to the fact that it altered the perception of certain features, such as hair and skintone.
Image via Square Enix
Various changes have also been made to lighting throughout the Benchmark and will be implemented once Dawntrail releases, such as the shadows from hair hanging over a character's face, details in low-lighting conditions, and a fix for low resolution sections of hair.
Image via Square Enix
The Lodestone post goes on to repeat the updates coming to the Fantasia system, including the 60 minute window during which players can tweak their decisions, and goes on to state that Square Enix remains open to feedback regarding both the Benchmark and FFXIV itself.
“In from the Cold” is a level 83 MSQ quest in Final Fantasy XIV: Endwalker, which involves you playing not as yourself but as an Unknown Imperial who needs to get back to Camp Broken Glass within a specified time limit. It’s a challenging quest but also incredibly memorable.
To complete “In from the Cold”, you’ll need to make your way back to Camp Broken Glass very slowly, navigating the unfamiliar Garlean streets while trying to avoid as much conflict as possible. I’d recommend setting aside roughly 45 minutes to an hour to complete this quest.
You do not, by default, have any health regeneration during this quest, although you can rarely find potions that grant a five-minute regeneration buff. You can also find Med Kits, which will restore 35% of the Unknown Imperial’s maximum HP, but you can only carry a certain number of these at any one time. Both of these items can be found by interacting with the many clickable elements encountered during the quest.
Getting to know the Unknown Imperial
Screenshot by Destructoid
After you’re transported into the body of the Unknown Imperial, you’ll lose all of your regular abilities and have to quickly get acquainted with some new ones. For those who regularly play as a Tank Job, particularly Paladin, these will be familiar:
Fight or Flight:
Increases weapon damage by 25% for 25 seconds. Has a 60-second cooldown.
Fast Blade:
A sword weapon skill that executes an attack at 200 potency.
Riot Blade:
Deals damage to a single target with 170 potency, increasing to 300 potency when used after Fast Blade.
Rage of Halone:
Paladin Job skill which delivers an attack with 100 potency, increasing to 330 potency when used after Riot Blade.
Rampart:
Reduces incoming damage by 10% for 20 seconds. Has a 90-second cooldown.
Surviving your first enemy encounter
Screenshot by Destructoid
To begin with, you’ll only have a time limit of 25 minutes to reach Camp Broken Glass, although this will change as you progress through the quest. While you should avoid as much conflict as you can during this quest, some enemies need to be fought, and the first one is just ahead and to the East.
The most challenging part of this first fight is the fact that you don’t regenerate health, so the biggest piece of advice I can give is to avoid any telegraphed attacks and make sure you use Fight or Flight and Rampart whenever they’re available.
Once you’ve defeated this soldier, interact with his corpse to find a Med Kit and use it to restore some of the health you lost during the fight, then interact with it again to pay your respects.
After this encounter, you’ll be warned that in order to survive, you’ll need to avoid any unwanted attention. With this in mind, you now need to find a way out of the first area you find yourself in.
Get the Magitek Reaper in working order
Screenshot by Destructoid
Head South and interact with the Immobilized Magitek Reaper (X:23.6, Y:16.9). Doing this will allow you to progress by unlocking the next two things you need to do. While you’re in the area, make sure to interact with the Wrecked Magitek Reaper (X:25.4, Y:16.5) to loot a Med Kit.
Next, head to one of the buildings to the West of the Immobilized Magitek Reaper and interact with him. He’ll give you the identification key required to use the Immobilized Magitek Reaper, but you’ll need some fuel if you’re hoping to get it working again.
To find the fuel, in the form of a Ceruleum Tank, head to the East and find the Fuel-concealing Wreckage (X:27.4, Y:13.4). Interacting with this wreckage will provide you with a Ceruleum Tank, but this poses a problem - you’ll enter into Transporting mode and, while carrying the Tank, you’ll be unable to use any of the Unknown Imperial’s abilities.
If you take any damage while Transporting the Tank, you will drop it and have to defeat the threat. Once you’ve done this, you’ll be able to pick it up again and continue onwards towards the Magitek Reaper. Interact with it while holding the Ceruleum Tank, and you’ll now have a fully operational Reaper.
Use the repaired Magitek Reaper to clear the way forwards
Screenshot by Destructoid
Now that you can use the Reaper to assist you in your journey back to Camp Broken Glass, you’ll have three new abilities to become familiar with, all of which do 5,000 damage each and are enough to one-shot each of the enemies you’ll encounter during the coming sequence:
Magitek Cannon
Ground-target AoE with a short cast time and no cooldown.
Diffractive Magitek Cannon
Line-attack AoE, which has a short cast time and a short cooldown.
High-power Magitek Cannon
A much larger AoE variation of Magitek Cannon, which has a short cooldown.
There will be multiple mobs of Magitek units which need to be defeated. Some of these will come in waves, meaning you’ll need to pay attention and adjust yourself accordingly:
Large mobs of units to the West, in front of the curtain of light blocking your way. Any attack is appropriate to take these out pretty efficiently.
Mobs of 5-7 Magitek Slasher units in the center of the area. Use Magitek Cannon to focus an attack to take them down.
Magitek Vanguards which spawn and use telegraphed abilities, which need to be avoided before taking out the Vanguards. The larger, High-power Magitek Cannon is perfect to defeat these.
Magitek Death Claws will slowly approach in a line. Use Diffractive Magitek Cannon to take out the line in one shot.
Once you’ve defeated all of the different waves of enemies, you’ll be able to dismount the Magitek Reaper and make your way past the now-disappeared curtain of light. Once you’re through, two Tempered Imperial Soldiers will appear, but these can be avoided pretty easily by simply walking behind them to avoid drawing attention to yourself.
Make your way South and then West, moving under the broken segments where a bridge used to be, to get to the next challenge.
Protect the Imperial Citizens
Screenshot by Destructoid
There’s a lot of local wildlife in the next area who are attacking some Imperial Citizens. You’ll need to defeat these creatures while continuing your journey North West. Thankfully, you’re unlikely to draw any aggro from these creatures as they’re pretty focused on their original targets, so you can take them out pretty easily.
The types of enemies you’ll need to defeat are:
Morozko
Ceruleum Zoblyn
Almasty
Eblan Bear
While you can fight these creatures in any order, I’d recommend taking out the bigger ones first, as they’re likely to do more damage to the people you’re trying to protect. You’ll also be helped by some other civilians.
After defeating the creatures and heading further North, you’ll encounter some more enemies. This time, you’ll have to defeat some Corrupted and Transformed Imperial Soldiers. The best method to do this is by focusing your attention on the Transformed Imperial Soldiers, because the civilians with you have entered a Magitek Reaper to take on the Corrupted Soldier.
At some point during this battle, the Corrupted Imperial will explode with a telegraphed AoE. You can avoid death by finding the safe spot behind the Magitek Reaper and sheltering there, but you won’t get out of this unscathed.
Drag yourself to safety
Screenshot by Destructoid
The blast from the Corrupted Soldier will render you unconscious for a short while, with the screen going black. Don’t worry, you haven’t failed, this was supposed to happen.
When you wake up, you’ll immediately be thrown into an Active Time Event. During this, you’ll need to quickly and repeatedly press any button you have at your disposal in order to remain conscious and drag yourself away from the battle. You start off going very slowly as you're weighed down with debuffs, but as these drop off you do pick up some speed. Thankfully, you don’t have to do this for the entire distance to Camp Broken Glass, just to the end of the street. This can take roughly ten seconds, so avoid hand cramps by alternating hands.
Once you’ve completed the Active Time Event, a cutscene will play and then you’ll wake up in your own body, free to talk to Alisaie in order to complete “In from the Cold”.
Whether you’re looking to level up in Final Fantasy XIV or hoping to get your hands on some exclusive items, you shouldn’t overlook Wondrous Tails. It can seem pretty confusing at first, but once you’re used to it, it’s a quick and easy thing to tick off your weekly checklist.
Wondrous Tails is a combination of incentive to run duties you might not have run for a while, and also a game of luck. For each successfully completed duty, you earn a stamp on a grid and if you’re lucky enough to get four stamps in a line, you get more worthwhile rewards. Completing nine duties guarantees you at least 50% of a level. That’s the TLDR; now let’s get into the details.
How to unlock Wondrous Tails in Final Fantasy XIV
Screenshot by Destructoid
Before you can unlock Wondrous Tails, you’ll need to have met a few requirements:
Have access to Idyllshire, which unlocks during the MSQ at level 58
Be at least level 60 in any Disciple of War or Magic Job
If you’ve met these requirements, head to Idyllshire and pick up the quest called “Keeping Up with the Aliapohs” from the Unctuous Adventurer (X:7.0, Y:5.9). It’s a pretty easy quest; all you need to do is introduce yourself to Khloe Aliapoh. She’s a young Mi’qote who wants to hear all about your adventures, providing you with a journal to complete each week.
Khloe can be found in the same booth as the Faux Commander, so while you’re here, you may as well unlock Faux Hollows while you’re here.
How to play Wondrous Tails in Final Fantasy XIV
Screenshot by Destructoid
Each week, after the weekly reset happens, you can head to Idyllshire and pick up a new journal from Khloe (X:5.7, Y:6.1), which will then be stored within the Key Items tab of your inventory. Inside, there are two pages. The left page is the list of duties you can complete to earn seals, and the right side is the grid where these seals will be placed.
You can either complete nine individual listed duties to earn your seals or use your Second Chances to re-run the same duty repeatedly. Each time you complete a listed duty, you’ll earn a seal which will be randomly placed on the grid on the right side page of the journal.
The very good news is that, as long as the duty is not from the current expansion, you can run any of the duties unsynced. This is especially useful for low level content, such as the level 50 Extreme Trials, allowing you to get seals very quickly. I won’t go into too much detail about the duties that can be included, but the duties always include the following to choose from:
Once you’ve completed nine duties, you’ll be able to hand your journal back into Khloe and claim your prizes and EXP. You have two weeks to complete the nine duties, and if you run out of time, you’ll have to pick up a fresh journal.
How to earn and use Second Chances for Wondrous Tails in Final Fantasy XIV
Screenshot by Destructoid
Once you’ve unlocked Wondrous Tails, you’ll start to earn Second Chances. These are earned every time you complete any duty within the game if one or more members of the party are new to the duty. You don’t need to currently possess a journal in order to earn second chances and you can have a maximum of nine Second Chances at any one time.
Second Chances can be used for two things:
Action
Points needed
What it does
Retry
1
Restores the status of a duty that has already been completed, allowing you to re-run it. Also removes one of the other duties.
Shuffle
2
When you have between 3 and 7 seals, you can use this to shuffle their positions on the grid.
If you’re looking to complete a journal quickly, using Retry will allow you to re-run relatively low-level content, such as the level 50 extreme trials. As you need to complete nine duties to complete a journal and you have nine Second Chances, you can run the same content nine times.
Shuffle should be used if you’re having remarkably bad luck, as it might offer a chance to get three lines, which means you get the most worthwhile rewards when handing a journal back to Khloe. However, as this costs two points, you may need to run multiple different duties as a result.
Wondrous Tails rewards in Final Fantasy XIV
Screenshot by Destructoid
Rewards for filling out a journal
If you’ve completed nine duties and collected nine seals, you can hand it back to Khloe to receive your rewards. What you get depends on where your seals fell, with rewards increasing in value depending on how many lines you manage to get.
No. of lines
Rewards
None(9 seals collected)
Guaranteed 50% of a level Select one of the following: - 1 Allagan Platinum Piece (10,000 Gil) - 500 Allagan Tomestones of Poetics - 1 Timeworn Ophiotauroskin Map
1
Guaranteed 50% of a level Select one of the following: - 1 MGP Gold Card (30,000 MGP) - 1 Khloe’s Bronze Certificate of Commendation - 300 weekly capped Tomestones (currently Comedy)
2
Guaranteed 50% of a level Select one of the following: - 2 MGP Platinum Cards (100,000 MGP total) - 1 Khloe’s Silver Certificate of Commendation - 1000 uncapped Tomestones (currently Causality)
3
Guaranteed 50% of a level Select one of the following: - 20 MGP Platinum Cards (1,000,000 MGP total) - 3 Khloe’s Silver Certificate of Commendation - 1 Khloe’s Gold Certificate of Commendation
Bronze Certificate of Commendation reward list
If you receive a Bronze Certificate of Commendation, you can talk to Khloe again and exchange it for prizes. Bronze Certificates can get you a selection of Magicked Prisms and various Cracked Clusters/Crystals, as well as the following minions. These rewards cost one Bronze Certificate each:
Dress-Up Thancred
Dress-up Alisaie
Wind-up Estinien
Wind-up Khloe
Wind-up Hien
Wind -up Zhloe
Silver Certificate of Commendation reward list
If you get at least two lines, you’ll get yourself some Silver Certificates of Commendation. These can be exchanged for the following items:
Item
Silver Certificates needed
Ornate Rinascita body gear pieces
2
Tanamo Headband
2
Spriggan Cap
2
Faux Commander Earring
2
Corgi Scarf
2
Cait Sith Neck Ribbon
2
Paissa Ring
2
Wondrous Whimsy Framer’s Kit
2
Stuffed Khloe
1
Wind-up Omega-M
1
Wind-up Omega-F
1
Brave New Urianger
1
Cracked Clusters/Crystals (various)
1
Gold Certificate of Commendation reward list
If you get lucky and get your hands on a Gold Certificate of Commendation, you’ll be able to exchange it for the most sought-after and most worthwhile rewards. These rewards are not only sought after, but worth a lot when sold on the Marketboard. Each of these rewards only requires one Gold Certificate:
Both Summoners and Scholars in Final Fantasy XIV are able to summon a pet to their side, which helps them in battle and supports them in times of need. You can summon them from early on, but if you want to change the appearance, you’ll need to be at least level 50.
If you’re playing as Summoner or Scholar, you’ll have either a Carbuncle or Eos at your side while exploring Eorzea. While the original is nice, there are options that allow you to customize the appearance of your pet.
Before you ask, no, you can’t have a white Carbuncle whether you’re playing as a Summoner or Scholar, even though we’ve seen at least one in Final Fantasy XIV previously. Alphinaud, the lucky duck, has a Moonstone Carbuncle that he claims to be the final result of his research. Unfortunately, he hasn’t passed on his knowledge, so we’re unable to follow suit with our own white pet.
How to change the appearance of your pet in Final Fantasy XIV
Screenshot by Destructoid
Before you can even begin to think about changing your pet’s appearance, you’ll need to reach level 50 as either a Summoner or a Scholar. Once you’ve done this, head to Limsa Lominsa Lower Decks and speak to Thubyrgeim (X:4.7, Y:11.4) in the Arcanist’s Guild while equipped as a Summoner. Pick up the quest called “An Egi by Any Other Name” and complete the simple steps.
Once you’ve done this, you’ll be able to freely change the way your pet appears to yourself and everyone around you. It’s worth noting that changing the appearance of your pet is purely cosmetic and has no effect on the way it acts during battle.
The command you’re going to want to memorize is as follows:
“ /egiglamour “egi name” “glamour” ”
Now, I’m going to take a second here to explain what on earth an ‘Egi’ is. ‘Egi’ is a suffix meaning ‘essense of’. Essentially, your pet is the ‘Egi’, whether you’re a Scholar with Eos at your side or a Summoner with a Carbuncle. Either way, that’s your ‘Egi’. Now that you know that, hopefully, this makes more sense.
Anyway, the “egi name” section of this input will differ depending on if you’re playing as a Summoner or a Scholar. For Summoners, this will need to be changed to “carbuncle” while for Scholars, this will need to be changed to “eos”.
The “glamour” section of the input is the most important part, and you have a few options regardless of which Job you’re playing, as well as some that are unique to each Job. Here are all of the things that can replace “glamour” in this input:
Change “glamour” to
Changes appearance to
“Emerald Carbuncle”
Blue colored Carbuncle
“Topaz Carbuncle”
Yellow colored Carbuncle
“Ruby Carbuncle”
Red colored Carbuncle
“Titan-egi”
Small floating Titan (Summoner only)
“Garuda-egi”
Small floating Garuda (Summoner only)
“Ifrit-egi”
Small floating Ifrit (Summoner only)
“Selene”
Replaces Eos with Selene (Scholar only)
So, with all this information, here’s a couple of examples to hopefully make things more clear:
If you’re a Summoner who wants to replace the default blue Carbuncle with a small version of Garuda who follows you everywhere, you’d input the following into the chat box:
“ /egiglamour “carbuncle” “garuda-egi” ”
Or if you’re a Scholar who wants to change Eos into a Ruby Carbuncle capable of healing you at all times, you’d input:
“ /egiglamour “eos” “ruby carbuncle” ”
If you’ve already got your pet summoned when you type in this input, you’ll need to summon them again before the changes will appear.
Here are all of the different appearances in picture format:
Screenshots by Destructoid
How to remove a glamour from a pet in Final Fantasy XIV
If you’re not happy with your choice to change the appearance of your pet, say you want Eos back at your side while playing as Scholar rather than the Ruby Carbuncle, you can easily remove the glamour by inputting the first part of the glamouring input while leaving out the second part:
“ /egiglamour “eos” ”
This will restore your pet back to its default appearance, so a Emerald Carbuncle for Summoners and Eos for Scholars.
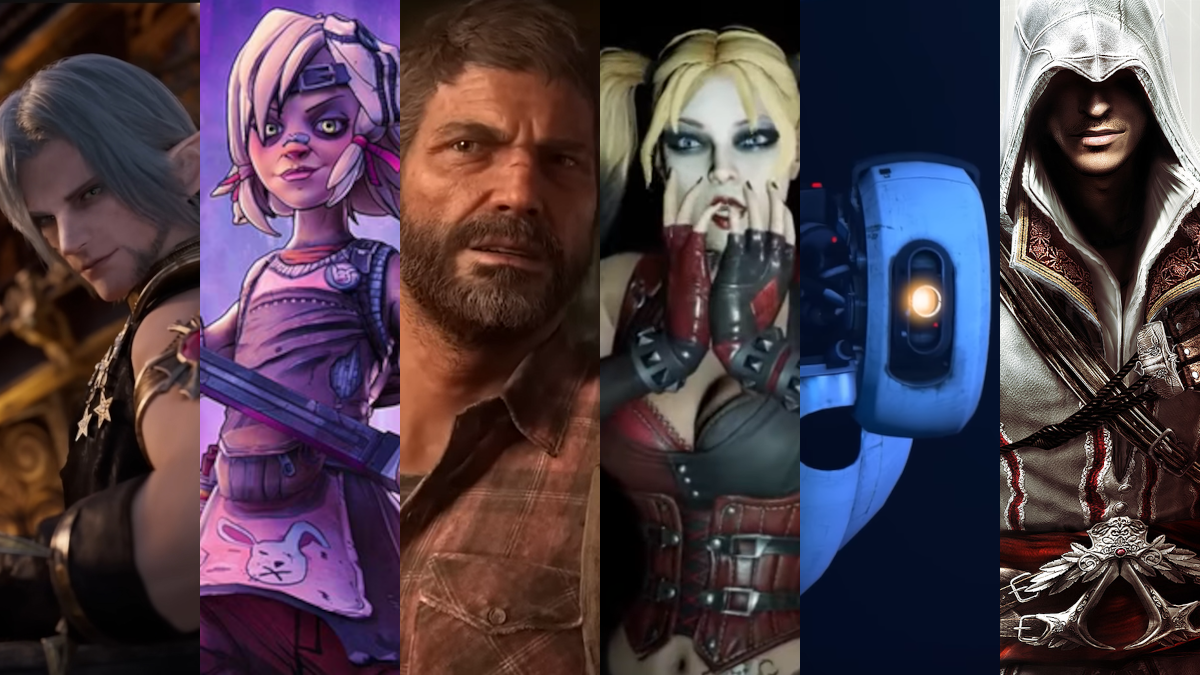
When it comes to video games, there are a lot of memorable characters. Outside of their design or role within a game, what makes these characters memorable is their voice, and every one of these comes as a result of actors spending hours in a recording booth.
There are a lot of voice actors out there, but some are more prolific or memorable than others. Their voices resonate in our heads as part of the characters we come to love while playing, but who’s behind these voices and where else have they appeared?
Joel Miller (The Last of Us) - Troy Baker
Image via Naughty Dog
Troy Baker might be one of the most well-known voices in video games. He’s not only the voice of Joel in The Last of Us but also Higgs Monaghan in Death Stranding, John Jones in Fortnite, The Joker in Batman: Arkham Origins, and the voice of Snow in multiple Final Fantasy titles, including Final Fantasy XIII.
Harley Quinn (Arkham City) - Tara Strong
Image via Rocksteady Studios
Tara Strong is a voice that’s iconic for multiple generations. To me, she’s Timmy from Fairly Odd Parents. To my daughter, she’s Princess Twilight Sparkle from the My Little Pony franchise. In video games, Tara has played not only Harley Quinn in multiple titles, but you can also hear her voice in Rage, and she’s the voice of Rikku in Kingdom Hearts II.
Snake (Metal Gear Solid) - David Hayter
Image via Konami
While David Hayter is perhaps most well known for his role as Snake in the Metal Gear Solid franchise and outside of it in other titles, he’s also appeared as the Winter Soldier in Marvel Heroes, a Jedi Knight in Star Wars: The Old Republic, and has multiple voice roles in the Ghost in the Shell game, released in 1997.
Mario (Multiple) - Charles Martinet
Image via Nintendo
I can’t in all good conscience write this list without including Charles Martinet. His voice simply is Mario to anyone who has ever played a single game of the franchise. However, Mario isn’t Charles’ only voice role in the world of video games. He’s appeared as Orvus in Ratchet & Clank Future: A Crack in Time, Vigoro in Skies of Arcadia, and, perhaps surprisingly, The Cat in the Hat in a few titles aimed at kids, such as Dr. Seuss Toddler.
Asterion (Baldur’s Gate III) - Neil Newbon
Image via Larian Studios
If TikTok is to be believed, Neil Newbon is the voice of everybody’s favorite Dom. However, before he was the voice of Asterion, Neil appeared in the Resident Evil games as Karl Heisenberg in Resident Evil Village and Nicholai in Resident Evil Resistance. He also played two roles in Detroit: Become Human, Elijah Kamski and Gavin Reed.
Ezio Auditore (Assassin's Creed II Trilogy) - Roger Craig Smith
Image via Ubisoft
Roger Crag Smith, I’m not ashamed to say, played a pivotal role in the formation of my love for gaming. I was, and remain to this day, obsessed with Assassin’s Creed II and will always consider it the best of the Assassin’s Creed titles. However, Roger Craig Smith has appeared in many more video games. He’s played Kale Vandelay and SEB-AAA in Hi-Fi RUSH, Sonic the Hedgehog in multiple titles and Mirage in Apex Legends. Most recently, you might recognize his voice as Mission Control in Helldivers 2.
Tiny Tina (Borderlands) - Ashly Burch
Image via Gearbox
Although most recognizable for her voice as Tiny Tina in the Borderlands games, Ashley Burch has played a lot of memorable characters in other titles. She’s the voice of Aloy in Horizon Zero Dawn, Nebula in Guardians of the Galaxy: The Telltale Series, Mel in The Last of Us Part II, and also provided the voice of Chloe Price in both Life is Strange games.
Urianger (Final Fantasy XIV) - Timothy Watson
Image via Square Enix
Aside from gracing the world with the purely Shakespearean presence that is Urianger Augurelt in Final Fantasy XIV, Timothy Watson has also appeared in Assassin’s Creed Valhalla as King Burgred, has multiple voice roles in Dragon Quest XI: Echoes of an Elusive Age, and played Mumkhar in Xenoblade Chronicles.
GLaDOS (Portal) - Ellen McClain
Image via Valve
The voice of everybody’s favorite psychopathic robot from the Portal games was provided by Ellen McClain, but it wasn’t the first time she provided an iconic robotic female voice in the world of video games. Ellen is also the voice behind the Combine Overwatch AI in Half-Life 2. She also appears in Cyberpunk 2077 as one of Delamain’s split personalities, though this one was modeled after GlaDOS.
Geralt of Rivia (The Witcher) - Doug Cockle
Image via Bandai Namco
Doug Cockle is the voice of Geralt in The Witcher game series as well as when Geralt appears in other titles like Soul Caliber VI. He’s also appeared as Bhaal in Baldur’s Gate III, Robert Nightingale in Alan Wake II, and provides multiple additional voices in Horizon Zero Dawn. Outside of gaming, Doug also played the role of Father John Maloney in 2001's Band of Brothers.
Anybody who has ever played even a small part of Final Fantasy XIV will know that it's a gargantuan game. With over 300 hours of MSQ alone, not including any side content, there's always something to do or discover. Worthwhile side quests, new people to meet, and even some secrets.
With almost 7,000 hours sunk into my own Eorzean adventure, I thought I'd found most of the secrets in the world. I labored under the illusion that I'd found all of the secret locations, interesting characters, and fun quirks of the world. However, one user on Reddit has proven me wrong, and I am now humbled. I'm also wondering what else might have escaped my attention, but that's another story.
According to this Reddit post, there are buildings in Kholusia that can only be accessed by those who play FFXIV as Lalafells.
Now, I've dabbled in playing as a Lalafell. I have an alt character who has, in the past, battled through A Realm Reborn in her tiny little shoes. However, I never made it to Heavensward on that character, let alone Shadowbringers, so I could be forgiven for not knowing about this secret, right? Wrong.
Screenshot by Destructoid
If you approach these buildings as any other race, something I was fairly confident I must have done at some point in the past, then a written prompt appears very blatantly on the screen saying, “This area can only be accessed by Lalafells.” How could I have missed that? How many secrets am I missing because I haven't tried running up to random small doors?
The main point of this Reddit post by u/DrForester wasn't to draw attention to the secret itself, though many in the comments were as dumbfounded by the revelation as I was. It was to highlight a use for the upcoming changes to Fantasia and the new 60-minute window of opportunity it provides. I mean, think about it.
Everyone is about to get a free phial of Fantasia, which will give us 60 minutes to transform into a Lalafell, head to Tomra, and investigate what we've been missing all this time (spoiler: according to this video, we're not missing much) before heading back into Character Creation to turn back into our usual selves. Honestly, it's a genius idea, when you think about it.
Image by Destructoid
I have to ask, though… Why do only Lalafells get a secret, exclusive area just for them to enter? Is there a secret Miqo'te meeting room I don't know about? Or maybe a Hrothgar headquarters that never gets spoken about? If not, perhaps there should be. Now, if you'll excuse me, I have random buildings to try and enter.
It’s true to say that, throughout your adventure across Eorzea, you’ll meet a lot of memorable characters in Final Fantasy XIV. Some of them leave more of a mark than others, but that’s not to say that each character isn’t meaningful in their own right.
I have to admit, narrowing this list down to just 10 characters was tough. Even when I thought I’d reached a final list, someone else would pop into my mind, and I found myself second-guessing my choices a lot. However, after a lot of soul-searching, I’ve managed to come up with a Final Fantasy XIV top 10 that represents some of my favorite moments, arcs, and themes from over a decade's worth of storytelling.
10. Gigi
Screenshot by Destructoid
Having discovered a Mammet with no memories in the snows of Coerthas, Hildibrand names him Gigi and promises to help restore what he's lost. He later goes on to adopt Gigi as a ward, at the suggestion of Edmont de Fortemps, to protect him from those who would do him harm. Essentially, Hildibrand Manderville has a Mammet son.
But not for long, after journeying out on an adventure to locate his Grandfather, Godbert, the Mammet gets stuck in the snow and freezes, only to be found by Godbert and turned into a Roegadyn temporarily. It’s just long enough to almost squeeze his father, Hildibrand, to death, though.
Honestly, Gigi makes this list because no other part of the Hildibrand storyline has made me laugh harder or warmed my heart more. This little Mammet, familiar to anyone who has played Final Fantasy IX, leaves his mark on your heart as well as one of the walls in Idyllshire.
9. Dulia-Chai Mewlah
Screenshot by Destructoid
Dulia-Chai is the Miqote mother figure we all need in our lives. After Alphinaud finally gains access to Eulmore under the guise of being there to paint a portrait for her and her husband, Chai-Nuzz, he’s all but adopted by the woman who pours love into their relationship.
Without missing a beat, she encourages Alphinaud with his painting, and the two bond, leading to a very tearful farewell when it’s time for Alphinaud to leave Eulmore. Dulia-Chai is also the face of progress in Eulmore after Vauthry's defeat, despite knowing they'd been complicit in allowing him to wreak havoc.
She also has a very motherly line which everyone needs to hear from time to time:
“No matter where you are, remember that there are people here who are praying for your health and happiness”.
8. Alpha
Screenshot by Destructoid
Originally created by Omega to battle strong foes, Alpha failed to live up to Omega’s expectations. The otherworldly weapon wiped Alpha's memories and used him to draw mortals into the Interdimensional Rift. Alpha inadvertently draws the WoL and the Garlond Ironworks team into the Rift, where Omega is hoping to observe them fighting powerful enemies.
Upon coming to understand his true purpose and being dismissed by Omega, Alpha doesn’t despair. He chooses to stay at the side of the Warrior of Light, helping in their battle against the rift's powerful enemies. As the raid series ends, Alpha is given the freedom to roam Eorzea, and occasionally, if you’re lucky, you can still see him on his adventures in the open world.
Alpha also helps during Endwalker when he visits Sharlayan to help finalize the Ragnarok, allowing the WoL to venture to the Edge of the Universe.
7. Raubahn Aldynn
Screenshot by Destructoid
Raubahn was arrested in Ul’dah on suspicion of espionage at the age of 25, after fleeing from the sudden Garlean invasion of his homelands. He was sentenced to fight in the Coliseum or “Bloodsands”, as it’s otherwise known. At some point, he was pardoned on a whim by Nanamo Ul Namo and won his freedom and the people’s respect.
After winning his freedom, he met a young Lalafell called Pipin, who had been sold into slavery to pay off his father's debts. Using his winnings to pay for the boy's emancipation from his family, Raubahn went on to adopt the Pipin and then, further down the line, purchased the Coliseum itself and earned himself a place on the Syndicate of Ul’dah.
Raubahn is unflinchingly loyal to Nanamo Ul Namo, even losing his left arm in his duty to protect her, and is solely responsible for reorganising Ul’dah’s military to form the Immortal Flames. If that doesn’t earn him a place on this list then I don’t know what does. He’s just an all-round good guy if you ask me.
6. Feo Ul
Screenshot by Destructoid
I honestly never thought I’d be able to say that a fairy would be among my favorite characters in a Final Fantasy game, but this is where I’ve ended up.
Feo Ul is the first Fae we meet during our time on The First and is originally intended to help us forge a connection with The Source in order to access retainers and convey messages. However, you soon come to realise that Feo Ul is incredibly possessive of the WoL, calling you their “precious sapling”.
Eventually, Feo Ul willingly takes the title of King of the Faeries in order to protect the WoL from having to do it, stating that they will always be able to help the WoL in times of great need. During the final battle with Vauthry, Feo Ul comes to the rescue of the Scions, allowing them to forge ahead and finish the fight.
5. Counselingway
Screenshot by Destructoid
Having given into despair when her main purpose in life is stripped away from her, Counselingway is pretty hard to reach at first. She’s depressed, longing for purpose, and unsure what she should do with her life. Then, Livingway, Dreamingway and the rest of the Loporrit’s set up a radio station to help her communicate with the people or Etheirys, the very people they were created to protect.
I’m sure I’m not alone in saying that Counselingway is, in some part, very familiar to all of us. We can all feel hopeless, lost, and unsure what to do with ourselves sometimes. But despite being hard to reach, she comes out of her shell and finds a love for something she never dreamed she’d be able to do.
Counselingway offers lessons in friendship, perseverance, and never giving up. I love her story and I’m proud of her for how far she’s come.
4. Emet-Selch
Screenshot by Destructoid
Emet-Selch has what could be the most gut-wrenching arc in Final Fantasy XIV. He’s the Founder and first Emperor of the Garlean Empire, which he admits was created purely to invoke chaos and bring about another Calamity, he’s at least partly responsible for the summoning of Zodiark that required the aether of more than half of the Ascians to complete, and he’s boomeranged back and forth about whether the Scion’s are worthy of his allegiance.
However, despite all of this, Emet-Selch has an undeniable longing to do something good, lurking deep down from the person he was before. He retrieves Y’shtola after she uses Flow to escape in the Ronkan Temple, he rescues us from the Void simply by snapping his fingers, and at the very end of the main Endwalker story, after the final lonely ascension, he’s there beside us to lend us his strength.
3. Tataru Taru
Screenshot by Destructoid
There are very few characters in Final Fantasy XIV who deserve their ending (so far) more than Tataru Taru. While the rest of the Scions are off defending the world and experiencing calamities, Tataru has consistently held down the fort from the very beginning. While everyone else was on The First, she continued her duties at The Rising Stones, never has a bad word to say about anybody and, perhaps most importantly, she’s always helping us to expand our wardrobe.
During Endwalker, Tataru has finally been able to live out her dream and opened up her own clothing boutique, offering her wares far and wide. She has organised provisions for countless important battles and if the WoL is ever uncertain about which direction they should head in, Tataru is always there to offer friendly advice and a new outfit.
On top of all this, Tataru is responsible for us having our very own Island Sanctuary. I’m not really a fan of Island Sanctuary as a whole, but even I have to admit that Tataru has one hell of a business head on her small Lalafell shoulders. Now if only she could inspire the Mammets to be a little more helpful, I’d be grateful.
2. G’raha Tia
Screenshot by Destructoid
Hard working, unflinchingly loyal, and by our side no matter what happens, G’raha is the best friend we all need. This man has ‘died’ or sacrificed himself for the WoL more times than I care to remember, each time having made the WoL promise to continue the adventure and fight ever onwards.
G’raha partially fuses himself with the Crystal Tower to prolong his life, enabling him to be the guide he was destined to be as The First faces peril from the Flood of Light. Even after the WoL has helped to fend off the threat, G’raha becomes a member of the Scions and is there, regardless of circumstance, to help guide the way.
Above everything else, G’raha provides the most hard hitting quote from anyone in Final Fantasy XIV, at least in my opinion:
“Yours is a long road, my friend, and it stretches on to places beyond imagining. With your every step, these grand adventures shall grow more distant and faint. And there may come a day when you forget the faces and voices of those you have met along the way. On that day, I bid you remember this... That no matter how far your journey may take you, you stand where you stand by virtue of the road you walked to get there. For in times of hardship, when you fear you cannot go on... The joy you have known, the pain you have felt, the prayers you have whispered and answered—they shall ever be your strength and your comfort. This I hope—I believe, here at memory's end.”
1. Ardbert Hylfyst
Screenshot by Destructoid
Even though we first meet Ardbert during Heavensward, he doesn’t come into his own until Shadowbringers. The WoL is the only person who can hear Ardbert upon arriving on The First, and he quickly becomes the WoLs comfort in times of pain and hardship. In the end, Ardbert and the WoL are revealed to be two halves of one sundered soul - soulmates, if you will.
He’s not the most sunshine-and-roses type of guy when we first meet him, but he slowly regains his sense of hope after shadowing us through the story of Shadowbringers. Towards the end of Shadowbringers, Ardbert merges his soul with the WoL in order to contain the Light. At the end of the main Endwalker story arc, his is the first and last voice you hear upon ascending the final hill alone.
“If you need a push, I’ll be right there behind you … Let’s finish this.” I get goosebumps just thinking about it.
I’ve played through Shadowbringers multiple times, as I have the rest of Final Fantasy XIV, and Ardbert’s story is the one that’s guaranteed to reduce me to an ugly crying mess very quickly. It’s the story that I connected with the most and stayed with me most consistently, so that’s why he’s always going to be my favorite character.
The first two episodes of Doctor Who season 14, with Ncuti Gatwa as the Doctor, were released on May 12, and rather than the Doctor himself, everyone is talking about one character—Maestro. They're one hell of a villain, but where have you seen that face before?
It seems that no matter where you look currently, you simply can’t avoid the face of Maestro. The musically talented villain is the undeniable star of The Devil’s Chord, the most recent episode of this season of Doctor Who so far, and they’re actually a pretty familiar face to some people.
In the show, Maestro is hell-bent on their mission to rid the world of music and keep it for themselves, but in real life, the actor who plays them is as opposed to this idea as it gets.
Screenshot via Disney Plus
Jinkx Monsoon is an American drag queen, singer, songwriter, actress and comedian. It’s safe to say that she’s got a serious amount of talent and is noted for her ability to perform off-the-cuff impersonations of celebrities. To date, she has released two studio albums (The Inevitable Album in 2014 and The Ginger Snapped in 2018), so if anyone was perfect for the role of Maestro, it would be her.
However, familiarity with Jinkx is more likely to come from her roles on television. While she doesn’t have an extensive acting career behind her, she was one of the featured drag queens on season five of Ru Paul’s Drag Race back in 2013, winning the season. She came back to the show in 2022, when she took part in season seven of Ru Paul’s Drag Race All Stars, going on to win that too and earning the title “The Queen of Queens”.
Screenshot via Jinkx Monsoon on YouTube
She did have some acting under her belt before becoming the star of The Devil’s Chord. She voice acted in an episode of Steven Universe, playing the main antagonist of the episode “ Lars of the Stars”, Emerald. She was also in an episode of Blue Bloods, playing Tallulah, as well as providing her voice as Normulon and Lemongrab in the gender-swapping Adventure Time: Fionna and Cake.
If you’re looking to make a little bit of money on the Marketboard or simply want some more storage space to avoid your inventory filling up in Final Fantasy XIV, you’re definitely going to need a retainer or multiple. Here’s how to get them, including how extra retainers work.
Hiring a Retainer in FFXIV doesn’t only bring with it access to the Marketboard or extra storage - hiring a Retainer and training them up through ventures will allow them to head out on their own adventures, returning with materials or items which can then be used or sold. Don’t worry if this all sounds a little daunting, I can help you figure it out.
How to hire a Retainer in Final Fantasy XIV
Screenshot by Destructoid
Before you can hire a retainer in FFXIV, you’ll need to have completed the level 17 MSQ quest “The Scions of the Seventh Dawn.” Then you’ll be able to pick up the side quest, "An Ill-Conceived Venture", which unlocks Retainers. You must do this side quest in the same city state in which you started (Limsa Lominsa, Gridania or Ul’dah).
The quest is always given by an NPC called Troubled Adventurer and can be found in the following location in each state:
New Gridania (X:11.8, Y:12.2)
Limsa Lominsa Lower Decks (X:9.0, Y:11.2)
Ul’dah - Steps of Nald (X:9.3, Y:8.7)
Once you’ve completed this quest, you’re free to hire a Retainer by talking to a Retainer Vocate in one of the major city states:
Parnell in Old Gridania (X:14.6, Y:9.3)
Chachabi in Ul’dah - Steps of Thal (X:13.3, Y:9.7)
Frydwyb in Limsa Lominsa Lower Decks (X:8.3, Y:11.7)
Prunilla in The Pillars, Ishgard (X:8.1, Y:10.9)
Kazashi in Kugane (X:11.6, Y:12.1)
Misfrith in The Crystarium (X:10.4, Y:13.1)
Tanine in Old Sharlayan (X:12.6, Y:10.8)
You can only hire two Retainers by default, but there are ways to add more retainers if you’re in need of extra space.
How to get extra Retainers in Final Fantasy XIV
If you’re wanting more than two retainers, you can do one of two things:
Download the FFXIV Companion App (on iOS or Android) and upgrade to premium, which provides one extra Retainer
Purchase extra Retainers (up to seven) via the MogStation
Retainers purchased through the MogStation cost $2 USD per month per retainer.
How to use a Retainer in Final Fantasy XIV
Screenshot by Destructoid
Once you’ve hired a retainer, you’ll be asked to design them using the Character Creation menu that you used to create your own character, then give them a name. Once this is done, you can access the Retainer service by interacting with any Summoning Bell.
Once you do this, you’ll have the following options:
Option
What it means
Entrust or withdraw items
Opens the retainers inventory, allowing you to transfer items from your own inventory for storage. Total storage of 175 items or stacks.
Entrust or withdraw Gil
Transfer Gil from your own pockets to the Retainer. Any Gil earned from items sold through a Retainer will automatically go here.
Sell items from your inventory
Opens your inventory, allowing you to sell items on the Marketboard.
Sell items from your Retainer’s inventory
Opened the Retainer’s inventory, allowing you to sell items on the Marketboard.
View sale history
Allows you to see a record of all recent items you’ve sold on the Marketboard.
Assign class
Assign a class to your Retainer, allowing them to go on different types of venture. You must have a level 1 weapon or tool in your inventory to assign a class to a Retainer.
Assign venture
Send your Retainer out on their own adventure. They will come back with items.
View report
Find out what happened on a venture which has concluded.
View retainer attributes and gear
Displays a character screen for the Retainer, allowing you to equip gear or weapons.
Reset Retainer class
Removes a Retainer’s class, allowing you to assign a different one.
Assign Retainer Job
Can only be used when a copy of Modern Vocation has been purchased from a Retainer Vocate for 40 Ventures. Equips Retainer with a Soul Stone.
Retainer ventures in Final Fantasy XIV
Screenshot by Destructoid
In order to send your Retainer out on ventures, you’ll need to stock up on some of the currency required, which is also called Ventures. These can be obtained in a variety of ways, such as with Wolf Marks, GC Seals or in return for certain types of Tribal Quest currency.
Depending on the class or Job applied to the Retainer, the options given when assigning a venture may vary, but in general, there are three different types of venture to which a Retainer can be assigned:
Job specific (Hunting, Mining, Botany or Fishing)
Field Exploration (Usually takes 18 hours, costs 2 Ventures)
Quick exploration (after the Retainer reaches level 10, takes one hour, costs 2 Ventures)
While Field Exploration ventures take a lot of time to complete, they’re excellent in terms of helping your Retainer level up as they reward far more experience. However, Quick Exploration ventures allow you to gain more items, including gear, much more quickly.
If you’re a fan of cozy farming games like Stardew Valley, a new one has hit the scene with an adorable and strangely familiar art style, a historic setting, and a deadly twist — Echoes of the Plum Grove.
Echoes of the Plum Grove is a project created by Unwound Games and originally funded through backing on Kickstarter. The project reached its funding goal within 90 minutes of launching on the site, raising almost $30,000 USD in order to develop the game, which was released fully on Steam on April 29, with a price tag of $19.99 USD. It has gone on to have Very Positive reviews, though not without a few complaints, which I’ll get to later.
The art style of Plum Grove is a delightful reminder of Paper Mario, with 2D characters roaming around a 3D world containing 2D elements. It almost feels like a stage, with cardboard props that can be hidden behind or interacted with.
Screenshot by Destructoid
Echoes of the Plum Grove is set in what I can only assume is colonial New England, judging by the fashion and the method by which you end up there in the first place. After a disastrous voyage in which everyone else perishes, your character washes up on the shores of Plum Grove, gains a farm and sets off to build relationships with locals, explore the world and progress the story.
As for the deadly twist, unlike other games of this type, the villagers around you age, get sick, and even die after you’ve grown close to them. It’s kind of heartbreaking to get to know your neighbors, build relationships and then watch them get Smallpox and die, but you do get some closure by being able to attend their funerals. You can also kill your neighbors with items such as Death Cake, but I’m not sure why you’d want to. There are also ghosts who roam the land.
If you don’t disable aging, your character will eventually die, so it’s a good job to head out in search of romance, marriage, and, eventually, a child. In fact, considering the fact that this is colonial New England and disease is rife, it might be a good idea to have a whole host of children because once you die, your story will continue through them. You can either experience pregnancy (as a male or female character, Plum Grove doesn’t want to strip that experience from anyone) or adopt children.
Screenshot by Destructoid
If you don’t want to face death during your playthrough, you have the ability to disable this (as well as disease) in the settings of the game, which is nice. Echoes of the Plum Grove also allows you to turn off the fishing minigame and disable things like hunger, energy and taxes. Yes, you have to pay taxes in Echoes of the Plum Grove.
As with other cozy farming games, such as Stardew Valley, Echoes of the Plum Grove has its own events calendar, including events such as a Bake Off and a fishing festival. Speaking of fishing, the minigame is actually vaguely fun, something which shocked me as a long-time fishing minigame hater. Upon hooking a fish, you just need to follow a path using your mouse until you catch up to the fish creating the path. Again, if you don’t want to do this, you can turn the minigame off in the settings and simply catch anything you hook, but where’s the fun in that?
Screenshot by Destructoid
There are some complaints that hold weight from players. There aren’t a lot of options when it comes to character creation, but once you’ve begun to play, you can visit the tailor's shop to expand your wardrobe. The tools are flimsy at best and repairing them is not only expensive but time-consuming. You can't repair them yourself, so your only option is the Blacksmith in town, who takes a whole in-game day to fix anything.
The biggest complaint that players have so far, myself included, is how grind-centricEchoes of the Plum Grove is. You don’t get an axe to begin with, though you can purchase one from the Blacksmith, so the only initial way to get wood is by shaking trees around the map, of which there aren’t many. Despite this, recipes call for a staggering amount of resources. The main story can also only be progressed with a rather large stockpile of wood, as well, so you’re going to have to make a choice between crafting and actually progressing.
Screenshot by Destructoid
With that said, there are a lot of things to enjoy about Echoes of the Plum Grove. The locals are interesting, especially the local hag who quests you with insulting 20 people. She’s my favorite. You can get married, have children and forge a lineage through them. You get to explore not only the living world but also a crypt filled with ghosts who want to pass on to the other side. If you’re in a cozy game lull and don’t mind a grind, Plum Grove is a good option.
Stardew Valley is filled with quests to complete and secrets to find, some of which unlock new areas to explore. One of these new areas, the Witch’s Swamp, not only unlocks new sights but also new features. Here’s how to unlock it.
Before you can trigger the quest that unlocks the Witch’s Swamp, you’ll need to have either completed the Community Center bundles or the Joja Warehouse tasks. Once you’ve done that, you’ll need to wait for a cutscene in the Mountains to play one night after you retire to bed.
How to complete Dark Talisman in Stardew Valley
Screenshot by Destructoid
After the Mountain cutscene, you’ll receive a letter from the Wizard in the mail. His ex-wife, also known as the Witch, has some magic ink in her house that needs to be retrieved. Unfortunately, you can’t just rock up to the Witch’s Hut and ask for it back - you need to find the Dark Talisman first, which will grant you access to the Swamp.
To complete the Dark Talisman, you’ll need to first talk to Krobus. He can unlock a door within the Sewers that leads to the Mutant Bug Lair. Head inside, and you’ll find the Dark Talisman after battling through, as the name suggests, some mutant bugs.
Once you’ve got the Dark Talisman, head north to the Railroad area and find the cave in the top right corner. You’ll be able to place the Talisman on the artifact blocking the entrance and proceed through the cave.
Make sure to take some Void Mayonnaise with you when you enter the Swamp. You’ll need to give it to the Witch’s Henchman, completing another quest called Goblin Problem and allowing you further into the Swamp. Head into the Witch’s Hut and you’ll find the magic ink on a table, which you can pick up and return to the Wizard to complete Dark Talisman.
What to do at the Witch’s Swamp in Stardew Valley
Screenshot by Destructoid
There are a few things that you can do once you’ve gained access to the Witch’s Swamp. There are a couple of fish there, Void Salmon and Catfish. Void Salmon don’t spawn anywhere else, and Catfish only appear on rainy days.
The main draw of the Witch’s Swamp, though, is the Witch’s Hut itself. Inside, you’ll find three different shrines, all of which are useful in a different way and need a specific offering to use:
Shrine
Effect
Required offering
Dark Shrine of Memory
Erases the memory of all past spouses (including Krobus), allowing you to build relationships with them again.
30,000 Gold
Dark Shrine of Selfishness
Turns any existing children into doves, permanently removing them from a playthrough
The first two proper episodes (discounting the Christmas special) of Doctor Who season 14, starring Ncuti Gatwa as the Doctor, have reached Disney Plus and BBC iPlayer, meaning that viewers are now able to dig deep and overanalyze everything for clues about what’s to come.
If there’s one thing that Whovians do really well, it’s looking beneath the surface to find foreshadowing. This week, there’s one thing that’s got a few fans talking—The One Who Waits. This as-yet-unknown character was mentioned during The Giggle, which aired back in December, but the moniker comes back up during this week's second released episode, The Devil’s Chord.
I’m going to hedge my bets and say that The One Who Waits is not a confirmation that Amy and Rory (the Doctor’s companions from the time of the Eleventh Doctor, portrayed by Matt Smith) are about to return. Yes, Rory was known as “the boy who waited”, which is a very similar moniker, but not quite the same.
Screenshot via Prime
Now that’s out of the way, there is a theory floating around Twitter and other corners of the internet about the identity of The One Who Waits. Buckle in because this one is a bit of a ride.
During The Devil’s Chord, during a discussion with Ruby on a London rooftop, the Doctor talks of his Granddaughter Susan, who he says is currently living with a previous version of himself on the other side of the city. He also admits to Ruby that he currently doesn’t know what became of Susan after the Genocide, which took the lives of all Time Lords except himself.
At the end of The Devil’s Chord, before we’re assaulted by a slightly out-of-place song and dance number, the Doctor breaks the fourth wall and winks at the camera after saying, “There’s always a twist at the end.” Still with me? Good.
Now, if you dig a little deeper into the casting of this series, you’ll find that there is actually an actress called Susan Twist in the cast, and this is where things start to get really interesting. Susan Twist has had a very short cameo appearance in every single one of Ncuti’s episodes so far, one of the 60th Anniversary Specials with David Tennant, and, according to the sneak peek clip that is available for the next episode, Boom, she’s in that one too.
Image by Destructoid
I’ve raked through all of the episodes so far and pinpointed her character in all of them:
Wild Blue Yonder
Twist plays Mrs Merridew, who speaks to Isaac Newton before he heads down to the apple tree
The Church on Ruby Road
She appears in the crowd at the pub where Ruby is playing the keyboard, saying, “give it some welly!” before asking for Gaudete, a Christmas carol from the 16th century, which would make sense if she was around at the time of Isaac Newton.
Space Babies
She plays Comms Officer Gina Scalzi, who appears on the monitor inside the room where Jocelyn is hiding
The Devil’s Chord
Twist appears as one of the tea ladies in EMI Studios, which would later become Abbey Road Studios. She says she wishes she could be “Margaret Lockwood”. What a woman, indeed.
According to the cast list for Boom, which is written by Steven Moffat, Twist will appear again, though her role is simply called “Ambulance”.
There are unconfirmed rumors that Twist will play a bigger part in the future of the series, taking the also unconfirmed role of Susan Triad. She will be the head of a company named Triad, which has already been name-dropped during the 60th anniversary special, The Giggle when Mel Bush is attempting to align the satellites. Remember, this is an unconfirmed rumor, but I'm counting nothing out of possibility.
So what’s the theory here? Well, we know that The One Who Waits has some connection to both the Toymaker and Maestro, considering the apparent relation between the two and the fact that they both issue a warning to the Doctor about The One Who Waits. It’s also been revealed, though in the Doctor Who audiobooks rather than the TV show, that the Toymaker has a sister who goes by the name of Hecuba.
Image by Destructoid
Hecuba, otherwise known as “The Queen of Time”, would be able to traverse through time in order to appear at any moment, which would explain why Twist’s characters never look as though they’ve aged, regardless of how many years in the past or future she appears. It would make sense, then, to assume that Hecuba, if that’s who this turns out to be, has been waiting a long time to confront the Doctor for whatever reason, likely in retaliation for what happened to her brother.
Whether or not this theory turns out to be true remains to be seen, but it’s definitely interesting to dive deep into Doctor Who and find the connections or even just speculate. There’s no telling what could happen in the coming episodes, with Russell T Davies (who is responsible for writing the vast majority of this season's episodes) well known for putting twists and turns in his writing.
During my time playing Final Fantasy XIV, I’ve overcome a lot of anxiety. Not just in the game but also outside of it, and certain things that I’ve experienced within Eorzea have transferred into real life.
Of course,, the story and characters stay with me; their words echo around my mind during times when I’m struggling. But things that I’ve managed to achieve during my game time have given me pause for thought in the real world as well. If I can overcome things that terrify me and push me in Eorzea, surely I can push myself in real life.
I’ve already talked about my experience overcoming tank anxiety in FFXIV before going on to be a Dark Knight main. That experience, in a strange way, taught me about taking life by the horns and doing things that push your boundaries. Healing, on the other hand, is something that I once found truly terrifying and had zero confidence doing.
Screenshot by Destructoid
Except now, all of my healer jobs are sitting at level 90, and I’m actually excited to increase them all to level 100 when Dawntrail drops at the end of June. I’m more than happy to jump into any content as a healer, though I might fumble my buttons to start with if it’s been a while. Getting to this point, though, was not easy.
I actually started playing Final Fantasy XIV as a healer. A Conjurer, to be precise. The trouble was, I had never played an MMO before and I had no idea that playing that job would place me in a party as the healer for everyone else involved. The green icon didn’t give me any clues, either. Like I said, I had no idea what I was doing. I didn’t even take the hint when I started to gain healing spells, simply thinking, “well, that might come in useful one day,” while going about my day using Stone and Aero to take down foes I encountered, like an idiot.
Screenshot by Destructoid
It wasn’t until I queued, on my own, for Sashtasha that I discovered the weight that I’d taken upon myself by choosing the Conjurer class. I didn’t know I was supposed to be healing, I didn’t know that was my role, but it quickly dawned on me when the party died and everyone blamed me. I’m not ashamed to admit that I dropped the dungeon and all but ran to the first city-state on the teleport list to pick up a new class, which ended up being Rogue.
And so it went on, I leveled Rogue and all of my other DPS classes, including ones which unlock later like Samurai and Dancer. My Conjurer remained at around level 19 for over a year, untouched and feared. Then, and if you’ve read my tank anxiety article, you’ll know what’s coming: my FC at the time got involved and pushed me to pick up Conjurer again. Thankfully, this was before the tanking experience, and they were much gentler with me than they went on to be with the whole Paglth’an debacle.
Screenshot by Destructoid
It started with FATEs, something that I could do without worrying too much about those around me. We ran up and down Western La Noscea, taking on every FATE we encountered, which not only gave me experience but also levels and new spells to go with them. I very slowly started to actually heal the people around me, though learning how to juggle DPS and healing was definitely a learning curve. Pretty soon, I was level 30 and able to go and pick up my Job Stone, turning myself into a White Mage.
By this point, the notion of healing wasn’t horrifically scary to me anymore, though I was far from good at it. But I still avoided it as much as I could. Eventually, I left that FC for one reason or another and set out on my own for a long time, not healing but also not fearful of it, until I saw someone with a specific weapon which I absolutely fell in love with — Canopus Lux.
Screenshot by Destructoid
This weapon is beautiful; there’s no denying that. Like the Amaro mount, which eventually drove me to tanking, this weapon was the driving force behind my finally overcoming the barrier that was keeping me from healing—my own lack of confidence.
And I did. I swallowed my pride, I picked up Astrologian, and I apologized to everyone I ended up with in a dungeon, telling them that they would likely die and they were welcome to kick me if they wanted to. I wasn’t griefing, I was just terrible at healing. Those first dungeons were hard, but I never got kicked. Like with my tanking journey, most people were very understanding, and some even gave incredibly helpful advice. Slowly, I gained confidence, but also skill.
Screenshot by Destructoid
Eventually, I started to crave the rush that healing gave me. I’m not saying that I enjoy having people's lives in my hands, but I enjoy being able to keep people alive and prolonging the battle long enough to win. It’s a thrill, and I’ve since learned that, like tanking, the different healing Jobs aren’t all that dissimilar to each other. Of course, each has its own nuances, but they follow the same pattern - if people are dying, you heal. If people are good, you do DPS.
With all that said, I’m never going to be a particularly good healer. I know what I’m doing, and I can keep people alive while doing some damage, but I still get confused between green and pink cards while playing Astrologian (I’m not looking forward to having to relearn the Job after its Dawntrail overhaul), I still accidentally spam Cure sometimes when playing White Mage and I’ll admit that I fall into the trap of over-reliance on Holy.
Screenshot by Destructoid
Sage is my strongest healer, and if I have to heal, it’s the Job I will always choose. If you asked me to play Astrologian or White Mage right now, I’d have to ask for 10 minutes with a training dummy to figure out what I was doing, and if you wanted me to play Scholar, I’d be clueless because I’ve always leveled it through Summoner. Like I said, I’m not a good ‘all-around’ healer, but if you want a Sage, I can do that for you.
I also introduced my fiancé to Sage, which is now his main Job alongside my Dark Knight. He, too, was terrified of healing, but thanks to my own experience overcoming that fear, I could help him overcome it, too. I’ve helped others beside him, as well, thanks to my Mentor status. Talking of which, I was playing as a healer when I finally gained enough Commendations to pick up the crown, which makes the role pretty special to me.
Screenshot by Destructoid
Now, how has all this helped me in the real world? Well, I’ve learned that while new things might be scary at first, there’s a lot of enjoyment that can be gained through learning how to do something. Gaining the confidence to try and ultimately do pretty well at something that absolutely terrified me in FFXIV showed me that learning something new doesn’t have to be something that I fear. I don’t need to shy away from something just because I don’t fully understand it. Figuring out how to do something isn’t just rewarding, but the experience of learning itself can be fun.
While my healing experience in FFXIV hasn’t caused me to go out and train to be a doctor in real life, it has given me a new perspective. I stopped shying away from bettering myself and took on training courses and new opportunities, including writing, which previously scared me to death.
Fear is natural, but it doesn’t have to define your actions, and you shouldn’t let it. What was it that Eleanor Roosevelt said? “Do one thing every day that scares you”. Your comfort zone may be cozy, but going beyond it is what helps us to grow.
If you watched the Final Fantasy XIV 80th Live Letter from the Producer, you will have seen some of the development team playing the FFXIV: Table Top RPG game. The game proved popular during first-wave pre-orders, but now you’ve another chance to get your hands on it.
If you missed out on wave one of pre-orders, don’t worry. Wave two of pre-orders is now open, and if you want to take your Eorzean journey to your dining room table, you’ve got another chance.
Costing $59.99, the FFXIV TTRPG Starter Kit comes complete with everything you could need to begin your journey with up to four friends, including:
Some pre-made character sheets (White Mage, Dragoon, Warrior and Black Mage)
Some empty character sheets ready to be filled in to your liking
Full rule book, suitable for beginners with everything you need to know
16 die in total, 6 D20 and 10 D6, complete with Meteor logo
Character tokens, ability markers and a full-color encounter map
Images via Square Enix
A number of other items have been released for pre-order alongside the TTRPG, including a variety of items that previously have only been seen at the Osaka pop-up store:
The 7-inch Vinyl Dawntrail single is also available for pre-order, as well as Dawntrail itself, if you’ve not secured your copy yet. If you want to get your hands on any of these goodies, head over to the Square Enix store.
If there’s one thing you’re always going to be in need of in Final Fantasy XIV, it’s Gil. It’s the main currency in Eorzea and whether you’re shopping for gear to increase your iLvl, glamour items, or minions, you’re going to need it and a lot of it.
It’s fair to say that some things, especially sought-after things like mounts and minions, are ludicrously expensive to buy. It’s also fair to say that crafting is, as it’s widely acknowledged, the best way to make piles of Gil very quickly.
I’ve wracked my brain, thought back to my early in-game experience and I’ve come up with some ways to make Gil without crafting in FFXIV. It’s worth remembering that none of these are likely to make you a Gillionaire, unless you get very lucky, and some of them are more effective than others. But hey, any money is good money, right?
Treasure Maps are good for making a quick buck
Screenshot by Destructoid
If you’re wanting to make a quick buck in FFXIV, one of the best ways to do it is by running Treasure Maps, especially high-level ones such as Kumbhiraskin and Ophiotauroskin Maps.
While you won’t always spawn a portal upon using a Map or get lucky in the dungeon itself, there’s always a chance that you’ll get a rare minion or sought-after material from a chest inside. They also give hefty sums of Gil as a reward on their own, as well, so they’re definitely worth exploring.
Before you can take part in the Treasure Hunt, you’ll need to complete the level 36 quest “Treasure and Tribulations”, which can be picked up by talking to H’loonh in Eastern La Noscea (X:21.1, Y:21.1).
Work towards your weekly challenges
Screenshot by Destructoid
After completing the level 15 quest “Rising to the Challenge” (head to Limsa Lominsa Upper Decks and talk to I’tolwann (X:11.4, Y:11.0) if you haven’t done this yet!), you’ll gain access to the Challenge Log.
This log is split into different categories, including Battle, Crafting & Gathering, and Levequests. While some challenges reward other currencies upon completion, such as Wolf Marks or MGP, most will provide you with a nice chunk of change (either 1,000 or 2,000 Gil) when completed.
The Challenge Log refreshes at the same time as the general weekly reset, 2 a.m. on a Tuesday, so make sure you get them completed before this happens or you’re missing out on free Gil.
Be the ‘adventurer in need’
Screenshot by Destructoid
When running daily roulettes, it’s always a good idea to check which type of player is classed as “in need”. If you queue for a Duty as this type of Job (Healer, Tank, or DPS), you’ll not only gain a significant boost of EXP, but also Gil as well.
You’ll only receive this boost if you queue for a duty with less than the required number of people in your party. If you are queueing with three friends for a Dungeon roulette, this buff won’t apply.
Levequests are repetitive, but they come with monetary rewards
Screenshot by Destructoid
I’m the first person to admit that doing Levequests is not my idea of a fun time, however, some of the higher level Levequests offer a comparatively huge amount of Gil when you consider how little effort is involved.
This is especially true for Large Scale Levequests, available in Foundation. Some of these Levequests offer a reward of more than 10,000 Gil per completion, so they’re definitely worth doing.
You get three Levequest Allowances every 24 hours of real time up to a maximum of 100 and what you do with them is up to you. I’d suggest using them if you have them, though, because otherwise, you’re just missing out on free Gil for very little effort.
Hoard and sell everything
Screenshot by Destructoid
Whether you’ve been grinding out dungeon runs, tackling FATEs in the overworld, or your retainers have returned from a venture with items in tow, almost everything can be sold for a profit in FFXIV. It’s unlikely that you’ll gain anything of significant value by any of these methods, though it does happen, but you will be able to amass a lot of items.
If you don’t want to mess around with the Marketboard, you can simply head to any vendor who sells items for Gil and select the “Buyback” tab in the pop-up window. Either click and drag items from your inventory into the vendor’s pop-up window, or right click the item in your inventory and click “sell”.
If you’re comfortable using the Marketboard, it can be a good place to sell stacks of items, especially high level items that you’ve gathered yourself. Even if you’re opposed to Crafting, you should definitely look into Gathering. It can be quite relaxing to zone out, listen to music, and pile up the materials in your inventory.
And if you’re up for a little bit of dodgy trading, keep an eye on item prices on different servers by utilizing tools such as Universalis. Items can often be purchased cheaply on other servers and sold for a profit in your home world. I know it feels scummy, but you’ve gotta do what you’ve gotta do, sometimes.
Make the most of your FC credits and GC seals
Screenshot by Destructoid
There are a couple of things that you can do with your FC and GC seals to transform the currency to Gil:
Stock up on GC seals by trading in usually untradeable dungeon gear and, as long as you’ve reached the rank of Captain, you’ll be able to buy Materiel Crates. These contain minions and mounts which can sometimes be pretty valuable.
Use your FC credits to purchase items from the OIC Quartermaster. These items can then be sold on the Martketboard for Gil. Miniature Aetherytes are a pretty safe bet, here as Estate owners need them in order to teleport to their house.
You can also purchase some materials which will be needed by Crafters, some of which can also be sold on the Marketboard.
Keep an eye on Moogle Treasure Trove events
Screenshot by Destructoid
Invariably, Moogle Treasure Trove events offer at least one popular item which can then be sold on the Marketboard for Gil. Usually, this is a minion or mount, so keep an eye on which are available in each event.
Take the Hunt for Genesis II, for instance, which begins on May 14. One of the rewards is the Ufiti Horn, which is selling for between 500,000 and 600,000 Gil at the time of writing. These are good items to purchase using Tomestones, set aside, and then sell at a later date when demand increases again.
Side quests might not make you rich, but at least it’s something
Screenshot by Destructoid
Let’s be honest, there are quite literally hundreds of side quests in Final Fantasy XIV and every single one of them rewards at least a handful of Gil upon completion. While it might only seem like pennies, clearing out an entire zone of side quests will increase your coffers by a pretty hefty sum.
Yes, they’re tedious at times and, if you’re not careful, you’ll spend more teleporting around the map than you earn by doing them. However, if you’re really stuck and dedicate yourself to flying rather than teleporting, you can earn enough to buy yourself something pretty when you get back to a city state.
There are a lot of fish in Stardew Valley and most of them are fairly simple to find. However, the Ghostfish only spawns in a very specific location and while there is an alternative way to get your hands on one, that way isn’t exactly guaranteed either.
While the Ghostfish isn’t the most valuable fish, even when a high quality one is smoked, you do need one for a few different things and they can give some particularly useful items when in a Fish Pond, but more on that later.
How to get a Ghostfish in Stardew Valley
Screenshot by Destructoid
If you’re after a Ghostfish in Stardew Valley, I’m afraid you have little choice but to head into the Mines. Once inside, if you want to actually catch the fish, you’ll need to head down to either floor 20 or floor 60 in order to fish there.
If you’re wanting to test your mettle, or hoping to avoid Fishing, you can battle some Ghosts between floors 51 and 79 of the Mines. They have an 8% chance to drop a Ghostfish when defeated.
There’s a small chance that the Traveling Cart will stock a Ghostfish at any time, as they’re part of the vendor's rotating stock. If a Ghostfish does show up, it will cost between 135 and 1,000 Gold to purchase.
How to use a Ghostfish in Stardew Valley
Screenshot by Destructoid
The main use for a Ghostfish in Stardew Valley is as part of the Fish Tank Bundle in the Community Center. There are no Villagers who like or love to receive Ghostfish as a gift, though they are a hated gift for Evelyn, Haley, and Pierre.
After this, the most efficient way to use a Ghostfish is by putting it into a Fish Pond. A Ghostfish will reproduce every 2 days, providing that you’ve got the capacity, and can possibly provide the following items:
Provided item
# of Ghostfish in Pond
Chance to drop per day
1 Roe
1-2 3-8 9-10
23-31% 36-73% 62-68%
1 Quartz
3-8 9-10
3-6% 5-6%
3 Quartz
9-10
10-11%
5 White Algae
9-10
4-5%
1 Refined Quartz
9-10
4%
3 Pale Broth
9-10
1.5-2%
A Ghostfish can be used in the spool of a Sewing Machine to create a Dyeable Fish Shirt, and in order to expand other Fish Pond's capacity from 7-10, two Ghostfish can be requested by Dorado, Lingcod, or Pike.
If all else fails, you can always simply sell your excess Ghostfish. They sell for between 54 and 135 Gold before smoking, depending on whether you have the Fisher and Angler professions chosen.
The 81st Final Fantasy XIV Live Letter From the Producer finally has a scheduled broadcast time and, as many have been expecting, it will focus primarily on Job information for the upcoming expansion Dawntrail.
The wait for Dawntrail is nearly over, with the release date for the next expansion set for just two months from now on July 2 and early access a few days earlier, so of course the dev team is promoting it and giving out more information about what to expect.
The next Live Letter From the Producer, which will be streaming live on May 16, is set to include some much anticipated 7.0 Job updates. Alongside details for the new Viper and Pictomancer jobs, there will hopefully be more information given on the overhauls coming to both Astrologian and Dragoon.
If you’re uncertain as to whether your setup can handle the massive graphical updates coming with Dawntrail, there’s still time to download and try out the Benchmark.
The stream is set to start at 7 a.m. EST / 4 a.m. PST / 12 p.m. GMT on Thursday, May 16, so this one might be a little tricky to watch live in the US. However, as always, the stream will be available to watch after the fact on the FFXIV YouTube channel.
Thankfully, this Live Letter will include a live translation from Japanese to English, so we won’t be left guessing any of the details, which is especially handy given the technical aspects of Job showcases.
As part of the new A Day at Disney Star Path event in Disney Dreamlight Valley, there are a lot of new duties to complete and some of them come complete with vague or riddle-esque descriptions. One of these makes it sound like Night Thorns are terrible at parties, but I promise you don’t have to cheer them up.
You can be forgiven if the description for this duty has you stumped, but the answer is actually pretty simple - all you need to do to complete this duty is craft the listed number of Purified Night Shards.
How to make Purified Night Shards in Disney Dreamlight Valley
Screenshot by Destructoid
To make Purified Night Shards, you’re going to need two things:
5 Night Shards
Crafted at a Crafting Station using three Onyx
Found when clearing away Night Thorns
Found when digging in sparkling mounds in any biome
1 Dream Shard
Critters can drop Dream Shards when fed a food that they like
Found when clearing away Night Thorns
Found when digging in sparkling mounds in any biome
Once you’ve got the required materials, simply head to a Crafting Station and find Purified Night Shard under the Potions and Enchantments tab.
How to use Purified Night Shards in Disney Dreamlight Valley
Screenshot by Destructoid
Although they aren’t generally used in crafting on a day to day basis, Purified Night Shards can be used in a number of different friendship quests with different Villagers:
Within any traditional Final Fantasy XIV party, there are three roles to fill: one Tank, one Healer, and two DPS in a light party or double that in 8-man groups. For a long time, I checked that last box as a strictly DPS-only player. It wasn't until years into my adventures that I'd stray from my comfort zone, thrust headfirst into tanking.
I’ll never forget my first proper tanking experience in FFXIV. My FC (Free Company) mates at the time, whom I will honestly never forgive but always be grateful to, insisted I give the role a try. They promised to go easy on me and promised I’d be fine. Reluctantly, I agreed. I was among friends; it couldn’t be that bad, right?
Wrong. But before we get into that, let me explain something. I had tanked before, but never with actual people. I’d clawed my way through the levels using Duty Support and a seemingly never-ending list of side quests and, eventually, by avoiding people in Eureka, the Bozjan Southern Front, and Zadnor. My Tank Job, a Paladin at the time, sat comfortably at level 80, and I was happy never to never reprise the role until the call of peer pressure.
Screenshot by Destructoid
Then, the leader of our ready-made light party dropped us directly into Paglth’an. Honestly, it’s one of my favorite dungeons of all time now, but back then it was a horrifying hellscape that I was quite happy never to visit again. When I tell you that I tanked that dungeon while screaming both internally and externally, shaking like a leaf and almost hyperventilating, I am not exaggerating. It was, in equal measure, the most enlightening and terrifying experience I’ve ever had in FFXIV. I was horrified at the thought of leading the party in that way.
For a while, I refused to jump back onto Paladin. I never wanted what felt like so much responsibility again, at least not with other people who would need to suffer through my mistakes. But then I saw the blasted Amaro mount, the reward for reaching level 80 in each class.
Screenshot by Destructoid
The Amaro is, to this day, my favorite mount. I call mine X-Wing and it ties me irrevocably to the one main story character who has touched me most deeply in my journey throughout Eorzea — Ardbert.
So, of course, I had to have it, and that meant I had no alternative but to pick up a sword, axe, and gunbladeto get there. This was the start of my deep dive into tanking, and through this, I’ve become a tank main. I overcame that miserable tanking anxiety, and it wasn’t easy, but it’s taught me so much. Mostly thanks to X-Wing, but helped along by the tank titles and rewards. They gave me something purposeful, something actionable I could work toward to feel a little proud of the baby steps there.
I threw myself in with full force, learning a laundry list of important MMO skills — like the importance of frank communication. I lost count of the number of times I immediately announced that I was new to an instance, asking for a little patience and grace. Sometimes people just dropped without saying a word, which I understood to mean they didn’t want to play with a rookie tank. I can’t say I didn’t take it personally at times, but I pulled up my pants and gave myself a pep talk while we waited for a replacement.
Screenshot by Destructoid
Most of the time, though, people were unbelievably understanding. They’d give tips, tell me I was doing a good job, and help me along the way. It’s this kind of behaviour that kept me going. It’s also this kind of behaviour that drove me to become a mentor, to help others with those same anxieties.
When I met my fiancé, I strove to help him try other roles one and only Job — Summoner. Not against his will, I should add. Summoner had just been completely overhauled with the Endwalker expansion, and he was complaining that he was bored. After my own experiences, I was already getting a knack for teaching, and now he's got a full roster of level 90 jobs, including Tanks, and mains Healer. Yes, we’re the dreaded healer-tank couple, but try not to judge us for it.
Screenshot by Destructoid
That was two and a half years ago, and it’s hard to believe it’s been that long since Endwalker dropped. But now here I am, a Dark Knight main, and I can’t DPS without getting bored. Of course, I’m going to level everything after Dawntrailreleases, but I will always go back to tanking.
Tanking did more than teach me a new role, too. It gave me perspective on fights I didn't have before. I get why and when a Tank will move so early in some boss fights, so it doesn't catch me off guard. I see the importance of a wall-to-wall pull in certain dungeons and how much time the DPS have to light the mob up before, well, the mob lights the tank up.
Screenshot by Destructoid
That’s not to say that I’m a perfect Tank. I’m pretty far from perfect. I forget my tank stance more than I’d like to admit, I still manage to lose aggro on stragglers in a big pull, and I still get a little annoyed when I’m watching the other Tanks battle it out for aggro during an Alliance Raid, but I’ve learned not to take it too seriously.
What’s the worst that can happen? We wipe? That’s not so bad. If someone else wants aggro in an Alliance Raid, I’m happy to give it to them and turn myself into a blue DPS. If I forget to turn on my Tank stance, I laugh it off and send a quick “well that could have gone better” in chat. Humor helps, and people seem to appreciate it.
Screenshot by Destructoid
Believe me, I know how petrifying Tank anxiety, or anxiety over any role, can be. Even if it's not in the Job description, your party often looks to you as a de facto leader, and that comes with pressure. But if you’re unsure about it, or feel like you can’t do it, I’m here to tell you that you can. It may not come easily at first, but communicating your fears and inexperience is part of venturing out of your comfort zone on a new Job. Laugh it off; people are, usually, more understanding than you think. Give it a few runs, and I promise you'll not only be a better player for it, but maybe you'll pick up a new main Job, too.
The Final Fantasy XIV: DawntrailBenchmark launched on April 14, giving players a tool to test their PC hardware for the coming expansion and some time with the MMO's new character creator and graphical updates. Some of the changes were a delight to see, others...not so much.
Director and producer Naoki Yoshida acknowledged as much today, via a Lodestone post. He confirmed several hiccups in the new benchmark application, admitting that some things that should have been updated have been left as they were previously, resulting in less-than-optimal lighting. He also promised a new benchmark to better reflect the Dawntrail upgrades, while clarifying it's still a test — all of those options may not make it into the replacement application.
Yoshida explained the team “received positive feedback and reactions from players" regarding some Dawntrail changes, but mostly stuck to addressing the problems FFXIV's community highlighted, noting they'd "seen others express their concerns." In his update, the director outlined their plans going forward, highlighting specific problems and fixes on the way with a new version of the benchmark. For the character creator, he highlight three specific concerns:
A. “Lifeless” eyes due to a lack of highlights in the pupils B. Facial contours appearing flattened due to incorrect lighting conditions caused by backlighting C. A lack of gloss or excessive appearance of gloss due to character creation-exclusive weather conditions (i.e. the use of thunderclouds)
via the Final Fantasy XIV Lodestone
Additionally, Yoshida said there are other issues with "certain data and processes," and — while not mentioned by name — some of those seem to point to specific problems the community highlighted, like strange seams in models and scales on the Au Ra. On the Lodestone, he noted problems like, "unimplemented high-resolution textures" for some FFXIV races, and "an issue with necklines" as data-related problems they're fixing, clarifying they are not intended to be present in the retail version of Dawntrail.
For all of those make-overs-gone-wrong, the director apologized and explained they're still incorporating feedback. Perhaps it's at least a little more comforting for those of you disappointed with the FFXIV tweaks to your Warriors of Light, but texture issues aside, the character creator has historically hasn't caught anyone's good side. Yoshida explains that, too, as some of the benchmark's lighting uses PlayStation 3 lighting techniques.
When will the updated FFXIV: Dawntrail benchmark be available?
Screenshot by Destructoid
There is currently no confirmation as to when the newly updated benchmark software will be available to download, as Yoshida asked for some time to ‘investigate the issues and reconstruct the benchmark environment’ before going on to say that the release date for the updated benchmark will be provided at a later date.
With the sad passing of Dragon Ball Z creator Akira Toriyama, Final Fantasy XIV players have come together across the world to pay tribute to a hero and legend of the anime sphere. Since news of Toriyama's passing broke, players have gathered outside the Pugilist’s guild in Ul’dah, many dressed as some of the creator's most beloved characters.
Although best known for creating the foundational world of Dragon Ball Z, Toriyama was also renowned for his work on much-loved RPGs. From his character designs in Chrono Trigger to striking designs in Dragon Quest, Toriyama touched artists and fans within the world of anime, manga, and video games.
Screenshot by Destructoid
It doesn’t matter which server you play on, it’s hard to miss the gathering of players in Ul’dah, decked out in cosplay in homages to the life’s works of Toriyama. There’s no end to the Goku outfits, and hundreds of people donning the Slime Crown and Thug’s Mug glamour items, inspired by Dragon Quest, and rewarded during the Breaking Brick Mountains event last held in 2021.
As they always do in sad times like these, players are utilising the Wanderer’s Campfire minion to light the streets of Ul’dah, and they’re likely to remain in their chosen spot for hours, or even days, in remembrance of Toriyama and all he gave to the world during his life.
It’s not the first time Final Fantasy XIV players have come together in honor of a treasured artist; back in 2021, the community came together after the death of Kentaro Miura, creator of the infamous Manga Berserk. Thousands of Dark Knights on every server lined the streets of Ul’dah in his memory, just as we’re seeing them do today. The community also gathered again for one of their own, Stephen Critchlow, who voiced Count Edmont de Fortemps in the Heavensward expansion.
The Disney Dreamlight Valley Premium Shop is no stranger to controversy and one of the latest additions, the Small Pink Wings, have caused a bit of backlash within the player community and renewed a call for an item preview function.
Ever since it was introduced back in February 2023, the Premium Shop has offered players a chance to get their hands on unique items or items from past Star Path events. From the beginning, there was discourse among players due to the price of items, but it has gone on to become a popular addition to the game.
However, the Premium Store is now a year old and it's still missing one much-desired feature — the ability to preview items before purchasing. While clothing items are displayed on a mannequin, wings aren’t. This is the main issue that has caused the latest controversy.
Disney Dreamlight Valley Small Pink Wings controversy
Image by Destructoid
There have been four different varieties of wings that have been featured as possible purchases in the Premium Store (shown above). Judging from the photos and the price of the latest set, you’d be forgiven for thinking that the Small Pink Wings would be a similar size to the other three.
Sadly, you’d be wrong and it’s this fact that has caused upset within the Dreamlight Valley community.
As it turns out, the wings are absolutely tiny and players feel as though they’ve been misled with the Premium Shop image, understandably, and the argument for some form of preview function has become all the stronger as a result.
Image via Disney Pixar
On the plus side, these wings have sparked a slew of jokes involving Heimlich from A Bug’s Life, after he gains his rather tiny wings and turns into a ‘beautiful butterfly’. Reddit comments are filled with people sharing images and gifs of the underrated character, causing others to state that they now actually want the wings in light of the comparison.
Final Fantasy XIV has a long list of recurring seasonal events that happen (mostly) around the same time every year. For 2024, two of these, Little Ladies’ Day and Hatching-tide, will combine into one celebration, beginning on March 14 and ending on April 1.
Usually, the bulk of Little Ladies’ Day occurs in March, while Hatching-tide celebrates in April. Rather than splitting them up this year, we’re getting one combined mega event adding differing decorations across Eorzea between its three city-states. The only bummer is we get only one (admittedly pretty fun) reward.
How to begin Little Ladies Day, Hatching Tide events in FFXIV
Image via Square Enix
In order to begin the event, you’ll need to have fulfilled the requirements:
Reach level 15
Have completed one of the following Main Scenario Quests, which is dictated by your starting city state:
The Ul’dahn Envoy
The Gridanian Envoy
The Lominsan Envoy
Once you’ve accomplished the outlined, head to Mih Khetto’s Amphitheatre in Old Gridania and speak to Jihli Aliapoh in order to begin this year's first quest, “The Princess and the Eggs”.
How to get the Peatie Horn (Goobbue mount) in FFXIV
Image via Square Enix
The reward for completing all quests associated with the dual event is the Peatie Horn, which will provide you with a brand new, flower crown adorned Goobbue, Peatie the Goobbue Maiden, to ride around Eorzea and beyond. Sure, it's just a reskinned Goodbue mount, but it's pink.
There will also be select items available from previous years’ events and last years rewards for both events, the Little Ladies’ Dance and the Tonberry outfit, are likely to make their debut on the FFXIV Online Store when the event goes live.
How will the decor work in the three main city-states?
Image via Square Enix
According to the official Lodestone, the event decorations will differ from state to state. While Gridania will be adorned with the standard decorations for the Hatching Tide Event, while Ul’dah will appear as it always does during the Little Ladies’ Day events.
Limsa Lominsa, as well as all of the residential districts, will begin the event decorated for Little Ladies’ Day before switching themes on March 22, ending the event with Hatching Tide themed decor.
Every so often, a bug or glitch is accidentally included within a game that players use to their advantage. Palworld had one such exploit from day one, which allowed players to capture Tower Boss Duos and add them to their typically Pal-filled party.
However, thanks to the recent implementation of patch 0.1.5.1, this ability has been removed, and players are feeling mixed emotions about it. On one hand, the community is upset that they can no longer capture Lily or Victor, but there’s widespread amusement due to Pocketpair’s public apology on the matter.
It’s not very often that a development team apologises for doing what they do - namely fixing bugs - in such a public manner. Commenters on the post are in agreement on one thing, though: The Pocketpair team is damned if they do and damned if they don’t.
Players had expected this exploit to be patched out of the game soon after it was discovered, but with the glitch remaining in the game through subsequent updates, the community held out hope the glitch had somehow become a feature. At the time of writing, players can still use Tower Boss Duos which were captured prior to the patch, but there’s no official word as to whether this will return in the future.
There were a lot of other things added in patch 0.1.5.1 that players are more than happy with, though, such as the ability to craft without having to hold down the F button and a long list of base improvements for the Pals. Thankfully, the issue of Pals becoming stuck in an endless cycle of juggling items seems to have been rectified, and my larger Pals no longer wind up stuck on the roof with no good explanation as to how they got there.
Despite the fact that things seem to be quieting down in terms of huge news for Palworld, the game remains one of the most played on Steam and recently reached the massive milestone of 25 million players across both Steam and Xbox, showing that even if players never regain the ability to have Zoe on their team, the game isn't going anywhere soon.
Google has a long history of easter eggs, from HTML trickery to paying homage to Bletchley Park with a very apt decoding animation. I can say with certainty that I wasn’t expecting to see a stampede of Chocobos on my screen today, though.
But that’s what happens if you do a search for “Chocobo” or “Final Fantasy”, in celebration of the release of Final Fantasy VII Rebirth. Along with the adorable retro Chocobos, you’ll also see a few Cloud Strifes, complete with Buster Sword aplenty and some (slightly disorienting) shaking visuals for the links underneath.
With the excitement surrounding the long awaited release of Final Fantasy VII Rebirth, it makes sense that Google would add this feature as they’ve done for popular titles in the past, such as the Last of Us mushroom easter egg.
How to get a Chocobo stampede on Google
Screenshot by Destructoid
It’s super simple to see this easter egg for yourself. All you need to do is head to Google and search “Chocobo” or “Final Fantasy”. All of the usual results will appear, but there will be a small yellow button in the middle of your browser window, toward the bottom, complete with a Chocobo silhouette.
Clicking on this button once will result in one or two Chocobos and the accompanying shakes of the search results beneath, but the fun really starts when you repeatedly spam click. Doing so will result in a stampede of multicolored Chocobos, as well as Cloud making an appearance.
Be careful though, maybe it’s just me being a little too over eager, but pressing the button too much may result in slowing your browser down to a standstill, at least for a little while.