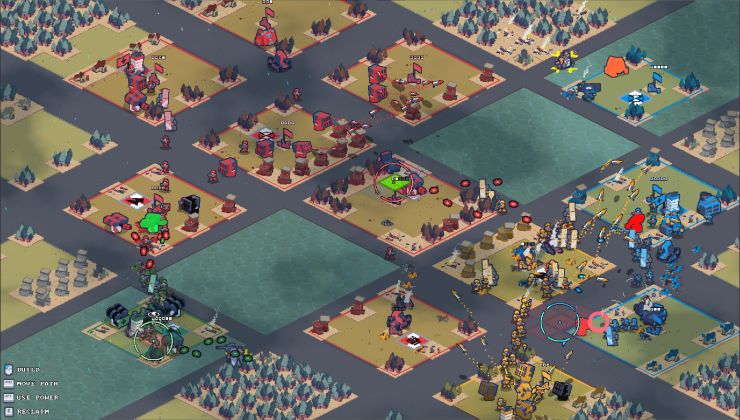
D.O.T. Defence looks like a fun spin on the RTS genre
 .
.
Read the full article on GamingOnLinux.
 .
.
Read the full article on GamingOnLinux.

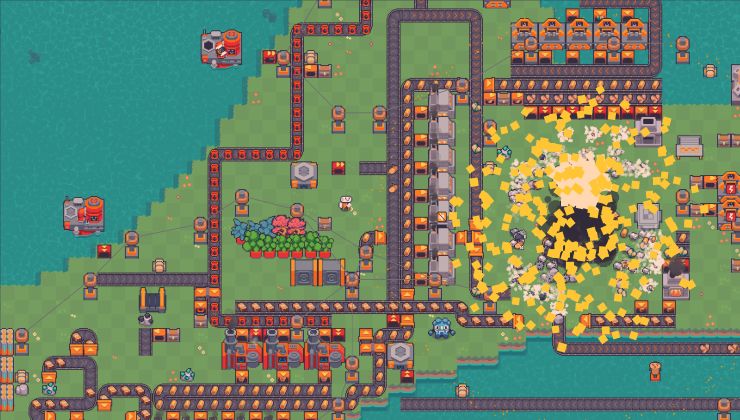
Perforce's latest annual State of Game Technology report claims the top three issues game developers currently face are funding, collaboration, and time for innovation.
Over a third of the 576 respondents - who categorise themselves as practitioners, senior management, and executives working in gaming, media/entertainment, automotive, and manufacturing - said that collaboration was difficult, claiming that "moving large files" was more of a hindrance to collaboration than remote working.
90% thought that the availability and access to senior leadership was more important than "the ability to work remotely" (81%).

 .
.
Read the full article on GamingOnLinux.
 .
.
Read the full article on GamingOnLinux.
 .
.
Read the full article on GamingOnLinux.
 .
.
Read the full article on GamingOnLinux.

Everybody has several games that mean quite a lot to them. For me, one of these games is Indiana Jones and the Infernal Machine. I not only grew up with this game, but I also have a lot of memories of this game. Outside of that, I also met some amazing friends through the community behind this game. I even did several speedruns of this game, and I’m an active member of the community. Now, color me surprised that 25 years after the release of this game, we got new fan-made content for this game. Not just fan made content in the style of fan patches to solve bugs with the game, a whole new level and promises of a level editor to create even more new custom content. This blew me off my socks and in today’s article I want to talk about it. So strap in and let’s get ready to play new content for one of the best Indiana Jones games ever made.
The new level – SED
There is a speedrunning discord server for this game. Well, it was a speedrunning discord server but for a few years now, this server has grown into a server of people who appreciate this game. If you want to join this discord, here is an invite link. When the server started to grow, several modders joined our server. One of these modders is going under the name of Urgon (currently) and what we didn’t know is that he was decompiling the whole game. Not only that, he was creating a level editor based upon an existing level editor.
This existing level editor is for Star Wars Jedi Knight & Mysteries of the Sith. Those games used an engine that formed the basis for the Jones3D engine. While he was developing that editor, he tested his skills by creating a new level. So, basically, parts of this new level are tests of the new level editor and what you can do with it.
Now, information about this new level and the download link can be found at this GitHub repository. If you want to download the actual level, you have to go to this page and click the green button named “Code”. In that dropdown, you can choose “download zip”. You’ll need that later if you want to install/play this custom level. Now, if you read the pre-mod or the installation instructions for this level, you might feel overwhelmed if you aren’t very technically inclined. That’s why two community members wrote two special tools to aid you in preparing your game.
You might ask yourself, like Klamath did in at the end of our stream of this custom level, why are there two tools for basically the same? Well, let me tell you the history about it. When I wanted to play the custom level, I had a bit of trouble myself while figuring out the tutorial. I also found that the required steps were quite a lot to do. So, I decided to start writing a PowerShell script that did all the steps. I announced that in the Indy3D discord that I was writing this. When I almost completed my tool, the_Kovic dropped his version of the tool.
Personally, I didn’t want to throw my work out the window and continued finishing my GUI version. When I finished, I didn’t convert my tool to an EXE and left it just as a script file you could run using a command line or a code editor. The next day, Kovic released a GUI version of his tool and I gave some feedback on his tool. In the days after that, I created an EXE version of my tool and we both kept adding features in our tool. He wrote his tool in C#, which is a bit friendlier to create an EXE. If I didn’t release my first version as a script only and converted it to an EXE, I think it might have been less overwhelming for people.
That said, Kovic thanked me for creating my tool since like he said on our stream: “It put my butt into gear to create a tool and write a GUI, which I normally don’t write“. On top of that, our tools aren’t meant to compete with each other. I can’t write C# and Kovic can’t write PowerShell. And it would be a shame to just delete work because somebody else was quicker or made their tool more user-friendly first. The result now is that we both have two very strong tools with a very similar, maybe even completely the same, feature set.
Outside a different choice of coding language, the biggest differences between both our tools are under the hood. In Kovic’s tool, you get more files than in my tool when you download the tool. And that’s because to prepare your game for custom levels, you need to extract several files in the resource folder. The tool used for extraction has a bug where instead of extracting the folders of the archive into the resource folder, it extracts them into separate folders, like if you would extract a zip file. Kovic packs a modified version of this extraction tool so that part of the process goes a bit faster. In my version, the tool just downloads the latest official versions of the tool and prepare the game that way.
In the end, both our tools give you the same end result. They prepare your game to install custom levels and play them. If you want to try out the_kovic’s tool, you can find the latest version on this releases page. If you want to try our my tool, you can find it on this releases page. Feedback to our tools is always welcome! If you find an issue or if you have an idea, feel free to hit us up, and we will look into it.
Earlier I talked about a stream of the level we did. Klamath, the_Kovic and me did a live stream where we played through this level. Now, I have to emphasize that release of this level is an impressive technical achievement. Creating a level for a 3D game isn’t easy and requires a lot of work. It’s even more impressive when you know that not everything is documented about the engine, and you have to decompile a lot of it. In the next part of this article, I’m going to talk about the level itself and critique it.
If you don’t want spoilers, I’d advise you to skip that section for now and come back later. Now, I want to say that I start reviewing the level in a moment, but this feedback is mostly meant for people who want to make new custom content. What did this new level do right and wrong if you look at it as a player who doesn’t know the technical background of this level? This isn’t meant to break down the amazing work the modders did to make this work.
Reviewing the new level
Editorial note: this review will spoil quite a lot. If you don’t want to get spoiled, you have to skip this section of the article. This isn’t a walkthrough of the level either. Some sections are skipped, I’m only going to talk about the sections I want to talk about.

The new level takes place 25 years after the ending of the original game. Indy returns to his Canyonlands dig site. You are set loose at the tent where Sophia picked Indy up with a helicopter to start the Infernal Machine adventure.
In terms of new content, there isn’t a lot new to see. Some ladders are missing and some parts of the level are blocked off. Also, all treasures are missing that you would usually find in the level.
Before I continue, I want to mention that some parts of this level are made quite difficult on purpose. The developer wanted to give us the feeling we were young kids again, playing this game for the first time, and have us figure out the new puzzles by ourselves. Yet, finding a correct balance between difficulty and unfair is a very fine line to thread. Personally, I think that in some sections, the developer crossed the line into unfair level design.
When running on the top section, you notice that there are some new voice lines. These voice lines are made possible with a voice cloning AI tool that was trained on lines from Doug Lee, the original voice actor for this game. The new voice lines sound amazing, and if you didn’t know better, you’d think that Doug Lee came back to record the new lines. In most cases, these voice lines really fit Indy’s personality and fit right into the game.
We come to our first snag when we want to go to the new content. I can understand not seeing the shovel and being confused, since it’s hanging at the jeep on top. And you know what’s even more confusing, the other side of the jeep model has a shovel in its texture! Anyhow, when you pick up the shovel and dig up the Infernal Machine part, it’s clear that you need to break a wall. Here comes one of the worst parts of this level. The location of this cracked wall is insanely well hidden. It’s in one of the last places you’d look, and several of the first players ran around for hours upon hours in Canyonlands before it was found. And when it was found, it made us annoyed.
It’s a clear example of how players who are used to the level, overlooking the obvious. The wall you need to break has an actual cracked wall texture, but it’s behind something you can’t see through. I think it would have been fine if the location, where it is at, had a bigger ledge so you’d notice it somewhat instead of just having to go on a wild goose chase.

Now, we enter the new area. We come to a big open space where the next set of puzzles are. The first puzzle is actually a jumping puzzle. Now, I highly advise you to not play this level if you haven’t played through most of Indiana Jones and the Infernal Machine. Not that there are spoilers, but because some of the jumps in this level are straight up difficult and not what you really expect from this game. Kovic calls it “Kaizo Jones” for a good reason.
There are some small platforms and not having the look key working is going to be a pain in this section. Since, there are some moments where you need to be able to free look and not being able to see beneath or above you will make things a lot more tricky. After you finished these jumps, you might start to notice that the developer of this custom level added some details. Like, the rope bridges are gently moving in the wind. This is something that isn’t present in the original game. It’s a new “COG” script that makes that possible.
These cog scripts are a blessing for custom content. Since, this game isn’t hardcoded at all, so if you learn how to write these cog scripts, you can basically write new mechanics as well. It’s insane what possibilities there are going to be in the future for this game. I hope there is going to be good documentation so that custom level creaters know what’s possible and what’s impossible with the level editor.
While you are exploring this area, you notice that it’s huge. This also explains why it takes quite a while to load this level. Currently, modders are looking into why it’s running so slow. Since, we don’t really know if it’s the level size or something else slowing down the loading of this level.
So, after jumping around the central column, you’ll arive at the shed. Here you notice you can actually enter the shed from the top. Kovic explains it quite well during the stream. If you want to hear some technical explanations on how this level works, I’d advice you to watch our stream. Since there is a lot of interesting development talk in there. Later, Kovic and myself had a contest in trying to quote voice lines from the main game. We got close to 200. Kovic won that because I said a line he already said.
After you picked up everything from this shed and climbed outside, you experience another new mechanic of this game. It’s a mechanic that gets backported from Indiana Jones and the Emperor’s Tomb. The fact you can use your whip to go over a zipline.
After you returned and struggled with getting across the other bridge, you will encounter other parts of this level. Here you’ll encounter two voice lines that straight up lie to you. The first voice line is that you need more force, explosives to break a rock that’s blocking your way forwards. Here is the issue with that, you get an explosive barrel later. You need to find an extremely hidden swim tunnel in the water. It’s not the only hidden thing in the water, so investigate behind and underneath rocks quite well. Since, these puzzles in this water border in the unfair territory. What makes that explosive voice line even more evil is that there is a box of TNT in the shed earlier. But what’s the second voice line that lies to you?
Well, that is after you made your way past said boulder. You find a minecart and interacting with it, Indy says that it will run with gasoline. And there is still gasoline left in the shed. Sadly, you can’t pick it up anymore. Now, this is a red haring, you don’t need this minecart at all.
By now, you have learned that this level likes to break the rules of how the main game is designed. You’ll have to think outside of the box sometimes to beat this level. But, for some jumps, you need to use your knowledge of what’s possible and impossible to progress. This makes it quite tricky sometimes to progress. And this brings me to a conclusion we also said on stream. I think that the issue is that people expected a more tame level than what we actually got and that might turn some people off. But, I’m so glad that the quick save system exists in this game. So, abuse the quick save system and make multiple saves since you’ll need them if you aren’t a veteran player of this game.

Anyhow, let’s get back into the flow of the level. After we completed the lever puzzle, we go back towards to the huge open area and take the lift to a new location. What follows is a totally new area where it’s a good thing if you saved up on health packs and you have a great sense of direction.
So, the short minecart ridge comes to an end. It doesn’t take long before you find yourself into a watermaze. This watermaze is unfair in my honest opinion. Klamath had a tricky time solving it and he had to use almost every health pack to get through it. Without Kovic pointing out the right tunnel, I think it would have made the stream quite a bit longer. There was supposed to be a minecart section instead of this swimming maze, but the developer had a hard time making the minecart section to work and he gave up and made this swimming maze.
Now, I’m all fine with this swimming maze, but the map glitches out at certain parts. I have a mediocre sense of direction and I wanted to rely on the map. The map doesn’t always render the tunnels correctly. You sometimes swim off the map or “in nothingness”. Sadly, I have to draw my own map. I wish I still had it, since it would make for a nice screenshot here… But I threw it out but me and my clumsiness… I knocked over my waterbottle over it.
After the swimming maze, we get a new section of “Kaizo Jones”. Where we get some extremely tricky platforming. Here is where you need to use the look key again and be sure you are playing in 4:3. If you are playing in another resolution like 16:9 or 16:10, this will also be one of the moments where you don’t see all the information.
The block puzzle that follows, feels right out of Tomb Raider. The initial reviews of this game called out this game as a Tomb Raider clone. While, this game does the formula a whole lot differently. We even talked about that during the stream. In terms of theming, Infernal Machine is a lot better. Tomb Raider feels like obstacle courses. But that’s thanks to a different engine and control style. If you want to hear the whole discussion, you can watch the stream from this point. Excuse Kovic’s internet being spotty while he was replying.
After the block puzzle, a new path opens in the swim maze. Then, some platforming comes. Something I love is how there is even a troll hidden inside the platforming. It caught me off guard and made me smile. This platforming section was also love to do. It felt like a real test on how well I know the game. This platforming section feels a lot better put together and feel less cryptic on where you need to go next. You really start to notice that the developer was getting more used to the level editor and made better puzzles. The moment of having to use the whip to swing over the gap while the platform underneath you was breaking was amazing.
After that, we get into the finale of this level. We jump into a portal and we land in a playable area which is shown at the end of Shambala, the 4th level in the original game. That area that’s shown to you after you have beaten the Ice Guardian. The path that takes you to Palawan Lagoon. It was possible to explore that using cheats and modified saves, but now it’s in a level for real. Exploring the little house at the end brings us to something you totally don’t expect this custom level to do. You’ll find a parchment inside with a riddle and at the end you notice something in red saying: “MAT -> ZIP”.
There is some meta gaming now going on. You’ll need to make a hard save and exit your game. You’ll need to go to your resource folder & then open the MAT folder. In there you’ll need to rename “SED.MAT” to “SED.ZIP”. You’ll also need to enter the password for the zip, since you get a new cog script to continue the level, which you need to place in your cog folder. In there, there is another surprise. But, that’s something I’m not going to spoil. But, be sure that Kovic is playing with that surprise and maybe I’m going to dig into it. PS, the next paragraph is in white with the right spelling of the password:
Marcus
The way the level ends is bittersweet. If you solve the final puzzle, something special happens and you can beat the level. You could argue that the ending of this level is “lazy” or “creative”… But, it’s an amazing way to wrap up the story in one level with a nice bow.
At the start of the custom level, I felt that it was quite rough around the edges and it had some moments that felt badly designed. In terms of game design that is. If you look at it visually and level flow wise, I personally think that this level would fit right into the original game as a final challenge. But, the further you go into the level, the more you start to notice that the developer of this level is getting used to the tools and the editor and more polished puzzles and area’s are coming through. You notice the journey of the developer and see it becoming better and better.
I want to give a big congrats to everybody who was involved in releasing this custom level. It’s a blast to play and I can’t wait to see more custom levels. The stream I did with this level was one of the best streams ever and it was also quite a lot of fun to write the tool to help people play this custom level. I’m curious what you think about this custom level and/or the content of this article. Feel free to drop something in the comment section down below.
And with that, I have said everything I wanted to say about this for now. I want to thank you so much for reading and I hope you enjoyed it as much as I enjoyed writing it. I hope to welcome you back in another article but until then, have a great rest of your day and take care.
Kunitsu-Gami: Path of the Goddess is a journey over a mountain to restore nature to all it’s glory, but is it a path worth treading?
Kunitsu-Gami: Path of the Goddess is brought to us by Capcom and is billed as an action strategy game, which is technically accurate but as with many genres in gaming nowadays that doesn’t actually tell you all that much about what is going on.
Kunitsu-Gami: Path of the Goddess is a tower defence game, however it’s forced me to add two new genres to our gaming lexicon, “Passive Tower Defence” and “Active Tower Defence”, and believe it, this distinction counts…Why you ask?
Well… I hate Tower Defence games, or henceforth what I shall call “Passive Tower Defence”, they are often an awful mix of dull and frustrating and not even beloved franchises to me have been able to engage me with the genre (heres looking at you Crystal Defenders”. I describe Kunitsu-Gami: Path of the Goddess as an “Active Tower Defence” and believe me does that activity make all the difference.
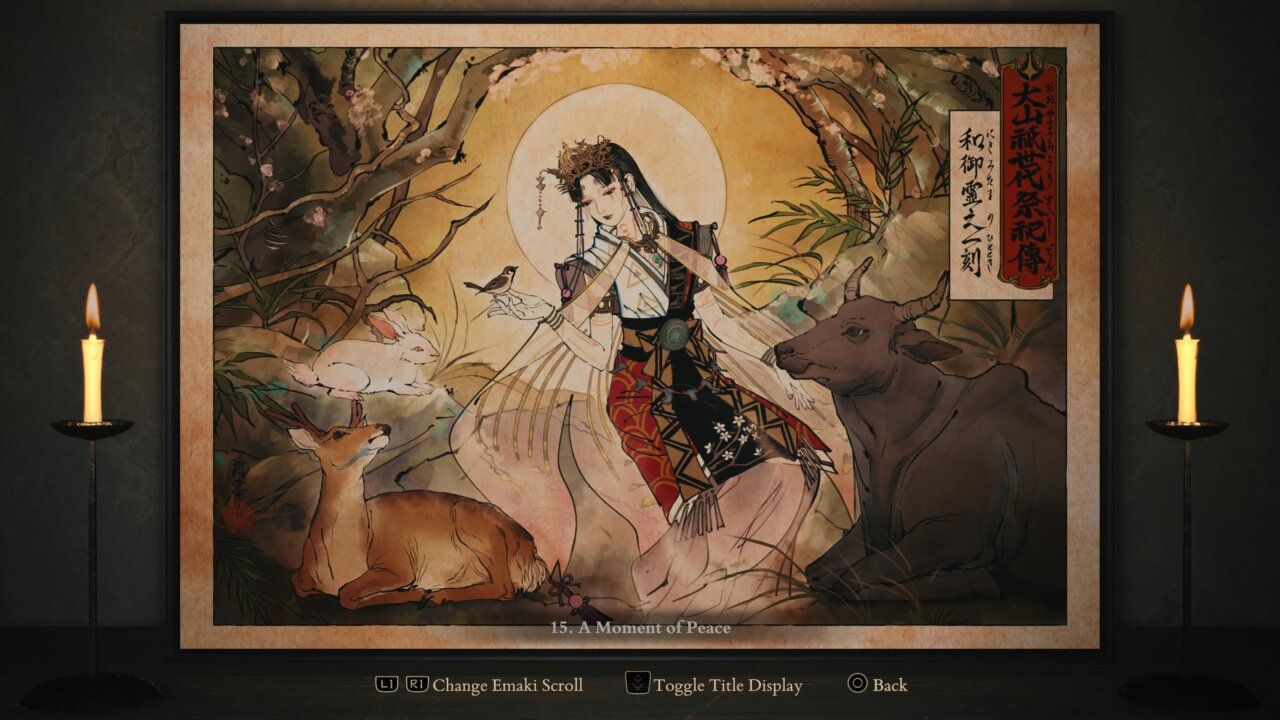
Kunitsu-Gami: Path of the Goddess runs on the RE Engine and looks absolutely stunning, for those of you seeing Kunitsu-Gami and having memories of Okami invoked, I’m right there with you. Like Okami, Japanese folk lore heavily inspired the game, the enemies derive from Japanese Yokai and the combat is inspired by Kagura, a form of ceremonial dance.
The game beings with Yoshiro, Son and the villagers atop the mountain, while dwelling on the mountain humanity has abused nature and sin has accumulated over the years and now the mountain is defiled. This has summoned the Seethe, has corrupted the villagers and tainted the animals. It’s your task as Soh to guide Yorshiro and cleanse the mountain.

Gameplay is split into the day and the night, during the day, you’ll clear the defilement, rescue animals (which earns you rations, health potions), clear the tainted blossom (which earns you crystals) and free villagers who will aid you in defending Yoshiro from the Seethe during the night. With the crystals you’ve earned you can assign the villagers different roles raging from melee, ranged and supports roles. Once darkness falls the Seethe emerge from Torii gates (In the Shinto religion a Torii gate marks passing into a sacred area, which is fitting given the corruption the Seethe represent) they wish to kill Yoshiro to stop her cleansing the area.
There are two types of stages in Kunitsu-Gami: Path of the Goddess, the main stages with the literal path you must clear for Yoshiro, each of which is followed by a “Boss” stage offering an entirely different sort of challenge. Both forms of stage are designed to be played more than once, initially you just need to complete the stage, but doing so, provides you with the option of replaying the stage completing specific challenges. If complete these challenges provide you with rewards to upgrade Soh or Musubi which you can use to level up the different villager roles, these upgrades apply to the role in general and aren’t stage specific so I’d heavily recommend completion of the challenges. Spending Musubi is easy enough and will have a massive impact, especially when it comes to defeating certain bosses. You may have upgraded your Woodcutters (melee units) into axe wielding gods of nature only to come across a flying Seethe and have them rendered useless, however, fear not, you won’t need to sit and grind, you can “refund” your spent Musubi and reallocate them as need be. This is a brilliant move on Capcoms part as far as I’m concerned, it immediately removes any anxiety about how to level up, eliminates any potential frustration and respects the players time, something increasingly uncommon in the modern industry.

The removal of frustration shouldn’t be misunderstood however, Kunitsu-Gami: Path of the Goddess isn’t a cake walk and one will have to pay attention during every moment of a stage or boss encounter. Some bosses have environmental factors that will impact how tough they are to vanquish, ignore your surroundings at you peril.
Unlike “Passive Tower Defence” games the gameplay of Kunitsu-Gami: Path of the Goddess gameplay is incredibly dynamic, given that you actively control Soh and are right in the thick of the action vanquishing the foul Seethe. Not only that, while you can position your village allies strategically in the best spots to defend Yoshiro, they aren’t merely static towers of DPS, you can redeploy them as the battle rages and I actually found myself invested in their survival.
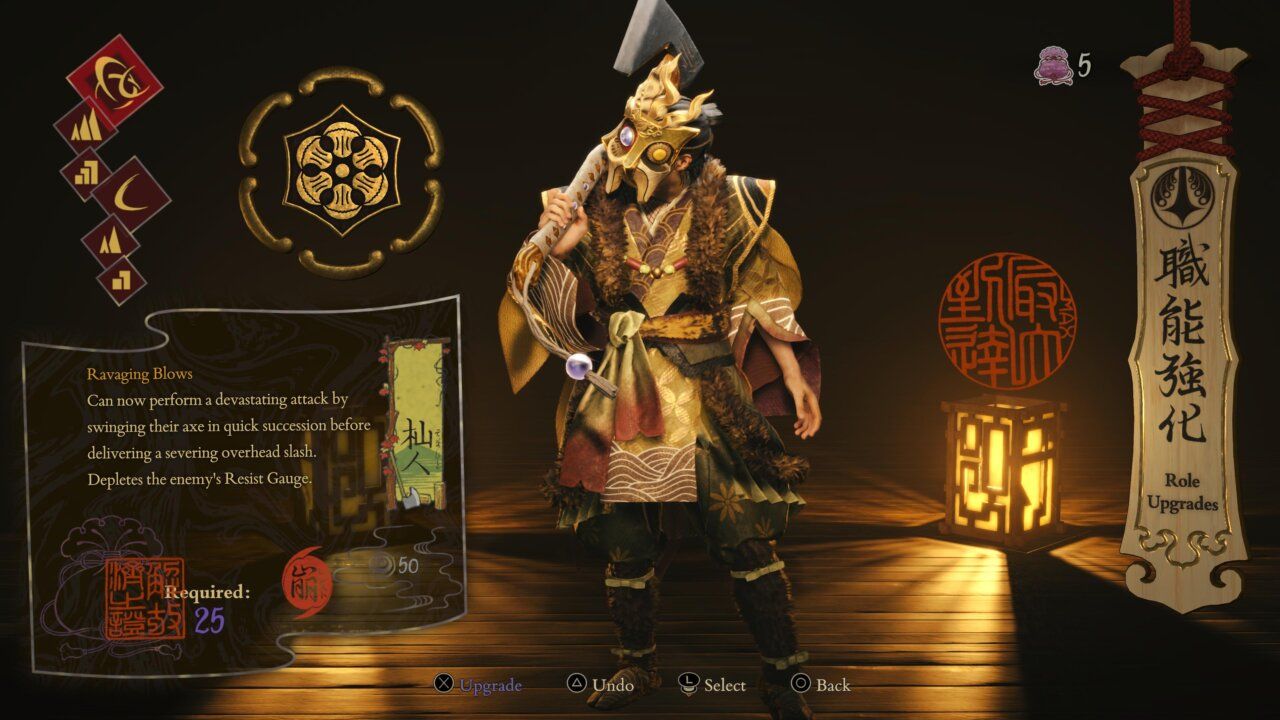
I think investment might be a core reason I enjoyed Kunitsu-Gami: Path of the Goddess, maybe it’s the old hippy pagan in me but the world of Kunitsu-Gami: Path of the Goddess is so beautiful designed, as is the foul corruption brought by the Seethes defilement that it was a joy to see the world cleansed. Everything about the game is stunning to look at, the character designs are fantastic, especially the Amaterasu costume you can use for Soh. Each villager role has a distinct look featuring a unique mask which becomes more embellished as you level up that roll. So stunning is the games design that I’m actually using a screenshot I captured in game as much as current MacBook desktop background.
The post Review – Kunitsu-Gami: Path of the Goddess – PS5 appeared first on GameHype.
I create a modelinstance in Libgdx that I call yellowInstance. The modelinstance is defined as follows: I need it to fall down under the force of gravity, But it just stays in the air!
 ModelBuilder yellowBuilder = new ModelBuilder();
            yellowBuilder.begin();
            Node nod = yellowBuilder.node();
            nod.id = "yellowboxy";
            Material yellowMat = new Material();
            yellowMat.set(PBRColorAttribute.createBaseColorFactor(Color.YELLOW));
            MeshPartBuilder yellowPartBuilder = yellowBuilder.part("yellowboxy", GL20.GL_TRIANGLES, VertexAttributes.Usage.Position | VertexAttributes.Usage.Normal, yellowMat);
            BoxShapeBuilder.build(yellowPartBuilder, 10f, 20f, 10f, 2f, 2f, 2f);
            yellowInstance = new ModelInstance(yellowBuilder.end());
I create the physics for it using Bullet Physics library as such:
btCollisionShape btBox = new btBoxShape(new Vector3(1,1,1)); //notice we take halves!
    Vector3 localInertia = new Vector3();
    btBox.calculateLocalInertia(5f,localInertia);

    //MotionStateForPhys msphys = new MotionStateForPhys(yellowInstance.transform);

    btRigidBody.btRigidBodyConstructionInfo info = new btRigidBody.btRigidBodyConstructionInfo(5f,null,btBox,localInertia);
    btRigidBody btYellowBody = new btRigidBody(info);

    /*btYellowBody.setMotionState(msphys);*/

    btYellowBody.setWorldTransform(yellowInstance.transform);

    dynamicsWorld.addRigidBody(btYellowBody);

    btYellowBody.activate(true);
here are the definitions for the important physics variables needed by the library
private btCollisionConfiguration collisionConfiguration;
private com.badlogic.gdx.physics.bullet.collision.btDispatcher btDispatcher;
private btDiscreteDynamicsWorld dynamicsWorld;
private btSequentialImpulseConstraintSolver solver;

collisionConfiguration = new btDefaultCollisionConfiguration();
    btDispatcher = new btCollisionDispatcher(collisionConfiguration);
    btInterface = new btDbvtBroadphase();
    solver = new btSequentialImpulseConstraintSolver();
    dynamicsWorld = new
btDiscreteDynamicsWorld(btDispatcher,btInterface,solver,collisionConfiguration);
    dynamicsWorld.setGravity(new Vector3(0,-10f,0));
Here is how I update the timeStep for the Physics library:
private void update(float deltatime){
btYellowBody.activate(true);
    dynamicsWorld.stepSimulation(deltatime , 5 , 1/60f);

}
Here is my render method that calls the update method where my Physics variables are:
inputHandler.UpdateAfterKeyPress(Gdx.graphics.getDeltaTime(),"levelone");

    worldBuilder.update(delta); //will update the physics in levelone!

    Gdx.gl.glClearColor(0, .25f, 0, 1);
    Gdx.gl.glClear(GL20.GL_COLOR_BUFFER_BIT);

    ScreenUtils.clear(BACKGROUND_COLOUR, true);

managerScenes.update(Gdx.graphics.getDeltaTime());
    managerScenes.render();

if (Gdx.input.isKeyJustPressed(Input.Keys.ESCAPE))
        Gdx.app.exit();
EDIT: IF I REMOVE THE FLOOR FROM THE PHYSICS SIMULATION, THE YELLOW BOX FALLS UNDER THE FORCE OF GRAVITY! WHY REMOVING THE FLOOR WILL MAKE THE BOX FALL DOWN!
this is how the floor is added: THERE IS SOMETHING I'M MISSING HERE!!
ModelBuilder mBuilder = new ModelBuilder();
    mBuilder.begin();

    // Start a new node with a specific name
    Node node = mBuilder.node();
    node.id = "floory"; // Set the node's id

    Material mat = new Material();
    mat.set(PBRColorAttribute.createBaseColorFactor(Color.BLACK));
    MeshPartBuilder mpartbuilder = mBuilder.part("floory", GL20.GL_TRIANGLES, VertexAttributes.Usage.Position|VertexAttributes.Usage.Normal,mat);
    BoxShapeBuilder.build(mpartbuilder,0,-0.5f,0,300f,1f,400f);
    ModelInstance mInstance = new ModelInstance(mBuilder.end());

    sManager.addScene(new Scene(mInstance));

    //create the physics id and body/shape properties


    btCollisionShape shape = Bullet.obtainStaticNodeShape(mInstance.nodes);


    btBoxShape/*btCollisionShape*/ btBox = new btBoxShape(new Vector3(150,0.5f,200)); //notice we take halves!
    btRigidBody.btRigidBodyConstructionInfo info = new btRigidBody.btRigidBodyConstructionInfo(0,null,btBox,Vector3.Zero);
    btRigidBody btBody = new btRigidBody(info);
    btBody.setWorldTransform(mInstance.transform);


    dynamicsWorld.addCollisionObject(btBody);
GameFromScratch.com
Evergine 2024 Release
The Evergine Engine ( the game engine previously known as Wave Engine) just released their first update of 2024 and it’s got several new improvements. Highlights of the Evergine 2024 release include: We are committed to addressing the most important feature requests from the industry, and this new version of […]
The post Evergine 2024 Release appeared first on GameFromScratch.com.
GameFromScratch.com
Godot Powered Action Game Maker Engine
The creators of Pixel Game Maker MV and RPG Maker have announced a new game engine, Action Game Maker and this one is being built on top of the Godot open source game engine. This is ultimately a replacement for Pixel Game Maker MV (or PGMMV) although it will not […]
The post Godot Powered Action Game Maker Engine appeared first on GameFromScratch.com.
GameFromScratch.com
GB Studio 4 Released
GB Studio, the free and open source retro game engine for creating GameBoy style (in fact… GameBoy ROMs!) games have just released GB Studio 4. It provides everything you need to create a game from art, level and music creation tools to an intuitive game programming interface. Available for Windows, […]
The post GB Studio 4 Released appeared first on GameFromScratch.com.
GameFromScratch.com
GDevelop 5.4 Released — Adds Multiplayer Support
The easy to use cross platform open source game engine GDevelop just released GDevelop 5.4. There are several new features in this release, but by far the two biggest are the addition of an easy to use multiplayer solution, as well as a rework of the game engine’s variable system. […]
The post GDevelop 5.4 Released — Adds Multiplayer Support appeared first on GameFromScratch.com.
GameFromScratch.com
ct.js Game Engine Gets New Catnip Visual Scripting Language
The ct.js game engine we first covered back in 2020 then revisited in 2023 has advanced a great deal since then. Catnip is a free and open source 2D game engine available for Windows, Mac and Linux. Since we last looked at Ct.js they have released version 4.0 with several […]
The post ct.js Game Engine Gets New Catnip Visual Scripting Language appeared first on GameFromScratch.com.
GameFromScratch.com
001 Game Creator Humble Bundle
There is a new Humble Bundle for game developers, the awfully named Royalty-Free Game Creator STEM Bundle. This is basically a bundle containing the 001 Game Creator game engine and several DLC packs for creating other genres of games such as Visual Novels and Point and Click Adventure games. As […]
The post 001 Game Creator Humble Bundle appeared first on GameFromScratch.com.

A trove of internal Google documents leaked this week, offering insight into how the search engine ranks websites. Mia Sato describes it as "an unprecedented look into Google's inner workings" even if it doesn't quite expose the secrets of the "algorithm" that SEO experts would most like to see. — Read the rest
The post What's in the leak of Google's internal search documents? appeared first on Boing Boing.
GameFromScratch.com
Choosing Your First Game Engine
When just starting out in game development, one of the hardest and most immediate decisions you will have to make is “What Game Engine Should I Start With?”. Of course, as the saying goes, you don’t know what you don’t know, making it almost impossible to make such a decision […]
The post Choosing Your First Game Engine appeared first on GameFromScratch.com.
GameFromScratch.com
Fyrox 0.34 Rust Powered Game Engine
The Fyrox open source game engine written using the Rust programming language, just released Fyrox 0.34. This release is actually pretty jam packed with new features including: Key Links Fyrox Homepage Fyrox 0.34 Release Notes Station Iapetus GitHub Project You can learn more about Fyrox and the Fyrox 0.34 release […]
The post Fyrox 0.34 Rust Powered Game Engine appeared first on GameFromScratch.com.
GameFromScratch.com
25 Game Engines in 25 Minutes
Today we are going to take a look at 25 different game engines in 25 minutes (ok, 28 minutes…). The only criteria to show up on this list is the engine is primarily 3D and has a world or level editor. If there is interest we may do a similar […]
The post 25 Game Engines in 25 Minutes appeared first on GameFromScratch.com.
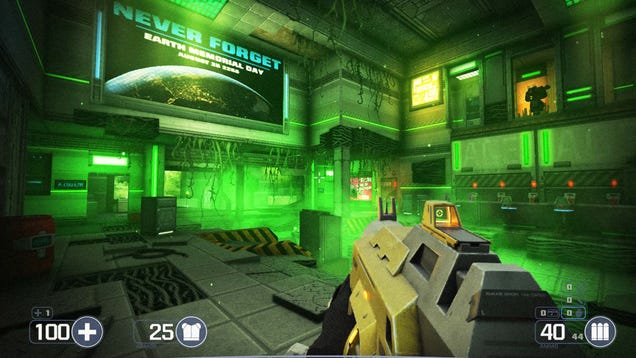
Things aren’t looking good for me. I’m a few levels into Selaco, a new FPS out now on Steam, and I’m stuck behind a bar as a group of sci-fi soldiers unload their rifles and shotguns into my hiding spot. I’m also low on health. So yeah, a bad spot to be in. I take a deep breath and try something.

Grand Theft Auto VI’s release date, a never ending well of speculation and hype, has just gotten a little more exact. Take-Two announced in its latest earnings report that it expects the most-anticipated sequel ever to hit PlayStation 5 and Xbox Series X/S in fall of 2025.
GameFromScratch.com
GameMaker in 2024
GameMaker just outlined new features coming to the seminal game engine GameMaker in 2024 and there are some pretty massive changes on the horizon. Highlight new features coming to GameMaker include: New Code Editor This is actually already available in the GameMaker beta (check it out in action here). This […]
The post GameMaker in 2024 appeared first on GameFromScratch.com.
I am trying to add a sprite at a "grid" location on the tiled map. The TMX tiled Map is like a grid, and you can access the size of the grid by calling mTMXtiledMap.getTileRows() and mTMXtiledMap.getTileColumns().
I want to add an object at grid location, say (2, 5). My tileMap is of size (10,10).
How can I do that? There is no function like mTMXTiledMap.addChild(int x, int y, Entity mEntity).
I would appreciate any suggestions!
I am currently developing car game in AndEngine. In which I was using revolute joint for car wheel and chassis attachment. But my friend suggest me that use wheel joint for that purpose for better behavior of the car. In AndEnginen I didn't found the wheel joint implementation. So what I have to do for wheel joint implementation.
I think I have to manually update the box2d library for this purpose but I don't know how many things get updated. Please suggest me some guidance on achieving better car behavior in AndEngine.
AMD GPUOpen - Graphics and game developer resources
This update to our AMD FSR 3 UE5 plugin provides improved UI rendering quality with DX12, improved generation of reactive mask for translucent elements + small bug fixes. FSR 3 source also updated on GitHub.
The post AMD FidelityFX Super Resolution v3.0.4 plugin for Unreal Engine 5 available now appeared first on AMD GPUOpen.
AMD GPUOpen - Graphics and game developer resources
Our one-stop guide to performance with Unreal Engine.
The post Unreal Engine performance guide appeared first on AMD GPUOpen.
AMD GPUOpen - Graphics and game developer resources
Our new AMD FidelityFX Super Resolution (FSR) 3 plugin guide for Unreal Engine guides you the installation and configuration process.
The post AMD FidelityFX Super Resolution 3 Unreal Engine plugin guide appeared first on AMD GPUOpen.