Which Cleric Domain and Deity Should You Choose in Baldur’s Gate 3?
Creating a Cleric in Baldur’s Gate 3 is one of the most intimidating things for beginners that aren’t familiar with Dungeons & Dragons because there are so many Domains and Deities to choose from. While Domains are more important – since they act as your subclass – your chosen Deity is still essential for roleplaying purposes and interactions with other companions and NPCs throughout the game.
All Baldur’s Gate 3 Cleric Domains, Explained

There are 7 Domains to choose from in Baldur’s Gate 3. Each comes with its own list of spells and abilities that will be awarded as you level up. For starters, the BG3 Tempest Cleric Domain is a fan favorite.
While some Domains are commonly associated with certain Deities (the Life Domain is usually associated with good Deities, for example) you can mix and match as you please.
Best Cleric Domain in Baldur’s Gate 3
If you ask me, the best Domain to choose for your Cleric is either the Life Domain or the War Domain. The former is the stereotypical choice for a Cleric, but with good reason, since it allows players to heal and buff allies on the field. Conversely, the latter is excellent for Clerics who don’t want to be shoehorned into a support role. The Tempest Domain also works for this purpose if you prefer lightning magic instead of traditional swordplay.
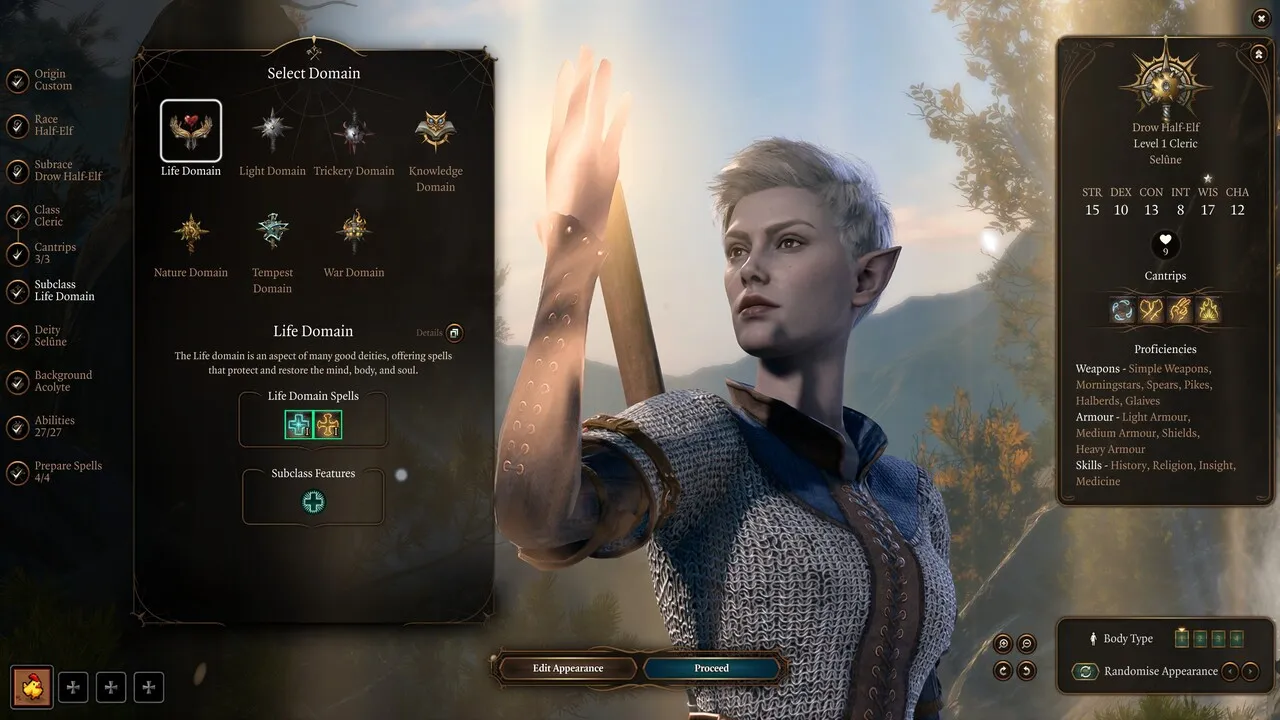
Life Domain
The Life Domain is associated with many good Deities. It focuses on protective and restorative spells, making it perfect for a support-oriented Cleric. In addition to Heavy Armor Proficiency, this Domain starts with Disciple of Life, which permanently buffs all healing spells by 2 HP.
Here’s what you’ll learn as you level up if you choose this Domain.
- Level 1 – Domain Spells (Bless, Cure Wounds)
- Level 1 – Disciple of Life (Subclass Feature)
- Level 1 – Heavy Armour Proficiency (Subclass Feature)
- Level 2 – Preserve Life (Action)
- Level 3 – Domain Spells (Lesser Restoration, Aid)
- Level 5 – Domain Spells (Revivify, Beacon of Hope)
- Level 6 – Blessed Healer (Subclass Feature)
- Level 7 – Domain Spells (Death Ward, Guardian of Faith)
- Level 8 – Divine Strike: Life (Action)
- Level 9 – Domain Spells (Mass Cure Wounds, Greater Restoration)
Related: Karmic Dice May Be Messing Up Your Baldur’s Gate 3 Rolls
Light Domain
According to the official in-game description, the Light Domain is centered around Deities of justice, majesty, and primordial flame. This Domain utilizes spells that can dispel darkness and are effective against undead creatures, which makes sense given the name. Warding Flare, this Domain’s unique spell, lets you force a Disadvantage on attackers.
Here’s what progression looks like for a Light Domain Cleric.
- Level 1 – Domain Spells (Faerie Fire, Burning Hands)
- Level 1 – Warding Flare (Subclass Feature)
- Level 1 – Light (Subclass Feature, Cantrip)
- Level 2 – Radiance of the Dawn (Action)
- Level 3 – Domain Spells (Flaming Sphere, Scorching Ray)
- Level 5 – Domain Spells (Daylight, Fireball)
- Level 6 – Improved Warding Flare (Subclass Feature)
- Level 7 – Domain Spells (Wall of Fire, Guardian of Faith)
- Level 8 – Potent Spellcasting (Subclass Feature)
- Level 9 – Domain Spells (Flame Strike, Destructive Wave)
Trickery Domain
The Trickery Domain is home to mischievous and chaotic Deities, perfect for Clerics who really wish they could play a Rogue or Bard. Their unique action is Blessing of the Trickster, which gives an Advantage on Stealth checks. Plus, they start out with Disguise Self and Charm Person too.
Here’s what you’ll learn as you level up as a Trickery Domain Cleric.
- Level 1 – Domain Spells (Disguise Self, Charm Person)
- Level 1 – Blessing of the Trickster (Action)
- Level 2 – Invoke Duplicity (Action)
- Level 3 – Domain Spells (Mirror Image, Pass Without Trace)
- Level 5 – Domain Spells (Bestow Curse, Fear)
- Level 7 – Domain Spells (Polymorph, Dimension Door)
- Level 8 – Divine Strike: Poison (Action)
- Level 9 – Domain Spells (Dominate Person, Seeming)
Knowledge Domain
The Knowledge Domain is the nerdiest of them all, designed for Clerics who wish to be proficient in language and academic skills. Blessings of Knowledge is its unique feature, letting you learn two additional languages at the start of the game. Plus, you can choose to be proficient in two of the following: Arcana, History, Nature, or Religion. Your proficiency bonus will be doubled to +4 for any skill checks that use your chosen two!
Here’s what progression looks like for the Knowledge Domain.
- Level 1 – Domain Spells (Command, Sleep)
- Level 2 – Knowledge of the Ages (Action)
- Level 3 – Domain Spells (Calm Emotions, Hold Person)
- Level 5 – Domain Spells (Speak with Dead, Slow)
- Level 7 – Domain Spells (Confusion, Otiluke’s Resilient Sphere)
- Level 8 – Potent Spellcasting (Subclass Feature)
- Level 9 – Domain Spells (Dominate Person, Telekinesis)
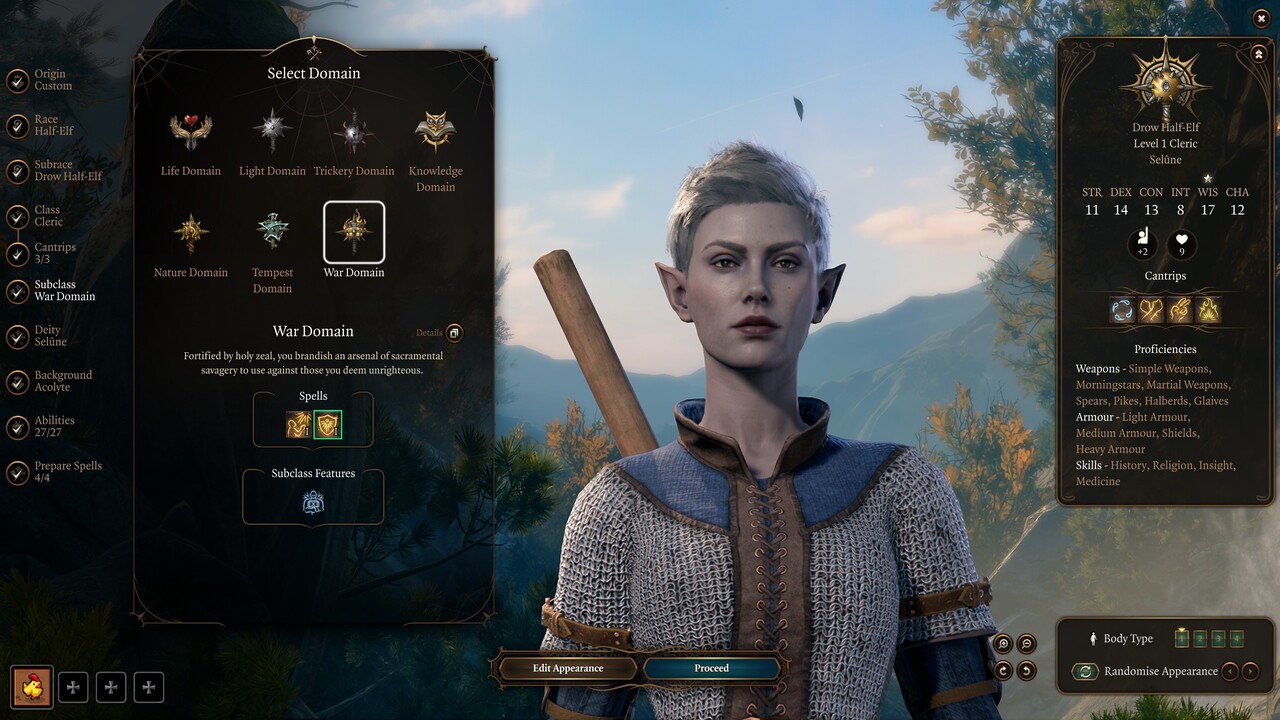
Nature Domain
The Nature Domain is self-explanatory, letting you channel your inner Druid to focus on the great outdoors. Nature Domain Clerics are proficient with Heavy Armor, just like Life Domain Clerics, and their unique feature — Acolyte of Nature — lets them learn any Druid cantrip of their choosing and gain proficiency in Animal Handling, Nature, or Survival.
Here’s what the progression path looks like for a Nature Domain Cleric.
- Level 1 – Domain Spells (Speak with Animals, Animal Friendship)
- Level 1 – Acolyte of Nature (Subclass Feature)
- Level 1 – Shillelagh (Cantrip)
- Level 2 – Charm Animals and Plants (Action)
- Level 3 – Domain Spells (Spike Growth, Barkskin)
- Level 5 – Domain Spells (Plant Growth, Sleet Storm)
- Level 7 – Domain Spells (Dominate Beast, Grasping Vine)
- Level 8 – Divine Strike: Elemental Fury (Action)
- Level 9 – Domain Spells (Insect Plague, Wall of Stone)
Related: Here’s an Easy Way to Clear Up Inventory Space in Baldur’s Gate 3
Tempest Domain
The BG3 Tempest Cleric Domain is centered around lightning, thunder, and storms. It’s mainly an offensive Domain that provides proficiency with Martial Weapons and Heavy Armor, so it’s perfect for Clerics who want to be on the front lines and deal massive damage. Its unique feature is Wrath of the Storm, a spell that strikes a foe and deals 2-16 Lightning damage (or half of that on a failed Saving Throw). I found the Wrath of the Storm feature to help me the most in the game’s brutal battles, so I highly recommend it.
Here are all the spells that a Tempest Domain Cleric learns as they level up.
- Level 1 – Domain Spells (Thunderwave, Fog Cloud)
- Level 1 – Heavy Armour Proficiency (Subclass Feature)
- Level 1 – Martial Weapon Proficiency (Subclass Feature)
- Level 1 – Wrath of the Storm (Subclass Feature)
- Level 2 – Destructive Wrath (Subclass Feature)
- Level 3 – Domain Spells (Shatter, Gust of Wind)
- Level 5 – Domain Spells (Call Lightning, Sleet Storm)
- Level 6 – Thunderous Strike (Subclass Feature)
- Level 7 – Domain Spells (Ice Storm, Freedom of Movement)
- Level 8 – Divine Strike: Tempest (Action)
- Level 9 – Domain Spells (Insect Plague, Destructive Wave)
Related: Which Paladin Oath Should You Choose in Baldur’s Gate 3?
War Domain
Last but certainly not least, the War Domain is designed for Clerics who want to smite evildoers with holy powers. Choosing this Domain will make you proficient with Heavy Armor and Martial Weapons and grant you the War Priest ability, which grants you War Priest charges that can be spent to make additional attacks during your turn.
Here’s what progression looks like for the War Domain.
- Level 1 – Domain Spells (Divine Favour, Shield of Faith)
- Level 1 – Heavy Armour Proficiency (Subclass Feature)
- Level 1 – Martial Weapon Proficiency (Subclass Feature)
- Level 1 – War Priest (Subclass Feature)
- Level 2 – Guided Strike (Action)
- Level 3 – Domain Spells (Magic Weapon, Spiritual Weapon)
- Level 5 – Domain Spells (Spirit Guardians, Crusader’s Mantle)
- Level 6 – War God’s Blessing (Subclass Feature)
- Level 7 – Domain Spells (Stoneskin, Freedom of Movement)
- Level 8 – Divine Strike: Warmaster (Action)
- Level 9 – Domain Spells (Flame Strike, Hold Monster)
What Does a Cleric Deity Do in Baldur’s Gate 3?
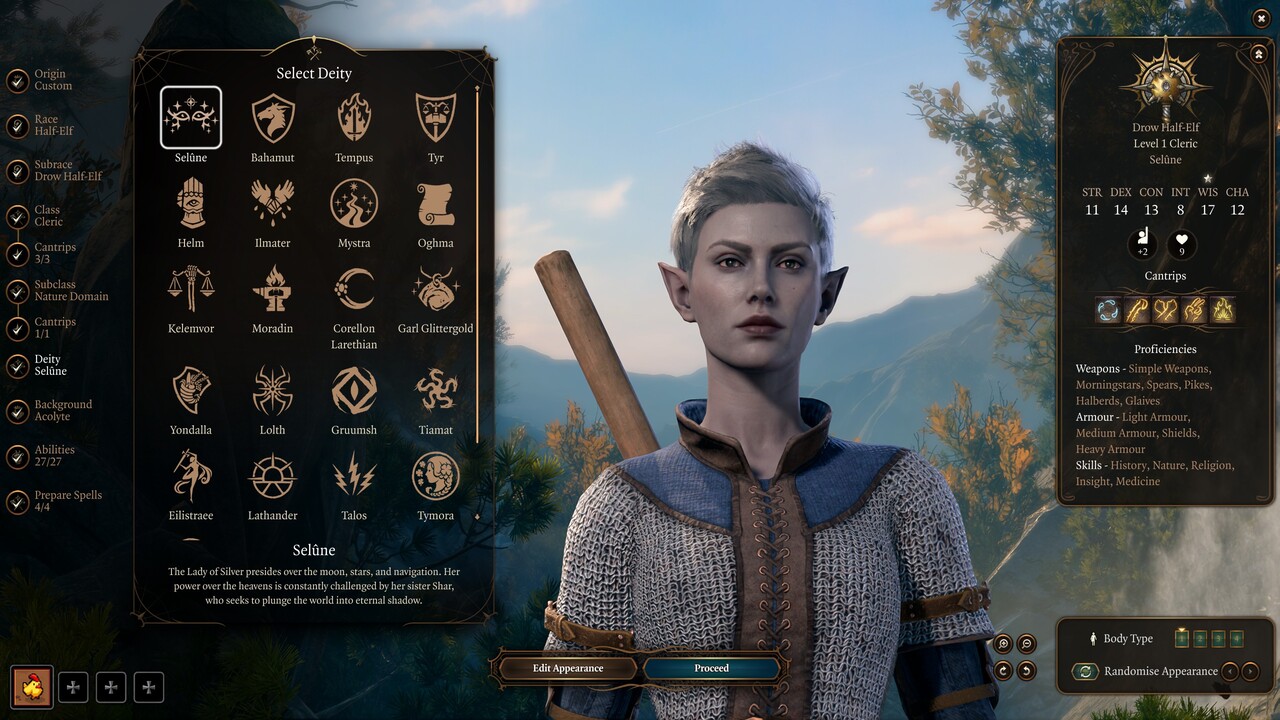
There are a whopping 21 Deities to choose from when creating a Cleric in Baldur’s Gate 3. This choice doesn’t affect anything related to gameplay or combat but will affect your relationship with certain NPCs and your available dialogue options in specific scenarios. This is purely a roleplaying decision, so try to choose the one that sounds the coolest to you. My personal favorite is the BG3 Tempus Cleric Deity.
Related: Avoid Baldur’s Gate 3’s Frustrating Traps System Using This Simple Command
Here’s a list of all 21 Baldur’s Gate 3 Deities with a brief summary of each.
- Selune: Goddess of the Moon, Stars, and Navigation
- Bahamut: Dragon God of Justice
- Tempus: Lord of Battles
- Tyr: Blind God of Law and Justice
- Helm: The Watcher, Eternal Sentry Among the Gods
- Ilmater: Crying God of the Oppressed and Persecuted
- Mystra: Mother of All Magic
- Oghma: God of Inspiration and Invention
- Kelemvor: Guides the Undead to the Afterlife
- Moradin: Dwarven God of Smiths, Artisans, and Miners
- Corellon Larethian: Creator of Elves and Overseer of Elven Pantheon, God of Art, Magic, and Nature
- Garl Glittergold: King of the Gnomish Gods, Deity of Humor, Gem-Cutting, Protection, and Trickery
- Yondalla: Mother of the Halfling Pantheon, Goddess of Home, Hearth, and Nature
- Lolth: Matriarch of the Drow Pantheon, Goddess of Spiders and the Underdark, seeks to corrupt all Drow and turn them into cultists.
- Gruumsh: Patron Deity of Orcs, God of War, Conquest, and Victory
- Tiamat: Dragon God of Greed
- Eilistraee: Goddess of Good Drow, Beauty, Song, and Freedom
- Lathander: God of Dawn and Spring, Birth and New Beginnings
- Talos: Uncaring and Destructive Force of Nature
- Tymora: Goddess of Fortune and Gambling
- Mielikki: Goddess of Forests
While most of these Deities can be chosen without affecting your character that much, be wary of selecting Deities like Lolth, who are reviled throughout Faerun. Lolth, for example, wishes to turn every Drow into a mindless servant. In addition, Tiamat is described as a “roiling mass of avarice and hate that is currently trapped within the Nine Hells.”
Openly worshiping some of these Deities might make some NPCs think less of you. However, nobody’s really going to care if you serve Garl Glittergold on the other hand. If you want to deepen your relationship with everyone’s favorite Wizard, Gale, you should choose Mystra to unlock some unique dialogue options with him at camp. Meanwhile, if you want NPCs to associate you with war and battles, select the BG3 Tempus Cleric Deity.
Speaking of deepening your relationship with Gale, check out our Gale romance guide for BG3.
Which Cleric Deity is Best in Baldur’s Gate 3?
As mentioned, choosing a Cleric Deity isn’t the most crucial decision in Baldur’s Gate 3, as they only change dialogue options. That said, it is recommended to pick one that can deepen a relationship with a party member or one that aligns well with the Clerics role.
For example, as stated in the last section, choosing Mystra, described as “Mother of all Magic,” will deepen your relationship with the Wizard Gale. Another great pick is Bahamut, described as the “Dragon God of Justice,” who is well regarded and looked at for their healing capabilities, which aligns well with the Cleric class.
Do Deities Matter in Baldur’s Gate 3?
Deities only matter if you care about the story of Baldur’s Gate 3. In other words, it depends on what you are trying to get out of the game. For example, deities don’t change how combat turns out or the game’s overall difficulty, but they do change the roleplaying nature of the game. You will get different dialogue options depending on the Deity you choose, so it’s smart to choose wisely if dialogue options are an important factor to you.
Considering Baldur’s Gate 3 is at its absolute best when role-playing and discovering the lore the game includes, I recommend you pick the Deity that sounds the coolest to you. You will find that BG3 can get incredibly in-depth regarding relationships with other characters, and each Deity can significantly impact how things pan out.
If you are unsure which one to choose, you can save before selecting the Deity and then load the game later if you get bored of your current pick. For example, I first selected the Bahamut Deity and didn’t like it, so I reloaded the save game and went with BG3 Tempest Deity instead, which was more my speed.
Which is the Best Race for a Cleric in Baldur’s Gate 3?
The best race to choose for the Cleric class in Baldur’s Gate 3 is the Duegar. The Duegar is the best for a couple of reasons: they get a boost in proficiency with bludgeoning weapons and gain an advantage against being paralyzed or charmed. These two status effects can turn the tide in combat, so having a Duegar cleric can help counter this.




 Fallout London is a massive DLC-sized mod for Fallout 4 that introduces a huge arsenal of new weapons and armor for players to find. Since the mod takes place in London, the clothing and weaponry it features are quite different from the gear you’d find in the Commonwealth of Fallout 4.
While you can shoot and loot your way through post-apocalyptic London and discover new weapons and armor naturally during your Fallout London playthrough, taking a shortcut to the cool stuff can make things more fun. Whether you have your eye on a unique weapon or just want to have your favorite outfit from the start of a new Fallout London playthrough, you can use console commands to immediately spawn specific items at any time and place.
Table of contentsHow to spawn items with console commands in Fallout LondonAll weapon IDs in Fallout LondonAll ammo IDs in Fallout LondonAll material IDs in Fallout London
How to spawn items with console commands in Fallout London
Experienced Fallout ...
 The Salvation’s Edge Raid finally brings Guardians face to face with the Witness for the final showdown in Destiny 2, but getting to the Witness requires completing a series of encounters throughout the Raid first. Salvation’s Edge is one of the coolest Destiny 2 Raids Bungie has ever created, but the mechanics take some getting used to for new players.
Thankfully, Salvation’s Edge is a fairly straightforward raid once you get the hang of things, and there are a lot of repeated mechanics from The Final Shape campaign so you should be at least somewhat prepared before going in. There’s a lot of loot on offer — including an all-new Exotic weapon — so here’s what you need to know about Salvation’s Edge in Destiny 2 The Final Shape.
How to Start Salvation’s Edge
Substratum Encounter Guide
Herald of Finality Encounter Guide
Repository Encounter Guide
Verity Encounter Guide
The Witness Encounter Guide
How to Get the Eupho...
  Soulmask is an early access survival game so there are bound to be a few issues with the game right now, but it’s basically unplayable on ultrawide monitors with a 21:9 or 32:9 aspect ratio because it’s so zoomed in.
There isn’t an FOV slider in Soulmask so you can’t just open the settings menu and zoom the camera out according to your preference, but the Soulmask community has discovered a quick fix that can make the game more playable if you’re using an ultrawide monitor. It’s not the perfect solution, but it will at least allow you to enjoy Soulmask for the time being on a 21:9 or 32:9 display.
How to Fix Soulmask Zoom on Ultrawide Monitors
While there isn’t an FOV slider in Soulmask, you can tweak some of the game’s files to zoom the camera out on ultrawide monitors. On Windows, search for and open “Run.” Then, type “%localappdata%” and click OK. From there, navigate to”AppData\Local\WS\Saved\Con...
  Soulmask is fun enough on your own, but playing with friends elevates the experience to a whole new level. If you want to create a custom world just for your group, you can even host your own dedicated server in Soulmask without much hassle.
Creating a dedicated server sounds scary on paper if you’ve never done it before, but it’s actually pretty simple. If you want to host your own custom Soulmask server, here’s what you need to do.
How to Make a Custom Server in Soulmask
To create a dedicated server in Soulmask, just follow these steps.
Create a new folder to hold your server’s files.
Download SteamCMD for Windows.
Extract the files to a folder in the root directory of your C drive (or whatever drive Steam is installed on).
Search for “CMD” in Windows and open Command Prompt.
Open the SteamCMD installation path on the command line. If you followed the instructions and put it on the SteamCMD folder on the root of your C driv...
  Arena Breakout Infinite, the free-to-play alternative to Escape From Tarkov, is blowing up on Twitch because there are thousands of closed beta keys being given away via Twitch Drops.
Since there are a ton of players desperately trying to claw their way into the closed beta for the F2P extraction shooter, there are a few issues popping up with the code redemption process and players are experiencing longer than usual wait times when trying to get their accounts whitelisted for the beta test. If you’re having problems with your Arena Breakout Infinite Twitch Drops, keep reading to learn what you can do.
How to Claim Arena Breakout Infinite Twitch Drops
Arena Breakout Infinite Twitch Drops work just like any other Twitch Drop campaign. As long as you watch any participating stream for 60 minutes, you’ll be granted beta access for Arena Breakout Infinite. The stream window must be active and unmuted for this to work, and you can check your current progress in the Twit...
  The closed alpha test for Marvel Rivals has finally begun for PC players, and while thousands of players were hoping to see an invitation in their email inboxes, only a select percentage of the population actually got into the test.
There were 30,000 invites sent out to random people who signed up for the alpha test, and a few thousand more were given out on the official Marvel Rivals Discord server. If you still don’t have a Marvel Rivals code, however, there’s no need to give up hope. Every player can claim an additional friend invite code for the Marvel Rivals alpha test that they can then share with someone else to get them in.
How to Get More Marvel Rivals Invite Codes
Screenshot: PC Invasion
To get an additional invite code for the Marvel Rivals alpha test, you need to reach level six. Once you’ve done so, head to the main menu and click Home followed by Overture to access the code claim section.
There are only a limited number of additional code...
  Marvel Rivals, Netease’s take on an Overwatch-style hero shooter set in the Marvel universe, is finally here for players lucky enough to be selected for its pre-launch alpha test, and as expected with an alpha, not everything is working perfectly.
For some reason, some players are unable to change the resolution in the game’s settings menu. This issue mostly affects players who use ultrawide monitors with 21:9 or 32:9 aspect ratios, plus gamers with multi-monitor setups. While Netease will surely patch this glitch in the future, there’s a workaround you can try for now if you’re stuck in windowed mode when playing Marvel Rivals.
How to Fix the Resolution Bug in Marvel Rivals
If you’re stuck in windowed mode in Marvel Rivals and are unable to change your resolution, then close the game entirely and return to your desktop. From there, change your desktop resolution to 1920×1080. Once you’re up and running in 1080p, boot up Marvel Rivals a...
  Much like Escape From Tarkov, Arena Breakout: Infinite has missions that require you to collect specific items from various points on the map and successfully extract with them.
One of the first quests that you’ll encounter in Arena Breakout is Personal Package. One of your contacts, Evita, needs you to collect a special envelope from the Artificial Lake on the Farm map. Thankfully, you get a quest marker on the map for this one, but it’s still hard to find where the envelope is hidden.
Arena Breakout Infinite Envelope Location
Screenshot: PC Invasion
To start this quest, load into the Farm map. Your destination is the Artificial Lake, a POI located in the northwestern corner of the map. Sometimes you’ll spawn right next to the Artificial Lake, but you might get unlucky and end up starting your raid on the eastern edge of the Farm. It’s a small map anyway, though, so it shouldn’t take too long to get there.
Once you reach the Artificial Lake...
 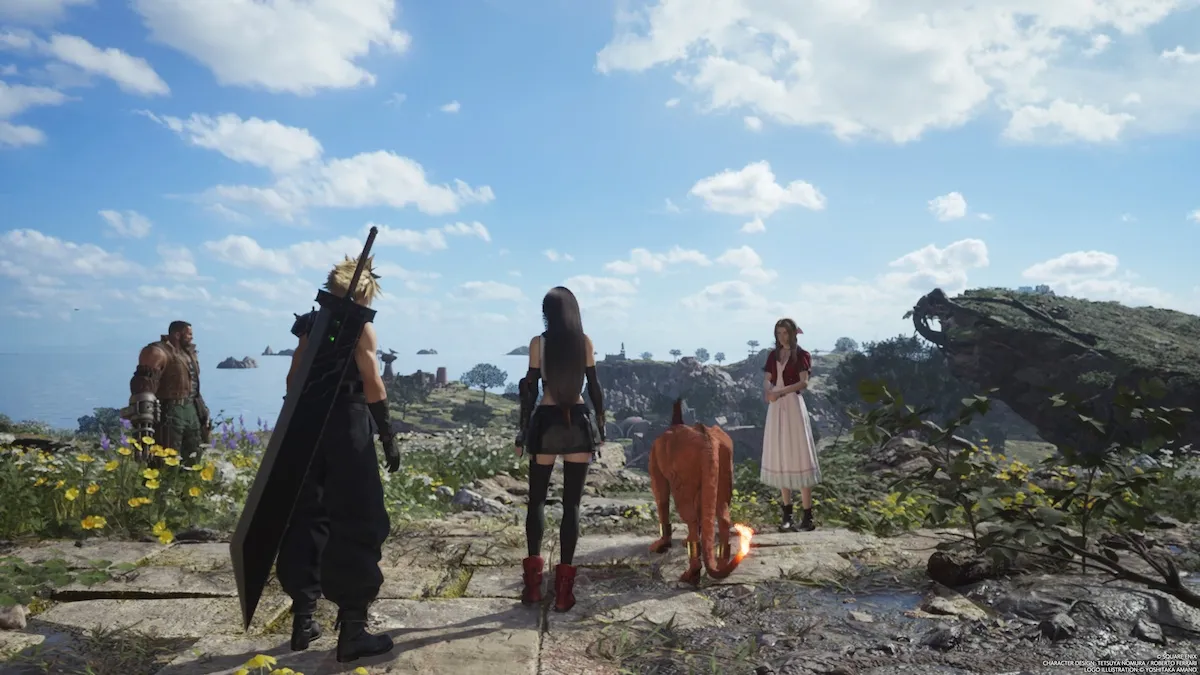 While most of Chadley’s Combat Simulator trials are fairly easy to unlock in Final Fantasy 7 Rebirth, some of them can be a pain. If you aren’t paying attention to enemy types and making sure to Assess every foe you encounter, then you’ll find yourself wandering around the game’s massive open world in search of one or two enemy types so you can gain access to new Combat Simulator missions.
To unlock Grasslands Region Intel: Level 2 in Final Fantasy 7 Rebirth, you need to battle 24 enemies in the Grasslands region. The Grasslands region is home to several enemy types, but you won’t be able to find them all just by walking around the overworld.
All Grasslands Enemy Locations in Final Fantasy 7 Rebirth
To unlock Grasslands Region Intel: Level 2, you only need to defeat 24 different enemy types in the Grasslands. There’s no need to Assess them (although you’ll want to do that to unlock another Grasslands Intel mission).
Related: FF7 R...