FreshRSS

Zobrazení pro čtení

Jsou dostupné nové články, klikněte pro obnovení stránky.

The FAR: Lone Sails studio returns with Herdling, a game where you herd a group of ‘mystical’ animals
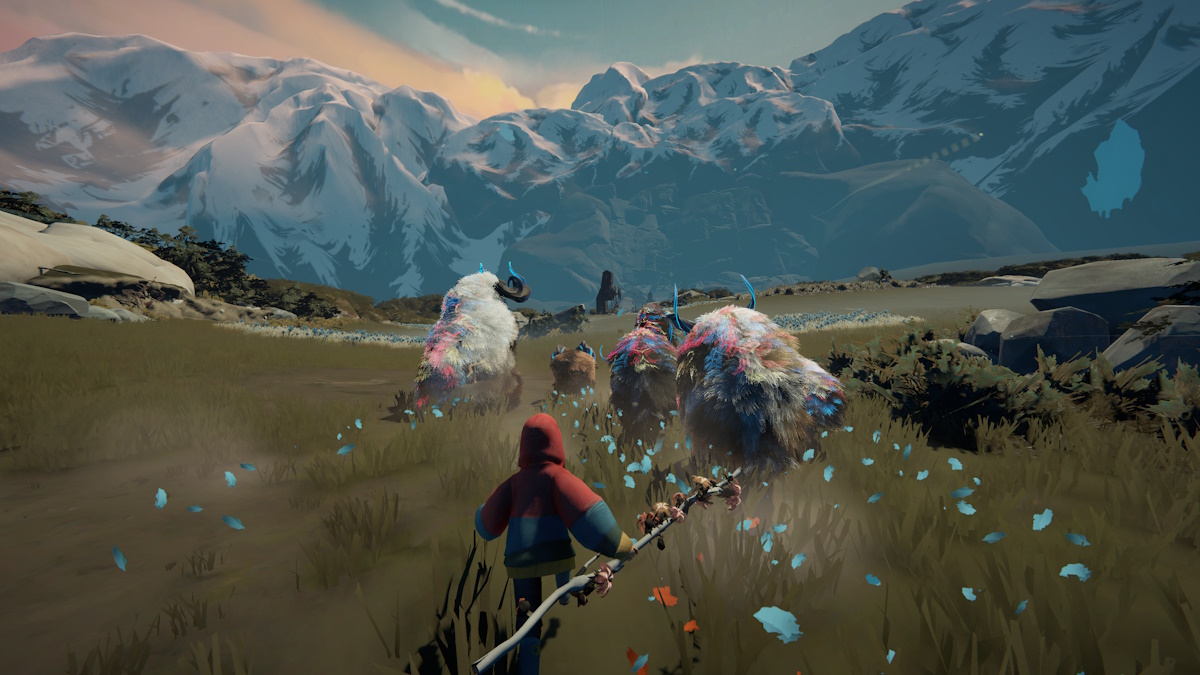
The folks behind the FAR games have announced Herdling, where you herd a group of strange beasts across various biomes as you make for a distant mountaintop. Developer Okomotive showcased the game today during Gamescom Opening Night Live 2024 with a trailer and a 2025 release window.

Okomotive has a penchant for chill, atmospheric games set in a suggested post-apocalyptic landscape. The studio tasked you with maintaining lumbering machines as you ventured to parts unknown in FAR: Lone Sails and FAR: Changing Tides. Okomotive plans to continue the theme with Herdling, but with lovable creatures instead of a loveable, fuel-guzzling vehicle.

Image via Okomotive

“With Herdling we wanted to start a new kind of adventure, not only for the players, but also for us,”
said co-founders Don Schmocker and Goran Saric. “To create the herd of beasts and their mountainous
world was an ambitious challenge for us and we enjoyed every step of that journey.”

No longer a solo adventure

Herdling looks to embrace the contemplative, atmospheric journey of a person traveling to a destination of some importance. There are some differences, of course. Herdling is a third-person adventure, placing you in the shoes and red hoodie of a herder guiding strange but gentle creatures called Calicorns to the top of a far-flung mountain. The FAR games were famous for their oppressive feeling of isolation and loneliness. Herdling may still emphasize the former, but at least you won't be alone.

Herdling game - making toward the mountains
Image via Okomotive

The trip still won't be an easy one. In FAR, Okomotive sprinkled light puzzle challenges and occasional threats throughout, and that won't change here. Herdling takes you through forests and valleys, tasking you to keep your herd safe while weathering fog and chilling snow.

“This idea of moving as part of a herd of large, lovable, mystical creatures was at the center of our design
process and we can’t wait to see players immerse themselves in the experience we have created,” said
Fabio Baumgartner, game designer, programmer, and sound designer of Herdling.

Herdling game - Calicorn
Image via Okomotive

Herdling doesn't have a release date yet, but it is slated for a launch in 2025. More about the game will be revealed during the Panic Games Showcase, held by the game's publisher Panic, on August 27.

The post The FAR: Lone Sails studio returns with Herdling, a game where you herd a group of ‘mystical’ animals appeared first on Destructoid.

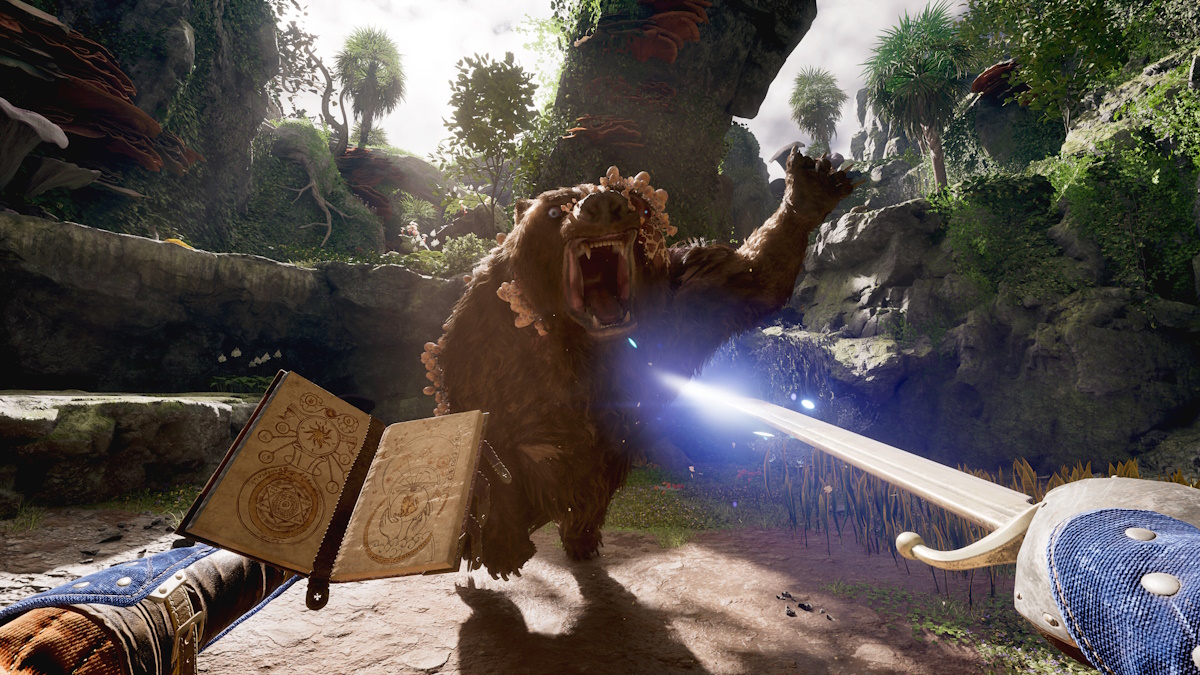
Avowed briefly had a release date announced before it was swiftly removed

avowed release date removed

Avowed, the next RPG from those famed RPG creators at Obsidian, got another trailer during the 2024 Xbox Games Showcase this weekend. The new footage confirmed it's coming this year, but Avowed had a full release date revealed elsewhere before it was quickly removed.

As spotted by Wario64 on X, the Avowed story trailer blog page on the official Obsidian site revealed a release date of November 12, 2024. But like the Troxler effect, not long after eyes were cast upon the date, it disappeared from the blog post entirely.

https://www.youtube.com/watch?v=AYvTNAaXMUA

The date came as part of a short quote provided by the game director, Carrie Patel. Today, the quote reads:

"The last few months at Obsidian Entertainment have been fast-paced and exciting. Since we saw you at the Xbox Developer Direct this past January, we’ve been busy with Avowed getting it ready."

Using the cosmic powers of the Wayback Machine, I was able to confirm the release date on the pre-edited page. Originally, the quote continued to say, "for release on November 12, 2024." And then it was gone.

Avowed release date removed
Image via Obsidian website/Wayback Machine

Avowed got a November release date for a short while, at least

There's no need to queue up that X-Files music; the reveal may have likely been for a target date, but something changed. I recall a year where every other month felt like it had a game delay announcement or two. It could have been altered, whether due to a delay or something else. We can't really know for sure.

For the most part, Obsidian is still targeting 2024 for Avowed. The exact month and day may still be up to the fates, but the year hasn't been changed yet. We may see the game around the fall regardless, nestled snuggly with others like Diablo IV: Vessel of Hatred and Life is Strange: Double Exposure.

The post Avowed briefly had a release date announced before it was swiftly removed appeared first on Destructoid.

Senua’s Saga: Hellblade II gets its first patch, addressing issues and misaligned peach fuzz (at last)

Hellblade 2 first patch crash fixes

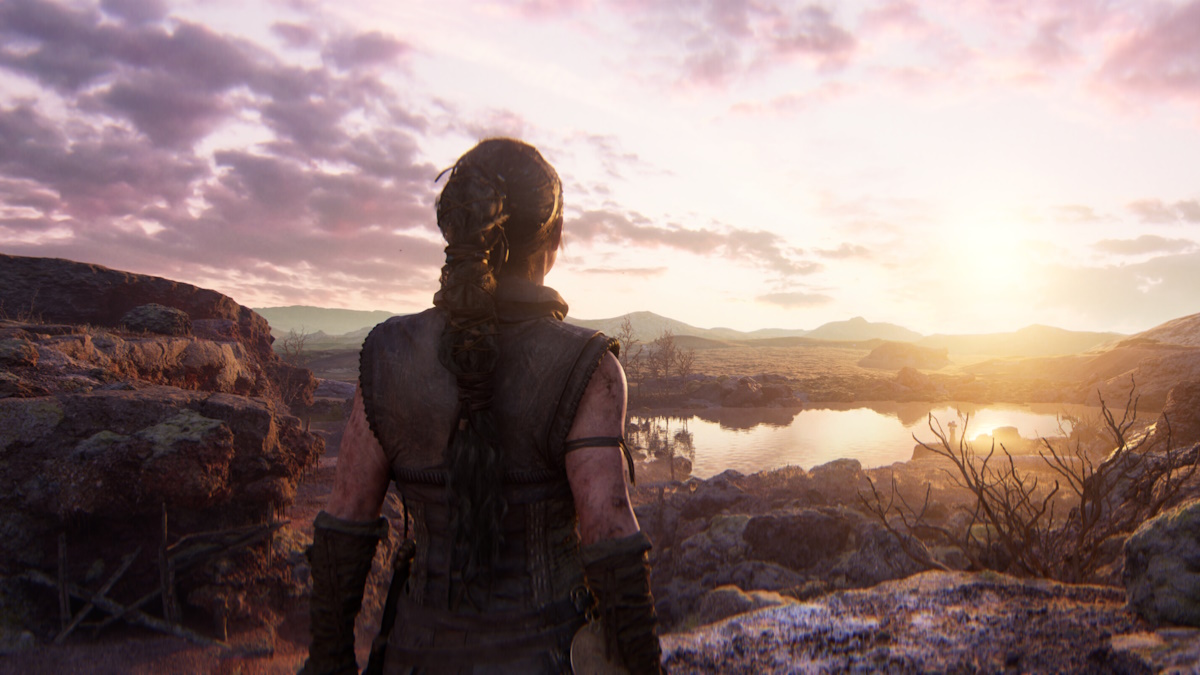
Senua's Saga: Hellblade 2 got its first-ever patch today, addressing a myriad of issues and, finally, the misaligned peach fuzz on Senua's face. Wait. Who notices that stuff?

Anyway, Hellblade 2 patch 1.0.5.0 is a small one, bringing around 20 fixes and changes to the game. Among the changes is one I feel is the most important for those who already finished the game. From now on, choosing the 'New Story' option in the menu will warn you that the feature will indeed reset your current progress. It didn't say this before, no doubt prompting some to reassess using the option. I do wonder how many save files got wiped, though.

Hopefully, some of you at least found all the hidden faces and Lorestangir before getting thrown back to the game's intro.

Hellblade 2 first patch - peach fuzz and various fixes
Image via Ninja Theory

Hellblade 2 patch deals with issues and face fuzz

The remainder of the patch is fairly typical, save for that whole face fuzz exception. Among the former and the New Story warning above, the patch also fixes memory leaks, ghosting issues, mission captions, and some artifacting when using FSR3. There is also one fix that kinda spoils an event near the end of the game, so I'd suggest you avoid reading the patch notes directly.

I'll post them below, sans spoilers (courtesy of Ninja Theory):

  • Added a warning prompt when selecting ‘New Story’ as this option resets the current save's story progress.
  • Fixed the large text size option, which was causing UI elements in chapter selection to go out of bounds.
  • Animation sync issues during some enemy executions in combat have been adjusted and fixed.
  • Adjusted the combat events during the Thórgestr battle at the end of Chapter 1
  • Several localization fixes.
  • Tree collision fixes in Chapter 2 settlement puzzle.
  • Fixed the crash when closing photo mode after extended gameplay.
  • Fixed a few cases of memory leaks game-wide.
  • Ultrawide fix during Chapter 3 cinematic to prevent Fargrímr from disappearing.
  • Indoor rain inside the broken house in Chapter 1 is fixed.
  • Ghosting issues fixed when running Frame Generation.
  • Added missing SFX during Chapter 3 puzzle and Chapter 4 combat
  • Fixed missing captions in several areas across the game.
  • Missing facial animations in Chapter 5 cinematic after village battle.
  • Misaligned peach fuzz around Senua's neck and face has been corrected.
  • [SPOILER] have been adjusted for a better combat experience.
  • Improved FSR3 artefacts.
  • Fixed the case of some animated objects were invisible during gameplay.
  • Fixed instances of black marks appearing on faces around beards and fine hairs on Low preset.

For more on Hellblade 2, check out our guide on opening the village gates and find out if you can remove the black bars.

The post Senua’s Saga: Hellblade II gets its first patch, addressing issues and misaligned peach fuzz (at last) appeared first on Destructoid.

Helldivers 2’s Dark Matter mission is getting a hotfix to address all the bugs (and the bugs)

Helldivers 2 dark matter mission hotfix

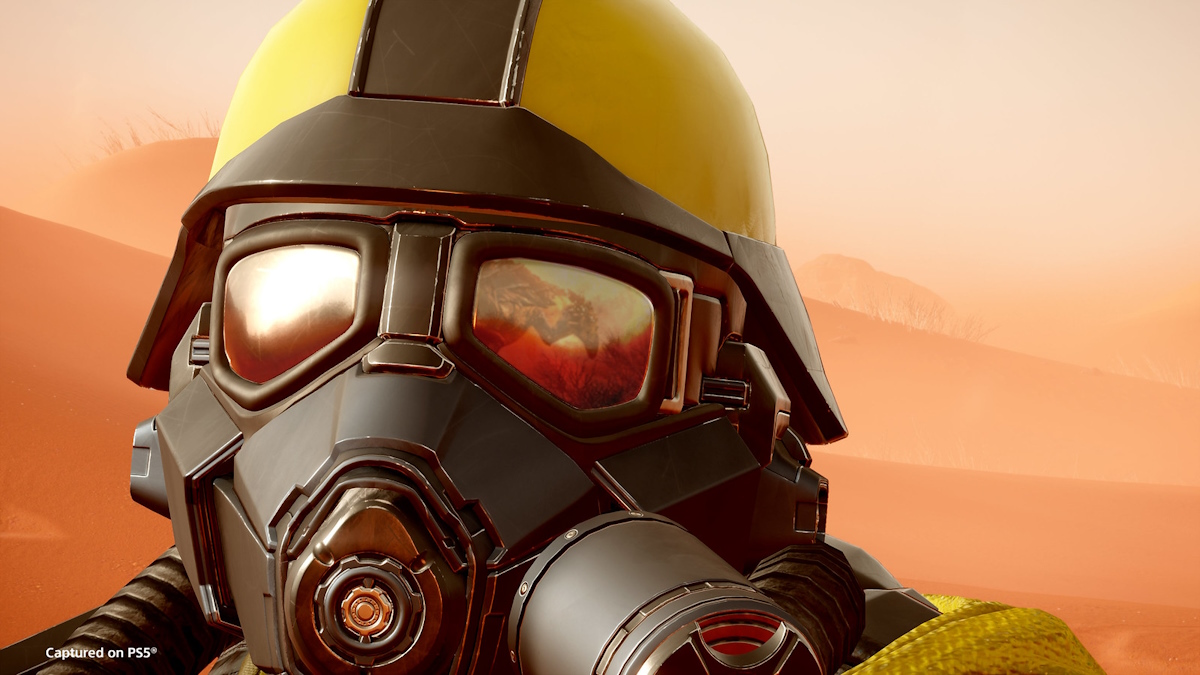
It's not so easy to destroy an entire planet, especially one so infested with bugs. And not just the Terminid kind, as Helldivers swiftly learned yesterday. The Dark Matter mission in Helldivers 2 is getting a hotfix following numerous reports of bugs and, um, bugs.

On May 30, the second phase of the Major Order 'Enduring Peace' began with a shocking demand from Super Earth's finest: Wipe the planet Meridia off the galactic map once and for all. To do so, divers had to inject a clearly dangerous substance known as Dark Fluid into the crust of Meridia — a planet swarming with Terminid following the failed Termicide experiment. Once enough of the stuff was injected the planet, the rock would collapse into a black hole. Sadly, things have been going quite badly.

https://www.reddit.com/r/Helldivers/comments/1d4aa1x/my_brother_in_christ_this_is_a_trivial_difficulty/?utm_source=share&utm_medium=web3x&utm_name=web3xcss&utm_term=1&utm_content=share_button

Players have been reporting that the mission is nigh impossible, regardless of the chosen difficulty. Heavy enemies such as Bile Titans spawn almost directly on the site of a drill you need to protect, making things harder than needed. Swarms of bugs spew from holes, and your vision is blocked by thick fog. If you actually manage to finish all three injection sites, you're swarmed with dozens of Shriekers.

Helldivers 2 is getting a hotfix for the Dark Matter mission soon

As you can see from the horror show above, the Dark Fluid mission has been a nightmare for many Helldivers 2 players, prompting Arrowhead to respond with news of a hotfix. Katherine "Baskinator" Baskin told players on the game's official Discord that the team is working on a hotfix to help with rapid Terminid spawns, which she confirms is a bug (not a feature). Hopefully, that also means the skies won't soon be darkened by countless Shriekers as well.

https://www.reddit.com/r/Helldivers/comments/1d4u53d/hot_fix_in_the_works/?utm_source=share&utm_medium=web3x&utm_name=web3xcss&utm_term=1&utm_content=share_button

I played the mission last night, and my experience aligns with that of many others. Bile Titans would appear 15 feet from the Dark Fluid drill and instantly attack, forcing the team to scramble. We did manage to complete the mission with Gatling Turrets and littering the ground with EAT-17 drops, but we didn't make extraction. I was the last one alive, possibly due to my heavy armor, but couldn't avoid the Shrieker blender and died 20 seconds before the Pelican arrived. Sorry, team.

helldivers 2 dark matter hotfix - my sorry ass on the ground
Screenshot by Destructoid

Whenever that hotfix drops, I hope it's soon. The Major Order is set to conclude early next week. Players may have to work overtime to get the mission done. As of now, the Helldivers have made almost no progress. It's going to be a rough weekend.

The post Helldivers 2’s Dark Matter mission is getting a hotfix to address all the bugs (and the bugs) appeared first on Destructoid.

Hades 2 plant guide: Every seed and where to get them

hades 2 plant guide all seeds and where to find them

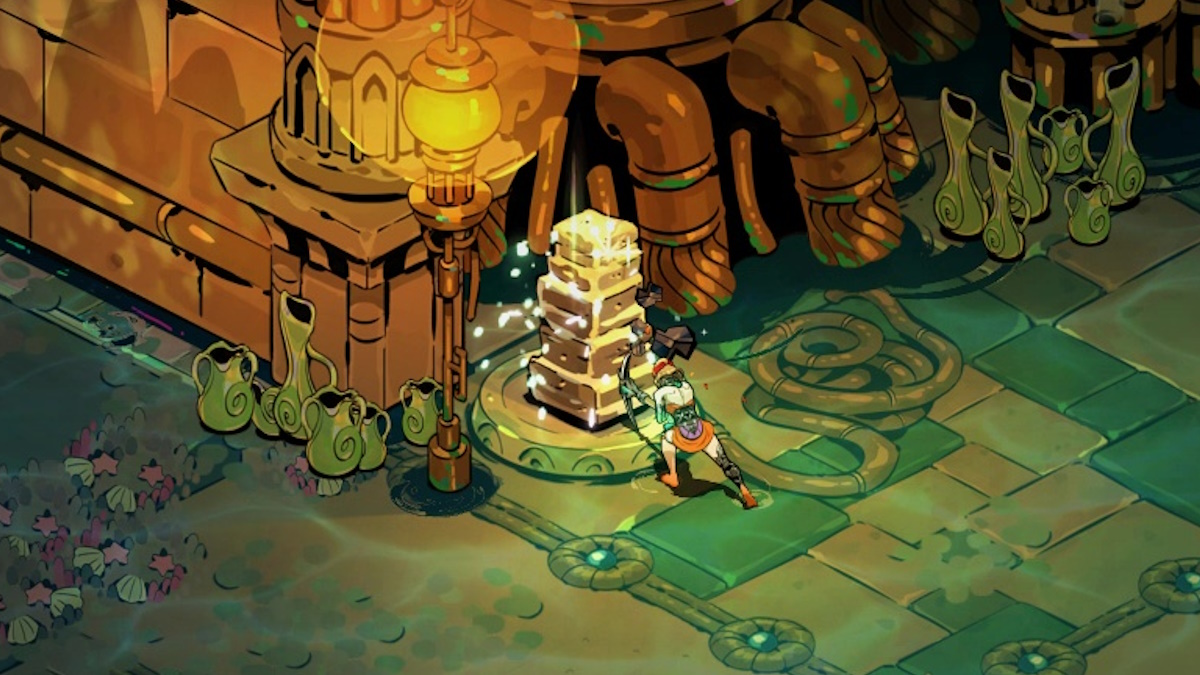
Beyond your usual resources and reagents, you also need to gather plants and seeds throughout the world of Hades 2. They're used in many spells, so finding them is a must. Here are all the plants and seeds you can find in Hades 2, and what they are used for.

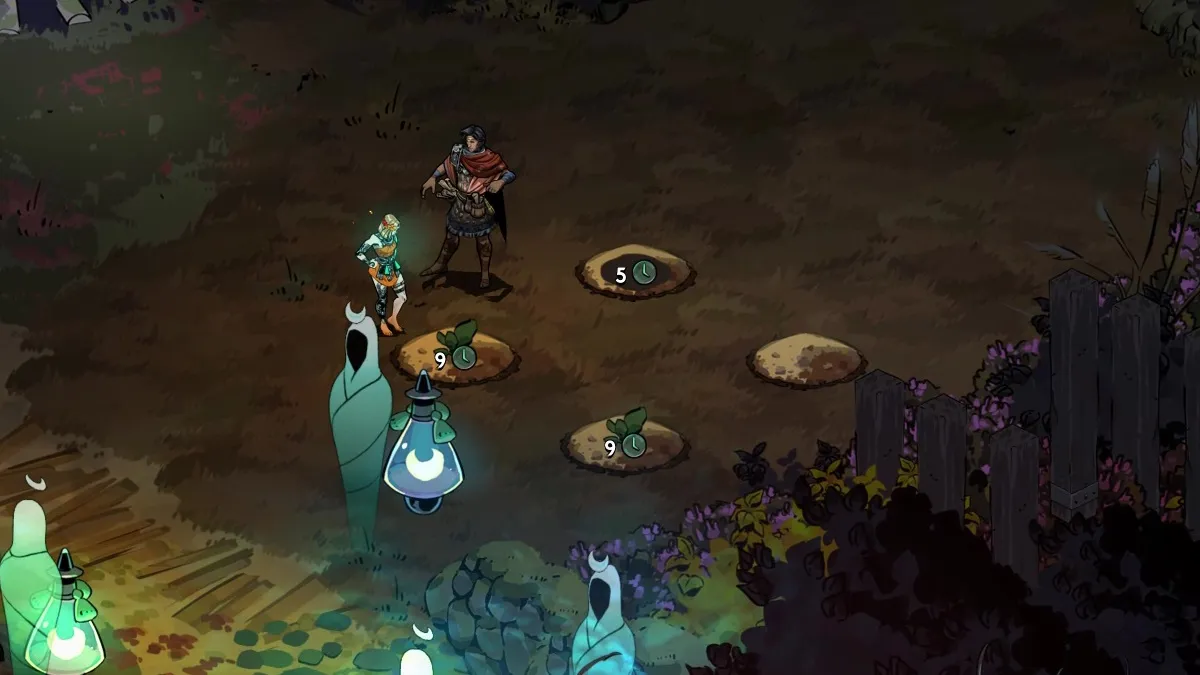
Most plants are used as materials for incantations you can cast using the Cauldron in the Crossroads. Some can be gathered by hand, but others must be grown. To grow seeds you find, you must play the game long enough to unlock the 'Flourishing Soil' incantation, which gives you two plots of soil in the Crossroads. You should get the incantation not long after gathering Moly, the yellow flower needed for it. Later, you'll be able to get even more plots for a higher plant yield.

Growing seeds in Hades 2 doesn't require water or fertilizer, just patience. Every seed will show you just how long it'll take until they're fully matured into harvestable plants. The time indicates Locations cleared. So, if the time is shown as a number 5, then you must clear five Locations in a Region before the plant is ready.

Hades 2 plant guide Every seed and where to get them - list menu in the game
Screenshot by Destructoid

All plants, seeds, and where to find them in Hades 2

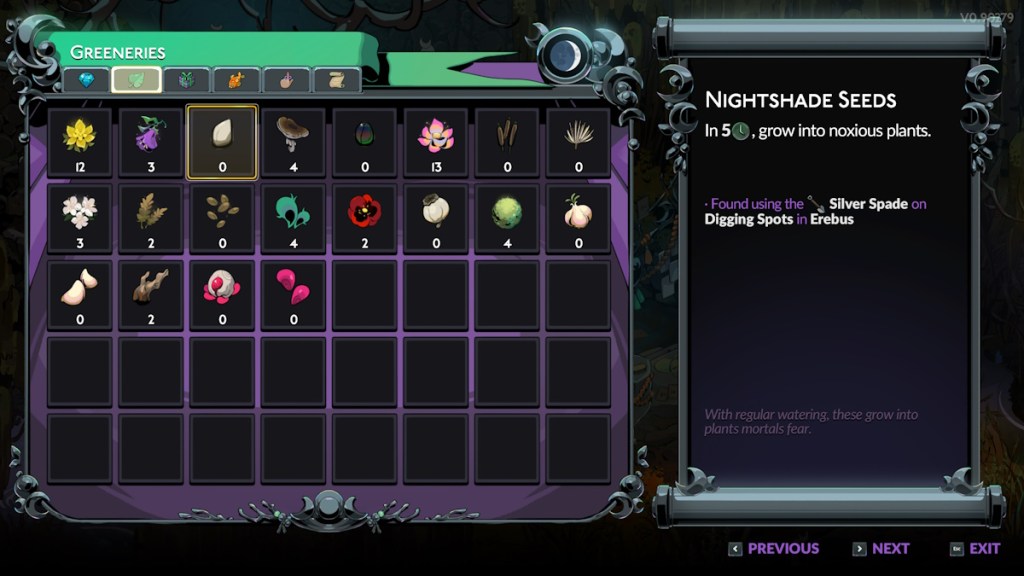
Plant seeds in Hades 2 require the Silver Spade tool to be unearthed. Look for plots of soil in each Region to get seeds. Keep in mind that if you don't take the Spade with you, you won't be able to get the seeds.

Plant Icon Plant Seed Where to get them What they're used for
Moly None Gather by hand in Erebus. Can also be given by Narcissus and as an award from the Fated List. Incantations involving dispelling and nullification.
All plants, seeds, and where to find them in Hades 2 - nightshade Nightshade Nightshade Seeds Unearthed from Digging Spots in Erebus using the Silver Spade tool. Can also be given by Narcissus and as an award from the Fated List. Incantations involving death and obscurity.
All plants, seeds, and where to find them in Hades 2 - deathcap Deathcap None Gather by hand in Erebus or wherever it is raining. Can also be given by Narcissus in Oceanus. Mostly sold to the Wretched Broker for Bones.
All plants, seeds, and where to find them in Hades 2 - lotus Lotus None Gather by hand in Oceanus. Incantations involving serenity and acuity.
All plants, seeds, and where to find them in Hades 2 - cattail Cattail Cattail Seeds Unearthed from Digging Spots in Oceanus using the Silver Spade tool. Incantations involving restoration and relief.
All plants, seeds, and where to find them in Hades 2 - myrtle Myrtle None Gather by hand in the Mourning Fields (Fields of Mourning). Incantations involving love and prosperity.
All plants, seeds, and where to find them in Hades 2 - wheat Wheat Wheat Seeds Unearthed from Digging Spots in the Mourning Fields. Incantations involving growth and respite.
All plants, seeds, and where to find them in Hades 2 - shaderot Shaderot None Gather by hand in Tartarus. Incantations involving eternity and quietude.
All plants, seeds, and where to find them in Hades 2 - poppy Poppy Poppy Seeds Unearthed from Digging Spots in Tartarus using the Silver Spade tool. Incantations involving dreams and slumber.
All plants, seeds, and where to find them in Hades 2 - moss Moss None Gather by hand on the Surface in the City of Ephyra. Incantations involving strengthened connections.
All plants, seeds, and where to find them in Hades 2 - garlic Garlic Garlic Seeds Unearthed from Digging Spots on the Surface in the City of Ephyra. Incantations involving resilience and fortitude.
All plants, seeds, and where to find them in Hades 2 - driftwood Driftwood None Gathered by hand in the Rift of Thessaly. Incantations involving stability and buoyancy.
mandrake root
Mandrake Root Mandrake Seeds Unearthed from Digging Spots in the Rift of Thessaly. Incantations involving power and protection.
All plants, seeds, and where to find them in Hades 2 - thalamus Thalamus Origin Seeds Unearthed from Digging Spots in Chaos. Incantations involving birthright and creation.
Golden Apple None Rewarded for defeating the Guardian of the Rift of Thessaly. Incantations involving beauty and fertility.
mystery seeds Mystery Plants Mystery Seeds Rare seeds unearthed from Digging Spots in many Regions. Can also be given by Narcissus. Can grow to become one of many different plants.

Our guide on every plant and seed in Hades 2 is not exhaustive. As this is an Early Access game, expect more changes to the guide as updates come in.

The post Hades 2 plant guide: Every seed and where to get them appeared first on Destructoid.

All resources and reagents in Hades 2 Early Access and where to find them

All resources and reagents in hades 2 and how to get them

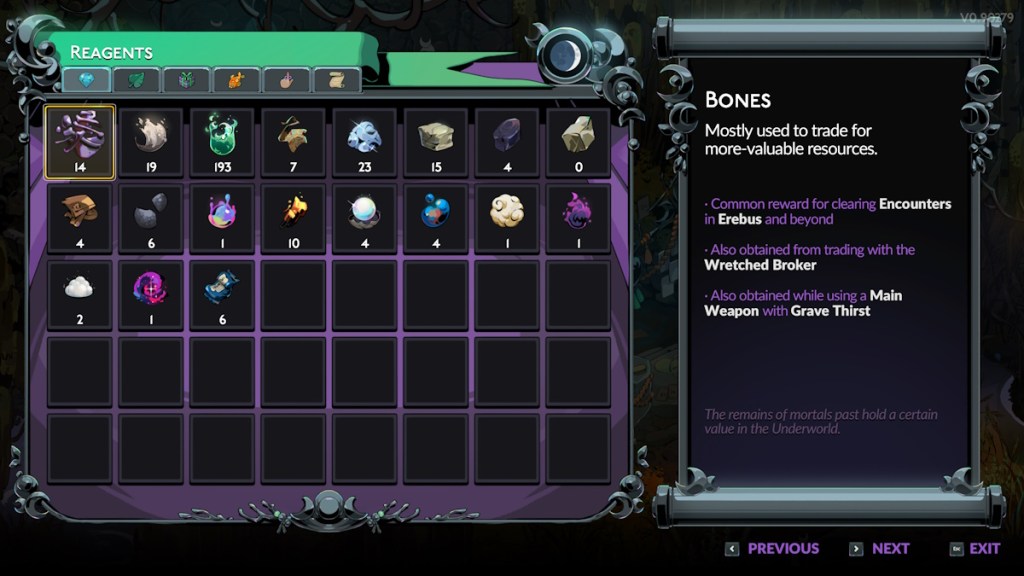
Progressing the story of Hades 2 means gathering materials required for upgrades and incantations. These reagents are many, and finding them all will take time. Some may not even be available until you reach late-game content. Here's every resource and reagent in Hades 2 Early Access, and how to find them.

all resources reagents in Hades 2 Early Access and where to find them
Screenshot by Destructoid

All resources and reagents in Hades 2 and where to find them

Our list of resources in Hades 2 is extensive, but by no means exhaustive. Hades 2 is a big game, and many resources are siloed to late-game Regions. We'll go over all the ones we've found so far, along with where to find them.

Resource Icon Resource Where to find
All resources and reagents in Hades 2 - bones
Bones Common reward for clearing Encounters.
Can be traded for from the Wretched Broker.
Can be obtained by using a weapon with Grave Thirst.
All resources and reagents in Hades 2 - ash Ash Common reward for clearing Encounters.
Can be traded for with Bones from the Wretched Broker.
Can be exchanged for Obol Points.
All resources and reagents in Hades 2 - psyche
Psyche Common reward for clearing Encounters.
Can be traded for with Bones from the Wretched Broker.
Can be gathered from Lost Shades using the Tablet of Peace tool.
Can be exchanged for Obol Points.
All resources and reagents in Hades 2 - fate fabric Fate Fabric Can be traded for from the Wretched Broker.
Can be exchanged for Obol Points.
All resources and reagents in Hades 2 - silver
Silver Can be harvested from Silver Ore Deposits in Erebus using the Crescent Pick tool. Also can be given by Narcissus in Oceanus.
All resources and reagents in Hades 2 - limestone Limestone Can be harvested from Limestone Ore Deposits in Oceanus using the Crescent Pick tool.
All resources and reagents in Hades 2 - glassrock Glassrock Can be harvested from Glassrock Ore Deposits in the Mourning Fields (Fields of Mourning) using the Crescent Pick tool.
All resources and reagents in Hades 2 - marble Marble Can be harvested from Marble Ore Deposits in Tartarus using the Crescent Pick tool.
All resources and reagents in Hades 2 - bronze Bronze Can be harvested from Bronze Ore Deposits on the Surface in the City of Ephyra using the Crescent Pick tool.
All resources and reagents in Hades 2 - iron Iron Can be harvested from Iron Ore Deposits on the Surface near the Rift of Thessaly and on ships using the Crescent Pick tool.
All resources and reagents in Hades 2 - plasma Plasma Can be harvested from Plasma Ore Deposits in Chaos using the Crescent Pick tool.
All resources and reagents in Hades 2 - cinder Cinder Rewarded for defeating the Guardian of Erebus.
All resources and reagents in Hades 2 - pearl Pearl Rewarded for defeating the Guardian of Oceanis.
All resources and reagents in Hades 2 - tears Tears Rewarded for defeating the Guardian of the Mourning Fields.
All resources and reagents in Hades 2 - wool Wool Rewarded for defeating the Guardian of the City of Ephyra.
All resources and reagents in Hades 2 - golden apple Golden Apple Rewarded for defeating the Guardian of the Rift of Thessaly.
All resources and reagents in Hades 2 - zodiac sand Zodiac Sand Rewarded for defeating the Guardian of Tartarus.
All resources and reagents in Hades 2 - shadow Shadow Creatable using the Cauldron after unlocking the Shadow Extraction incantation.
All resources and reagents in Hades 2 - moon dust Moon Dust Can be traded for from the Wretched Broker.
Creatable using the Cauldron after unlocking the Moonlit Essence from Shadow or Moonlit Essence from Stars incantations.
Can be exchanged for Obol Points.
All resources and reagents in Hades 2 - star dust Star Dust Rewarded for clearing Chaos Trials in the Pitch-Black Stone. Can be used in incantations that unlock the potential of Arcana Cards or let you bond with Animal Familiars.
darkness Darkness Can be gathered by hand in Chaos.
rubbish Rubbish Rewarded(?) for cleaning up after Eris in the Crossroads. Defeat Eris at least once as the Guardian of the Rift of Thessaly to have her appear at the Crossroads.
nightmare Nightmare Can be obtained by completing Testaments from the Oath of the Unseen.
Can be traded for with Bones from the Wretched Broker after obtaining one Nightmare.

Since Hades 2 is in Early Access, expect this list to change and expand over time. Be sure to return to this page often, especially following updates. We're also still making our way through the game, so more reagents may join the list before you know it. Good luck gathering what you need.

The post All resources and reagents in Hades 2 Early Access and where to find them appeared first on Destructoid.

How to farm Bones in Hades 2

How to farm bones in Hades 2

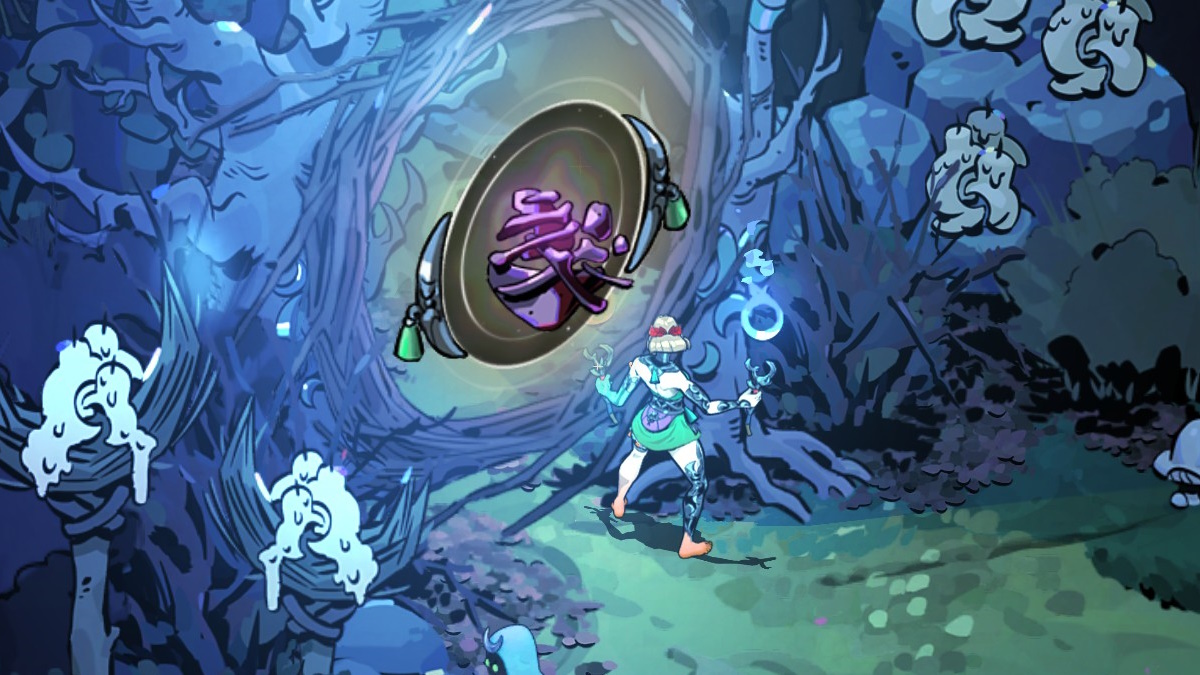
Out of the many materials worth gathering in Hades 2, Bones are arguably the most important. Yes, the purple calcium-rich litter is more useful than you realize, letting you trade in the stuff for resources that range from common to high rarity. Here's how to farm Bones in Hades 2.

Bones are a common reward for clearing enemy encounters in Hades 2, but that's hardly the only way to acquire them. You can easily up your Bones yield by following some easy steps, all the while staying cognizant of how and where Bones may appear.

Hades 2 Bones farming guide: Boons, incantation, Keepsakes, and more

There is a lot you can do to increase the amount of Bones earned in Hades 2. First off, you should consider the path of resource gathering. You should have the Crescent Pick unlocked already. If not, look for its incantation and then summon it to the Silver Pool in the Crossroads Training Ground. With that done, let's go over the many steps you can take to farm tons of Bones in Hades 2.

Enter doors with the Bones insignia

This should be a no-brainer, but if you're hunting down bones, be sure to pick the correct path. Doors that offer Bones as a reward are adorned by the item's symbol. For more on door symbols and what they mean, check out our guide.

How to farm Bones in Hades 2 - bones door
Screenshot by Destructoid

Use weapons with 'Grave Thirst' activated

The number-one best way to farm Bones in Hades 2 is to complete an incantation that gives your weapons 'Grave Thirst'. When it's active, a random weapon is given Grave Thirst, which allows you to passively earn a small amount of Bones as you complete each Location in the game. You can tell which weapon has the bone thirst if it's engulfed in a black and red haze:

How to farm Bones in Hades 2 - weapon with grave thirst
Screenshot by Destructoid

Here's how to get Grave Thirst:

  • Unlock the Crescent Pick tool for one Ash
  • Harvest Limestone in Oceanus, the second Region of the game
  • Return to the Cauldron until you see the incantation 'Gathering of Ancient Bones'
    • Activate the incantation using 2 Limestone

How to farm Bones in Hades 2 - incantation for grave thirst
Screenshot by Destructoid

With that complete, you can go out each night with a weapon hungry for Bones.

Multiply your chances with Poseidon's Keepsake

Poseidon offers you some of the best boons in Hades 2, and two are perfect for farming Bones in Hades 2. Seek out the God of the Sea and offer him Nectar for his Keepsake, 'Vivid Sea'. Equipping it increases the chances of Poseidon's boon appearing, and upgrading the Keepsake allows you to increase a Boon's rarity once per night.

During your farming runs, equip Poseidon's Keepsake and seek out the boons Ocean's Bounty and Double Up. The former boon makes it so resources gathered are worth more. But the second is key: Double Up has a chance of doubling any reward you find. Upgrading the boon to Rare ups the chance to 25%; and 30% at Epic.

How to farm Bones in Hades 2 - Poseidon boon 1
How to farm Bones in Hades 2 - poseidon boon 2

Improve your odds with Arcana Cards

This is more of a late-game strategy, but one worth looking into. After all, you'll need Bones no matter your experience with the game. There are several Arcana Cards that allow you to change Location Rewards. You'll find them at the bottom-left corner of the card list:

How to farm Bones in Hades 2 - arcana cards
Screenshot by Destructoid

Unlocking and activating these cards provide you multiple chances to re-roll a door reward.

Sell unwanted goods to the Wretched Broker

You'll get more resources than you need in Hades 2, so thankfully there's someone out there more than happy to take them off your hands. The Wretched Broker will trade any excess stock you have for Bones. Many incantations need things like Deathcap and Nightshade but, afterward, they end up mostly taking up space. Open up the 'Pawn Shop' tab and sell them to the Broker, along with other items, like fish you've captured, for some extra scratch.

How to farm Bones in Hades 2 - broker's pawn shop
Screenshot by Destructoid

Complete tasks for the Fated List of Minor Prophecies

Technically, this isn't a very reliable method to farm Bones since it takes a lot of time. However, completing tasks for the Fated List will reward you with heaps of Bones. Unlocking game mechanics, completing lists, and finishing story missions can award in dozens or hundreds of Bones. Keep an eye on the list and see if you can get a little bit further with each farming run.

How to farm Bones in Hades 2 - the fated list rewards
Screenshot by Destructoid

By the way, here's how you can accomplish the task in the image above.

One final tip:

  • If you don't have a door with the Bones symbol but there's one for Gold Coins, pick the latter and seek out Charon's shop. The Stygian Boatman often sells Bones for a fee.

That just about covers it all. Bones are exceptionally important in Hades 2, and their worth only increases the more progress you make as rarer resources get added to the Wretched Broker's stock.

The post How to farm Bones in Hades 2 appeared first on Destructoid.

Helldivers 2: How to choose the best payload for the SEAF Artillery

Helldivers 2 best payload SEAF Artillery

Stratagems are powerful tools in Helldivers 2, but you're typically limited to four per mission. But if you're fortunate, you may be able to up that count. The SEAF Artillery found on a map adds an extra Stratagem to the mix, but it works best when you choose the right payload.

There are multiple payload variants. The best payload options you can use for the SEAF Artillery can be based on preference, but it also depends on the difficulty and enemy type in Helldivers 2. If you're against bugs, tossing down a napalm strike to defend points is ideal. But when fighting Automatons, a calculated EMF strike is wiser. For high-level missions, you can pick smoke to cover your retreat. Both factions die to explosives, though, and those are likely the ones you want to know about the most.

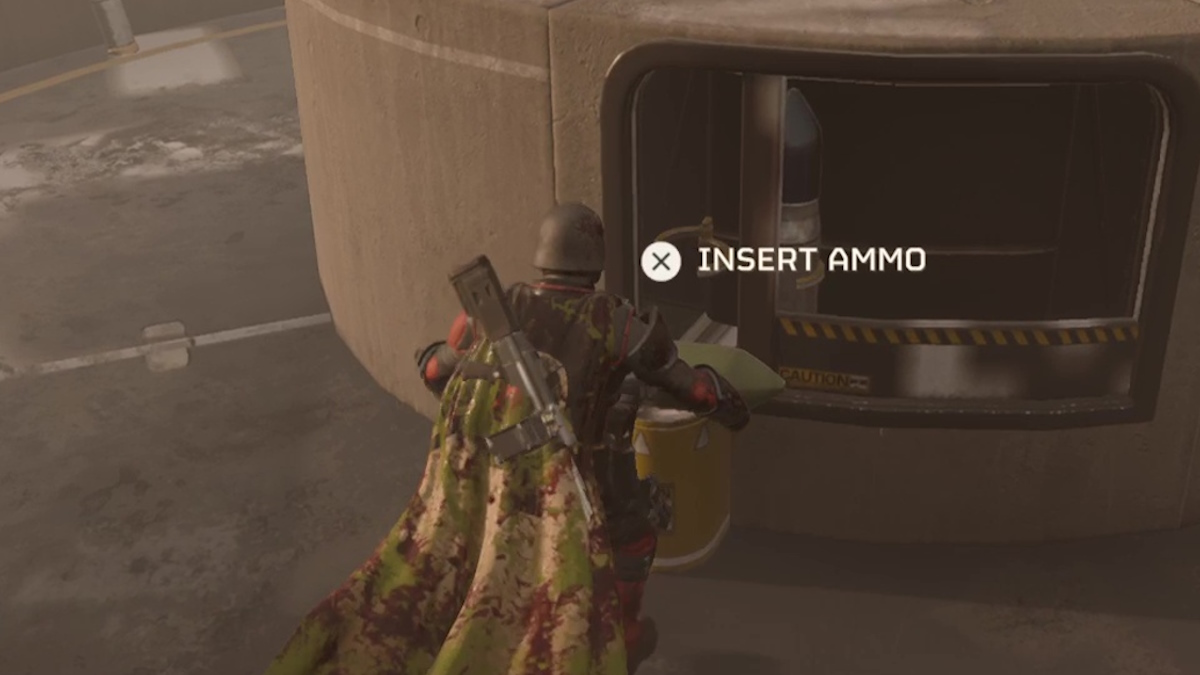
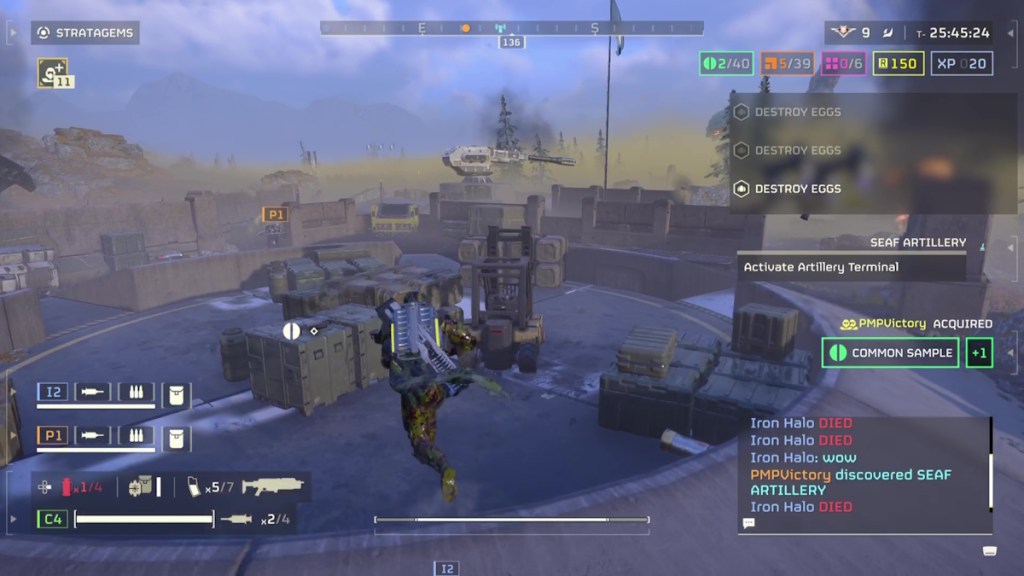
The SEAF Artillery counts as a Secondary Objective, which means it can spawn randomly on some maps. It can also appear regardless of the enemy faction, so bugs and bots will feel its fury. The weapon, once activated, will give you an extra Stratagem to use in the fight for Liberty and Justice. It's a good idea to load it up with payloads to prep it for war. The payloads are large munitions found around the artillery and must be manually loaded into the gun.

The SEAF Artillery terminal in Helldivers 2, highlighting objectives like Destroy Eggs
Screenshot by Destructoid

How to pick the best payload for the SEAF Artillery in Helldivers 2

In my experience, newer players of the game tend to grab whatever payload they find and load it up without knowing what it can do. I did the same until I started paying attention. The SEAF Artillery is powerful, not just because it makes kickass explosions, but because you can change how it functions with different payloads.

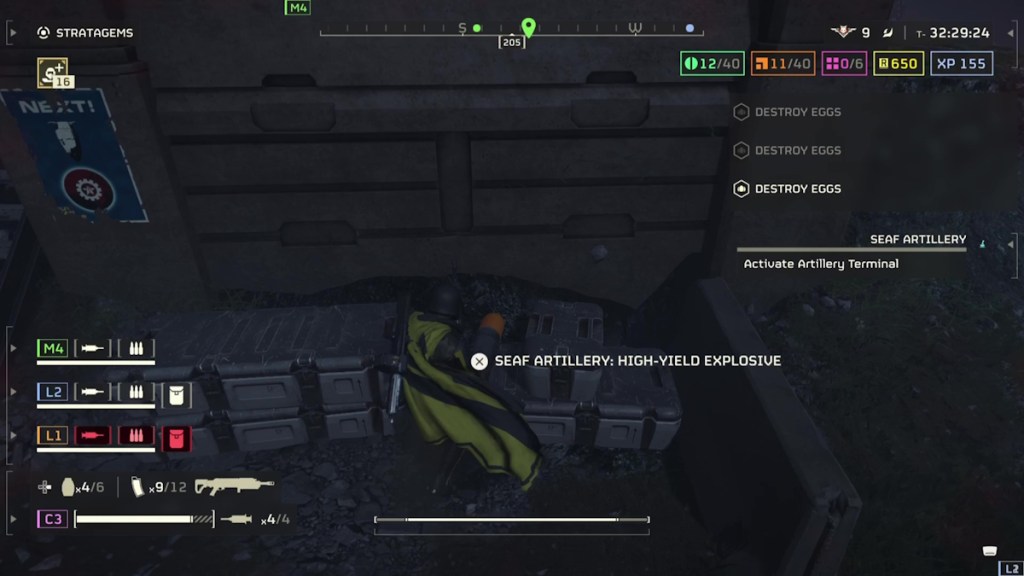
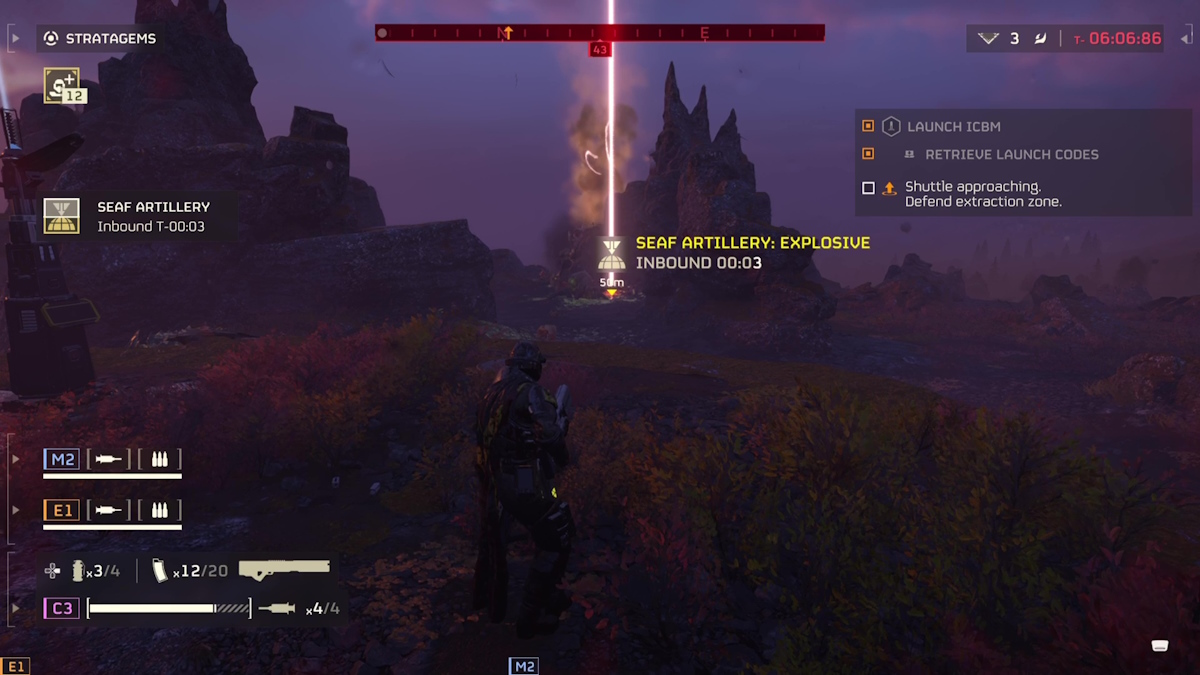
To find the best payload you want with the SEAF Artillery, approach a warhead and read the description that appears. It shows next to the button or key required to pick the payload off the ground. The type appears like this: "SEAF ARTILLERY: [PAYLOAD TYPE]". If you want napalm, look for "SEAF ARTILLERY: NAPALM", etc.

There are six types of payloads for the SEAF Artillery, which are differentiated by color. They are all capped with cones, making them more akin to spicy crayons.

Helldivers 2 best payload SEAF Artillery high-yield explosive shell
Screenshot by Destructoid

All SEAF Artillery payloads and appearance:

  • Mini-Nuke
    • Yellow cone

  • Explosive
    • Green cone

  • High-Yield Explosive (like the Eagle 500kg)
    • Orange cone

  • Napalm
    • Red cone

  • Smoke
    • Gray cone

  • Static Field
    • Blue cone

How to load and fire the SEAF Artillery in Helldivers 2

Loading the SEAF Artillery and firing it in Helldivers 2 is a simple enough affair. First, you can locate and access the terminal to power up the gun. Fully loaded, the weapon takes five shells you can find scattered around its proximity.

You can only move one payload at a time. Pick up a payload using the button or key prompt and carry it to the breech at the gun's base. Press the button again near the loading section of the breech, and you'll load the shell. Once you have all five loaded, return to the terminal to activate the artillery.

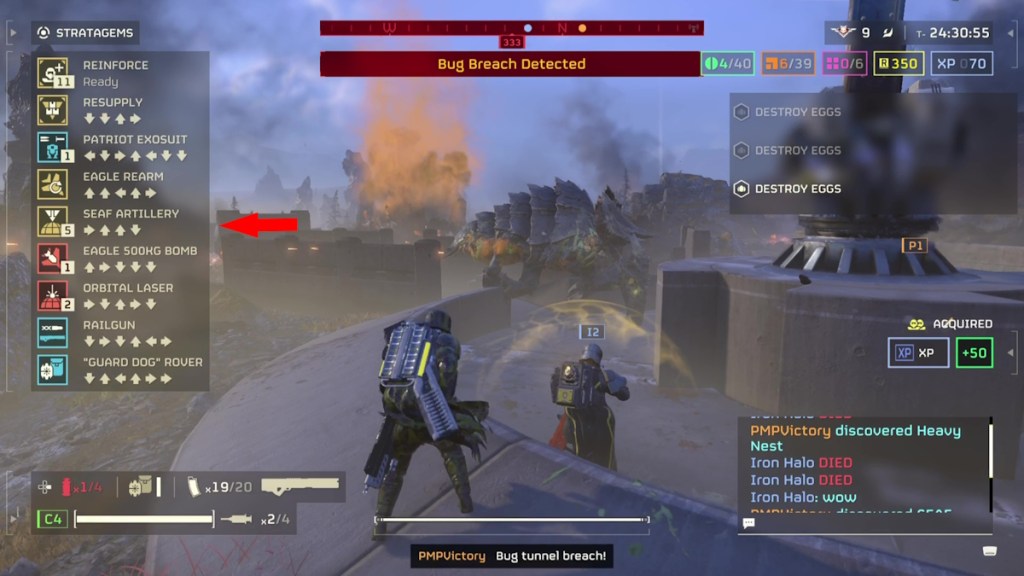
You use the SEAF Artillery just as you would any other Stratagem in Helldivers 2. Open up the Stratagem menu, where you should see its name and icon with the number '5', showing it's fully loaded and ready.

SEAF Artillery in Helldivers 2
Screenshot by Destructoid

Tips and tricks:

  • Drop and pick up the payload as you make your way to the gun to move more quickly
  • Don't activate the terminal until you have all five payloads, since that can cause enemy attacks
  • The load order is the firing order, so if you want to shoot a Mini-Nuke first, put it in the first spot
  • The location of the strike will tell you the payload type before it drops
  • Look around the artillery for ammo and samples

SEAF Artillery: Explosive type
Screenshot by Destructoid

That's about all you need to know on how to pick the best payload for the SEAF Artillery in Helldivers 2. It's a powerful stratagem, so activating it during a mission is almost always worth the effort.

The post Helldivers 2: How to choose the best payload for the SEAF Artillery appeared first on Destructoid.

All Helldivers 2 armor sets

All Helldivers 2 armor sets

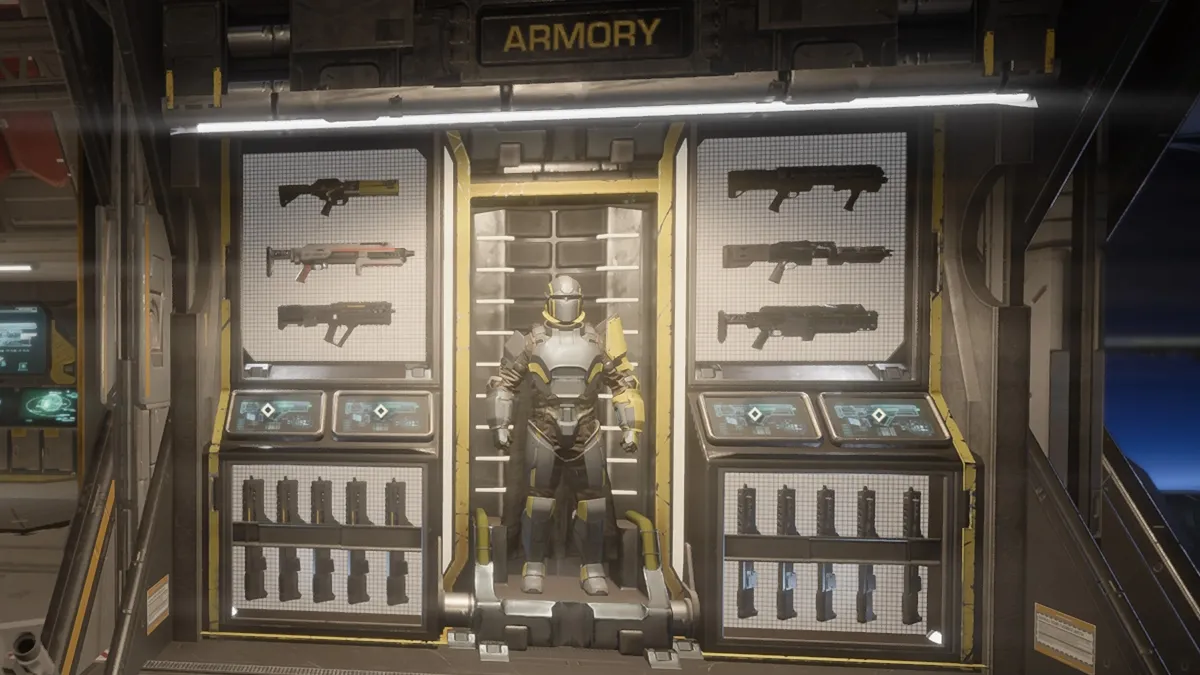
There's no point in spreading Managed Democracy throughout the galaxy if you can't be fashionable while doing it. Okay, so all the armor sets in Helldivers 2 sport a clear purpose, but with that gear and cape, you can't argue that Helldivers have an immaculate drip.

Helldivers 2 has 44 armor sets to mix and match. They're separated into three types — Heavy, Medium, and Light — and come equipped with an Armor Passive that gives you a small boon. Developer Arrowhead Games is constantly delivering more armor sets via monthly Warbonds and the Superstore, so be sure to keep an eye out for more ways to increase your style points.

All Armor Passives in Helldivers 2 and what they do

There are eight Armor Passives in Helldivers 2, and each offers different buffs. Knowing what they do can help you survive longer on the battlefield.

Armor Passive What it does
Extra Padding Provides a higher armor rating.
Fortified | Further reduces recoil when crouching or prone by 30%.
| Provides 50% resistance to explosive damage.
Med-Kit | Increases initial inventory and holding capacity of stims by +2.
| Increases stim effect duration by 2.0s.
Scout | Markers placed on the map will generate radar scans every 2.0s.
| Reduces range at which enemies can detect the wearer by 30%.
Engineering Kit | Further reduces recoil when crouching or prone by 30%.
| Increases initial inventory and holding capacity of grenades by +2.
Democracy Protects | 50% chance to not die when taking lethal damage.
| Prevents all damage from bleeding if chest hemorrhages.
Servo-Assisted | Increases throwing range by 30%.
| Provides +50% limb health.
Electrical Conduit Provides 95% resistance to arc damage.

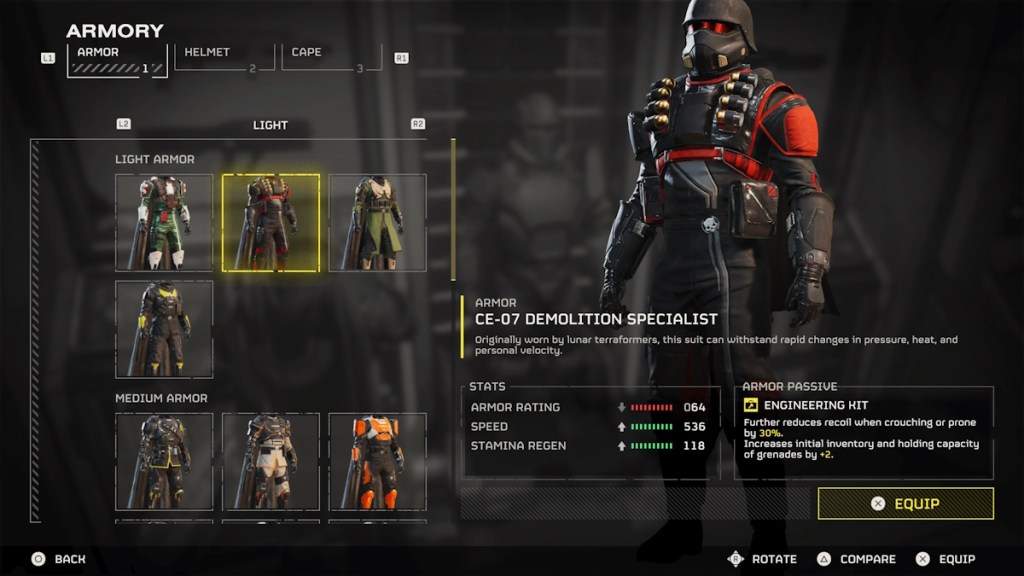
All Helldivers 2 armor sets demolition specialist armor
Screenshot by Destructoid

All armor sets in Helldivers 2, their passives, and how to get them

Here are all the currently available armor sets in Helldivers 2. Keep in mind that some are locked behind Warbonds or need to be purchased in the Superstore, while others are no longer available.

Aspects such as Armor Rating, Speed, Stamina Regen can differ among sets in the same type. In those occasions, you'll see all three aspects are balanced to compensate for any difference. For example, the SC-34 Infiltrator has a higher Armor Rating than other Light sets, but that is matched with lower Speed and Stamina Regen. Keep the differences in mind when choosing your equipment.

Every helmet in the game comes with the standard issue stats of 100 Armor Rating, 100 Speed, and 100 Stamina Regen.

Armor Type Armor Rating Speed Stamina Regen Passive How to Get
B-01 Tactical Medium 150 500 100 Extra Padding Default armor (four color variations)
TR-7 Ambassador of the Brand Medium 100 500 100 Extra Padding Pre-Order Bonus (no longer available)
TR-9 Cavalier of Democracy Medium 100 500 100 Democracy Protects Pre-Order Bonus (no longer available)
TR-62 Knight Heavy 150 150 50 Servo-Assisted Pre-Order Bonus (no longer available)
DP-53 Savior of the Free Medium 100 500 100 Democracy Protects Super Citizen Edition
TR-117 Alpha Commander Medium 100 500 100 Med-Kit Twitch Drop (no longer available)
SC-34 Infiltrator Light 70 530 115 Scout Helldivers Mobilize! Warbond
FS-05 Marksman Heavy 150 450 50 Fortified Helldivers Mobilize! Warbond
CE- Trench Engineer Medium 100 500 100 Engineering Unit Helldivers Mobilize! Warbond
CM-09 Bonesnapper Medium 100 500 100 Med-Kit Helldivers Mobilize! Warbond
DP-40 Hero of the Federation Medium 100 500 100 Democracy Protects Helldivers Mobilize! Warbond
FS-23 Battle Master Heavy 150 450 50 Fortified Helldivers Mobilize! Warbond
SC-30 Trailblazer Scout Light 50 550 125 Scout Helldivers Mobilize! Warbond
SA-04 Combat Technician Medium 100 500 100 Scout Helldivers Mobilize! Warbond
CM-14 Physician Medium 100 500 100 Med-Kit Helldivers Mobilize! Warbond
DP-11 Champion of the People Medium 100 500 100 Democracy Protects Helldivers Mobilize! Warbond
SA-25 Steel Trooper Medium 100 500 100 Servo-Assisted Steeled Veterans Warbond
SA-12 Servo Assisted Medium 100 500 100 Servo-Assisted Steeled Veterans Warbond
SA-32 Dynamo Heavy 150 450 50 Servo-Assisted Steeled Veterans Warbond
EX-03 Prototype 3 Medium 100 500 100 Electrical Conduit Cutting Edge Warbond
Ex-16 Prototype 16 Medium 100 500 100 Electrical Conduit Cutting Edge Warbond
EX-00 Prototype X Light 50 550 125 Electrical Conduit Cutting Edge Warbond
CE-27 Groundbreaker Medium 100 500 100 Engineering Kit Democratic Detonation Warbond
CE-07 Demolition Specialist Light 64 536 118 Engineering Kit Democratic Detonation Warbond
FS-55 Devastator Heavy 150 450 50 Fortified Democratic Detonation Warbond
SC-37 Legionnaire Light 50 550 125 Servo-Assisted Superstore
SC-15 Drone Master Medium 100 500 100 Engineering Kit Superstore
B-24 Enforcer Medium 129 471 71 Fortified Superstore
CE-74 Breaker Light 50 550 125 Engineering Kit Superstore
B-08 Light Gunner Light 100 550 125 Extra Padding Superstore
FS-61 Dreadnought Heavy 150 450 50 Servo-Assisted Superstore
FS-38 Eradicator Light 50 550 125 Fortified Superstore
B-27 Fortified Commando Heavy 200 450 50 Extra Padding Superstore
CM-21 Trench Paramedic Light 64 536 118 Med-Kit Superstore
FS-11 Executioner Heavy 150 150 50 Fortified Superstore
FS-34 Exterminator Medium 100 500 100 Fortified Superstore
CE-81 Juggernaut Medium 100 500 100 Engineering Kit Superstore
CM-17 Butcher Heavy 150 450 50 Med-Kit Superstore
CE-67 Titan Light 79 521 111 Engineering Kit Superstore
CM-10 Clinician Medium 100 500 100 Med-Kit Superstore
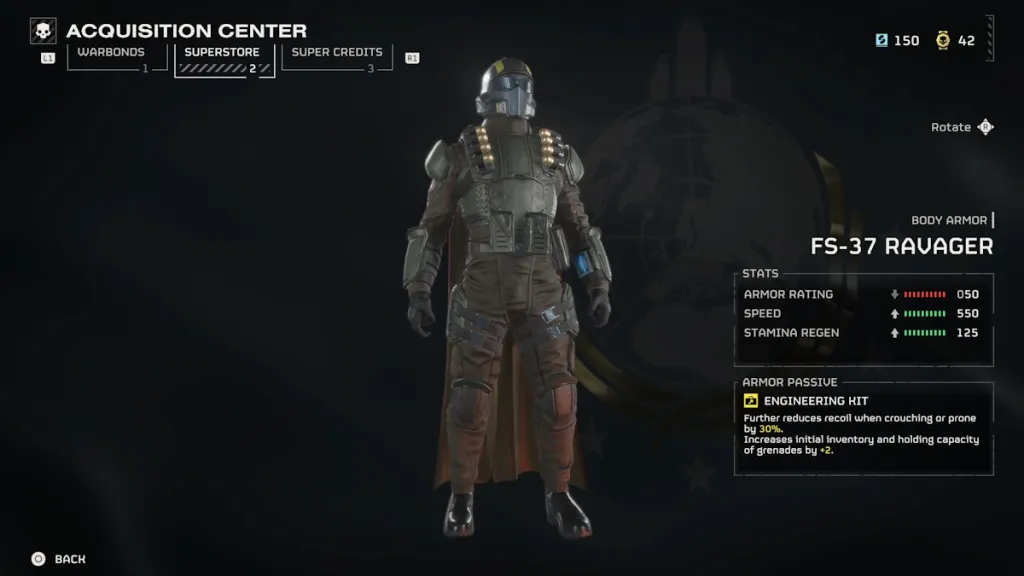
FS-37 Ravager Light 50 550 125 Engineering Kit Superstore

All Helldivers 2 armor sets Ravager set in the superstore
Screenshot by Destructoid

As mentioned, Arrowhead adds more armor sets all the time. The developer also tweaks armor values from time to time. We'll keep updating the list whenever the Armory changes.

The post All Helldivers 2 armor sets appeared first on Destructoid.
How to find and complete Secondary Objectives in Helldivers 2

How to find and complete Secondary optional Objectives in Helldivers 2

As you fight your way up into higher difficulties, you will start getting Secondary Objectives to find and complete in Helldivers 2. These optional quests award in more experience points and Requisition Slips, so they're worth tracking down. Here's how to find them.

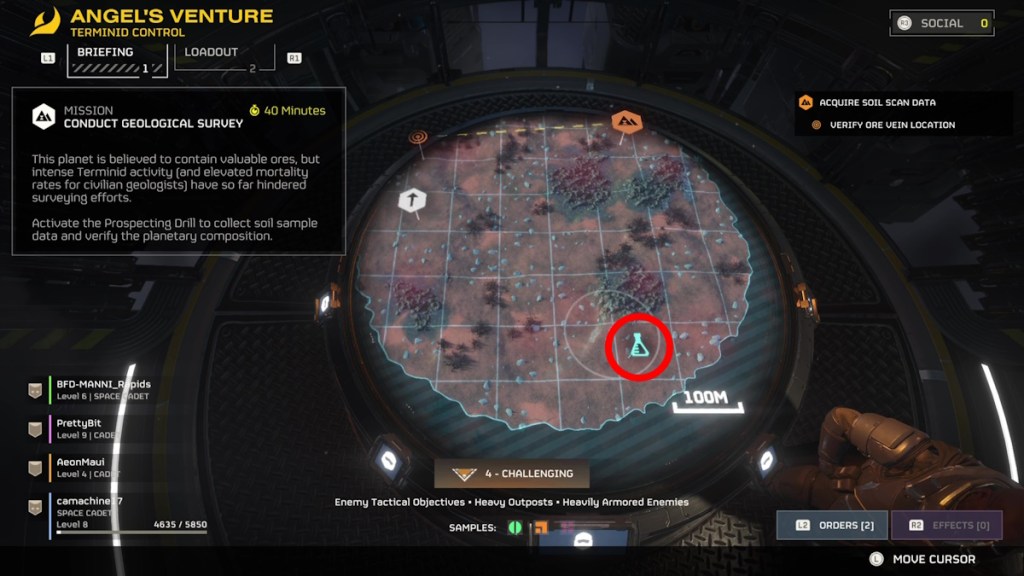
A good way to find out what missions include Secondary Objectives is by looking for the light blue icons on the maps before you begin. In my experience, Secondary Objectives start appearing at Medium difficulty and beyond. Look for blue icons that can look something like crashed pods with smoke or beakers. These icons indicate a Secondary Objective, and their location on the map can usually be seen before the mission starts.

Conduct a Geological Survey mission in Helldivers 2, as it appears from the assignment objective screen
Screenshot by Destructoid

Keep in mind that you won't always be able to see a clear map ahead of the mission.

Other ways to find Secondary Objectives in Helldivers 2

Secondary Objectives don't all show up on the map, though. You may have one before the mission starts, allowing you to track it directly from the mini-map once you're in the game. But you should still explore the area fully.

There may be more objectives to find on a map, so it pays to be thorough. I started a mission recently that had me destroy a research station as a Secondary Objective. But just around the corner was a Terminid Spore Spewer, and suddenly I had more meat on the menu.

Rushing through the Main Objectives typically is a quick way to get some cash and experience, but mission timers can be fairly long. If you have 40 minutes, don't let it go to waste.

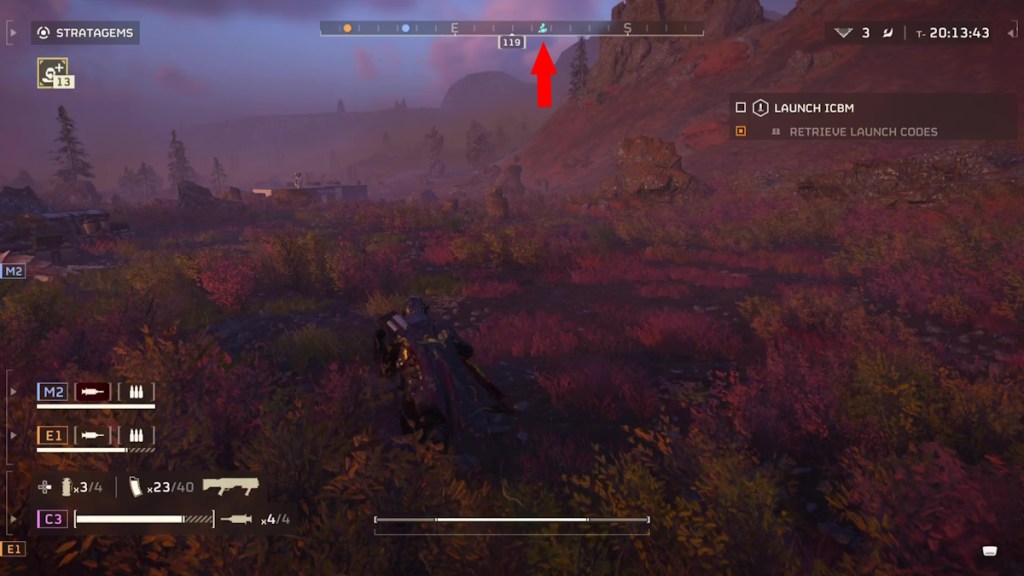
When you're near a Secondary Objective, you'll see the icon you need to follow show up on the compass near the top of the screen.

How to find and complete Secondary Objectives in Helldivers 2 icon on the compass
Screenshot by Destructoid

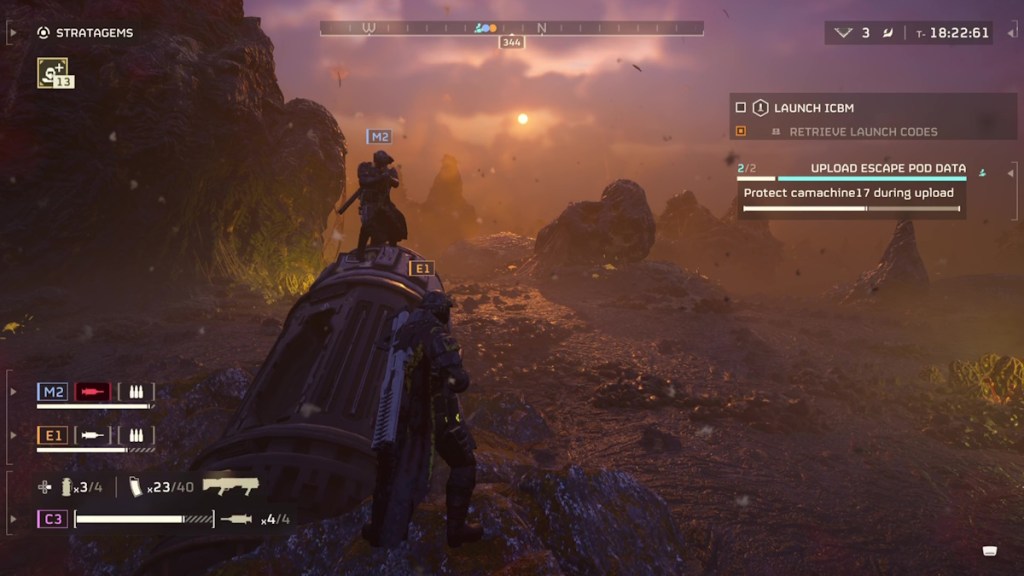
The game will tell you how to complete the objective once you're close enough.

How to find and complete Secondary optional Objectives in Helldivers 2 escape pod babysitting
Screenshot by Destructoid

What kind of Secondary Objectives are there?

Secondary Objective types are varied. Some will have you blow a thing up and in those cases, you can use an orbital Stratagem. The game gave me a unique Stratagem to destroy the aforementioned research station, however. An objective may have you upload the data of an escape pod, while another will task you with powering on a radar station that reveals map details.

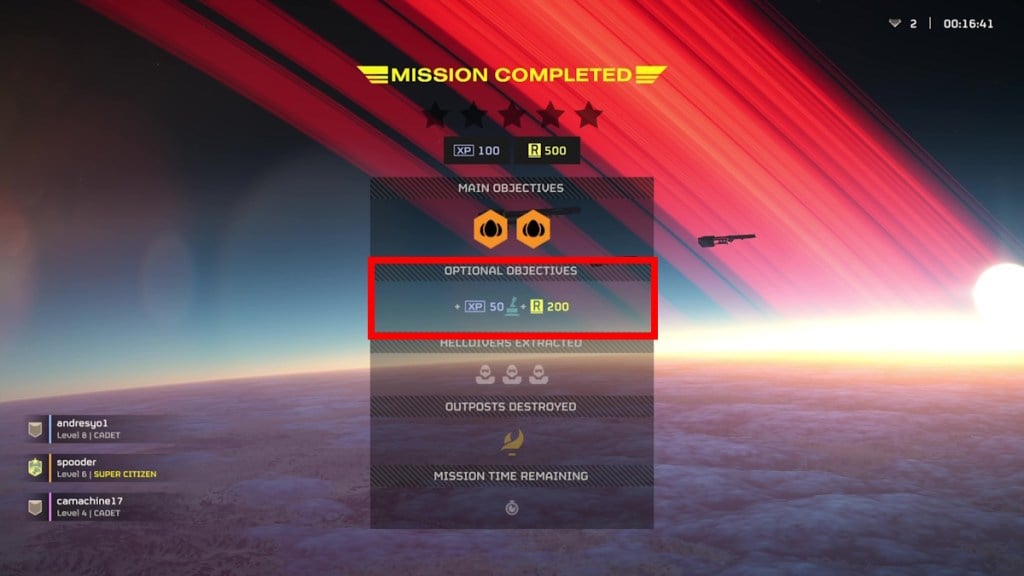
How to find and complete Secondary optional Objectives in Helldivers 2 mission complete screen
Screenshot by Destructoid

No matter what Secondary Objectives you're given, completing them offers rewards at the end of a mission. You can earn a good chunk of additional experience points and Requisition Slips, so it's certainly within your interest to seek them out.

All Secondary Objectives in Helldivers 2

There are 14 Secondary, or Optional, Objectives in Helldivers 2. The first three in the table below appear to be default Optional Objectives and can be seen during the mission planning stage. Others must be located while in the mission. Here's our list of all the Secondary Objectives in Helldivers 2 so far.

Objective Description Completion Effect Terminid or Automaton
Upload Escape Pod Data A crashed escape pod in the region contains valuable data. Nothing. Both
Destroy Rogue Research Station This facility contains unpatriotically produced research data, and must be razed to the ground. Use explosives or call a Hellbomb. Nothing. Both
Terminate Illegal Broadcast An illegal propaganda broadcast has been traced to this location. Nothing. Both
Destroy Stalker Lair Find and destroy the Stalker Nest to stop them from spawning in the area. Use explosives. You won't get harassed by Stalkers in the area. Terminid
Activate Radar Station Activate the Radar Station to reveal Points of Interest and Objectives on the map. POIs and Objectives are no longer hidden when using the map. This is one of the most important Secondary Objectives to complete. Both
Activate SEAF Artillery SEAF Artillery will provide an additional Stratagem option once activated. The Artillery awards you an extra offensive Stratagem with five shots based on the ammo type loaded. Both
Destroy Spore Spewer Locate the Spore Spewer and destroy it using explosive munitions. Destroying the Spore Spewer removes the fog of spores obscuring your vision in the area. Terminid
Destroy Mortar Emplacement Find and destroy the Automaton Mortar emplacements. Use explosives or call a Hellbomb. You won't get mortared while in the area anymore. Automaton
Destroy Stratagem Jammer Locate and raze the Stratagem Jammer that's blocking you from using Stratagems. You'll be able to call in Stratagems in the area once more. Automaton
Destroy Detector Tower Destroy the Detector Tower (Eye of Sauron) in the area to end Automaton Drops after your detection. Call in a Hellbomb. Getting detected by the tower will cause Automaton Dropships to arrive in defense. Destroying the tower stops the drops. Automaton
Activate SAM Site Locate and activate the friendly SAM Site in the area. The SAM Site will shoot down Automaton Dropships on occasion. Automaton
Destroy AA Emplacement Find and raze the Automaton AA Emplacement so you can call in Eagle Airstrikes. Eagle Airstrikes are now available in the proximity. Automaton
Destroy Shrieker Nest Find a Shrieker Nest and use a Hellbomb to destroy it. The Eagle 500kg Bomb may work, but it's finicky. No more damn Shriekers in the vicinity. Terminid
Destroy Gunship Fabricator Destroy the Gunship Fabricator using a Hellbomb. No other Stratagem will work. Gunships no longer clog the proximity. Automaton

The post How to find and complete Secondary Objectives in Helldivers 2 appeared first on Destructoid.
Helldivers 2 dev plans to tone down heavy enemy spawn rates and health following balance patch response

Helldivers 2 dev plans to tone down heavy enemy spawn rates and health following balance patch response

It appears Helldivers 2 developer Arrowhead Games is preparing even more nerfs, but not for your favorite weapons — this time. No, according to a post on Discord, the Helldivers 2 team is planning to reduce the spawn rate and health pools of heavy enemies like the infamous Charger soon.

The news recently came out of the official Helldivers 2 Discord channel. According to the community manager, who goes by Spitz on the channel, Arrowhead has listened to "concerns over the last few days regarding enemy spawns, enemy armor, and the ability to kill these enemies." In response, the dev is preparing to make changes in a "future hotfix" so that the high-level fights feel a bit more manageable.

helldivers 2 heavy spawn rates screenshot of running diver
Image via Arrowhead Games/Sony

"I can confirm that we're currently looking at changes to the spawn rates and health pools of heavy enemies, and will be attempting to spread them out more to prevent large spikes of tougher mobs appearing at the same time, as well as making them a bit easier to bring down," Spitz explained on Discord. "This change should go out in a future hotfix - no date as of yet. Thanks as always for your patience!"

Helldivers 2 heavy enemies will get lower spawn rates soon

The news follows the recent backlash regarding a balance patch that went down harder than an Eagle 500kg Bomb. Some weapons earned much-needed buffs, but the update also nerfed the fan-favorite Railgun. Not only do you have to charge it in Unsafe mode to dish out the same armor-shredding damage, but you also need to aim for weak points more often.

The nerf doesn't seem so bad so long as you haven't experienced the madness that is 'Suicide Mission' difficulty and beyond. A single Charger enemy isn't too challenging to take down, even solo. But once you're faced with five at once while also avoiding several Bile Titans, things can get a bit heated. And frustrating.

helldivers 2 heavy spawn rates fighting a bile titan with the old meta build
Screenshot by Destructoid

The Railgun paired with a Shield Generator Pack felt like the best answer. But now players are looking to face the horde feeling truly outmatched. Luckily for divers, that may change soon.

Two Support Weapons got a secret buff in the Helldivers 2 balance patch

Spitz continued, noting that the balance patch included changes to a couple of Support Weapons that weren't listed in the notes.

"In addition, we forgot to mention (oops) that the EAT-17 and Recoilless Rifle no longer suffer from a 50% damage decrease when hitting an armored enemy at a 'glance angle' that deflects the shot," Spitz wrote. "Combined with the upcoming adjustment to health and spawn rates, this should make the larger enemies a bit less common, instead spawning more 'chaff' enemies to support them, and should allow players to bring these enemies down with a single well-placed shot. Hopefully, this leads to fewer instances of endless kiting and players being left without any effective weaponry to kill harder enemies."

As time goes on, expect Helldivers 2 to change even more. The news of the changing spawn rates feels like a positive step in the right direction. With mechs now available and more weapons on the way, Helldivers may soon get the firepower they need to put Chargers and other heavies back in their place.

The post Helldivers 2 dev plans to tone down heavy enemy spawn rates and health following balance patch response appeared first on Destructoid.

The Helldivers 2 Exosuit mech Stratagem has been unlocked and is now available for purchase

Helldivers 2 Exosuit mech Stratagem unlocked and available for purchase

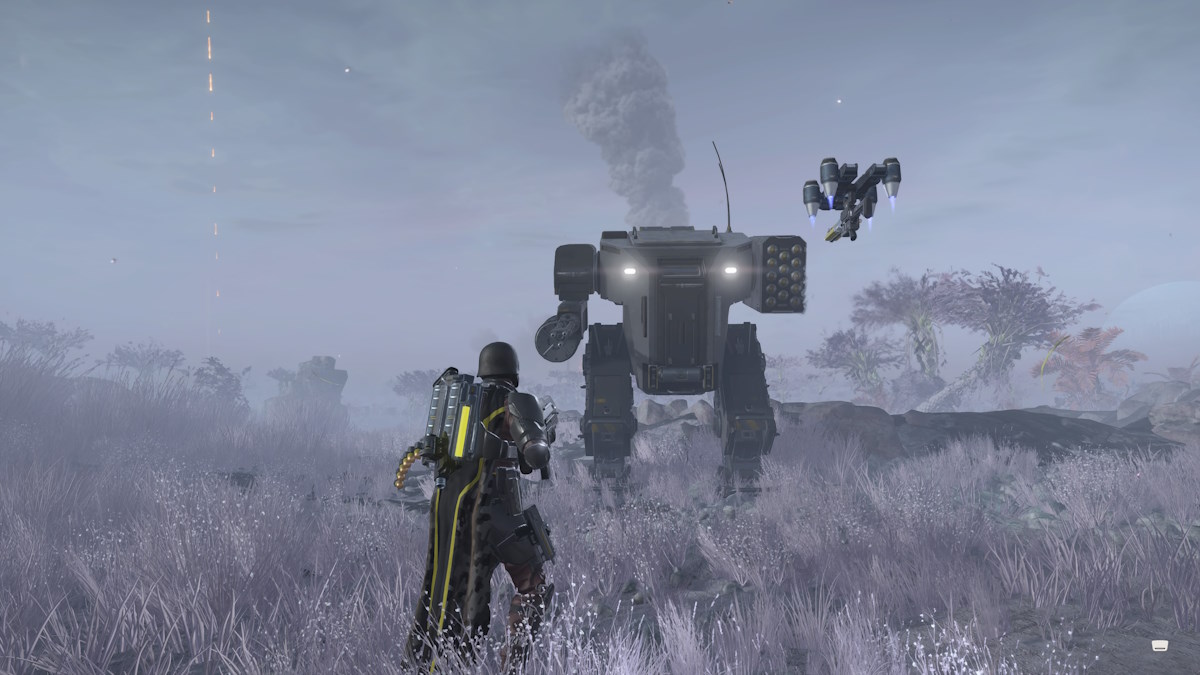
Following today's liberation of the planet Tien Kwan, Helldivers 2 players have successfully unlocked the Exosuit mech Stratagem for purchase. As it is a walking tank, the big toy does have a steep price tag. But there's good news for those who want to play with it right away.

With Tien Kwan now liberated, Helldivers 2 players can acquire the freshly unlocked mech Exosuit. The Exo-45 Patriot Exosuit Stratagem is available for purchase under the 'Stratagems' tab in the 'Ship Management' area of your Destroyer ship. You need to be level 25 to unlock it for purchase, and then spend 20,000 Requisition Slips to add it to your arsenal.

Helldivers 2 Exosuit mech Stratagem unlocked and available for purchase
Screenshot by Destructoid

The unlocked Exosuit mech Stratagem can be used in Helldivers 2 today regardless of purchase

If you don't have the level or the funds for the suit, developer Arrowhead Games is throwing the community a bone. The suit is temporarily available in your list of default Stratagems alongside the Supply Drop and others. It's unknown just how long you can use it without purchase. For now, though, any player can call down the suit for some Bot-busting, Bug-stomping action.

Helldivers 2 Exosuit mech Stratagem unlocked and available for purchase message showing it's available to try for free
Screenshot by Destructoid

The Exosuit mech is a powerful Stratagem and comes with a short list of strengths and weaknesses. It's armed with two weapons for arms: A heavy machine gun and a rocket launcher. The machine gun is loaded with 1,000 armor-piercing rounds, and the rocket launcher can fire 14 rockets. Once your munitions are depleted, they're gone for good.

You can only call down one mech per mission. There doesn't seem to be a health bar. It's armored and can take some hits, but it does show damage over time. The moment your mech is out of ammo or destroyed, it's back to basics. You also can't use Stratagems once you're piloting the mech, but you can enter and exit the Exosuit freely.

Helldivers 2 Exosuit mech Stratagem unlocked and available for purchase using the heavy machine gun
Screenshot by Destructoid

I can also confirm that it will not survive one hit from a Charger, but you can easily take down the pesky bug with three rockets.

The post The Helldivers 2 Exosuit mech Stratagem has been unlocked and is now available for purchase appeared first on Destructoid.

Helldivers 2: How to kill a Tank

Helldivers 2 How to kill a Tank

Of all the 'tank' enemies in Helldivers 2, only one is an actual freakin' tank. The Annihilator Tank is the Automaton answer to the age-old question of "Where did that hole in my chest come from?" Good thing it's not too tough to kill a Tank in Helldivers 2.

Granted, taking one out does require you to not be standing in front of it. Much like other vehicles (such as Helldiver 2's own Hulk) the Annihilator Tank comes with a weak point that's a video game classic. You need to find the big, glowing spot and shoot at it until the machine lies in pieces. That's easier said than done, usually, but with the right firepower and some quick footwork you too can beat the Tank.

Screenshot by Destructoid

How to tank the Tank in Helldivers 2

The best way to kill an Annihilator Tank in Helldivers 2 is to circle around it and shoot the weak point on the back of the turret. Several things make this a challenging task, however. For one, the Tank's turret moves nearly as fast as your basic Helldiver run speed. Getting to its back can be a tall order.

Another issue is the Tank itself. Like the Hulk, it comes in variations. But unlike the Hulk, the Tank only has two to boast of: A heavy laser machine gun version, and another with your standard laser cannon.

Out of both variants, I found the machine gun type to be the trickiest to deal with. I have been able to outrun the rapid laser fire by moving perpendicular to the Tank. But it's easy to get stuck if you try and duck behind cover.

Screenshot by Destructoid

The cannon variation isn't much of a threat unless one takes aim at you while you're unaware. Usually, one shot from the massive gun is all it takes for your ass to get rag-dolled. The cannon does have a tell: You will see a red glow in the gun's barrel as it charges to fire. I found it easier to dodge the single blast than the laser shots from the machine gun (remember to use the dodge move to reduce explosion damage).

Since the Tank is clearly an enemy decked out in armor, you should employ anti-armor weaponry to crack it. It does go down quickly once you target the weak point, but try using these Support Weapons and Stratagems to your advantage:

  • EAT-17 Expendable Anti-Tank
  • Spear
  • Recoilless Rifle
  • Autocannon
  • Railgun
  • Eagle 500kg Bomb
  • Orbital Laser
  • Orbital Railcannon Strike
  • Rocket or Mortar Sentry

Keep in mind that both the Autocannon and Railgun are best used against the Tank's weak spot. You can kill a tank with a Railgun by targeting the turret, but it's a long, laborious task that can eat up your ammo. Move around the tank, or get an ally to run a distraction so you can fire at the weak point. Teamwork makes the dream work — and the Tank dead.

Use your quick wits and feet to kill a Tank

Another weakness of the Tank is that, due to its size, the vehicle is slow and not all that maneuverable. I've found that if you try and get it stuck on objects like a rock, you can hinder it long enough to get to its weak point.

Screenshot by Destructoid

Some quick footwork and:

Screenshot by Destructoid

Ultimately, I feel the Tank isn't often the most challenging heavy enemy in Helldivers 2. That crown goes to the Charger and its ability to weigh several tons and yet still able to sneak up on you.

The post Helldivers 2: How to kill a Tank appeared first on Destructoid.

❌