FreshRSS

Zobrazení pro čtení

Jsou dostupné nové články, klikněte pro obnovení stránky.

Guayota Review

I want to like Guayota, but it won’t let me. From never knowing when to stop the exposition to tossing me to an entirely different area when I’ve spent minutes working on a puzzle, Guayota actively does what it can to prevent me from having a good time.

Presentation

The game starts well, with a charming art style and a soft-spoken narrator. There’s an air of mystery that sets up the adventure quite well at first. Sadly, the game goes from mysterious and evocative to boring really fast.

The narrator won’t stop talking, and by the time I get to the Island, it’s hard to remember everything that was said or why it even matters. Without any emotional connection with anything that is going on, it becomes hard to care about the plot.

When you finally get to control the main character, the first NPC greets you with walls of text. By that point, I was starting to wonder if I’d ever get to play the game.
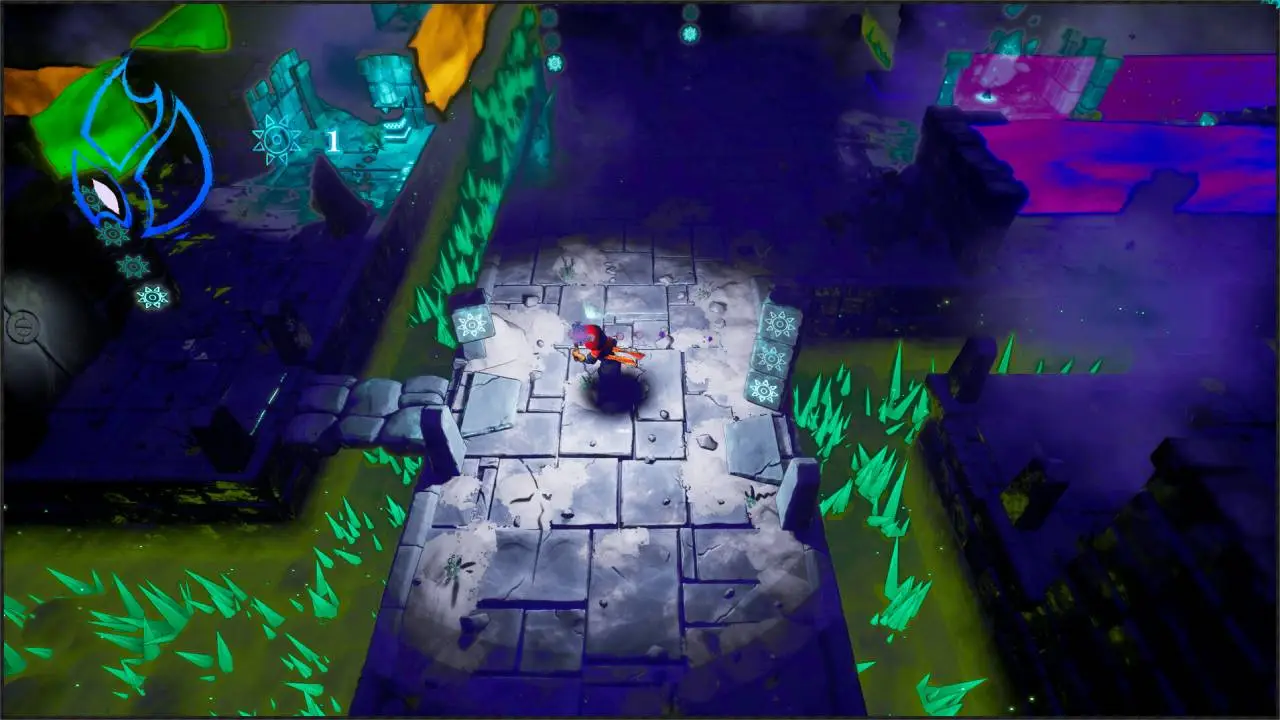
Guayota-1
Image: Team Delusion

What makes this all the more disappointing is the game’s intriguing backdrop, rooted in the mythology of the Canary Islands. Guayota introduces players to the rich lore of the Guanche people, which is a refreshing break from the more common mythologies explored in games.

Unfortunately, this cultural depth is overshadowed by the game’s excessive exposition, making it hard to appreciate the unique setting.

The sad part is that the voice acting is not bad. In fact, the art of the game is great. The animation and cutscenes are charming, and the beach itself looks great and invites exploration, but they lose all their charm rather quickly considering how they overstay their welcome at the beginning of the game.

Exploring the beach teleports you to a frozen mountain, making me feel like I skipped a section of the game. From there, you’ll get into ancient buildings where the puzzles are located, and all the colors seem to be sucked out of the screen.
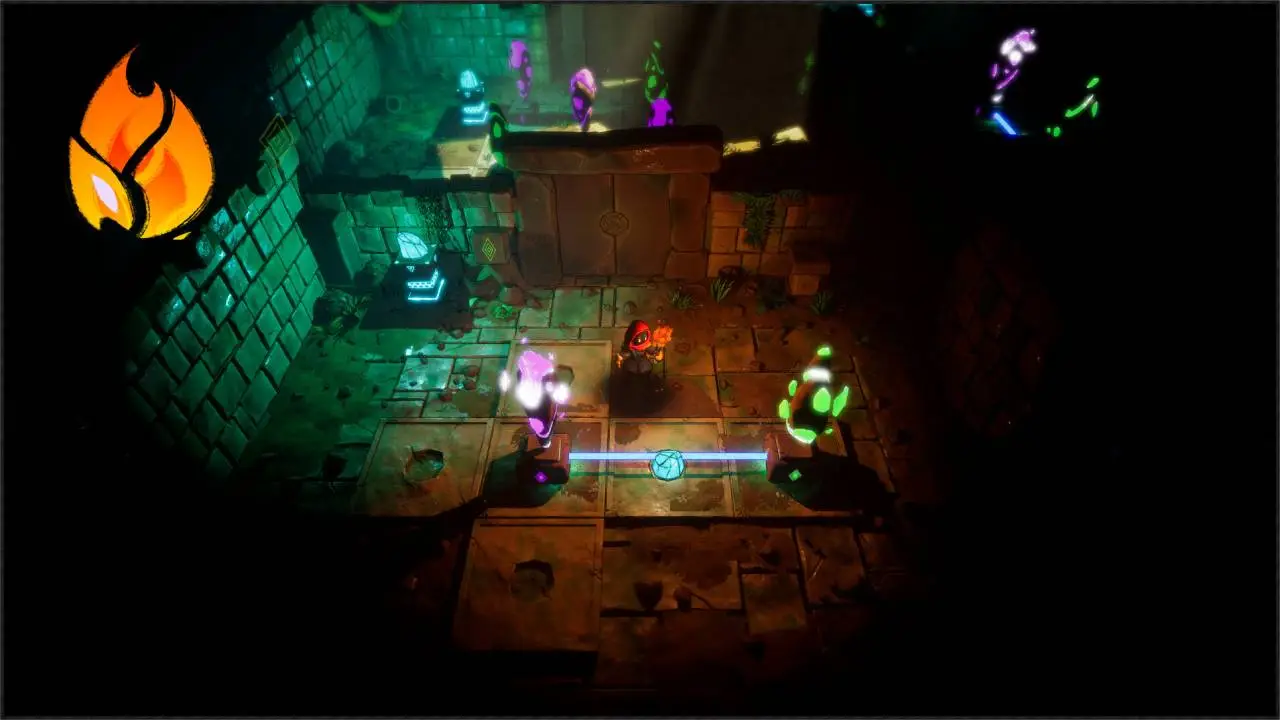
Guayota-2
Image: Team Delusion

This sudden shift in the environment—from a vibrant beach or jungle to a bleak, color-drained temple—mirrors the game’s tonal inconsistency. While the visual contrast is likely intentional, it often feels more jarring than atmospheric.

The darker environments, though fitting for the game’s themes, can also make navigation frustrating and significantly detract from the vibrant visuals of the island. It doesn’t take long for dark corridors and stone walls to feel old.

The Game

When it comes to gameplay, Guayota is a puzzle game that mixes problem-solving based on position and pure logic with precision-based challenges that don’t seem to match very well. The puzzles can be fun, and I was enjoying myself at first, but they did start feeling repetitive after a while.

More often than not, I’m confused by what Guayota wants me to experience. The game introduces me to a dash command that is used to go through static walls. The dash mechanic feels out of place, with no urgency or precision required, making it just one example of the game’s many issues.
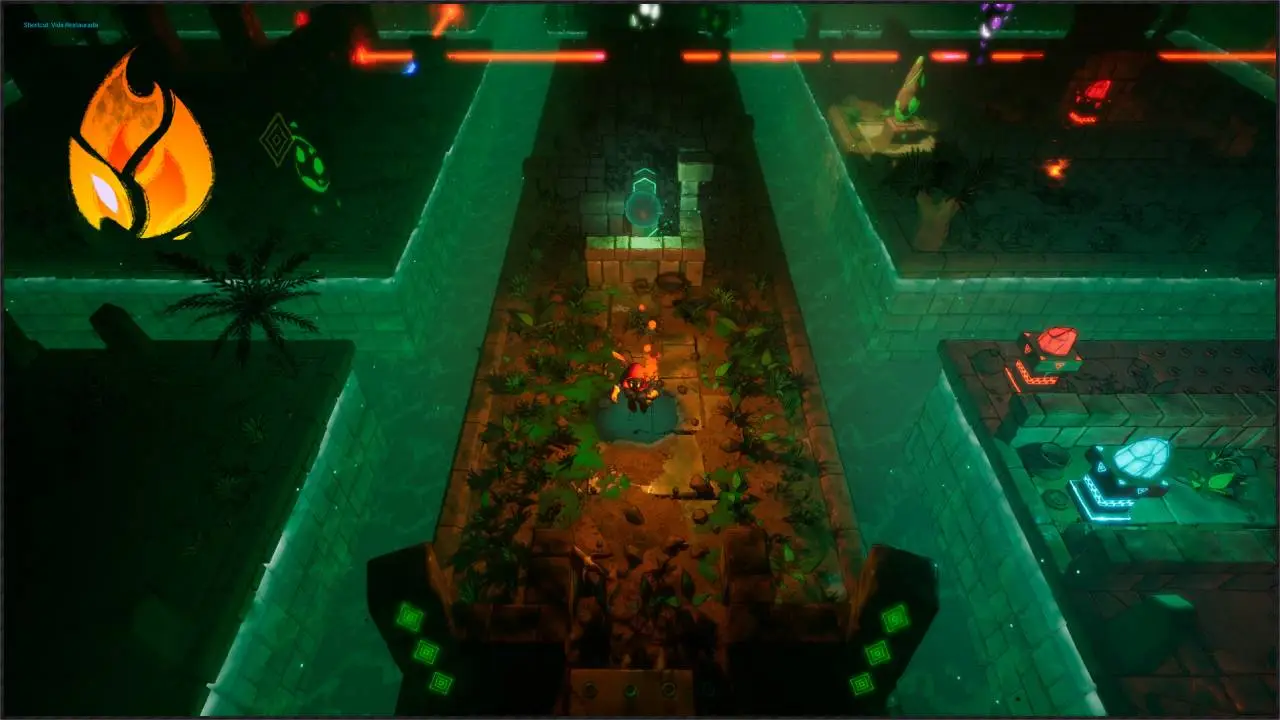
Guayota-3
Image: Team Delusion

To make things worse, the game’s dual-realm system transports you to a completely different challenge. Failing in the light world forces you into the dark world to complete a different version of the puzzle.

While this concept could add depth, it often feels disjointed, interrupting the flow and making progress feel more like a chore than a challenge. Instead of enhancing the puzzle-solving experience, this mechanic frequently disrupts it, leading to frustration rather than satisfaction.

As mentioned previously, this is the main theme of my experience with Guayota. I always felt like the game consistently got in the way of the fun, whether through excessive exposition or disruptive mechanics.

This is particularly disappointing because there were moments when I genuinely enjoyed solving puzzles and exploring. Unfortunately, the puzzles and the scenery started feeling repetitive, and every time I got caught enough times by a trap while trying to figure out a puzzle, the game would prevent me from trying again by tossing me into the dark world.

The Verdict

Guayota has all the elements of a great puzzle adventure—a unique mythological setting, charming visuals, and a variety of brain teasers—but it squanders much of its potential through frustrating mechanics and poor pacing. The game frequently interrupts your progress with unnecessary exposition and disjointed transitions, making it difficult to stay engaged.

While there were moments I genuinely enjoyed solving Guayota’s puzzles, these are often overshadowed by design choices that end up hindering fun instead fostering it. Ultimately, Guayota leaves you feeling more frustrated than fulfilled, despite its intriguing premise and occasional flashes of brilliance.

All Baldur’s Gate 3 Merchant Locations in Every Act

Baldur’s Gate 3 has a lot of merchants for players to stumble across on their quest, and it’s easy to miss talking to many of them before finishing the game, which can cause players to miss out on some truly incredible gear for their builds.

Where to Find All Merchants in Baldur’s Gate 3

Act 1

Dammon-Baldurs-Gate-3
Image: Larian Studios

Although there are many merchants in Act 1, most of them are relatively easy to come across. The most important merchants you’ll want to talk to, of course, in the first map are Dammon, who is directly tied to Karlach’s questline, and the Zhentarim merhcants you can help save from the Gnolls near the Risen Road which can offer players with some of the better early magic weapons, and an optional encounter with a spectator.

MerchantLocation
ArronEmerald Grove
Auntie EthelEmerald Grove (will later be located at Riverside Teahouse)
DammonEmerald Grove
MattisEmerald Grove
MolEmerald Grove
GlompGoblin Camp
GratGoblin Camp
Roah MoonglowGoblin Camp
BremThe Risen Road
CyrelThe Risen Road Tollhouse
A’jak’nir JeeraCrèche Y’llek (Rosymorn Monastery)
EstherRosymorn Monastery Trail (Rosymorn Monastery)
BlurgEbonlake Grotto (Underdark)
Derryth BonecloakEbonlake Grotto (Underdark)
OmeluumEbonlake Grotto (Underdark)
KithGrymforge (Underdark)
GreymonGrymforge (Underdark)

Act 2

Formula-Gruna-BG3
Image: Attack of the Fanboy

When you reach the Shadow-Cursed Lands and take on Ketheric Thorm and the Sharran Gauntlet, there are plenty of NPCs to interact with that offer powerful new items to aid in your impending face-off with Myrkul’s chosen.

MerchantLocation
BarcusLast Light Inn
DammonLast Light Inn
MattisLast Light Inn
TalliLast Light Inn
Sister LidwinHouse of Healing
Hoarding MerregonGauntlet of Shar
Araj OblodraMoonrise Towers
Lann TarvMoonrise Towers
Roah MoonglowMoonrise Towers

Act 3

Dye-Vendors-Baldurs-Gate-3-1
Image: Attack of the Fanboy

Act 3 has even more merchants than Act 1. There are way too many places to visit, and way too many things to buy. Boney sells scrolls, which are always useful for those playing a Wizard, and Danthelon’s Dancing Axe has good weapons and it’s fairly easy to find.

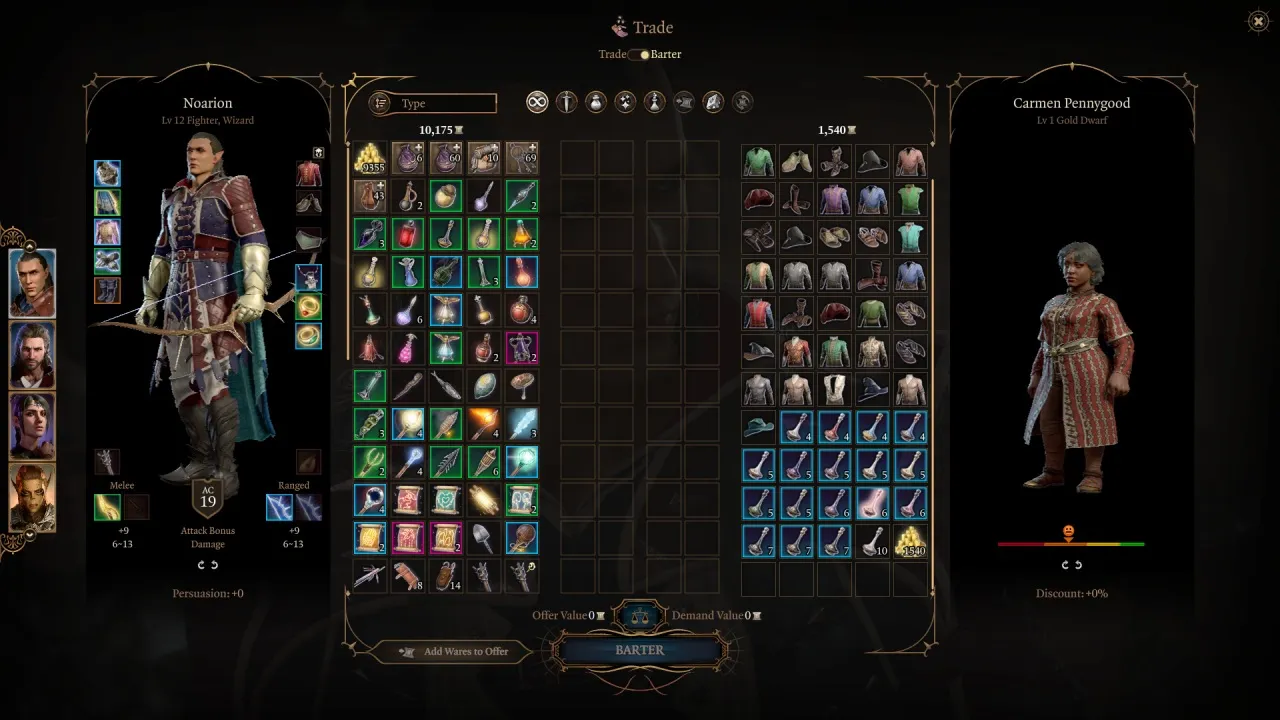
Carmen and Figaro have many clothing and dye options for players, Vicar Humbletoes and Nansi Gretta have scrolls, and Dammon will be back with weapons and armor. Make sure to visit Lorroakan’s Projection at Sorcerous Sundries since he has rare scrolls and good magic items.

MerchantLocation
BumpnagelAngleiron’s Cellar (Rivington)
ExxvikyapRivington General (Rivington)
Ferg DrogherRequisitioned Barn (Rivington)
MattisRequisitioned Barn (Rivington)
BoneyCircus of the Last Days (Rivington)
PopperCircus of the Last Days (Rivington)
Zara the MummyCircus of the Last Days (Rivington)
Carmen PennygoodCarm’s Garm (Wyrm’s Crossing)
Entharl DanthelonDanthelon’s Dancing Axe (Wyrm’s Crossing)
Hoots HooliganSharess’ Caress (Wyrm’s Crossing)
Stylin’ HorstThe Velveteen Elixir (Wyrm’s Crossing)
Quartermaster Arkleia OlorilWyrm’s Rock Fortress (Wyrm’s Crossing)
Traveller GriskaFraygo’s Flophouse (Wyrm’s Crossing)
Thodric ShedeeverAlong the bridge (Wyrm’s Crossing)
Roberon SiltAlong the bridge (Wyrm’s Crossing)
Velson OakesAlong the bridge (Wyrm’s Crossing)
Glynda OltowerAlong the bridge (Wyrm’s Crossing)
Oliver TefocoBeehive General Goods (Lower City)
Nansi GrettaThe Bibliophile (Lower City)
Derryth Bonecloak or Baelen BonecloakBonecloak’s Apothecary (Lower City)
Thomas C. QuirkiliousChromatic Scale (Lower City)
HelsikDevil’s Fee (Lower City)
Alan AlythElfsong Tavern (Lower City)
LakrissaElfsong Tavern (Lower City)
Figaro ‘Facemaker’ PennygoodFacemaker’s Boutique (Lower City)
Avery SonshalFelogyr’s Fireworks (Lower City)
Clerk TamaraFelogyr’s Fireworks (Lower City)
DammonForge of the Nine (Lower City)
SkittleHeapside Prison (Lower City)
Mystic Carrion or ThrumboPhilgrave’s Mansion (Lower City)
Bosun GannetThe Blushing Mermaid (Lower City)
Tender HenkThe Singing Lute (Lower City)
OmotolaThe Glitter Gala (Lower City)
Lorroakan’s Projection or RolanSorcerous Sundries (Lower City)
Tolna Tome-MongerSorcerous Sundries (Lower City)
Gloomy FentonsonStormshore Armoury (Lower City)
Fytz the FirecrackerStormshore Armoury (Lower City)
Vicar HumbletoesStormshore Tabernacle (Lower City)
Old TroutmanEastern Docks (Lower City)
BarekiUndercity Ruins (Lower City Sewers)
SevernGuildhall bar (Lower City Sewers)
Sticky DondoGuildhall (Lower City Sewers)
Echo of AbazigalMurder Tribunal (Lower City Sewers)
KollThe Watch Citadel (High Hall)

Baldur’s Gate 3 Gale Approval and Romance Guide: Likes, Dislikes & Dialogue Choices [Patch 6]

Gale is a smooth-talking, good-hearted companion in Baldur’s Gate 3. If you’re not playing him as an Origin character and want to romance him, learning his likes and dislikes is a good way to win the Waterdeep wizarding prodigy’s heart.

Before being abducted by the Nautiloid, Gale held close relations with Mystra, the goddess of magic – and even shared a romantic relationship with her.

How To Increase Gale’s Approval in Baldur’s Gate 3

How-to-Revive-Gale-in-Baldurs-Gate-3
Image: Larian Studios

Gale can be a bit hard to figure out. He’s a heroic and kind-hearted individual, but is also extremely driven by ambition and logic. Gale appreciates when you save lives and make decisions that benefit others, such as choosing to save the tiefling camp in Act 1. Additionally, showing an interest in magic and allowing him to rant about his interests will also build up your relationship.

Gale’s Likes

  • Demonstrating intelligence
  • Protecting allies and other NPCs
  • Showing magical knowledge
  • Using nonviolent solutions to problems
  • Displaying kindness to others
  • Petting Scratch & the Owlbear cub at camp
  • Respecting other people’s privacy and boundaries – especially his early on
  • Giving him Magic Items to consume in Act 1

Gale’s Dislikes

  • Unnecessary violence
  • Recklessness
  • Ignorance to the world around you
  • Lack of curiosity
  • Distrusting him

How To Romance Gale

WDW2
Image: Attack of the Fanboy

To romance Gale, you need to make your decisions with his approval in mind. It’s the same process you go through when looking for approval of any character in the game. There are numerous instances and encounters at the campsite with Gale that could shape his perception of you.

Act 1 Romance Choices

There are way too many ways to make Gale like you during Act 1. The Wizard of Waterdeep will notice and approve of your behavior every time you save NPCs from danger, demonstrate heroism, show empathy, avoid unnecessary violence, and engage in intelligent conversations. Just make sure to entertain his curiosity, act like a hero, and take his concerns seriously.

Act 2 Romance Choices

One of the most effective ways to romance Gale is by completing his companion quest, “Wizard of Waterdeep”. However, there are other things that you can only do in Act 2 to make Gale like you more:

  • Shuffle the board in the game between Mol and Raphael
  • Do not drink Jaheira’s wine when you first meet her
  • Tell Arabella you found her parents dead.
  • Ask Elminster why you’re facing the Absolute alone if even the gods know about its threat.
  • Let Gale teach you magic.

Act 3 Romance Choices

In Act 3, several dialogue choices can influence Gale’s approval. For example, inside the House of Hope, refuse to remove your clothes and pledge your body to Raphael’s personal incubus, Haarlep. You can also persuade Gale to join you in bed with the Drow twins. When he expresses his doubts, tell him: “Your body looks great to earn his approval.

What to Do With ‘Fake Portrait of a Noble Before His Death’ in Baldur’s Gate 3 (BG3)

Baldur’s Gate 3 is a game filled with intriguing quests and mysteries that span across multiple Acts. One such mystery is an item that has puzzled many players is the ‘Fake Portrait of a Noble Before His Death.’ This item can be obtained from Oskar Fevras in the sewers, but is it actually used for anything in-game?

How to Use the Fake Portrait of a Noble Before His Death in BG3

Oskar-the-Paintor
Image: Attack of the Fanboy

Although the ‘Fake Portrait of a Noble Before His Death’ seems to be a key item in a quest line involving Oskar Fevras, it’s just a miscellaneous item. It appears Oskar may be selling counterfeit versions of costly paintings in Act 3 to earn some money. If you want, you can buy this and other paintings from him and drop them in your camp to decorate it; while simultaneously implying that his life could have taken a different turn if someone had rescued him from the Zhentarim hideout in Act 1.

The ‘Free the Artist’ Quest Line

Kerri-Baldurs-Gate-3
Image: Attack of the Fanboy

The portrait is related to Lady Jannath’s estate, located south of the House of Grief and north of the Steel Watch Foundry. If you explore the estate, you’ll discover that Lady Jannath and Oskar share a romantic relationship, and she has been searching for him. Calling back to Act 1, if you exhaust Oskar’s voicelines in the Zhent’s hideout after deciding you do want to help him, you’ll learn he was set to marry before needing to ‘think things through’ and getting captured by the Zhents.

To properly finish complete his questline, you will need to help him out during Act 1. Here’s how to reunite Oskar and Lady Jannath:

  1. Free Oskar from the Zhentarim hideout in Act 1 by persuading Brem, the trader in the hideout to set him free or by buying his freedom.
  2. Look for Oskar in Baldur’s Gate during Act 3 at Lady Jannath’s Estate to the west of the Lower City, north of the Steel Watch Foundry. There is a Dragonborn standing guard at the front door that will give advise the player not to enter, but ultimately won’t do anything if you do.
  3. Toggle ‘Non-Lethal Attacks’ to being active on the ‘Passives tab’.
  4. Knock out Oskar, who is threatening Lady Jannath in her room.
  5. Loot Oskar and get the key from him after he’s knocked out and talk with Lady Jannath to find out about all the strange paranormal activity effecting their home.
  6. Reach the Atelier at the top of the manor. Note: You may need to find creative methods of getting to the top without constantly being knocked down by the cursed skulls throughout the house.
  7. Take the Painting of a Smiling Maiden in the Atelier and place on the Painting Stand.
  8. Go behind the secret door that opened and read the letter.
  9. Read the letter inside the locked chest.
  10. Get the Torch of Revocation from Mystic Carrion in Philgrave’s Mansion, located south of Sorcerous Sundries and Felogyr’s Fireworks in the abandoned house.
  11. Use the Torch of Revocation to destroy the Painting of a Smiling Maiden in the Atelier.
  12. Return to Oskar and Lady Jannath’s bedroom and speak with them to trigger the quest’s finale.

Moving forward, the optimal way to conclude this quest is by attempting to persuade Kerri that her behavior is out of character. Go for persuasion checks whenever you can. That said, this is a moment for you to roleplay how your character would respond to the following conversation moreso than just deciding what the “right” choice would be.

If you let Oskar stick around in the land of the living after the fact, he will offer to take you back into the Atelier to paint a portrait of the hero that saved him and his troubled marriage.

❌