Codes for Dragon Traveler give you valuable resources and currency required for progression. In the guide below, we will list out all the working codes, how to redeem them, and more useful information. So, here is our complete Dragon Traveler redeem codes guide.
Some codes can last forever (VIP9999, VIP5555, etc.), while others have limited durations.
Are codes case-sensitive?
No, codes for this game aren’t case-sensitive.
When do you unlock code redemption?
You unlock the code system right after you finish the tutorial (clear the whole Chapter 1 of the story).
That does it for our Dragon Traveler codes list. For more useful guides, including our Dragon Traveler tier list, check out the Guides section here at Gamepur!
There is a wide variety of characters you’ll obtain as you progress in Dragon Traveler, with some being much better than others. In the guide below, we will explain which characters are the best and why you should invest in them. Scroll down, and let’s dive into our ultimate Dragon Traveler characters tier list!
Dragon Traveler Characters Tier List
BEST CHARACTERS
S
Poseidon
Athena
Ifrit
Hades
CORE FACTION CHARACTERS
A
Marylis
Huginn & Muninn
Atanith
Fenrir
Scheherazade
DECENT & VERSATILE CHARACTERS
B
Gullveig
Medusa
Minotaur
Lorilin
Cleopatra
Siegfried
Titania
Oberonnie
Nemesis
Goren
Caligula
Nanalie
Chiron
Anubis
Goblin Drummer
Herman
Melina
White Tiger
Drasill
MEDIOCRE CHARACTERS
C
Guna
Lancelot
Beowulf
Telperion
Van Helsing
Gudong
WEAK CHARACTERS
D
Arthur
Pan Junbao
Cerberus
Tiers Explained
S Tier: The best and most versatile characters in Dragon Traveler. These characters are used in almost every meta team for both PvE and PvP.
A Tier: The core carry/DPS characters for their respective races. You’ll want to get these and use them based on which other characters you’re using.
B Tier: Decent and versatile characters that can fill the gaps in your team composition, but they aren’t as massive a priority as the S/A-tier characters.
C Tier: Mediocre characters that can replace some of the B-tier characters, but they are seldom used in meta teams.
D Tier: Weak characters that have subpar kits compared to virtually all other characters in the game.
NOTE: This ranking is based on the strength of characters in the TW version of the game, which should roughly be the same for the global version. We will update it if necessary.
In the tier list above, we ranked all SSR characters in Dragon Traveler based on their overall strength across all game modes. Higher-tier characters should be your top priority regarding pulls/upgrades, while lower-tier characters aren’t worth spending resources on.
S Tier – Best Characters in Dragon Traveler
Character
Details & Ranking Summary
Poseidon
TBA
Athena
TBA
Ifrit
TBA
Hades
TBA
A Tier – Core Faction Characters
Character
Details & Ranking Summary
Marylis
TBA
Huginn & Muninn
TBA
Atanith
TBA
Fenrir
TBA
Scheherazade
TBA
B Tier – Decent & Versatile Characters
Character
Details & Ranking Summary
Gullveig
TBA
Titania
TBA
Siegfried
TBA
Cleopatra
TBA
Lorilin
TBA
Minotaur
TBA
Medusa
TBA
Oberonnie
TBA
Nemesis
TBA
Goren
TBA
Caligula
TBA
Nanalie
TBA
Chiron
TBA
Anubis
TBA
Goblin Drummer
TBA
Herman
TBA
Melina
TBA
White Tiger
TBA
Drasill
TBA
C Tier – Mediocre Characters
Character
Details & Ranking Summary
Guna
TBA
Lancelot
TBA
Beowulf
TBA
Telperion
TBA
Van Helsing
TBA
Gudong
TBA
D Tier – Weak Characters
Character
Details & Ranking Summary
Arthur
TBA
Pan Junbao
TBA
Cerberus
TBA
Dragon Traveler Tier List FAQ
What are the best characters in Dragon Traveler?
The best characters in Dragon Traveler are Poseidon, Athena, Ifrit, and Hades.
Should you save resources for upcoming characters?
No, there is no reason to save for upcoming characters as most of the currently meta characters are useful, if not meta, well into the future. Plus, it’ll make your grind faster if you invest in them now.
Should you even use non-meta characters?
Yes, even non-meta characters have their use, especially if your team is missing some characters or utility.
That does it for our Dragon Traveler characters tier list for now. We will keep updating it as new characters are added, so be sure to bookmark it! Also, check out the Guides section here at Gamepur for more helpful content.
Clans in Kanom Tokyo provide you with permanent buffs regardless of your character’s race and are one of the most important things to roll for in the game. In the guide below, we will explain all the races, their buffs, pros, and cons, and rank them from best to worst. Here is our ultimate Kanom Tokyo clans tier list!
Kanom Tokyo Clan Tier List
BEST CLANS
S
Yoshimura
VERY GOOD CLANS
A
Arima
Noro
Ken
Kamishiro
Suzaya
DECENT CLANS
B
Oomori
Tsukiyama
Fueguchi
Koutarou
Kirishima
USELESS CLANS
C
Tsuchigami
Akegami
Shirakawa
Kurogane
Ryuzaki
Tiers Explained
S Tier: The best clans in Kanom Tokyo, with the best bonuses for end-game builds.
A Tier: Very strong clans that you can safely stick with until you get the best clans.
B Tier: Decent clans that don’t provide that good buffs, but aren’t useless either.
C Tier: Useless clans that provide no buffs at all.
In the tier list above, we ranked all clans in Kanom Tokyo based on their overall strength and stats. Generally, Yoshimura is the best clan, especially due to its revive, and the only one worth using in the end-game. More details about each clan are in the section below.
S Tier – Best Clans in Kanom Tokyo
Clan
Buffs
Ranking Summary
Yoshimura
+15% Defense +10% Max HP Double Jump Revive with 20% Max HP (once per life)
+ By far the best race in Kanom Tokyo + Gives excellent defensive buffs and utility + The revive you get is invaluable for PvP
A Tier – Very Good Clans
Clan
Buffs
Ranking Summary
Arima
+15% Damage +10% Speed Active skill that reduces vision/increases speed
+ Has a decent DPS buff and movement speed + The active will help you get away from enemies – Yoshimura has a much better passive
Noro
+10% Max HP Increased HP regen
+ Makes you very tanky, which is very good for PvP – Doesn’t provide any offensive buffs
Ken
+15% Damage +5% Defense When <50% HP, gain +10% Speed (once per life)
+ Provides excellent combat stats + One of the best Legendary clans you can get – The passive isn’t that great
Kamishiro
+50% Yen Gained +25% EXP Gained
+ One of the best clans for progression + The extra EXP and Yen is very useful early on – Isn’t that useful later into the game
+ Provides the best mobility bonuses out of all clans – Doesn’t provide survivability/damage
B Tier – Decent Clans
Clan
Buffs
Ranking Summary
Oomori
+10% Damage
+ Decent damage buff for a low-rarity clan – Can’t compare to Legendary+ clans
Tsukiyama
+5% Damage +5% Defense
+ Decent overall buffs for a low-rarity clan – Can’t compare to Legendary+ clans
Fueguchi
+10% Defense
+ Defense isn’t as OP as DMG, but it’s still useful – Most other Rare clans are better
Koutarou
+5% Speed +5% Defense
– Speed and Defense are both low-priority stats – One of the worst Rare clans you can get
Kirishima
+10% Speed
– Only speed is not that useful – The worst Rare clan in the game
C Tier – Useless Clans
Clan
Buffs
Ranking Summary
Tsuchigami
No buffs
– Doesn’t provide any bonuses
Akegami
No buffs
– Doesn’t provide any bonuses
Shirakawa
No buffs
– Doesn’t provide any bonuses
Kurogane
No buffs
– Doesn’t provide any bonuses
Ryuzaki
No buffs
– Doesn’t provide any bonuses
How to Get Clan Spins in Kanom Tokyo
Image by Gamepur
You can get clan spins in Kanom Tokyo by using codes and by opening gacha items you receive as rewards when completing quests. However, the chance to get spins from gacha items is fairly low, making redeeming all available codes a very high priority.
Kanom Tokyo Clans FAQ
What is the best clan in Kanom Tokyo?
The best clan in Kanom Tokyo is Yoshimura, providing defensive buffs, double jump, and revive.
What is the best way to get clan rerolls in Kanom Tokyo?
Yes, the clan buffs apply to both Ghouls and Humans.
That does it for our Kanom Tokyo clans guide and tier list. If you want to learn more about other popular titles, check out the other guides in the Roblox section here at Gamepur, including our Devil Hunter clans tier list and The Forge maze guide!
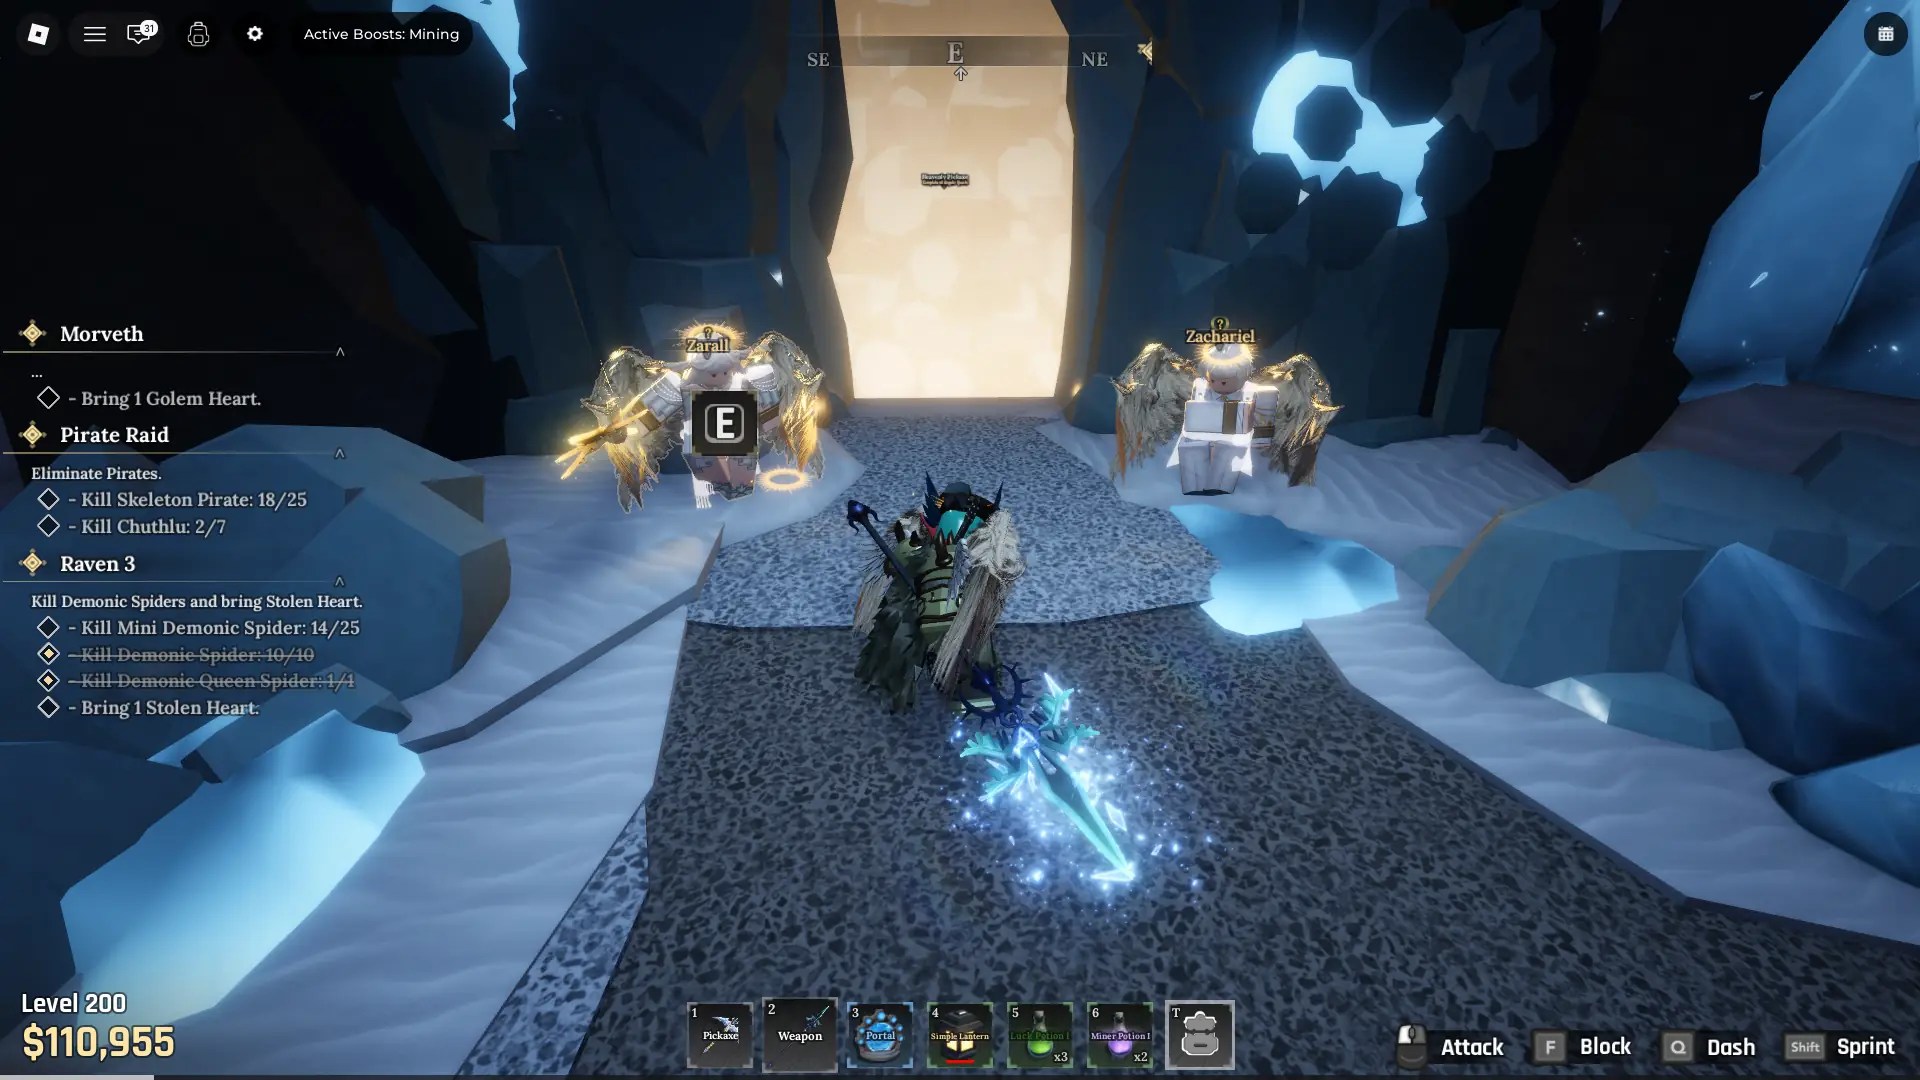
The maze is a special location in the third area (Frostpire Expanse) in The Forge. In the maze, there is a merchant, selling unique blueprints and items, as well as enemies that you’ll need to defeat to unlock one of the best pickaxes in that area. To help you navigate it, here is the complete guide to the maze in The Forge Roblox experience.
How to Reach The Maze in The Forge
Image by Gamepur
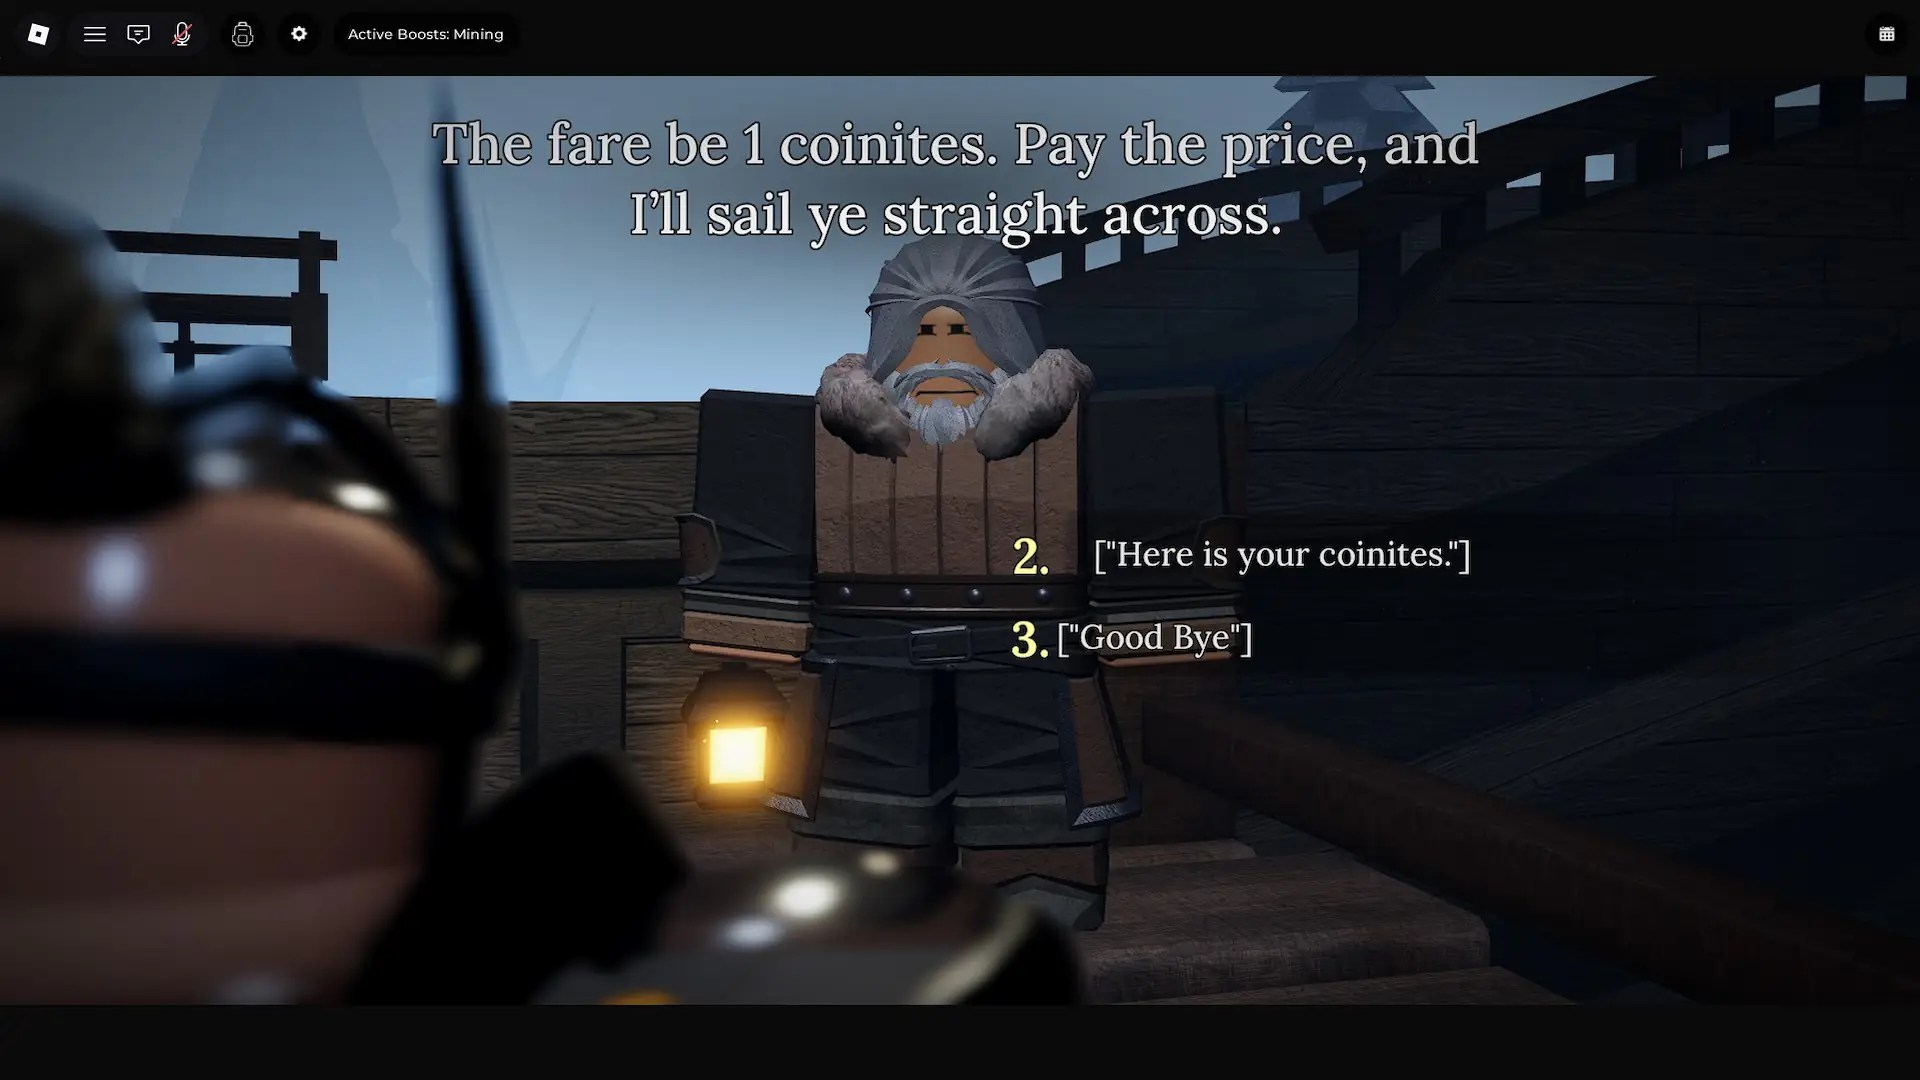
To reach the maze in The Forge, you’ll need to have at least 1 Coinite, which drops from Medium Red Crystals, Large Red Crystals, Hearts of the Island (all located in the Raven Cave within the Frostpire Expanse). Once you have the Coinite, talk to the Ferry Operator on the south end of the island, and he will teleport you to the maze’s entrance. There is a zone of water around the maze that’ll kill you if you are in it, making swimming to the maze impossible.
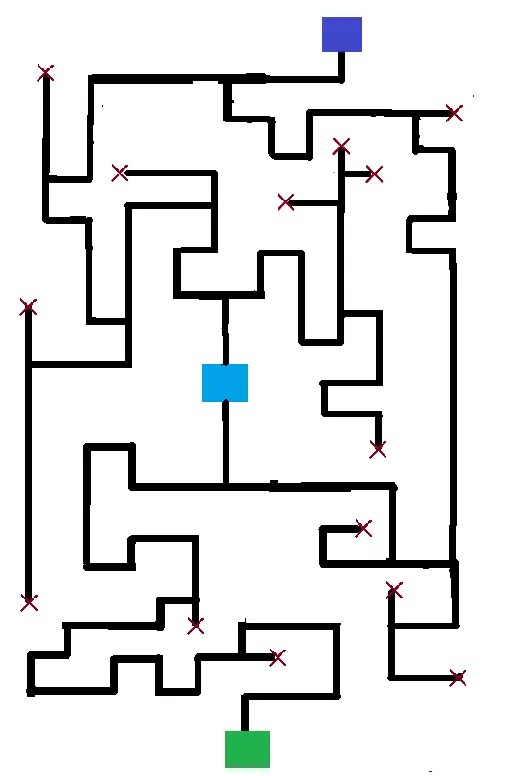
The Forge Maze Day 2 Guide
Go forward until you reach the first T-junction and turn right (→).
Continue going forward until you reach the second T-junction and turn left (←).
Continue to the third fork in the road, and go left (←) to reach the Merchant.
Go down the road past the Merchant and turn left (←) on the next T-junction.
Continue to the fifth fork in the road and go left (←).
Continue to the sixth fork on the road and take the first road to theright (→).
Keep going forward until you reach the seventh fork and turn right (→).
On the last fork, continue forward (↑) to reach the Heavenly Pickaxe location.
Image via The Forge Discord
Merchant Location & Shop Details
Image by Gamepur
The Merchant is one of the core NPCs within the maze who sells unique items and blueprints. The merchants’ shop resets every 24 hours, allowing you to restock on some of the items. Here are all of the items the Merchant sells and their prices:
Item
Description
Price
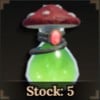
Fungi’s Potion (Stock: 5)
+20% Mining Speed, +15% Mining Damage, and +15% Luck Boost for 600 seconds.
$17,500
Knight Spear
Contains a hidden recipe for the Knight Spear. Use it to obtain the recipe.
$320,000
Colossal Gemblade
Contains a hidden recipe for the Colossal Gemblade. Use it to obtain the recipe.
$500,000
Anchored Greatsword
Contains a hidden recipe for the Anchored Greatsword. Use it to obtain the recipe.
$440,000
Colossal Terrorblade
Contains a hidden recipe for the Colossal Terrorblade. Use it to obtain the recipe.
$470,000
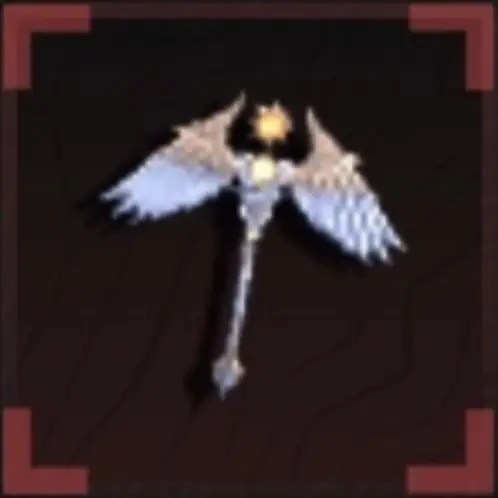
Heavenly Pickaxe Location, How to Unlock, & Stats
Image by Gamepur
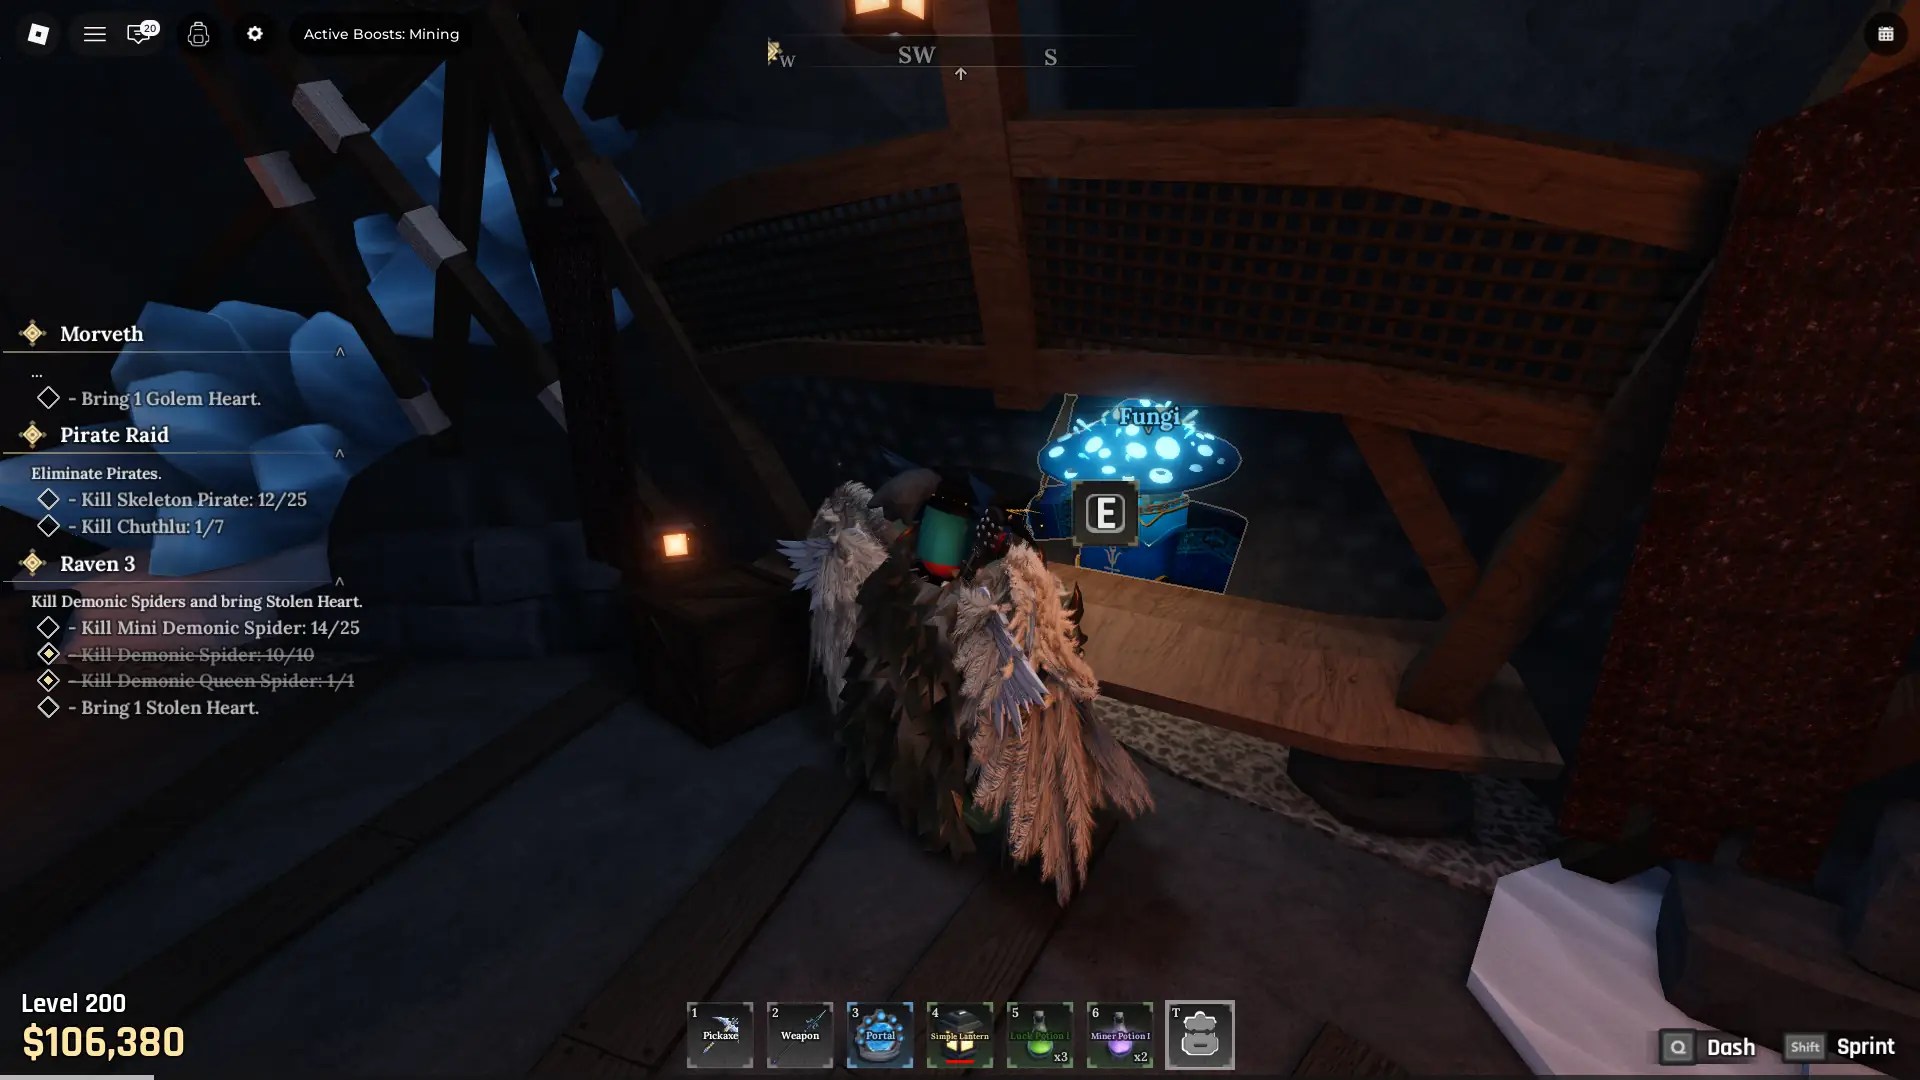
At the end of the maze, you’ll find the Heavenly Pickaxe altar, with two NPCs standing in front of it. You’ll need to talk to them and complete three quests to unlock the Heavenly Pickaxe for purchase. Here are all the quests and their requirements:
Maze Quest 1
Kill Skeleton Pirate x10
Kill Chuthlu x2
Maze Quest 2
Kill Skeleton Pirate x25
Kill Chuthlu x7
Maze Quest 3
Kill Skeleton Pirate x50
Kill Chuthlu x15
Heavenly Pickaxe Stats
Pickaxe
Mine Power
Luck Boost
Rune SLots
Price
Heavenly Pickaxe
725
+85%
4
$2,400,000
The Forge Maze FAQ
Does the maze layout change every day?
Yes, the maze’s layout changes every day, and you’ll need 1 Coinite to enter it every time.
When do the merchant wares reset?
Merchant wares reset every 24 hours, allowing you to buy potions again. The blueprint purchases don’t reset.
Is the Heavenly Pickaxe woth buying?
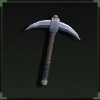
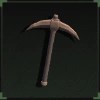
Yes, the Heavenly Pickaxe is worth buying, though at that progression stage, the Dragon Head Pickaxe is a bit better stats-wise.
That does it for our The Forge maze guide. To learn more about this and other popular Roblox titles, make sure to visit the Roblox category here at Gamepur. Also, check out our Devil Hunter clans tier list, in case you’re playing that game as well!
Your character’s clan in the Devil Hunter Roblox experience determines the basic stat bonuses and traits and is a core component of your build. In the guide below, we will cover the best clans, what they do, how to get rerolls, and other useful information. Scroll down, and let’s dive into our ultimate Devil Hunter clans tier list!
Devil Hunter Clans Tier List
BEST CLANS
S
Hayakawa
Kishimoto
Kishibe
VERY GOOD CLANS
A
Fujimoto
Higashiyama
Himeno
DECENT CLANS
B
Sawatari
Yoshida
Tiers Explained
S Tier: The best clans in Devil Hunter, providing the best stats and passives.
A Tier: Very good clans that can be the best options depending on your build, but aren’t as universally strong as the S-tier ones.
B Tier: Decent clans that can be good if you have the appropriate devil contract, but those contracts aren’t that OP.
In the tier list above is the general ranking of clans in Devil Hunters. Most clans provide no buffs, and we excluded those from the tier list so as not to clutter it (all no-buff clan names are listed below). Some clans give general buffs and traits, while some buff specific devil contracts. The better the buffs and the devil contracts they affect are, the better the clan. More info about each clan is in the section below.
S Tier – Best Clans in Devil Hunter
Clan
Effects
Ranking Summary
Hayakawa
• Slightly reduces the requirements of all contracts. • 10 Posture • 30 Soul
+ Reduced contract requirements benefits all builds + Has very good total stat buffs + One of the best clans in the game
Kishimoto
• Has stronger resolve and sanity scaling, and better resistance to contract debuffs. • 10 Posture • 25 Soul
+ Buffs various stats, including Posture and Soul + One of the best clans you can get in the game
Kishibe
• Increased status resistance, soul drain resistance, and more damage to devils. • 15 Posture • 10 Health • 20 Stamina
+ Better total stat buffs than most other clans + Has both offensive and defensive traits + One of the best overall clans in the game
A Tier – Very Good Clans
Clan
Effects
Ranking Summary
Fujimoto
• Reduced stamina drain from skills. • 10 Posture • 10 Health • 10 Stamina
+ Decent stat buffs for any build + Reduced stamina drain is a universally strong buff – Doesn’t excel at anything compared to some other clans
Higashiyama
• Increased light weapon damage, mobility, and stamina restored on heavy attacks. • 10 Mobility • 20 Stamina
+ Can be the best option for light weapon users + Provides very good buffs in general – Not that strong for non-light weapon builds
Himeno
• Reduces Ghost devil contract ability costs and strengthens Fear effects.
+ Ghost devil is very strong, and this clan makes it even better – Doesn’t provide any stats or buffs for other devil contracts
B Tier – Decent Clans
Clan
Effects
Ranking Summary
Sawatari
• Reduces Snake devil contract ability costs and lessens its penalties.
– Snake devil isn’t that strong – Doesn’t provide any bonuses if you don’t use the Snake devil contract
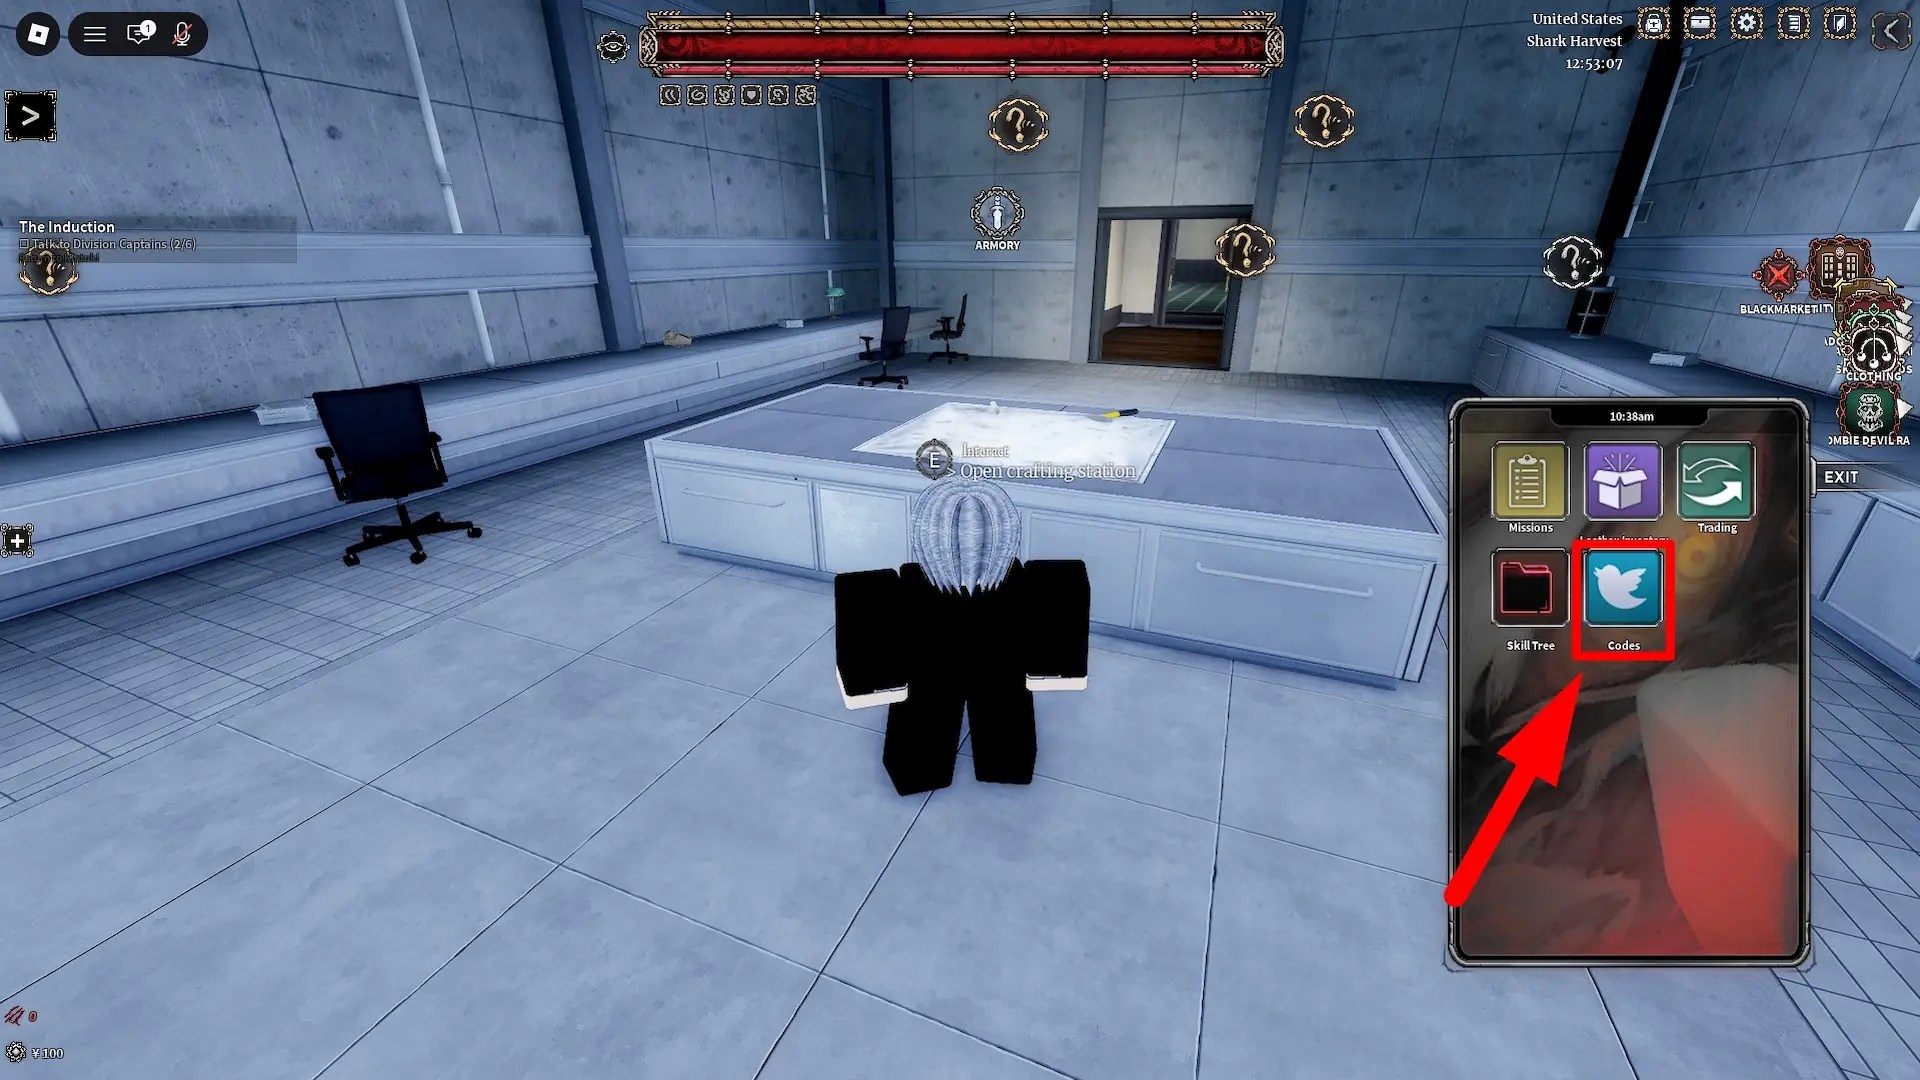
You can get clan rerolls by redeeming codes in the in-game phone app (click ‘N’ to open your phone) and by completing various game modes and earning rewards. Generally, it isn’t hard to get clan rerolls, and there is little reason to buy them with Robux.
Devil Hunter Clans FAQ
What are the best clans in Devil Hunter?
The best clans are Hayakawa, Kishibe, and Kishimoto.
Is rerolling clans with Robux worth it?
No, rerolling clans with Robux isn’t worth it, as you can get plenty of clan rerolls for free by playing the game and redeeming codes.
How to use clan rerolls?
To use clan rerolls, open your inventory, equip the clan reroll item, and then use it.
Cursed techniques are the basic move sets your character will have in JZ (Jujutsu Zero), and they are arguably the most important part of your entire build. Therefore, it’s important that you use only the best CTs available. In our Jujutsu Zero cursed technique tier list below, we will rank all CTs from best to worst, provide details on their pros and cons, and explain which other CTs they combo with the best.
Jujutsu Zero Cursed Techniques Tier List – Best CTs Ranked
BEST CURSED TECHNIQUES
S
Shrine
Limitless
Blood Manipulation
GOOD CURSED TECHNIQUES
A
Disaster Flames
Disaster Tides
Star Rage
DECENT CURSED TECHNIQUES
B
Ratio
Straw Doll
WEAK CURSED TECHNIQUES
C
Cursed Speech
Exploding Flesh
Tiers Explained
S Tier: The best cursed techniques in Jujutsu Zero, with OP skills and high damage.
A Tier: Very strong cursed techniques that aren’t as OP as the S-tier ones, but they can still work really well depending on your build.
B Tier: Decent cursed techniques that you can use early on for an easier grind.
C Tier: Weak cursed techniques that will underperform in virtually all scenarios.
In the tier list above is our general ranking of all cursed techniques in Jujutsu Zero right now. Rarer CTs are usually stronger, with better AoE, damage, and CC on their skills. You can learn more about each CT’s strengths, weaknesses, and best CT combos in the section below.
S Tier – Best Cursed Techniques in Jujutsu Zero
Cursed Technique
Ranking Summary
Best CT Combo
Shrine
+ Excellent AoE, damage, and range on all skills + Has the highest burst damage out of all CTs in Jujutsu Zero + Arguably the best cursed technique in the game
Limitless
Limitless
+ Very good damage, AoE, and CC on all its skills + The only cursed technique with a domain expansion right now – Requires a lot of grinding to unlock all of its skills
Shrine
Blood Manipulation
+ Excellent range, AoE, and single-target damage + By far the best non-Special Grade cursed technique – Isn’t as strong as Shrine or Disaster Flames
Shrine
A Tier – Good Cursed Techniques
Cursed Technique
Ranking Summary
Best CT Combo
Disaster Flames
+ Almost as good as Shrine regarding raw damage + Has very good range and AoE, making it OP for farming weaker enemies – Most skills are mid compared to its special
Shrine
Disaster Tides
+ Big AoE, decent damage, and long CC on all skills + One of the best CTs for dealing with large groups of enemies + Fairly short cooldowns compared to other high-rarity CTs – Skills can be difficult to aim and hit against mobile targets – Doesn’t have as much damage potential as Shrine and some other CTs
Shrine
Star Rage
+ Good range, damage, AoE, and CC on all skills + A jack-of-all-trades CT that will perform decently well in every scenario + One of the best CTs to use early on and against weaker enemies – Doesn’t excel at anything and isn’t as OP against strong enemies
Limitless
B Tier – Decent Cursed Techniques
Cursed Technique
Ranking Summary
Best CT Combo
Ratio
+ The best low-rarity cursed technique in Jujutsu Zero + Has a gap closer, big hitboxes/AoE on skills, and excellent damage + Fairly low cooldowns considering its high damage numbers – Can’t compare to most high-rarity cursed techniques
Shrine
Straw Doll
+ Decent damage, AoE, and CC on most skills + One of the best low-rarity cursed techniques – Short range and RNG make some skills hard to land – Long-range CTs will easily kite Straw Doll users
Shrine
C Tier – Weak Cursed Techniques
Cursed Technique
Ranking Summary
Best CT Combo
Cursed Speech
+ Okayish AoE and low cooldowns – Very short CC on all but one skill – Doesn’t have as much burst damage as other CTs – One of the overall worst cursed techniques in Jujutsu Zero
Shrine
Exploding Flesh
– Deals damage to the user with Final Trick, which is really bad – Has the lowest DPS out of all cursed techniques – The overall worst CT in Jujutsu Zero
Shrine
How to Get Cursed Techniques in Jujutsu Zero
You get cursed techniques (CTs) in Jujutsu Zero by rolling on the CT gacha (star-shaped icon in the top-side menu). The gacha requires Lumens (in-game currency) to roll, and there are different banners with boosted rates for specific Special Grade CTs. You can equip two different cursed techniques at once from your inventory.
Image by Gamepur
Jujutsu Zero Cursed Techniques Tier List FAQ
What are the best cursed techniques in JZ?
The best CTs in Jujutsu Zero are Shrine, Limitless, Blood Manipulation, and Disaster Flames.
What are the best non-special grade cursed techniques in JZ?
The best non-special grade CTs in Jujutsu Zero are Blood Manipulation, Star Rage, and Ratio.
Clans in JZ (Jujutsu Zero) give you unique buffs that can make your build go from mediocre to OP, and knowing which ones to reroll for is extremely important. In our Jujutsu Zero clans tier list below, we will rank all clans from best to worst based on their overall power, as well as provide you with details on what buffs each clan gives, how to get rerolls, store clans, and more!
Jujutsu Zero Clan Tier List – Best Clans Ranked
BEST CLANS
S
VERY GOOD CLANS
A
GOOD CLANS
B
DECENT CLANS
C
WEAK CLANS
D
Tiers Explained
S Tier: The best clans in Jujutsu Zero, with extremely high stat buffs that you’ll need for the strongest end-game builds.
A Tier: Very strong clans that provide stat buffs that are otherwise hard to stack, such as %ATK (Attack Damage) and %CDR (Cooldown Reduction).
B Tier: Strong clans that provide slightly less stats compared to the A-tier ones, but are still good in general.
C Tier: Decent clans that don’t provide as much stats as the higher-tier ones or provide less important stats.
D Tier: Weak clans that provide almost meaningless buffs compared to the higher-rarity ones.
In the tier list above is the general power ranking of all clans in Jujutsu Zero right now. As clans give only stats, their strength is determined by how much stats they give in total and how good the stats they provide are. The best stats for all builds will be those that are hard to stack from gear and other sources, such as ATK, Cooldown Reduction, and Critical Rate. More details about each clan and the stats they provide are in the section below.
+ The best clan in Jujutsu Zero regarding offense + Excellent ATK and Cooldown Reduction buffs + Has the highest Crit Rate bonus out of all clans
Kashimo
??? 1 in ???
+35% ATK +20% CR +100% CD +30% CDR
+ One of the best clans in Jujutsu Zero regarding offense + Almost as good as Sukuna, providing very good stats + Required to obtain a unique Cursed Technique skill in the future – Is just a slightly worse than Sukuna
Tengen
??? 1 in ???
+150% HP +15% CR +115% CD +50% CE
+ The best clan in Jujutsu Zero regarding defense + Massive HP boost makes it OP for the hardest content – Mediocre DPS buffs compared to other Special Grade+ clans
A Tier – Very Good Clans
Clan
Rarity
Stats
Ranking Notes
Zen’in
Special Grade 1 in 400
+35% ATK +15% CR +30% CDR -20% CE
+ Excellent offensive buffs, especially Cooldown Reduction + By far the best Special Grade clan right now – Can’t compare to the ???-rarity clans
Geto
Special Grade 1 in 400
+40% ATK +35% CER +20% CDR -20% HP
+ Very good offensive buffs, especially ATK and CDR + Cursed Energy Rate is relatively hard to stack from other sources – Reduces your HP, which is a huge debuff for already squishy builds
Fushiguro
Grade 1 1 in 70
+45% ATK +10% CDR -20% CER
+ Gives you a massive ATK bonus and a decent CDR bonus + By far the best Grade 1 clan right now + The negative modifier to CER isn’t that high
B Tier – Good Clans
Clan
Rarity
Stats
Ranking Notes
Gojo
Special Grade 1 in 400
+25% ATK +15% CR +50% CD
+ Has decent offensive buffs, though they aren’t OP + Has no negative modifiers, unlike most other clans – Most other high-rarity clans have much better stats
Abe
Grade 1 1 in 70
+30% ATK +55% CE -10% CER
+ Very good ATK and Cursed Energy buff + Fairly irrelevant negative modifier to CER – Doesn’t have as much offensive stats as some other good clans
Inumaki
Grade 2 1 in 4
+20% ATK +35% CE -10% HP
+ One of the best low-rarity clans to get + Decent ATK and CE buffs with a low HP debuff
Todo
Grade 2 1 in 4
+25% ATK +30% CD -5% DR
+ One of the best low-rarity clans to get + Decent ATK and CD buffs with a low DR debuff
C Tier – Decent Clans
Clan
Rarity
Stats
Ranking Notes
Okkotsu
Grade 1 1 in 70
+10% CR +35% CER
+ Has no negative modifiers + Provides CR and CER, which are relatively hard to stack – Flat ATK that other Grade 1 clans provide is just better
Kugisaki
Grade 2 1 in 4
+25% CD +20% HP -10% CE
+ Decent HP buff for any build that lacks survivability – 25% CD makes almost no difference later on
Nanami
Grade 2 1 in 4
+10% ATK +10% CR -10% HP
+ Decent ATK and CR buffs for offense + One of the few low-rarity clans that isn’t that bad – Some other Grade 2 clans are better
Fujiwara
Grade 3 1 in 4
+12% ATK +10% DR -5% HP
+ One of the best low-rarity clans for offensive stats + Very small HP debuff makes it extra worth having – Way less powerful than most higher-rarity clans
D Tier – Bad Clans
Clan
Rarity
Stats
Ranking Notes
Kamo
Grade 1 1 in 70
+40% CD +20% DR -15% HP
+ Okayish DR buffs – The negative HP basically nullifies its DR increase – CD isn’t as good of a stat to get from clans as ATK or CR
Miwa
Grade 3 1 in 2
+20% HP -10% CER
+ Fairly decent HP buff for builds that lack survivability – No offensive stats, making it suboptimal choice for grinding
Itadori
Grade 3 1 in 2
+10% ATK -20% HP
+ Okayish ATK buff – Very bad HP debuff, making it the overall worst clan in Jujutsu Zero
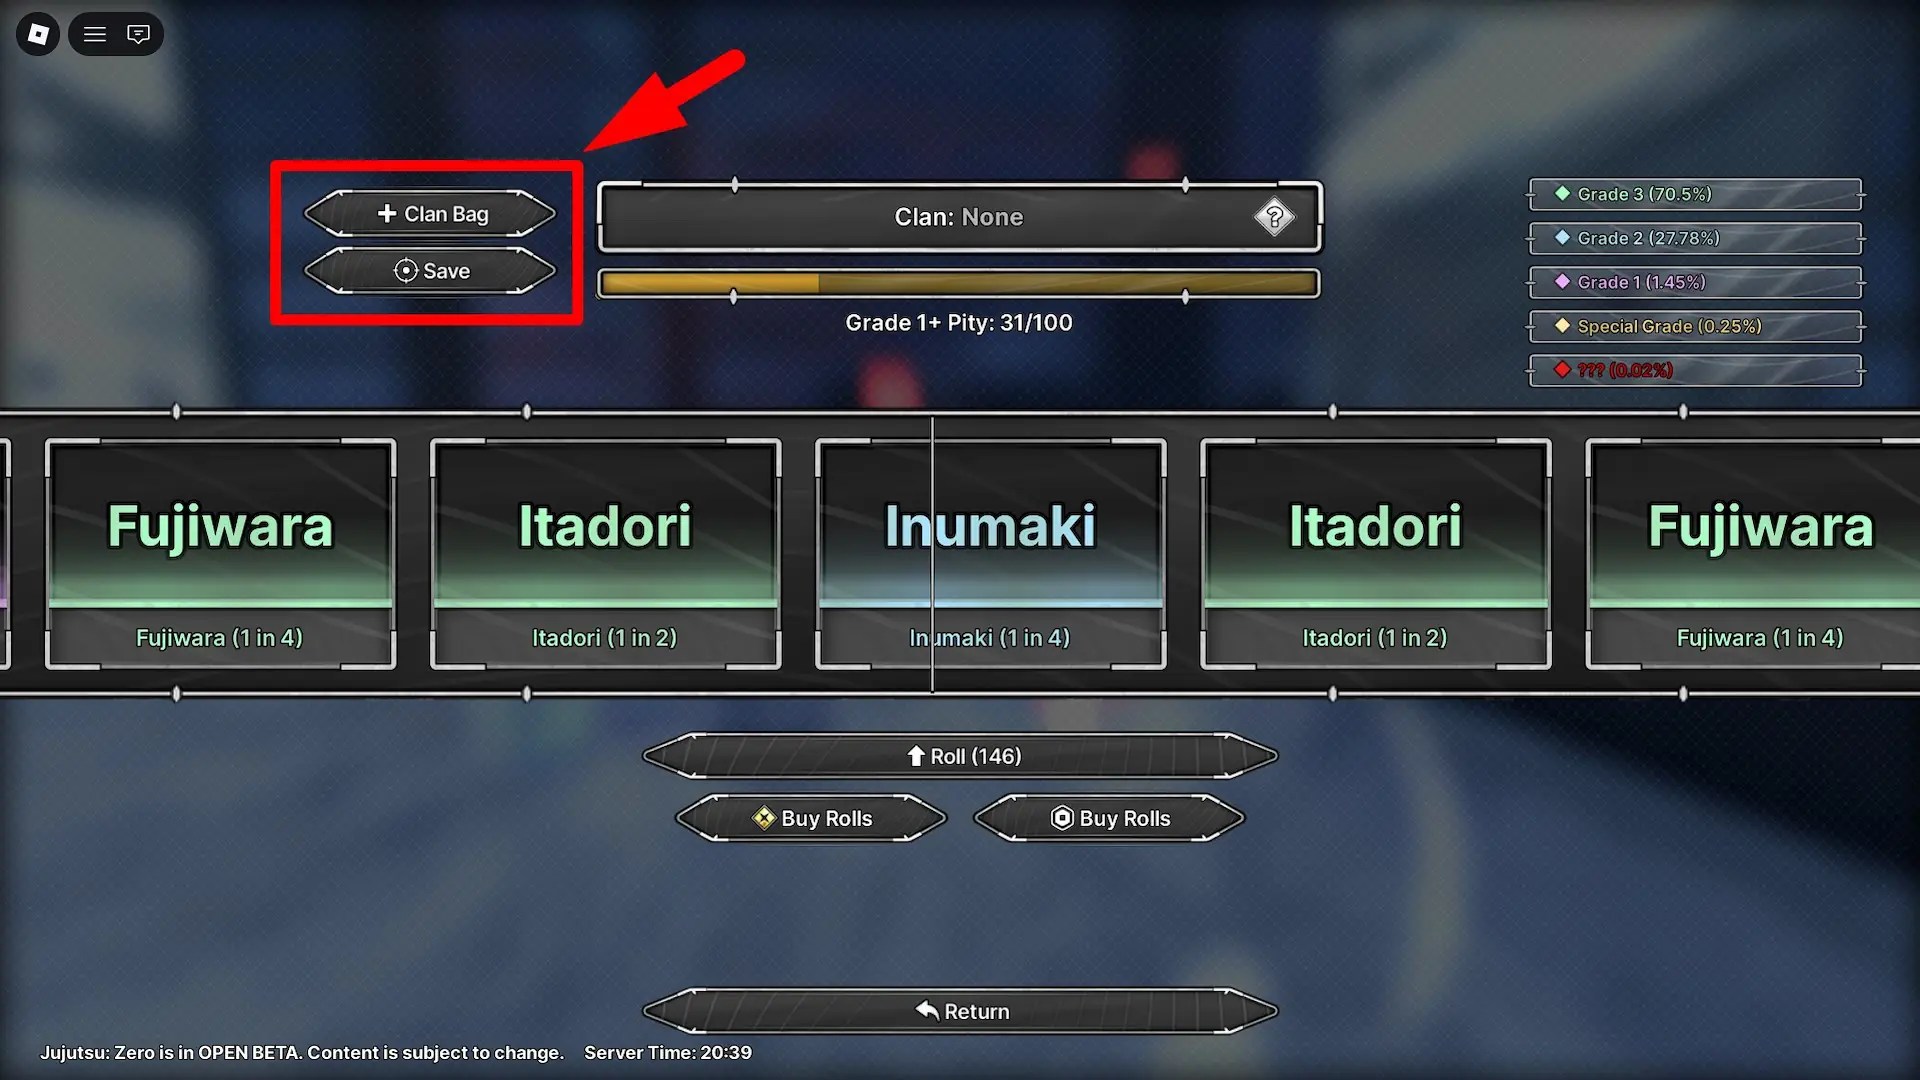
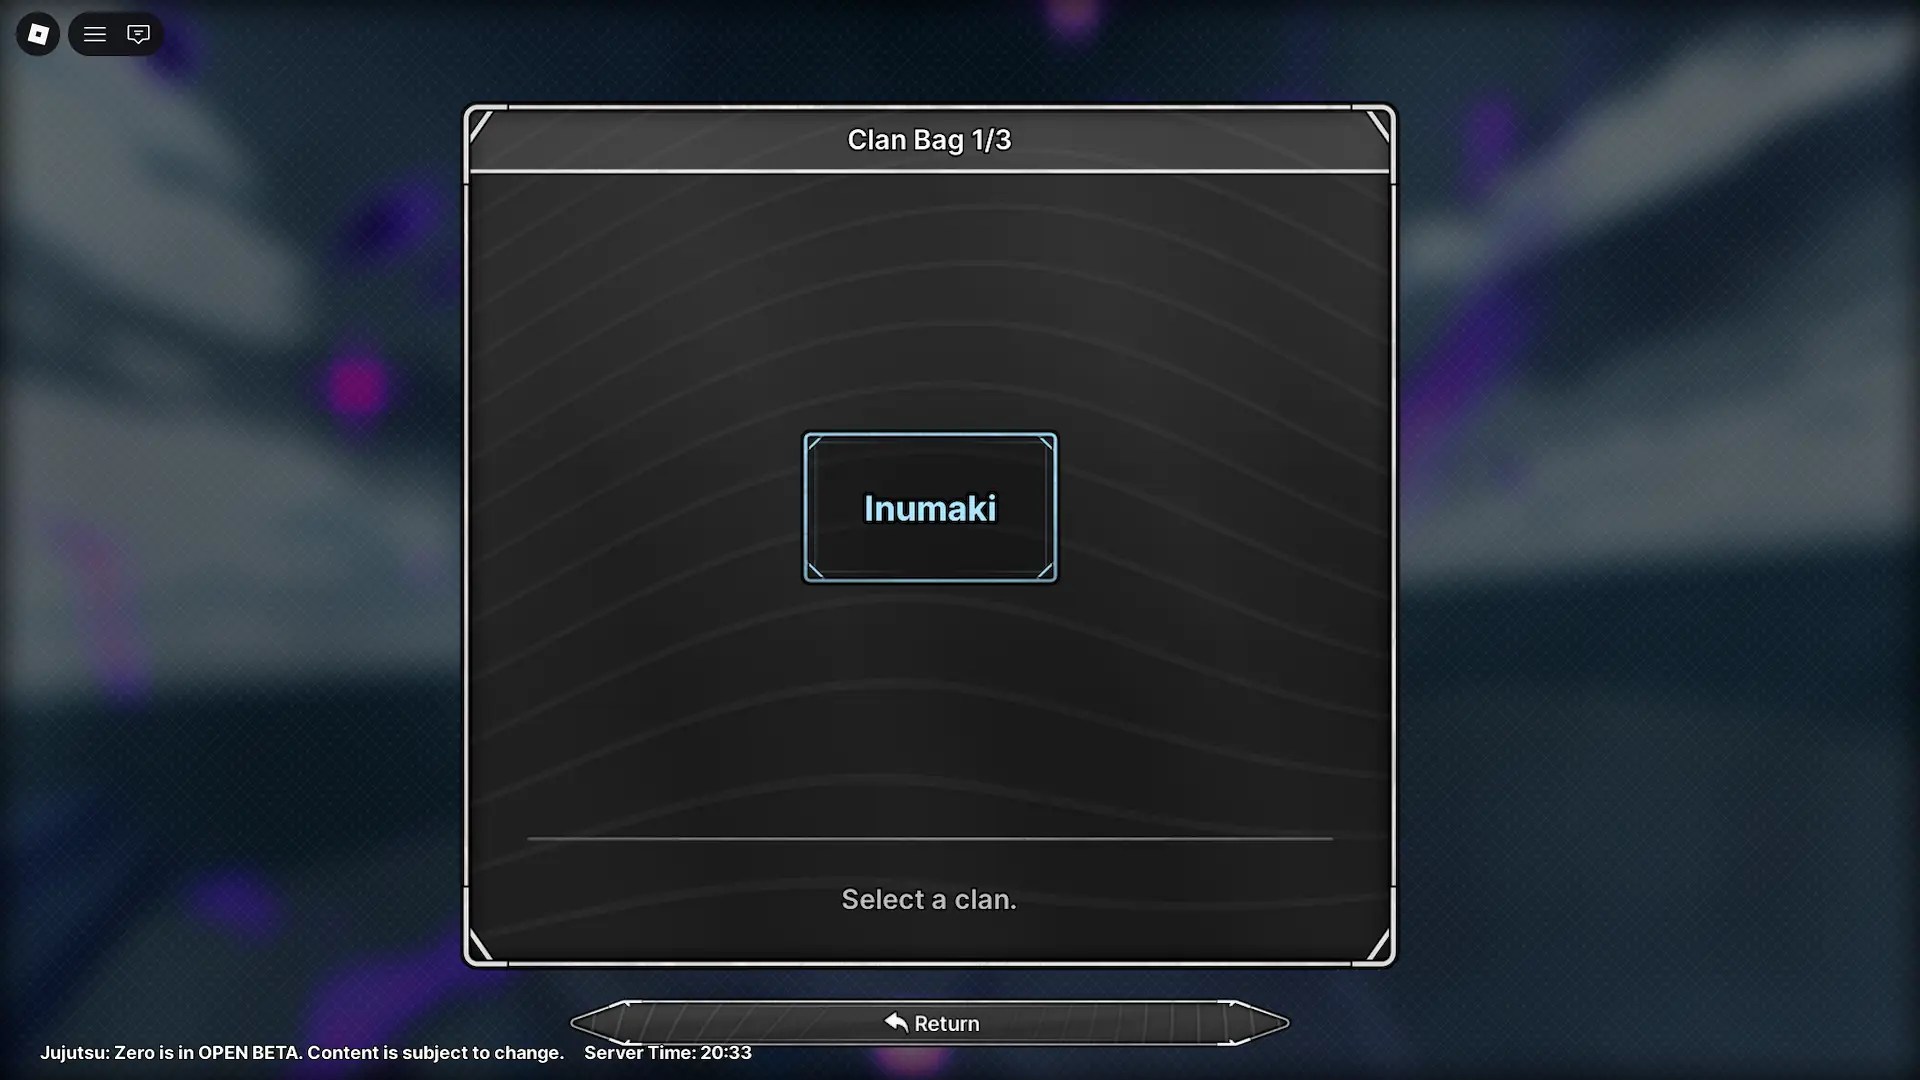
How to Reroll & Save Clans (Clan Bag) in Jujutsu Zero
In Jujutsu Zero, you can change your clan by rerolling it in the Clan section of the main menu. Whenever you reroll, your clan will be changed on that slot. You have 4 slots at the start, of which 3 are in the Clan Bag, and 1 is the equipped slot. To save a clan to the bag while rerolling, click on Save on the left side of the reroll menu.
Image by Gamepur
To change to one of the clans that you have in your bag, click on Clan Bag on the left and select the clan that you want to switch to. The clan from your bag will be swapped with the one you had equipped. Again, the maximum you can have is 3 clans saved in the bag and 1 clan equipped.
Image by Gamepur
How to Get Clan Rerolls in Jujutsu Zero
You can get clan rerolls in Jujutsu Zero by completing various in-game content and by claiming codes. Generally, it’s best that you redeem any codes that are available, as those are the easiest rerolls you’ll get. You can get all the codes on the Jujutsu Zero Discord server.
Jujutsu Zero Clan Tier List FAQ
What are the best clans in JZ?
The overall best clans in Jujutsu Zero are Sukuna, which provides the best offensive buffs, Kashimo, which is similar to Sukuna, and Tengen, which provides the best defensive buffs.
What are the best Special Grade clans in JZ?
The best Special Grade clans in Jujutsu Zero are Zen’in and Geto, providing excellent offensive buffs with negligent debuffs.
What are the best Grade 1 clans in JZ?
The best Grade 1 clans in Jujutsu Zero are Fushiguro and Abe, with Fushiguro being a slightly better choice.
This is the best AAC (Anime Auto Chess) units tier list, where we give you a quick rundown of which champions are the best and why. You should use this tier list as a cheat sheet on which units to get and upgrade first, and it should come especially handy if you’re a new player. Note that the meta in AAC is ever-evolving, and expect frequent updates.
AAC (Anime Auto Chess) Units Tier List
BEST UNITS
S
Blade Master
Flame Reborn
The Light Admiral
Red Emperor
The Lava Admiral
The Ice Admiral
Weather Manipulator
Cat Burglar
Young Boy
VERY GOOD UNITS
A
Fire Gunner
Hell Flame
Light Admiral
Red Hair
Lava Admiral
Blade Dancer
Sasook
DECENT UNITS
B
Ice Admiral
Yellow Flash
Alien Antagonist
Sharkbone
Sword Man
Mr Third
Fused Gatsu
Sakke
Kuroiashi
Genius Gunslinger
Sand Kid
Pikko
Medic Ninja
WEAK UNITS
C
Itadakiru
Young Joe
Mr First
Girl Soul Reaper
Kombo
Subordinate
Nihongo
VERY WEAK UNITS
D
Seiya Prince
Ki Student
Giant Gatsu
Demon Hunter Trainee
Alien Captain
Tiers Explained
S Tier: The best units in Anime Auto Chess, with the highest potential for clearing end-game/high-difficulty stages.
A Tier: Very strong units that can replace most of the S-tier units, and that are relatively easy to obtain.
B Tier: Decent units that can be good, especially early on, but they lose value in higher-difficulty stages due to their mediocre stats/passives.
C Tier: Weak units that will underperform compared to B-tier ones, but they are still not the worst AAC has to offer.
D Tier: Very weak units that you probably won’t even have to use, as getting Epic units isn’t that hard.
Common & Uncommon Units: Common and Uncommon units were available in the earlier versions of the game. Currently, there is no way to obtain them, and we won’t include them in the rankings until that changes.
In the tier list above is our ranking of units in the Anime Auto Chess Roblox experience. Generally, higher-rarity units should be your priority, as they have higher stats, more upgrades, and better passives than the lower-rarity ones. However, support/utility units such as Young Boy (money-generation) can be useful despite being low-rarity. For more details about the ranking factors, check out the section below.
AAC Tier List Ranking Factors
Rarity & Base Stats: Rarity of the unit influences its base stats, and higher-rarity units will often be the best options.
Utility/Support: Some units, like Young Boy or Medic Ninja, have support passives that’ll help out your team much more than another DPS unit.
Basic Abilities: All units have basic abilities that define their kit. The better the ability and its effects and damage, the better the unit will perform.
Upgrade Bonuses: Every unit upgrade provides bonus stats, as well as new passives. These are essential for grading a unit’s strength.
Evolution Potential: Some units have evolutions, making them better long-term investments. Still, some non-evo units can be OP purely because of their kits.
Unit Summaries: We will add a unit summaries section soon!
Anime Auto Chess Units Tier List FAQ
What are the best Legendary units in Anime Auto Chess?
The best Legendary units are Weather Manipulator, Fire Gunner, Hell Flame, Light Admiral, Ice Admiral, and Lava Admiral.
What are the best Epic units in Anime Auto Chess?
The best Epic units are Cat Burglar, Young Boy, Sword Man, Mr Third, Sakke, Fused Gatsu, and Kuroiashi. Of all the Epic units, the absolute best ones are Young Boy and Cat Burglar, providing excellent money-generation.
What are the best Rare units in Anime Auto Chess?
The best Rare unit is Medic Ninja, as she provides decent heals. All other Rare units are fairly underwhelming.
What are the best support units in Anime Auto Chess?
The best support unit are Cat Burglar, Weather Manipulator, and Young Boy, as their money-making passives allow you to easily upgrade and max out all the champions that you place during a run.
What are the best units in Anime Auto Chess?
The overall best units in AAC are Blade Master, Flame Reborn, The Light Admiral, Red Emperor, The Lava Admiral, The Ice Admiral, Weather Manipulator, Cat Burglar, and Young Boy.
Codes for Anime Auto Chess allow you to get free gems (Radiant Emblems), trait/potential rerolls, loot bags, and other resources and currency that you’ll need for progression. In the guide below, we list out all the currently working AAC (Anime Auto Chess) codes and provide a quick explanation on how to redeem them in-game.
All Anime Auto Chess Codes List
CompCode02!!: x25 Power Fragment, x10 Ability Shards (New)
DrippyAdmiral: Exclusive Ice Admiral Skin (New)
CompCode01!: x25 Power Fragment, x2,000 Radiant Emblem (New)
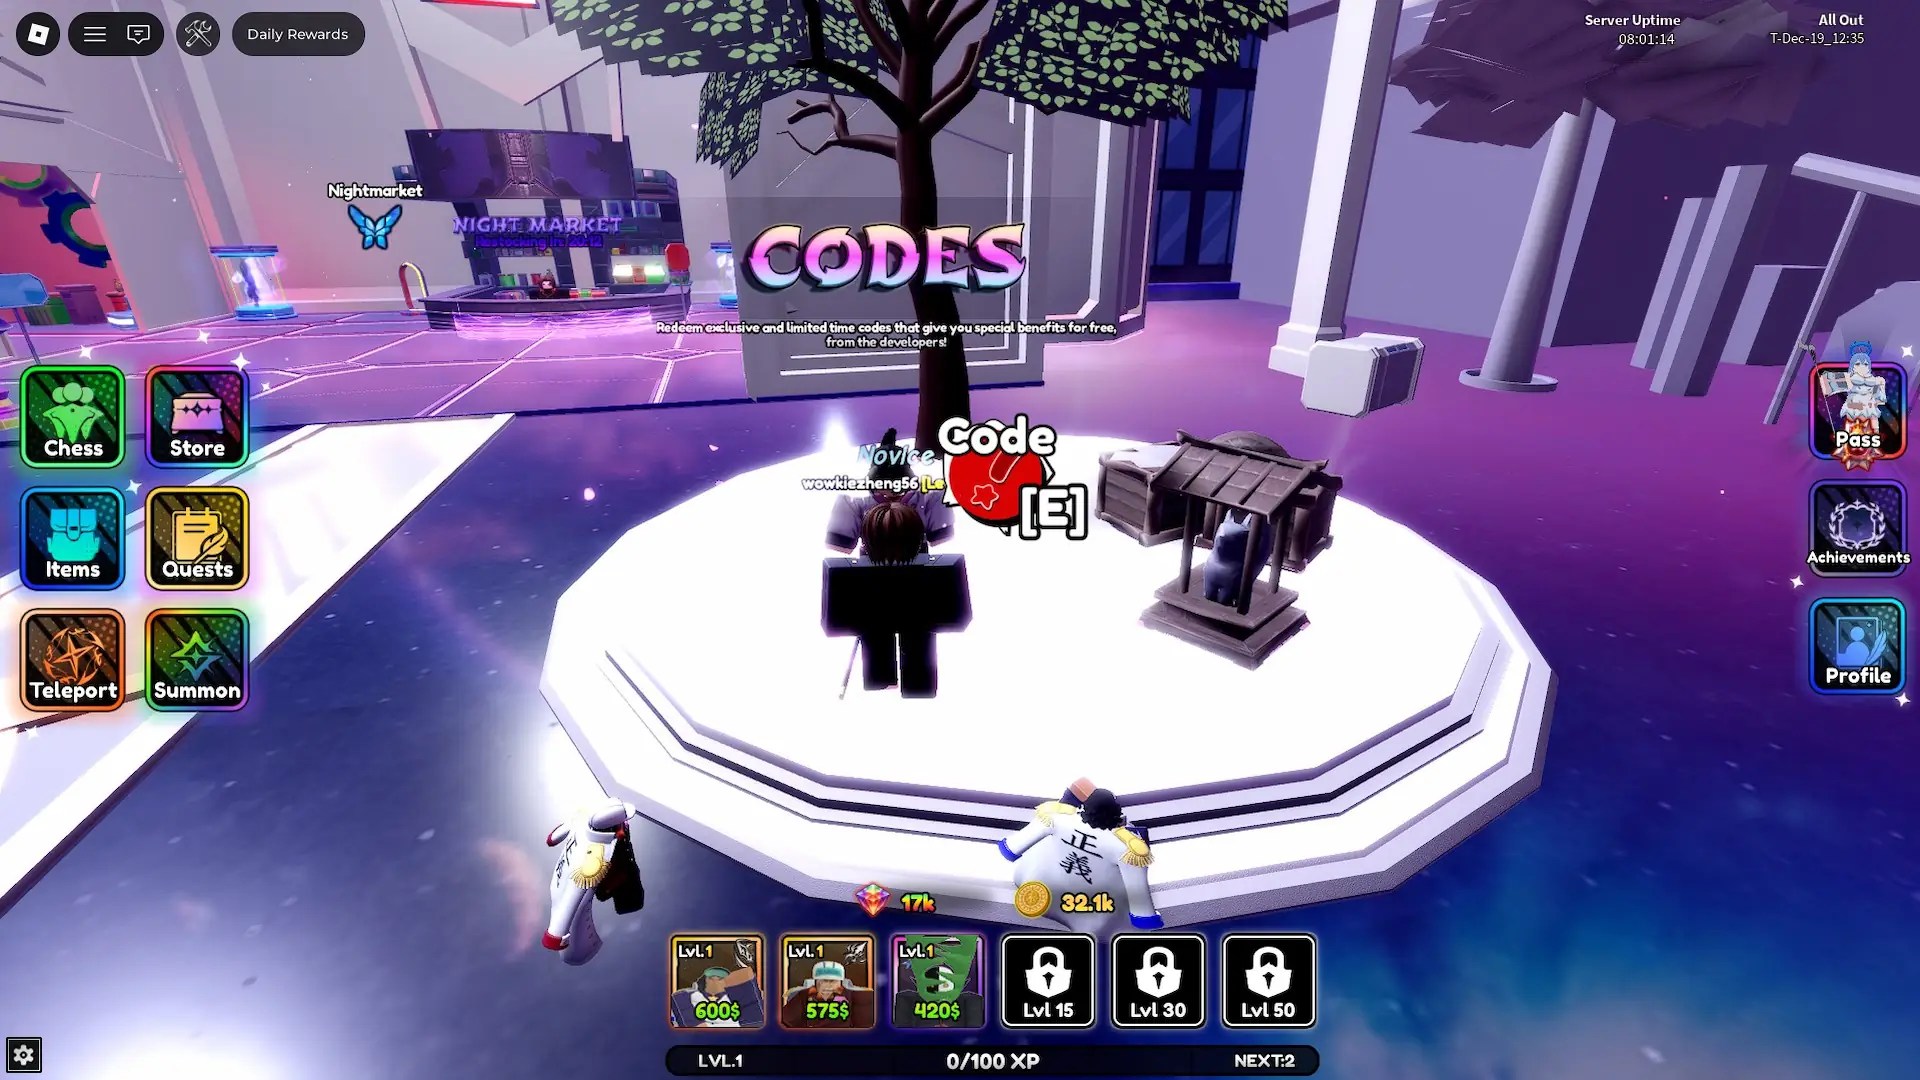
Close the window to skip the tutorial if you’re talking to the Codes NPC for the first time.
Copy-paste or type in a code from the list above into the input field.
Click Redeem to claim the code and get the resources.
Image by Gamepur
Why Is My Code Not Working?
Already Claimed Code: Each code can be claimed only once. If you try to do it more than once, you’ll get the appropriate error message.
Misspelled Code: If you’re typing the codes out, there is a chance of spelling errors. Therefore, it’s important you double-check the code before clicking redeem. Also, note that the codes for Anime Auto Chess are case-sensitive!
Expired Code: The developers can deactivate codes at any time. So, it’s best you redeem every code as soon as you find it.
Being on an Old Server: If you’re on a server that hasn’t restarted in a long time, the code might not work as the server will be hosting an older version of the game. To fix this, go to a private server or reconnect to the game and try to get a fresher server.
Where to Find More AAC Codes?
The best place to look for more codes is the official Anime Auto Chess Discord server. There, you can also find help regarding gameplay, tips and tricks, announcements, and people to play the game with. If you’re only looking for codes and don’t want to spend any extra effort, bookmark this post instead and check in every few days to see if any new codes dropped, as we keep the list up-to-date.
Anime Auto Chess Codes FAQ
How long do codes last?
Codes for AAC usually last for a week, unless the developers specify otherwise. Whenever there is a big update, most of the old codes will be deactivated by the developers.
Are codes case-sensitive?
Yes, codes for Anime Auto Chess are case-sensitive. So, double-check the spelling and capitalization if you’re typing them out.
Can you redeem codes without going to the lobby?
No, you can’t redeem codes without going to the lobby. You’ll have to talk to the Codes NPC.
This is the list of the best builds for every unit in UTD (Universal Tower Defense). In the guide below, we explained what the best relics, traits, and stats are for each unit in Universal TD, build alternatives, and other important information to make your units as strong as possible.
All Universal Tower Defense Best Unit Builds
In the tables below, you’ll find the best builds (traits, relics with stats, and stat point distributions) for every unit in Universal Tower Defense, categorized by unit rarity. Note that we included only evo versions for units that have evolutions. Here are some notes regarding the best builds and why some stats are preferred:
Best Traits: For most units that stack DoTs and have a low Cooldown, Astral will be the best trait. For most units with 1-2 maximum placements, the best trait will be Ruler. It all depends on what kind of unit it is, its maximum placement count, passives, etc.
Best Stat Point Distributions: Since the percentage increase across stats is fairly equal, it’s often best to go with Cooldown, unless that unit needs some other stat, of course.
Relic Stats: You get ~3.5x more Damage than Cooldown from relic’s main stats, making it a much better choice in 99% of cases. Only if the unit depends on some other stat will you not go with Damage.
Here is the list of all the relic set bonuses in UTD (Universal Tower Defense), and it will help you understand how we determined all the best relic sets in the builds section above. In the table further below are all the possible main/sub-stats each piece of gear can have, depending on its type (body, head, or legs).
Relic Set
Head Bonus
Body/Legs Bonus
Junior Ninja
Increase received buffs by 1.1x
+5% Damage +10% Wind Damage
Master Ninja
Every 5 attacks, increase DOT damage by 20% for 10 seconds
+5% Damage +10% Dark/Rose/Fire Damage
Sun God
Every 6 attacks unit gains damage buff equal to his range (1 Range = 1% Damage buff) for 7 seconds
+5% Damage +10% Light/Water/Ice Damage
Laughing Capt.
-10% Active Ability Cooldown
+5% Damage -5% Cooldown +5% Range
Bers. Shinigami
Every 5 hits gives a buff to next attack (Deals extra 20% True Damage) (Ignoring all resists.)
The best stat to invest points in is most often Cooldown, as the buffs from point investments are all fairly equal. However, some characters will go better with Damage or Range, depending on their passives.
What is the best main stat on relics?
The best main stat on relics is most often Damage, as it affects the unit’s total DPS, and you can get much more of it from gear compared to Cooldown or some other DPS-related stat.
What is the best relic set?
The best relic sets are most often Laughing Captain, Sun God, and Ex Captain Uraharo.
And that does it for our Universal TD (Universal Tower Defense) best unit builds guide. For more helpful information about this title, check out our Universal Tower Defense units tier list, as well as the Roblox section here on Gamepur.
Last Updated: December 22th, 2025 • Revamped the ranking and the details of the units that were rebalanced recently.
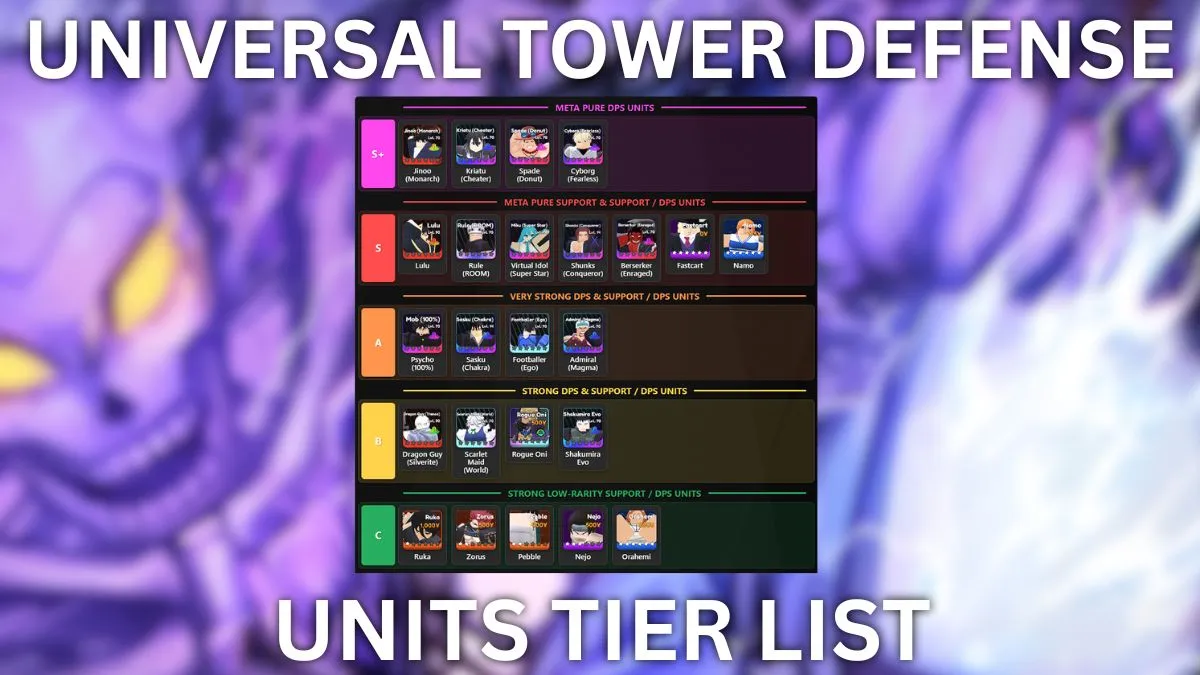
This is our UTD (Universal Tower Defense) tier list, ranking all units from best to worst based on their strength across all game content. It should serve you as a guide on which units to prioritize when it comes to getting and upgrading them. Note that UTD is still a fairly new game and that the meta can change soon. We’ll make sure to keep testing out all the units and updating the tier list with new information daily.
Universal Tower Defense Units Tier List
META UNITS
S+
Jinoo (Monarch)
Spade (Donut)
Virtual Idol (Super Star)
Berserker (Enraged)
Fastcart
VERY STRONG UNITS
S
Sasku (Chakra)
Kriatu (Cheater)
Shunks (Conqueror)
Admiral (Magma)
Scarlet Maid (World)
Dragon Guy (Silverite)
STRONG UNITS
A
Psycho (100%)
Rule (ROOM)
Shakumira Evo
Lulu
Cyborg (Fearless)
Rogue Oni
Namo
DECENT UNITS
B
Footballer (Ego)
Ruka
Nejo
Zorus
Pebble
Orahemi
MEDIOCRE UNITS
C
Greybeard
Gen
Masked Ninja
Triple Threat
Fire Foot Cook
WEAK UNITS
D
Gaaru
Ranji
Roku
Nutaru (Kid)
Laffy
Tiers Explained
S+ Tier: The overall strongest units in Universal Tower Defense that you’ll want to use for almost every stage.
S Tier: Very strong units that you’ll use together with the meta units, depending on which stage you’re playing.
A Tier: Strong units that can replace some S+/S-tier units, but more often than not they’ll be suboptimal choices..
B Tier: Decent units that can work as DPSs/supports for the early game, but higher-rarity supports will almost always be a better choice.
C Tier: Mediocre units that can serve as DPSs in the early game, but they don’t have enough utility to be useful for harder stages.
D Tier: Weak low-rarity units that you’ll probably never even have to use.
The tier list above is the general ranking of all units in UTD (Universal Tower Defense). Note that we only included the evolutions for units that have them, as every unit was rated with maximum Etherealization bonuses, maximum level, maximum stats, and everything else decked out. More information about each unit’s strengths and weaknesses, the ranking factors, and other details is below.
BEST BUILDS: Check out our Universal Tower Defense Best Unit Builds guide to learn everything about the best traits, relics, stats, and other build details for every unit.
Ranking Factors Explained
Here is the list of ranking factors we took into account when compiling our Universal Tower Defense tier list above. Note that there are a lot of details about each unit and that the game is still fairly new. So, be ready for many updates and ranking changes as we test each unit out more. Unit details are in the section below.
DPS vs Supprt vs Support/DPS: Some units provide only DPS, some only support, and others provide both DPS and support (support/DPS). Generally, you’ll want all the utility that you can get, making units that are support/DPS more desirable, if they can match pure DPSs output, of course.
Rarity: Rarer units will have higher base stats, more upgrades, and evolutions, making them stronger in general, especially for Infinite and other modes where the low cost of low-rarity units won’t matter.
DPS & Other Stats: DPS will be the main thing limiting you from clearing certain stages with high-HP bosses. Also, range, max placement count, and other stats will affect how much total damage that unit will be dishing out during a stage.
Utility & Support Passives: Units that have OP passives, such as buffs for allies, extra DPS for themselves, slow/CC, and DoTs, will all have extra value compared to the units that don’t have any extra utility.
Evolutions: Units with evolutions should be your priority, as investing in them makes much more sense long-term. Plus, most of the strongest units in the game have evolutions.
Etherealization Bonuses: Some units have extremely good Etherealization bonuses, while some have weak ones. Therefore, some units should be a higher priority, as their duplicates can provide more value compared to the duplicates of some other unit.
Targeting: Units with Hybrid and Air targeting are indispensable for most harder modes and stages. Therefore, it’s important to get at least a few of those.
Placement Count: The higher the maximum placement count of a unit, the higher its total DPS will be. This isn’t important for most stages, but for those with very high-HP bosses, you’ll need as much DPS as you can get.
S+ Tier – Best Units in Universal Tower Defense
Unit
Unit Details & Ranking SUmmary
Best Trait & Stats
Jinoo (Monarch)
[Jinwoo]SecretDarkHybrid • Summons Shadow Soldiers that deal damage to enemies • Can buff its own summons, increasing the Damage they deal • Uses Mana to cast skills, regenerating it with Takedowns • Insane stats all around and excellent buffs from Etherealization • Arguably the strongest unit in UTD, capable of soloing most content
Ruler Damage
Spade (Donut)
[Ace]MythicFireHill • Inflicts Burn for 100% Damage for 4 seconds with attacks • Bypasses all Armor on enemies, which is OP for some stages • Gains scaling Range and Damage with each Burn inflicted • Has a full AoE attack and insane stats all around once fully upgraded • One of the overall strongest DPS units in Universal Tower Defense
Astral Cooldown
Virtual Idol (Super Star)
[Miku]MythicLightHybrid • Provides massive buffs to Damage or Range to all units in range • By far the overall best full Support unit in the game • Etherealization and Evolution increase her buffs further • Essential unit for clearing most end-game content
Artificer Range Buff Pot.
Berserker (Enraged)
[Kenpachi]MythicLightHybrid • Deals insane damage in a big full AoE area • Extremely good with the Ruler Trait, as it has 1 maximum placement • Ignores 50% of Elemental Restrictions on Armor/Hyperarmor • Slows enemies by 20% and increases their Damage taken by 15% • One of the best full AoE DPS/Support units in Universal TD
Ruler Cooldown Damage
Fastcart
[Speedwagon]EpicFireGround • Gains 5% more Income with no DPS units in its range (Ethereal 2) • The only true Farm unit in the game • Extremely OP for accelerating upgrades in most stages
Fortunate Range
S Tier – Very Strong Units
Unit
Unit Details & Ranking SUmmary
Best Trait & Stats
Sasku (Chakra)
[Sasuke]MythicDarkGround • Stuns enemies with its attacks (65% Chance at Ethereal 6) • Can dodge enemy attacks, making it useful against bosses with stun • Deals DoT DMG to all enemies in range after 30 stuns (Evolution) • Has an active ability that deals nuke DMG • One of the best CC/DPS units in the game
Ruler Cooldown
Kriatu (Cheater)
[Kirito]MythicIceGround • Gains DPS buffs and follow up attacks as he lands critical hits • Has a full AoE attack on last upgrade and very high stats all around • Gains unique buffs in Virtual Realm, making it absolute meta for that mode • Has one of the highest total DPSs out of all units in UTD
Duelist Cooldown
Shunks (Conqueror)
[Shanks]MythicRoseGround • One of the few units in the game with Stun Immunity • Buffs the Damage of all units in range when the boss spawns • Applies Stun with its attacks for 3s (extra duration on distant enemies) • One of the best and most versatile Support units in the game
Ruler Cooldown
Admiral (Magma)
[Akainu]MythicFireHybrid • Spawns puddles of lava with attacks, confusing enemies and applying Burn • Is one of the best units for applying Burn in the game • Confusion it applies is great for slowing down enemies • Very good support unit even before you evolve it
Eternal Cooldown
Scarlet Maid (World)
[Sakuya]ExclusiveLightHybrid • Applies various debuffs to enemies in range, depending on chosen skill • Has the longest slow in the game at Ethereal 6 • Fills her Time Gauge by getting Takedowns to activate skills • Deals solid damage and can work as a versatile support on any team • One of the best support units for dealing with swarms of enemies
Ruler Astral Cooldown
Dragon Guy (Silverite)
[Ragna]SecretIceHybrid • Stuns and slows enemies with its attacks • Gets stunned when using Resolve, charging up the Trance • Gains extra stats and new abilities when entering the Trance • Works more as a support unit rather than a DPS
Ruler Cooldown Damage
A Tier – Strong Units
Unit
Unit Details & Ranking SUmmary
Best Trait & Stats
Psycho (100%)
[Mob]MythicRoseHybrid • Inflicts Wind Shear DoT with its attacks, dealing extra damage • Slows enemies that enter 30% of its range • Has extremely high range and decent other stats • Performs really well as a support/DPS with Hybrid targeting
Ruler Range
Rule (ROOM)
[Law]ExclusiveWaterGround • Switches between two modes, gaining different stats • Increased DPS, Stun, and other buffs against bosses • Can teleport enemies back with his active ability • One of the best boss-killers/supports in the whole game • There are better DPS units for the hardest stages
Ruler Range
Shakumira Evo
[Shikamaru]MythicDarkGround • Slows enemies with his passive and gains increased Range • Has decent DPS but not as good as other evolved Mythic units • Can stun the strongest enemy for 15s with its ability (Ethereal 6) • Works mostly as a support but can be a starter DPS
Eternal Cooldown
Lulu
[Lelouch]SecretDarkHybrid • Applies various CC to enemies with its abilities, relying on Cooldown • Has extremely high single-target DPS once fully upgraded • Doesn’t deal damage before the last upgrade • Very expensive to max out, making it weak for short stages
Ruler Astral Cooldown
Cyborg (Fearless)
[Genos]MythicFireHill • Has excellent Range and applies Burn with its attacks • Deals more damage when attacking Burning enemies (Passive) • Gains scaling Damage and free upgrades (Evolution) • Gets a nuke ability on its last upgrades when evolved • One of the best Mythic Hill units for stacking Burn
Eternal Cooldown Damage
Rogue Oni
[Obito]ExclusiveFireGround • Excellent full AoE DPS for dealing with regular mobs • Applies an 80% DMG burn when attacking 6+ enemies • Gains Range and Damage with more Burning enemies (Ethereal 6)
Ruler Cooldown Damage
Namo
[Nami]RareWaterHybrid • Decent Hybrid DPS for the early game once fully upgraded • Enemies hit generate 3x Money, making it an OP farm unit • Doesn’t require any upgrades to make its passive work well • Can’t generate as much money as Fastcart during the early waves
Any Trait Cooldown
B Tier – Decent Units
Unit
Unit Details & Ranking SUmmary
Best Trait & Stats
Footballer (Ego)
[Isagi]ExclusiveFireGround • Buffs own damage based on strongest enemy’s missing HP (max 75%) • If he fails to kill an enemy, he buffs the strongest allies in range • Has fairly decent stats but relatively underwhelming passives
Ruler Cooldown
Ruka
[Rukia]LegendaryIceHybrid • Applies Freeze with her attacks like other Ice units • Gets Hybrid targeting on its last upgrades • One of the best low-rarity CC supports if you can lower her CD enough
Eternal Cooldown
Nejo
[Neji]EpicWindHybrid • Applies Knockback with its attacks after Upgrade 5 (Ethereal 6) • Buffs the Crit Chance of all allies in range • One of the best low-rarity support units early on
Eternal Cooldown
Zorus
[Zora]LegendaryDarkGround • Places traps that can CC/apply DoTs • One of the best low-rarity support units • Gains increased trap spawns at Ethereal 6 • Especially good for slowing down bosses in difficult stages
Eternal Cooldown
Pebble
[Lee]LegendaryRoseHybrid • One of the best low-rarity DPS units because of its passive • Applies Knockback with its attacks while gaining Damage • Increases enemy Damage taken by 10% (Ethereal 6) • Cheaper to place and upgrade than most other low-rarity units
Eternal Cooldown
Orahemi
[Orihime]RareRoseHill • Shields a unit from Stun every 20s at max upgrades • Excellent for stages where bosses can stun your units • She isn’t required for that many stages
Any Trait Range
C Tier – Mediocre Units
Unit
Unit Details & Ranking SUmmary
Best Trait & Stats
Gen
[Gin]LegendaryFireGround • Gains Damage based on its Range stat • One of the highest-range low-rarity DPS units at max upgrades • Doesn’t have any utility like Pebble or Zorus
Eternal Range
Greybeard
[Blackbeard]LegendaryDarkGround • Deals +65% extra DMG to Armored enemies (Passive) • Gains Range and Damage as it gets kills (Ethereal 6) • One of the best low-rarity units for Infinite mode • Isn’t that OP for shorter stages before you deck him out
Eternal Cooldown
Masked Ninja
[Kakashi]EpicFireHybrid • Buffs other Team 7 units, giving them bonus Range and Damage • One of the few low-rarity units that can target Air enemies • Cheaper to place and upgrade compared to most other low-rarity units
Any Trait Cooldown
Triple Threat
[Zoro]EpicRoseGround • Gains extra Damage and Range from its passive and Etherealizations • One of the best low-rarity Ground DPS units • Can have extremely high Range with all the bonuses active
Any Trait Cooldown
Fire Foot Cook
[Sanji]EpicFireHybrid • Decent DPS and other stats once you max him out • Gains extra value if you can reliably apply Burn on enemies • Gains a huge Range buff with its 2nd attack (Upgrade 5)
Any Trait Cooldown
D Tier – Weak Units
Unit
Ranking Summary & Best Relics, Traits, & Stats
Best Trait & Stats
Gaaru
[Gaara]RareWaterGround • Stuns enemies with its attacks when fully upgraded (doesn’t work) • Has only 2 maximum placement, which isn’t good • It is one of the few units in the game with Stun Immunity (Passive)
Any Trait Cooldown
Ranji
[Renji]RareWindGround • Gains Damage from its passive and Etherealization levels • Lower DPS compared to most other Rare units • Lower Range and higher Cooldown than most Rare units
Any Trait Cooldown
Roku
[Goku]RareFireGround • Gains %Damage with every attack, resetting each wave • The passive won’t stack enough with Wave Skip active • Even with the passive stacked up, it isn’t a good unit
Any Trait Cooldown
Nutaru (Kid)
[Naruto]RareWaterGround • Okayish Ground DPS for the early Story stages • Most of its passives and Etherealization bonuses are bad/hard to proc • Requires a Mythic unit for the E6 bonus to work
Any Trait Cooldown
Laffy
[Luffy]RareWindGround • Gains Range with more unique Pirate Crew units on the team • Has very low base Range and other stats • One of the worst DPS units in the whole game
Any Trait Cooldown
Universal Tower Defense Tier List FAQ
What are the overall best DPS units in Universal Tower Defense?
The overall best DPS units in Universal TD right now are Jinoo (Monarch), Kriatu (Cheater), Spade (Donut), and Berserker (Enraged).
What are the best Support units in Universal Tower Defense?
The overall best support units in Universal TD right now are Rule (ROOM), Virtual Idol (Super Star), Lulu, Admiral (Magma)Shunks (Conqueror), Scarlet Maid (World), Namo, and Fastcart.
What are the best Air/Hybrid DPS units in Universal Tower Defense?
The best Air DPS units in Universal TD right now are Spade (Donut), Dragon Guy (Silverite), Scarlet Maid (World), Jinoo (Monarch), and Berserker (Enraged).
What are the best Ground DPS units in Universal Tower Defense?
The best Ground DPS unit in Universal TD right now is Kriatu (Cheater).
What are the best beginner units in Universal Tower Defense?
The best beginner units in UTD right now are Admiral, Pebble, Masked Ninja, Nejo, and Fastcart.
Anime Story is a tactical RPG Roblox experience where you create a team of up to 5 legendary anime characters, each possessing unique stats and abilities, and challenge various stages to progress. It’s one hell of a grind, and if you want to make it quicker, you’ll need to use nothing but the best units. In our Roblox Anime Story tier list below, we will rank all units in the game from best to worst, as well as provide you with win info on what each unit does and its strengths and weaknesses.
In the tier list above is the ranking of all units in the Anime Story Roblox experience. Higher-rarity units are better, and there is an exponential difference in stat scaling between units of different rarities. Still, if you can Ascend a Legendary unit, for example, and level it up more than a Mythic/Secret, it will be better until those higher-rarity units catch up. For more details regarding each unit and its ranking, see the section below.
Lore & Legends (set 16) of champions for TFT (Teamfight Tactics) has been released on December 3rd, 2025, bringing 40 new champions that you can unlock during the game and buff up your team. In the guide below, we will explain how to unlock all set 16 champions in TFT, their classes, origins, and every other important detail regarding them.
How to Unlock All Set 16 Teamfight Tactics Champions
In the table below, you can check out all the information on how to unlock every set 16 characters in Teamfight Tactics (TFT), as well as level requirements, and each character’s classes and origins. Use it as a cheat sheet for unlocking these new characters when playing TFT.
Champion
Details
How to Unlock
Required Level
Bard
2 Caretaker
Reroll 4 times before Stage 2 Carousel
None
Graves
2 Bilgewater Gunslinger
Field in combat: Twisted Fate with 2 items equipped
None
Orianna
2 Piltover Invoker
Field in combat: 3 unique Piltover units
None
Poppy
2 Yordle Demacia Juggernaut
Field in combat: Demacian or a Yordle with 2 items equipped
None
Tryndamere
2 Freljord Slayer
Field in combat: Ashe with 2 items equipped
None
Yorick
2 Shadow Isles Warden
Field in combat: 2-star Viego with 2 items equipped
None
Darius
3 Noxus Defender
Have Draven drop 1 Gold
None
Gwen
3 Shadow Isles Disruptor
Collect 20 Shadow Isles Souls
None
Kennen
3 Ionia Yordle Defender
Field in combat: 8 unique star levels of Ionia, Yordle, or Defender
None
Kobuko & Yuumi
3 Yordle Bruiser Invoker
Field in combat: 6 unique star levels of Bruiser, Yordle, or Invoker
Req. Lvl 7
LeBlanc
3 Noxus Invoker
Field in combat: Sion with 2 items equipped
None
Diana
4 Targon
Field in combat: 2-star Leona with 3 items equipped
Req. Lvl 6
Fizz
4 Bilgewater Yordle Disruptor
Field in combat: 5 unique Yordles or Bilgewater units
Req. Lvl 7
Kai’Sa
4 Void Assimilator Longshot
Field in combat: A Longshot unit with 3 items equipped
Req. Lvl 8
Kalista
4 Shadow Isles Vanquisher
Collect 70 Shadow Isles Souls
None
Nasus
4 Shurima
Lose 2/4/5 combats in a row with Azir
None
Nidalee
4 Ixtal Huntress
Field in combat: Two 2-star Neekos
None
Renekton
4 Shurima
Lose 2/4/5 combats in a row with Azir
None
Rift Herald
4 Void Bruiser
Have Void active for 8 player combats
None
Singed
4 Zaun Juggernaut
Field in combat: 4 unique Zaunites or Juggernauts and lose 35 Player Health
None
Skarner
4 Ixtal
Field in combat: A non-Tank with a Gargoyle’s Stoneplate equipped
None
Veigar
4 Yordle Arcanist
Field in combat: Unit with 2 Rabadon’s Deathcaps equipped
None
Warwick
4 Zaun Quickstriker
Field in combat: 2-star Jinx and 2-star Vi
None
Yone
4 Ionia Slayer
Field in combat: 3-star Yasuo
None
Aatrox
5 Darkin Slayer
Field in combat: A champion who starts combat with 40% Omnivamp
Req. Lvl 8
Galio
5 Demacia Heroic
Field in combat: 12 unique star levels of Demacia
None
Mel
5 Noxus Disruptor
2-star Ambessa with an item dies in combat
None
Sett
5 Ionia The Boss
Field in combat: Only 1 unit in the two front rows of the battlefield
Req. Lvl 8
T-Hex
5 Piltover HexMech Ginslinger
Field in combat: 9 unique star levels of Piltover
None
Tahm Kench
5 Bilgewater Glutton Bruiser
Spend 500 Bilgewater Silver Serpents
None
Thresh
5 Shadow Isles Warden
Collect 175 Shadow Isles Souls
None
Volibear
5 Freljord Bruiser
Field in combat: A unit that starts combat with 3,800 Health
Req. Lvl 8
Xerath
5 Shurima Ascendant
Alternate winning and losing for 3/5/6 combats with Azir
None
Ziggs
5 Zaun Yordle Longshot
Field in combat: A Yordle or a Zaunite with 3 items equipped
Req. Lvl 9
Aurelion Sol
7 Targon Star Forger
Field in combat: 5 unique Targonians
None
Baron Nashor
7 Void Riftscourge
Field 7 unique Void units
Req. Lvl 10
Brock
7 Ixtal
Collect 500 Ixtal Sunshards over the course of the game
None
Ryze
7 Rune Mage
Field in combat: 5 Region Traits together
Req. Lvl 9
Sylas
7 Chainbreaker Defender Arcanist
Sell a 2-star Jarvan, a 2-star Garen, and a 2-star Lux
None
Zaahen
7 Darkin Immortal
Have the ‘Trials of Twilight’ Augment and field a 3-star Xin Zhao for 5 combats
None
Teamfight Tactics Lore & Legends Set 16 Champions FAQ
How many new champions are there in set 16?
There are 40 champions in the Lore & Legends set.
What are the rewards for unlocking champions?
In the Lorefinder tab of the TFT you’ll be able to collect the rewards for unlocking all the champions. These rewards include portal skins, tactician skins, and other cosmetics.
How many champions there are in total during the Lore & Legends set?
There are 100 champions in total. 60 of them are available by default, and 40 can be unlocked during the game.
That covers all you need to know on how to unlock all champions in Teamfight Tactics set 16 (Lore & Legends). For more useful guides, be sure to check out the Guides category here on Gamepur!
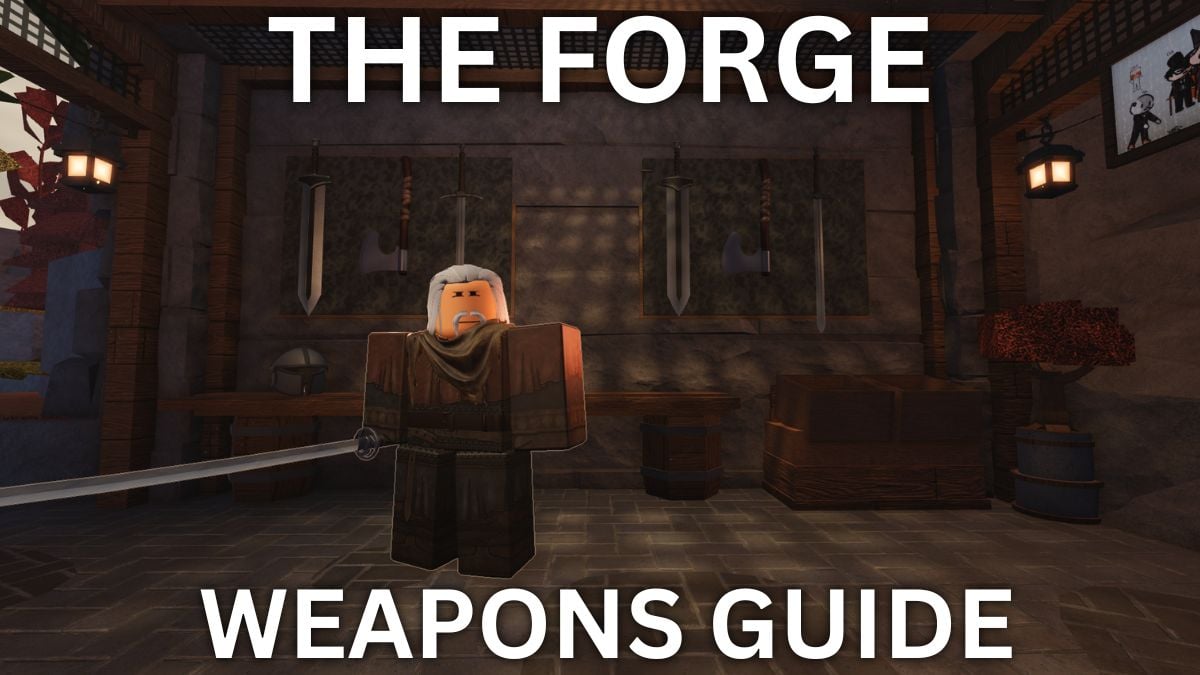
Weapons are one of the most important pieces of gear in The Forge, and there are many different ones you can craft, some being OP, while others are not so much. In our The Forge weapons tier list and guide below, we will explain which weapons are the best and why, all weapon stats, sell prices, optimal crafting recipes, and more. Scroll down and let’s dive into it!
The Forge Weapons Tier List – Best Weapons to Use
BEST WEAPONS
S
GOOD WEAPONS
A
DECENT WEAPONS
B
WEAK WEAPONS
C
Tiers Explained
S Tier: The best weapons in The Forge with a good ratio of damage, attack speed, and range.
A Tier: Good weapons that have decent stats, but aren’t as OP as the S-tier ones.
B Tier: Decent weapons that can work, but some of their stats are simply suboptimal.
C Tier: Weak weapons that simply can’t compete with all the others.
In the tier list above, you can check out our general ranking of all weapons in The Forge Roblox experience. All weapons have different Range, Damage, and Attack Speed, making some better than others. Here is how stats impact the game, and how they impact each weapon’s ranking. All weapon stats and other useful information are in the sections below.
Weapons Ranking Factors
Damage: The base damage of a weapon will influence its DPS and also how good it is at one-shotting things, as well as its stun damage. Higher-damage weapons will allow you to stun enemies with just a few hits.
Attack Speed: The attack speed of a weapon is the other thing that will influence its DPS, and it will also help you weave in attacks between blocks/parries. If the weapon’s attack speed is too low, you won’t be able to dish out damage without getting hit.
Range: The higher the weapon’s range, the better it will be at dealing initial damage and kiting enemies, as well as dealing with multiple enemies at once.
DPS: Against high-HP enemies, your DPS will play a big part in how quickly you’ll deal with them. However, it won’t be as important against low-HP targets that can be killed with one full attack cycle.
Attack Animations: Some weapons, like Gauntlets, have very fast attack animations, while others, like Double Battle Axe, have insanely long ones. The longer the wind-up, the harder it will be to deal damage and weave in attacks after parries.
Crafting Costs: Heavy weapons are much more difficult/expensive to craft, and will require a bunch of high-rarity ores to be good.
All Weapons & Their Stats in The Forge
In the tables below, you can find the stats, rarities, and important details regarding each weapon in The Forge Roblox experience and their ranking in the tier list above. The recipes/required ores for each weapon type are outlined further below.
Rarities: Some weapons are only craftable in certain worlds/areas and can have different rarities, depending on other weapons of the same type in the crafting pool. Rarities for different worlds will be indicated in square brackets ([W1] = World 1, [W2] = World 2, etc.).
+ Fairly easy/cheap to forge + Decent Damage, Attack Speed, and Range – Most other Straight Swords are better – Longer attack animations than other Straight Swords
+ Fairly cheap to forge + Very good Damage, Attack Speed, and Range + The best Straight Sword in the game + One of the overall best weapons in the game – Extremely difficult to forge
+ Very good Damage, Attack Speed, and DPS + Extremely fast attack animations + One of the overall best weapons in the game – Very short range compared to other weapons
+ Very good Damage and Attack Speed + Extremely fast attack animations + One of the overall best weapons in the game – Lowest DPS out of all Gauntlets – Very short range compared to other weapons
+ Very good Damage, Attack Speed, and DPS + One of the overall best weapons in the game – Very short range compared to other weapons – Longer attack animations compared to other Gauntlets
+ High base damage and range – Extremely slow attack animations – Very expensive to craft considering its strength – One of the worst weapons in the game
+ High base damage and range – Extremely slow attack animations – Very expensive to craft considering its strength – One of the worst weapons in the game
+ Very easy to craft compared to other Colossal Swords + Very good balance of all stats and high DPS – Extremely expensive to craft – The longest attack animations out of all Colossal Swords
+ One of the best DPSs out of all weapons in the game + Very good stats all around + Shorter animations compared to other Colossal Swords – Extremely expensive/difficult to craft
+ The best DPS out of all weapons in the game + Extremely good stats all around – Extremely expensive/difficult to craft
Optimal Ores for Crafting Every Weapons Type
Below you can see a short rundown on how many ores you need to maximize the chances of crafting certain weapon types, their sell price, and how efficient it is to craft those weapons if you plan to just sell them. To learn which the best crafting recipes are, check out our guide on how to make the best gear in The Forge. Also, see our guide on how to make money in The Forge to learn the best money-farming methods.
Weapon Type
Optimal Number Ores
Base Price
Sell Efficiency
Dagger
3
$68
22.7
Straight Sword
6
$120
20
Gauntlets
9
$205
22.8
Katana
12
$324
27
Great Sword
16
$485
30.3
Great Axe
22
$850
38.6
Colossal Sword
30
$1355
45.2
Colossal Swords Crafting: You can go beyond 30 ores used, but the diminishing returns on the chance aren’t worth it, really.
The Forge Weapons FAQ
What are the best weapons in The Forge?
The best weapons in the game right now are Chaos, Ironhand, Dragon Slayer, Boxing Gloves, Relevator, and Skull Crusher.
What is the best weapon type in The Forge?
The best weapon type in the game right now is Gauntlets, having extremely quick attack animations and very high DPS.
What are the worst weapons in The Forge?
The worst weapons in The Forge are all the daggers (Dagger, Falchion Knife, Gladius Dagger, and Hook) and all the great axes (Double Great Axe and Scythe.)
The pickaxe is your most important piece of gear in The Forge Roblox experience, and often the most expensive one. It’s important you buy only the best pickaxes, while skipping those that don’t provide enough of a boost. In the tier list and guide below, we will explain what the best pickaxes are in The Forge, all pickaxe stats, locations, and other useful information. Let’s dive into it!
The Forge Pickaxes Tier List
BEST PICKAXES
S
Prismaratic Pickaxe
Void Pickaxe
Christmas Pickaxe
GOOD PICKAXES
A
Frost Pickaxe
Snow Pickaxe
Candy Cane Pickaxe
Mist Pickaxe
Aqua Pickaxe
Arcane Pickaxe
Lightite Pickaxe
DECENT PICKAXES
B
Tungsten Pickaxe
Mythril Pickaxe
Magma Pickaxe
Titanium Pickaxe
Cobalt Pickaxe
Platinum Pickaxe
Gold Pickaxe
BAD PICKAXES
C
Demonic Pickaxe
Uranium Pickaxe
Stonewake’s Pickaxe
Iron Pickaxe
Bronze Pickaxe
Ranking Tiers Explained
S Tier: The best pickaxes for the end game farming.
A Tier: Pickaxes that have very good price/performance ratios and that will be the best to use until you reach the end-game pickaxes.
B Tier: Decent pickaxes that aren’t as economic or as strong as the S/A-tier ones, but are still okay for progression.
C Tier: Bad pickaxes that aren’t really worth buying.
In the tier list above, you can check out the overall ranking of all pickaxes in The Forge, based on how good a purchase they are. Check out the ranking notes below to learn what makes a pickaxe a good purchase, and other tier list-related info.
Tier List Ranking Notes
Why is Mine Power Important: The base Mine Power of a pickaxe determines which ores you can mine, and if it’s too low, you won’t be able to mine some rocks. For example, the Uranium Pickaxe is a terrible purchase as it isn’t a massive improvement over the Titanium Pickaxe, and it also can’t mine Basalt Veins, which require 78 Mine Power.
Why is Price Important: As you’re progressing, you won’t have unlimited money, and therefore, it’s important you don’t waste it on an expensive pickaxe that won’t even speed you up. For example, the Demonic Pickaxeseems good on paper, but it’s 4x more expensive than the Arcane Pickaxe, and slotting in runes is 4x more expensive as well! You’ll need $1,000,000 to make it marginally better than a $200,000 pickaxe, which is just not worth it.
Why is Lightite Pickaxe so Good: Because it has a low cost, and is also better than the Arcane Pickaxe without any runes.
In the table below, you can see the list of all pickaxes in The Forge Roblox experience, their stats, prices, and their locations. You can sell your old pickaxes for 75% of their value to the gear sellers. Also, note that the Pickaxe Sellers are located in the main towns and sell most of the existing pickaxes.
Miner Fred Pickaxe Seller [World 1 – Stonewake’s Cross]
Best Pickaxe Progression in The Forge
Pro Tip for Buying New Pickaxes: There is a trick you can use to buy new pickaxes earlier than you might think. This is best done for more expensive pickaxes. Here is how it works:
OPTIONAL: Roll the Goblin race on another slot and equip it before purchasing a new pickaxe for that 12% discount.
Save up enough money so you’re missing less than 75% of your current pickaxe’s value.
Buy Bronze pickaxe ($150).
Sell your old pickaxe for 75% of its value.
IMPORTANT: Do NOT detach runes! It’s a waste of money, and they are easy to farm anyway.
Buy the new pickaxe.
Sell the Bronze Pickaxe.
Based on the tier list above, the ore requirements you’ll need to meet and the quests that those will be important for, here is the best possible pickaxe progression path in The Forge right now:
Bronze Pickaxe: Allows you to 2-hit Pebbles, farm ores, craft a few Heavy Armor pieces, and get the next pickaxe ASAP. Check out our ultimate guide on how to make money in The Forge to learn the best crafting and money-farming method.
Gold Pickaxe: Allows you to 1-hit Pebbles and 3-hit Rocks. It’s the best pickaxe you can get that early into the game.
Platinum Pickaxe: The best pickaxe in World 1, allowing you to 4-hit Boulders if you get the Mine Power boost from achievements, runes, or your race.
Cobalt Pickaxe: The first pickaxe in World 2, and it allows you to 7-hit Basalt Rocks.
Titanium Pickaxe: One of the pickaxes you’ll be using the longest. It can 5-hit Basalt Rocks and 15-hit Basalt Cores. It’s really good, and it also doesn’t cost much.
Lightite Pickaxe: The best and most economical pickaxe you can get in World 2. It’s cheap compared to other strong World 2 pickaxes, and it has amazing base stats.
Arcane Pickaxe: The Arcane Pickaxe is the last World 2 pickaxe you should go for.
Aqua Pickaxe: The first good pickaxe in World 3, providing a huge boost over the Arcane Pickaxe, with a relatively low price.
Snow Pickaxe: A huge improvement over the Aqua Pickaxe, and it also allows you to mine a lot of new rocks.
Void Pickaxe: One of the best end-game pickaxes, and the one you’ll be using for a very long time.
Prismaratic Pickaxe: The best pickaxe in the game, with decent improvements over the Void Pickaxe, especially regarding Mine Speed.
The Forge Pickaxes FAQ
What is the best Pickaxe in The Forge?
The best pickaxes in The Forge right now are Prismaratic Pickaxe, Void Pickaxe, and Christmas Pickaxe.
What is the best Pickaxe progression in The Forge?
The best pickaxe progression right now is Bronze Pickaxe → Gold Pickaxe → Platinum Pickaxe → Cobalt Pickaxe → Titanium Pickaxe → Lightite Pickaxe → Arcane Pickaxe → Aqua Pickaxe → Snow Pickaxe → Void Pickaxe → Prismaratic Pickaxe.
Should you detach runes from pickaxes before selling them?
No, detaching runes from pickaxes isn’t worth it, as you can always farm more Miner Shards from Delver Zombies and Bombers.
There are dozens of different ores for you to collect in The Forge, with some of them possessing unique effects depending on how you use them for forging. In the guide below, we will list all ores, their stats, traits, and from which rocks/enemies they drop. Scroll down, and let’s dive into our ultimate The Forge Roblox ores guide!
All Ores in The Forge Roblox Experience
In the tables below, you’ll find all ores in The Forge Roblox experience, their rarities, multipliers (when forging), prices, gear traits, and where they drop from. Use it as a cheat sheet for filling the Ore Index when playing the game. Also, note that you won’t be able to mine some rocks if you don’t have a good enough pickaxe.
Stonewake’s Cross (World 1) Ore List
Ore
Rarity
Multiplier
Price
Trait
Can Drop From
Stone
Common 1/1
0.2x
$3
None
Pebble
Sand Stone
Common 1/2
0.25x
$3.75
None
Pebble Rock
Copper
Common 1/3
0.3x
$4.5
None
Pebble Rock Boulder
Iron
Common 1/5
0.35x
$5.25
None
Pebble Rock Boulder
Tin
Uncommon 1/7
0.425x
$6.38
None
Rock Boulder
Silver
Uncommon 1/12
0.5x
$7.5
None
Rock Boulder Basalt Rock
Gold
Uncommon 1/16
0.65x
$19.5
None
Boulder Basalt Rock
Mushroomite
Rare 1/22
0.8x
$12
None
Rock Boulder
Platinum
Rare 1/28
0.8x
$12
None
Boulder Basalt Rock
Bananite
Uncommon 1/30
0.85x
$12.75
None
Rock Boulder
Cardboardite
Common 1/31
0.7x
$10.5
None
Rock Boulder
Aite
Epic 1/44
1x
$16.5
None
Boulder
Poopite
Epic 1/255
1.2x
$18
On weapons and armor, deal 15% Poison DMG in AoE for 5s, fearing enemies (15s CD). Activates when HP drops below 35%.
Pebble Rock Boulder
Forgotten Kingdom (World 2) Ore List
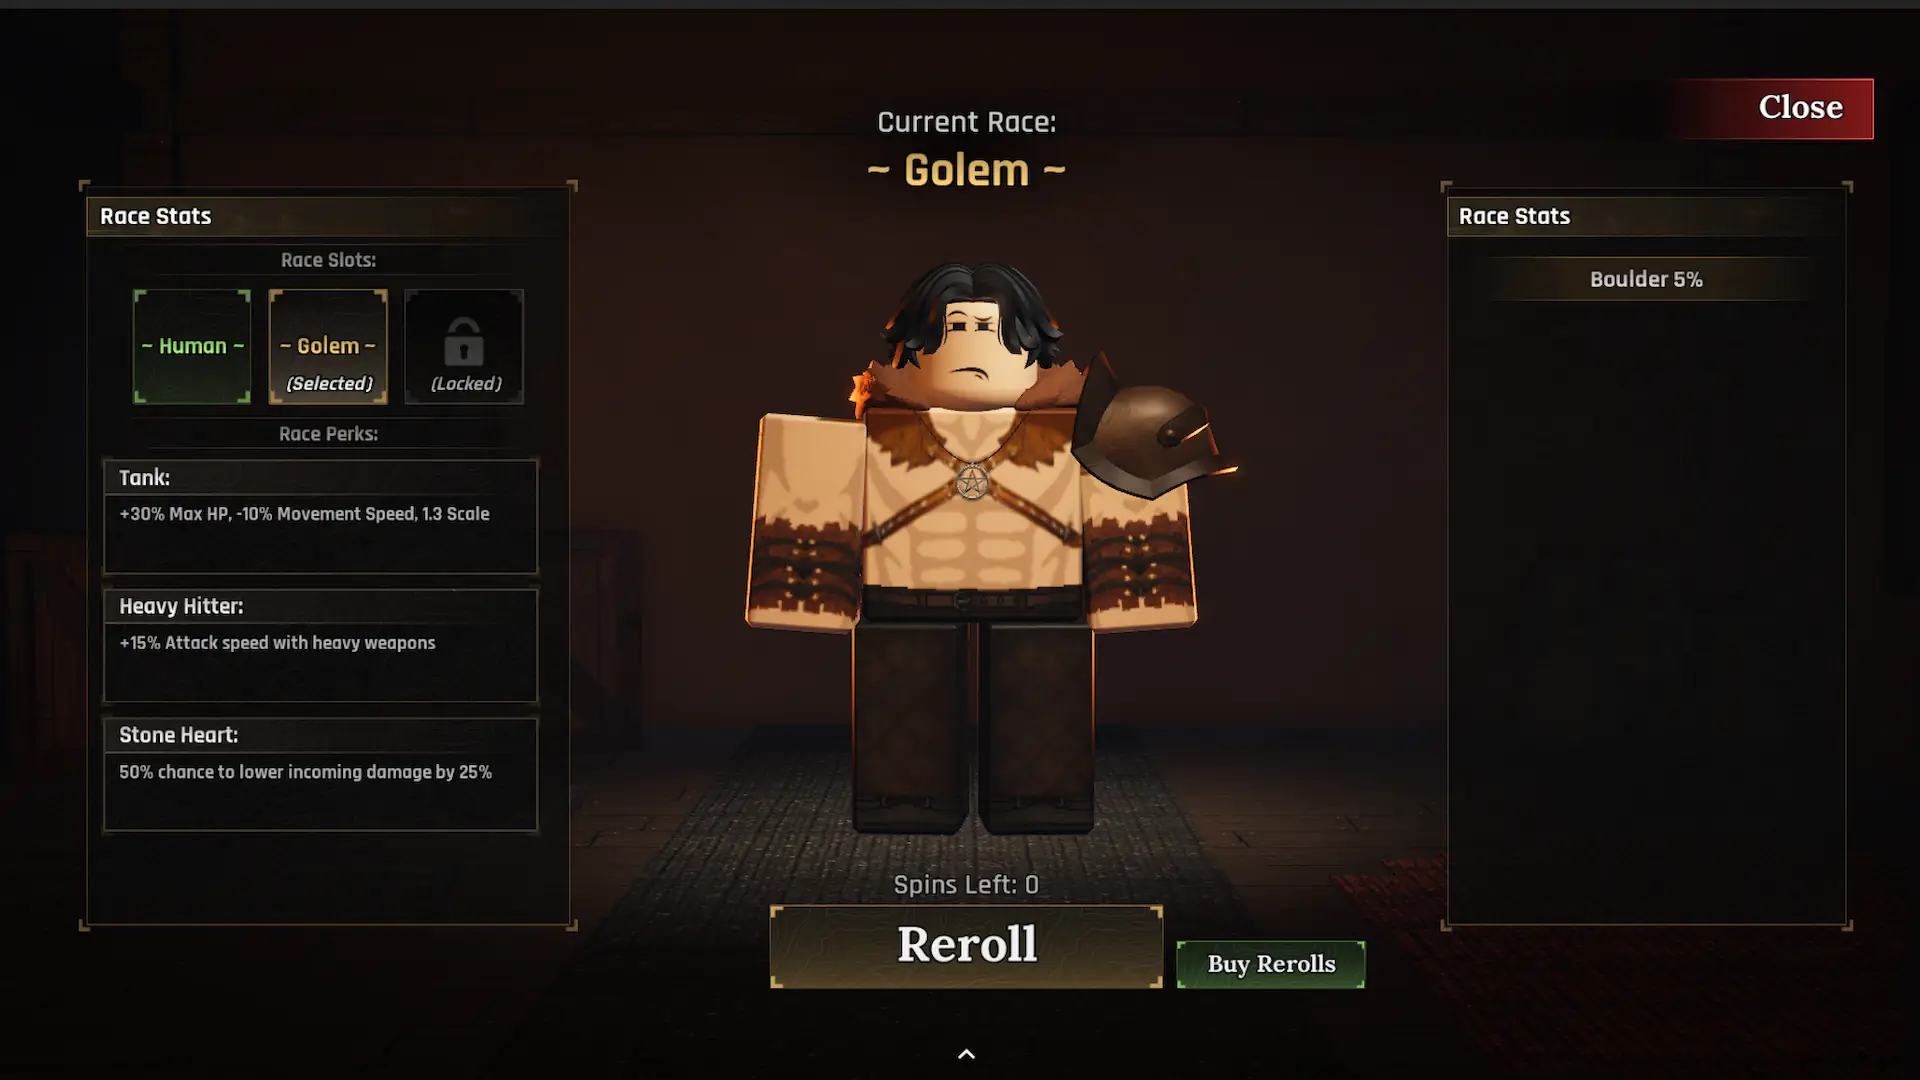
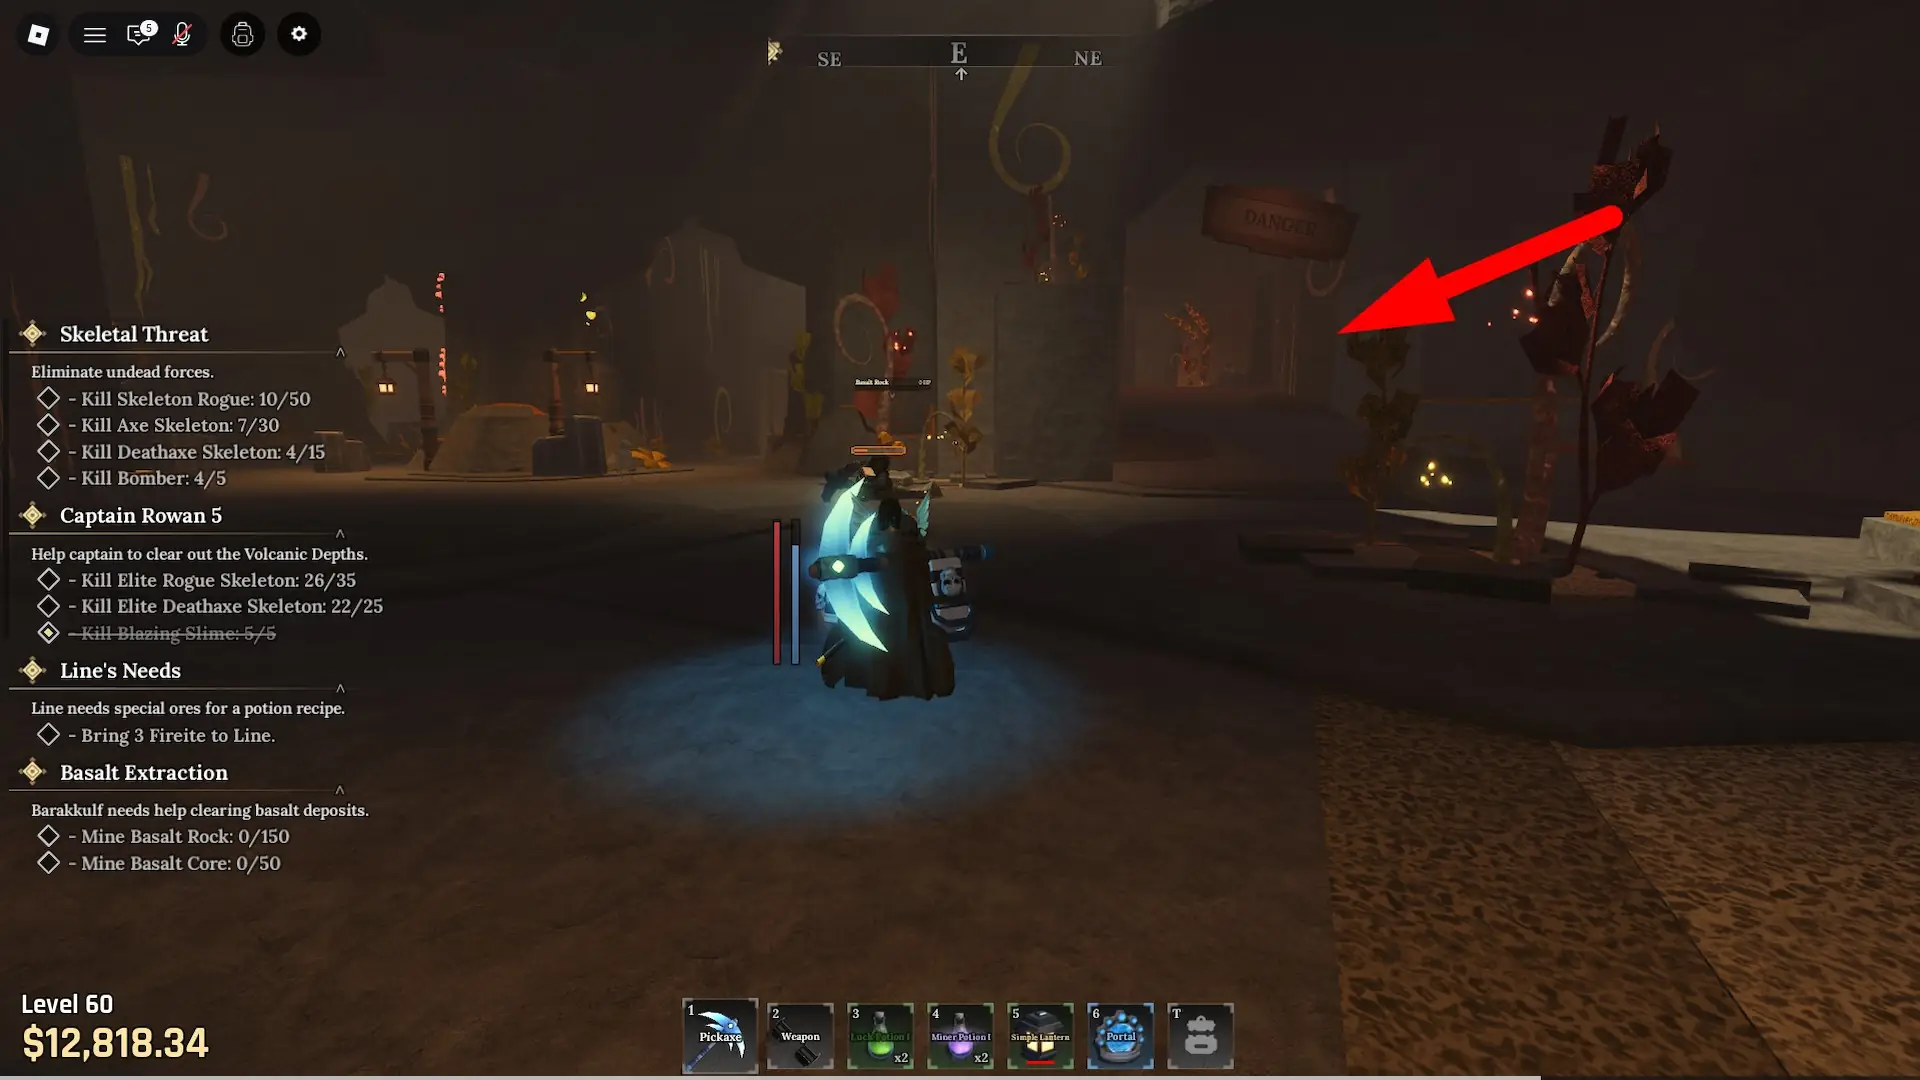
VOLCANO AREA: Volcanic Rock can be found in the volcano area (Volcanic Depths)within the Forgotten Kingdom’s cave. There is a lava-ridden area on the right side of the cave, with two Basalt Veins blocking the entrance. In this area is also where the Elite mobs spawn.
Image via The Forge
Ore
Rarity
Multiplier
Price
Trait
Can Drop From
Cobalt
Uncommon 1/37
1x
$15
None
Basalt Rock Basalt Core
Titanium
Uncommon 1/50
1.15x
$17.25
None
Basalt Rock Basalt Core
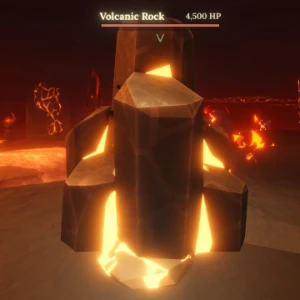
Volcanic Rock
Rare 1/55
1.55x
$23.25
None
Volcanic Rock
Lapis Lazuli
Uncommon 1/73
1.3x
$22.5
None
Basalt Rock Basalt Core
Quartz
Rare 1/90
1.5x
$22.5
None
Basalt Core Basalt Vein
Amethyst
Rare 1/115
1.65x
$24.75
None
Basalt Core Basalt Vein
Topaz
Rare 1/143
1.75x
$26.25
None
Basalt Core Basalt Vein Volcanic Rock
Diamond
Rare 1/22
2x
$30
None
Basalt Core Basalt Vein
Sapphire
Rare 1/192
2.25x
$33.75
None
Basalt Core Basalt Vein
Cuprite
Epic 1/303
2.43x
$36.45
None
Basalt Core Basalt Vein Volcanic Rock
Obsidian
Epic 1/333
2.35x
$35.25
30% extra HP on Armor.
Volcanic Rock
Emerald
Epic 1/363
2.55x
$38.25
None
Basalt Core Basalt Vein Icy Pebble
Ruby
Epic 1/487
2.95x
$44.25
None
Basalt Vein Icy Pebble
Rivalite
Epic 1/569
3.33x
$49.95
+20% Crit Chance on Weapons.
Basalt Vein Volcanic Rock Icy Pebble
Uranium
Legendary 1/777
3x
$66
5% of player’s Max HP as AoE DMG in combat, on Armor.
Basalt Vein Icy Pebble Icy Rock
Mythril
Legendary 1/813
3.5x
$52.5
15% extra HP on Armor.
Basalt Vein Icy Pebble Icy Rock
Eye Ore
Legendary 1/1,333
4x
$60
-10% Max HP, +15% DMG boost on Weapons and Armor.
Basalt Rock Basalt Core Basalt Vein Volcanic Rock
Fireite
Legendary 1/2,187
4.5x
$67.5
20% DMG burn for 2s with 30% chance on-hit on Weapons.
Volcanic Rock
Magmaite
Legendary 1/3,003
5x
$75
50% DMG AoE explosion with 35% chance on-hit on Weapons.
Volcanic Rock
Lightite
Legendary 1/3,333
4.6x
$69
15% extra Movement Speed on Armor.
Basalt Vein Icy Pebble Icy Rock
Demonite
Mythical 1/3,666
5.5x
$82.5
20% DMG burn for 2s with 15% chance on-hit and 25% chance to burn the enemy when damage is taken on Armor.
Volcanic Rock
Darkryte
Mythical 1/6,655
6.3x
$94.5
Upon taking damage, there is 15% chance to turn into a shadow to dodge the attack on Armor.
World 2 Ores in World 3: Some ores such as Uranium, Mythril, etc., can also be dropped from World 3 rocks.
Ore
Rarity
Multiplier
Price
Trait
Can Drop From
Tungsten
Common 1/180
2.6x
$48.75
None
Icy Pebble Icy Rock Icy Boulder
Sulfur
Uncommon 1/215
2.75x
$51.56
None
Icy Pebble Icy Rock Icy Boulder
Pumice
Rare 1/265
2.9x
$54.38
+5% extra HP on Armor.
Icy Pebble Icy Rock Icy Boulder
Graphite
Rare 1/315
3.1x
$58.13
Reduce incoming Phys DMG by 12% on Armor (20% chance on hit).
Icy Pebble Icy Rock Icy Boulder
Aetherit
Rare 1/390
3.4x
$63.75
+5% extra Movement Speed on Armor.
Icy Pebble Icy Rock Icy Boulder Small Ice Crystal
Scheelite
Rare 1/474
3.7x
$69.38
None
Icy Rock Icy Boulder Small Ice Crystal
Larimar
Epic 1/575
4.1x
$76.88
None
Icy Rock Icy Boulder Small Ice Crystal
Neurotite
Epic 1/690
4.3x
$80.63
None
Icy Rock Icy Boulder Small Ice Crystal
Frost Fossil
Epic 1/820
4.5x
$84.38
+17.5% Physical Damage and -5% Movement Speed on Weapons and Armor.
Icy Boulder Small Ice Crystal Medium Ice Crystal
Tide Carve
Epic 1/980
4.7x
$88.13
None
Icy Boulder Small Ice Crystal Medium Ice Crystal
Velchire
Legendary 1/1,450
5.5x
$103.13
20% more Movement Speed on Armor.
Icy Boulder Small Ice Crystal Medium Ice Crystal Large Ice Crystal
Sanctis
Legendary 1/1,830
6x
$112.5
18% more Stamina on Armor.
Icy Boulder Small Ice Crystal Medium Ice Crystal Large Ice Crystal
Snowite
Legendary 1/4,325
8x
$150
Apply 15% Attack Speed and Movement Speed slow for 3s on Weapons (30% chance on hit).
Icy Pebble Icy Rock Icy Boulder Small Ice Crystal Medium Ice Crystal Large Ice Crystal
Iceite
Mythical 1/9,898
10.5x
$196.88
Freeze enemies for 2s on Weapons (25 chance on hit; 12s cooldown).
Icy Rock Icy Boulder Small Ice Crystal Medium Ice Crystal Large Ice Crystal
The Peak (World 3) Ore List
WIP: We will fill out this section with data soon!
Enemy Drops Ore List
Ore
Rarity
Multiplier
Price
Trait
Can Drop From
Boneite
Rare 1/222
1.2x
$18
None
Skeletons
Dark Boneite
Rare 1/555
2.25x
$33.75
None
Elite Skeletons
Slimite
Epic 1/247
2.25x
$33.75
None
Slimes
Exclusive Ore List
Ore
Rarity
Multiplier
Price
Trait
Can Drop From
Galaxite
Divine 1/1,000,000
11.5x
None
None
None
The Forge Roblox Ores FAQ
How do ore traits work?
You need at least 10% of the ore when forging to activate its trait. The trait will have 100% of its effect when at least 30% of the used ore is of that kind. Anything in-between will be scaled (0.1x – 1x). You can mix ores to have multiple traits on the resulting weapon/armor.
How do ore multipliers work while forging?
The resulting multiplier will be the net average of all the oresyou used for that forging. If you used 10 ores with a 0.2x multiplier and 5 ores with a 0.5x multiplier, the result will be (10 * 0.2 + 5 * 0.5) / 15 = 0.3.
How do ore rarities work?
Ore rarity and drop chance are relative to other ores in the same pool. For example, Blue Crystal Ore in the Goblin Cave has a 1/255 rarity. However, it will drop very often as there are no lower-rarity ores to drop instead of it. The real chance for it and the other 1/255 ores in the Goblin Cave to drop will be 19-20%.
And that does it for our The Forge ores guide. Now that you know where to find all the ores, check out our The Forge codes list to get free Race Rerolls, The Forge beginner’s guide to learn all the mechanics, and The Forge race tier list to learn which races are the best!
The Forge is one of the most grindy experiences out there, and if you’re new, you’ll be discovering new ways to optimize your progress by the day. However, there is a method that will give you the most money in the shortest amount of time possible. Here is the best way to earn money in The Forge Roblox experience.
What is the Best Method of Farming Money in The Forge?
Image by Gamepur
The best way to make money in The Forge is to forge only Heavy Armorusing 30 ores exactly, and then sell it. Doing this in World 2, even with the most basic ores, will net you anywhere from $20,000-$40,000 per hour, depending on which rocks and ores you’re farming the most. Here is why this method works and why it’s the best:
All Heavy Armor Has the Same Price: Heavy Leggings, Helmets, and Chestplates all have the same base price, which isn’t the case for weapons. However, the Dark Knight set does have a better base price than the Knight set.
Heavy Armor > Weapons: You can get a 90% chance of forging a Heavy Armor piece with only 30 ores. The only weapons that have the same price ($915) as Heavy Armor are Colossal Swords, which have only a 49% chance of forging with 30 ores. The other 51% chance is occupied with Great Axes and other weapons that have way lower sell costs.
30 Ores is the Best: As mentioned before, all Heavy Armor pieces have the same price, meaning that you don’t care which one you craft. With 30 ores, you’re minimizing the required ores and maximizing the chance to craft a heavy Armor Piece.
Why Crafting Weapons is Suboptimal: Forging weapons is suboptimal just because there are so many of them, cluttering the pool, and lowering your chances of crafting Colossal Swords, which are the only weapon type that has the same price as Heavy Armor.
Other Good Ways to Make Money in The Forge
Here are some other good ways to make money in The Forge Roblox experience, especially early on when you haven’t finished all the main quests and index entries:
Complete Index Entries: Discover new ores, crafts, and enemies, and claim the rewards from your Index to get a bunch of money.
Complete Quests: Main quests and repeatable quests are a great way to earn money.
Forging > Selling Ores: You’ll always make double your money when using ores to forge items than when selling them. So, be sure to do that.
Killing Enemies: Killing enemies is a great way to make money. However, it isn’t sustainable if you die often. Also, make sure to sell Essences that you get for extra cash.
The Forge Money-Making FAQ
Is killing enemies better for making money than crafting?
No, killing enemies isn’t better for making money, unless you can 1-shot most of them. The only way to do that is if you have the best armor and weapons.
Runes are one of the most essential parts when upgrading your kit in The Forge, and slotting them in can be extremely expensive, especially for pickaxes. Therefore, it’s important that you know what each rune does, which ones are the best, what sub-stats to target, and other important details. You’ll learn all that and more in our ultimate The Forge runes guide and tier list below!
The Forge Runes Tier List
BEST RUNES
S
Miner Shard
Luck
Miner Shard
Swift Mining
Miner Shard
Mine Power
Drain Edge
Rot Stitch
VERY GOOD RUNES
A
Briar Notch
Rage Mark
Chill Dust
DECENT RUNES
B
Miner Shard
Yield
Blast Chip
Frost Speck
BAD RUNES
C
Venom Crumb
Flame Spark
Ward Patch
Ranking Tiers Explained
S Tier: The best runes you can have in The Forge, with OP passives and stat buffs.
A Tier: Very good runes that work well regardless of your build.
B Tier: Decent runes that will buff your DPS/mining by a bit.
C Tier: Bad runes that don’t provide enough boosts to warrant using them.
In the tier list above, you can see the general power ranking of runes in The Forge. Miner Shard only applies to pickaxesand affects only your ore-mining performance. Other runes can be applied to armor/weapons, depending on their effects. Drain Edge is generally the only good rune for weapons, while Rot Stitch is the best rune for armor. All others can be useful, but you’ll be mostly deciding which one you use based on the sub stats (we explain those further below).
All Runes in The Forge – Farming Locations & What They Do
In the table below, you can find all runes in The Forge Roblox experience, their effects, which enemies/quests they drop from, and which gear they are usable on. Note that the Miner Shard rune can have only one of the 4 possible effects, and can not have any sub stats.
Rune
Effect
Drops From
Usable On
Miner Shard
One of These: Yield I: 3-10% chance to drop 1 extra ore from mines. Luck I: 5-16% overall Luck increase. Swift Mining I: 4-12% increased Mine Speed. Mine Power I: 8-15% increased Mine Damage.
Delver Zombie Bomber
Pickaxe
Drain Edge
Life Steal I: Restores 5-13% of Physical Damage dealt on hit.
Reaper
Weapon
Blast Chip
Explosion I: Explode with a 8-20% chance on hit, dealing 20-40% DMG.
Bomber
Weapon
Flame Spark
Burn I: Deal 5-10% DMG as fire per second for 1-2s. 15-25% chance on hit.
Poison I: Deal 4-7% DMG as poison per second for 1-2s. 25-35% chance on hit.
Blight Pyromancer
Weapon
Chill Dust
Snow I: Slow enemy MOV SPD and ATK SPD by 5-10% for 1-2s. 15-25% chance on hit.
Unobtainable
Weapon
Frost Speck
Ice I: Freeze enemies for 1-2s with a 10-20% chance on hit (15-20s CD).
Crystal Spider Diamond Spider Prismarine Spider
Weapon
Briar Notch
Thorn I: Reflect 2-10% physical DMG taken (caps at 5%max user HP; 0.05s CD).
Deathaxe Skeleton Elite Deathaxe Skeleton
Armor
Rage Mark
Berserker I: Boosts PHYS DMG and MOV SPD by 12-26% for 3-5s. Activates below 35% HP (50-60s CD).
Elite Rogue Skeleton Common Ork
Armor
Ward Patch
Shield I: Reduce incoming PHYS DMG by 6-14%. Has 5-15% chance per received hit.
Tutorial Quest
Armor
Rot Stitch
Bad Smell I: Deal 5-15% poison DMG for 1-2s, fearing enemies. Activates below 35% HP (15-20s CD).
Unobtainable
Armor
All Rune Sub Stats
Every rune in The Forge, except for the Miner Shard, can also have a sub stat, giving you additional stats. These are rolled randomly when you obtain the rune and can’t be changed later. In the table below, you’ll find all the possible sub stats, their effects, which type of rune they can appear on, and how good they are (rating column).
Trait
Effect
Applies To
Rating
Attack Speed I
Increase Attack Speed by 5-18%.
Weapon Runes
Very Good
Lethality I
Increase Physical Damage by 5-15%.
Weapon Runes
Good
Critical Chance I
Increase Critical Chance by 6-15%.
Weapon Runes
Good
Critical Damage I
Increase Critical Damage by 5-15%.
Weapon Runes
Decent
Fracture I
5-20% extra Stun hit DMG by on hit.
Weapon Runes
Decent
Endurance I
Gain 4-10% more Stamina.
Armor Runes
Bad
Surge I
Reduce Dash cooldown by 3-11%.
Armor Runes
Bad
Vitality I
Grants 5-10% max HP.
Armor Runes
Very Good
Stride I
Increase Dash Distance by 4-15%.
Armor Runes
Bad
Phase I
Increase Dash invincibility duration by 4-11%.
Armor Runes
Bad
Swiftness I
Increase Movement Speed by 4-10%.
Armor Runes
Very Good
How to Use Runes in The Forge
Image by Gamepur
To apply or remove runes from your gear in The Forge, you’ll need to visit the Runemaker NPC located in each major town. You can increase the rune slots of your gear pieces via Enhancement (every 3 levels will give the gear +1 rune slot). The price of applying/removing a rune depends on the base price of that gear piece. Here is how adding/removing runes works:
Attaching Runes:
Select a piece of gear.
Click on the desired rune in the middle area of the rune menu.
Click on Attach below the rune’s description on the right.
Detaching Runes:
Select a piece of gear with a filled rune slot.
Click on the filled rune slot on the bottom left of the gear piece image on the left.
Click on Detach below the rune’s description on the right.
Useful Tips for Runes
Rune Master Achievement: You can farm this achievement by attaching/detaching a rune on the cheapest possible piece of gear ($10 Stone Dagger rune attach + detach costs $220). It isn’t cheap to max out a Critical Chance achievement this way, but it is the quickest.
Save Runes With Good Sub Stats: Most runes’ effects except Drain Edge aren’t important, so look at their sub stats when deciding which to use. A +15% Attack Speed boost will be 10x better than a max roll Flame Spark without a sub stat.
Don’t Attach Weak Runes to Pickaxes: If you don’t have a good rune to attach to your pickaxe yet, don’t waste money attaching a random one. It’s just too expensive, and you’ll be losing money and stats this way.
Don’t Detach Runes From Pickaxes: Since pickaxe rune detachment is expensive as well, it’s 10x better to farm another max-rolled rune than to spend $30,000-$40,000 detaching one.
The Forge Runes FAQ
Are some runes unobtainable?
Yes, some runes are unobtainable right now, or are only acquired via quests. Those runes are Rot Stitch, Frost Peck, and Chill Dust.
What are the best runes?
The best rune for weapons is Drain Edge, the best runes for pickaxes are Luck Miner Shard, Mine Power Miner Shard, and Mine Speed Miner Shard, and the best rune for armor is whichever one gives you Max HP as a sub stat.
What is the best place to farm runes?
The best place to farm runes is the Volcanic Depths. There, you’ll find elite enemies which all drop really good runes.
In the tier listbelow, we ranked all races in The Forge Roblox experience from best to worst, as well as outlined all the buffs that they provide and the reasons why they are good or bad. Use it as a cheat sheet when rerolling your race. We also included information on how to get race rerolls, when to stop rerolling, and other tips that’ll help you as you play the game.
The Forge Roblox Race Tier List
BEST RACES
S
Demon
Mythical
Angel
Mythical
Dwarf
Epic
Goblin
Rare
VERY GOOD RACES
A
Golem
Legendary
Dragonborn
Legendary
Minotaur
Legendary
DECENT RACES
B
Shadow
Epic
Orc
Rare
WEAK RACES
C
Undead
Rare
Zombie
Uncommon
Elf
Uncommon
Human
Common
Ranking Tiers Explained
S Tier: Demon and Angel are the best races you can have in The Forge, with OP passives and stat buffs. Dwarf and Goblin are solid when saved in 2nd/3rd slots, as they give you useful buffs for farming.
A Tier: Very good races that you can stick with while rerolling, but they aren’t as OP as Angel or Demon.
B Tier: Decent races that work well until you can get one of the Legendary/Mythic races.
C Tier: Weak races that aren’t that strong stat/passive-wise.
The tier list above showcases the overall power ranking of all races inThe Forge Roblox experience. Generally, higher-rarity races will be better than the low-rarity ones, as they provide bigger stat boosts. Also, combat stats are the most valuable, as battling enemies is one of the most important parts of gameplay. For more details about the ranking factors, race passives, and other details, see the sections below.
The Forge Codes: Check out our list of all codes to get free Race Rerolls and other resources!
Tier List Ranking Notes
Rarity: Races of higher rarity are usually better, with higher stat boosts and better passives.
Combat vs Farming Stats: Combat stats will usually have a bigger effect on your gameplay early on, and races that have higher combat stat boosts should be your top choice. However, once you start getting the best gear and the best runes, Angel will become by far the best.
Race Slots: You’ll have multiple slots for storing races, so switch them out depending on what your current loadout needs the most. Dwarf and Goblin are excellent when saved in another slot, as you can switch to them when buying items or grinding ores.
Debuffs: Lower-rarity races also apply debuffs to certain stats, and depending on which stat they debuff, they can be much worse than they seem.
S Tier – Best Races in The Forge
Race
Effect
Ranking Summary
Demon Mythical
Demonic Powers: +20% Movement Speed, +20% Attack Speed, +20% Physical Damage, +20% Stronger Fire Damage, 30% Height, +10% Width & Depth. Backfire: 25% chance to burn the enemy when damage is taken. Cursed Aura: While in combat have a small area around you that deals 10% damage of your weapon per second. Devil’s Finger: When you dash, teleport with hellfire particles and have 20% chance to create a hellfire circle dealing 45% of your weapon damage per second for 3 seconds to enemies inside.
+ The overall best race for combat in The Forge + OP offensive/combat stat buffs and passives + The Attack Speed boost is extremely good with Daggers
Angel Mythical
Wings: -20% Dash Cooldown, +50% Dash Distance, +15% Longer Dash IFrame, +20% Movement Speed, +25% Jump Boost, +20% Stamina. Mighty Clover: +25% Luck Boost. Smite: 50% chance to call upon Smite on-hit for 30% of physical damage. Holy Hand: Have infinite stamina while below 20% health.
+ The best exploration/farming-focused race + The Luck Boost is massive, especially during the early game + Becomes the best race once you have the best gear
Dwarf Epic
Heavy Short: -20% Height, -5% Movement Speed. Gifted Miner: +15% Mining Damage, +5% Better Forge. Critical Mining: 20% chance to deal +50% damage to rocks.
+ Very good utility for builds that focus on mining + One of the best races to use before you get Angel – Has no value for combat, unlike most other races
Goblin Rare
Tiny: -15% Health, -15% Size. Sneaky: +15% Movement Speed, +10% Attack Speed with daggers. Bargain: 12% discount when shopping.
+ Decent Attack Speed buff if you’re using daggers + The discount is OP, making it worth saving in a slot – Isn’t that good as a main race later on
A Tier – Very Good Races
Race
Effect
Ranking Summary
Golem Legendary
Tank: +30% Health, -10% Movement Speed, +30% Size. Heavy Hitter: +15% Attack Speed with heavy weapons. Stone Heart: 50% chance to lower incoming damage by 25%.
+ Excellent race for tanky builds with heavy weapons + One of the best Legendary classes for the late game – Doesn’t work well with non-heavy weapons
Dragonborn Legendary
Durable Scales: +20% Max HP and +10% Height. Sharp Fangs: +12% Physical Damage. Dragon’s Breath: 40% chance to burn enemy and deal 30% of weapon’s damage per second for 3 seconds.
+ The best offense-orriented non-Mythical race + The extra DPS from its Burn passive is really good – Doesn’t have as much stats as the Angel/Demon
Minotaur Legendary
Beast: +20% Health, -10% Movement Speed, -10% Stamina, +10% Height, +20% Width & Depth. Bull’s Fury: While under 50% Health, activate Rage Mode; increasing movement speed and physical damage by 30%.
+ OP buffs if you can constantly stay at low HP + One of the best non-Mythical races – You’ll need to stay at low HP to make the most value out of it
B Tier – Decent Races
Race
Effect
Ranking Summary
Shadow Epic
Shadow Pact: +15% Movement Speed, +10% Attack Speed, +10% Stamina, +5% Physical Damage, -10% Health. Phantom Step: Upon taking damage, there is 15% chance to turn into a shadow to dodge the attack.
+ Excellent offensive buffs for any build + Solid DMG reduction from its dodge passive – Relatively squishy compared to most other races
+ Decent DPS and survivability buffs – Isn’t exceptional in any way compared to other races
C Tier – Weak Races
Race
Effect
Ranking Summary
Undead Rare
Fragile Bones: -12% Health. Sharp Surface: Reflect 10% of the damage taken. Second Chance: Refills 50% of health when health is under 10%, every 5 minutes.
+ Passive can come in clutch and save you from death – The passive cooldown is fairly long – It doesn’t provide much extra damage
Zombie Uncommon
Rotten: -25% Health. Mutated Genes: +2% health regeneration every 5 seconds. Absorb: 15% chance to convert incoming damage to health.
+ Buffs your HP regeneration by a lot – Lowers your Max HP, which isn’t good – Doesn’t provide much of a real boost to survivability
Elf Uncommon
Superior Genes: +15% Stamina and +5% Height. Glorious: +7% Luck Boost.
+ Extra Luck is decent early on – Becomes useless once you get Luck from other sources – Provides no combat buffs
Human Common
Blessed: +3% Luck and +3% Extra XP.
– By far the weakest race in The Forge – Provides no combat buffs – Other buffs it gives are fairly weak
How to Reroll Race in The Forge Roblox Experience
Image via The Forge
Changing your race in The Forge is done via rerolls, which are RNG-based, and you get 5 free rerolls at the start. Talk to the Wizard NPC to start rerolling. Higher-rarity races have a lower chance of being rolled, and the opposite is true for lower-rarity races. You can also unlock extra slots to save races and switch between them by increasing your level. Here are all the race roll chances:
Human – Common (25% Chance)
Elf – Uncommon (15% Chance)
Orc – Uncommon (14% Chance)
Goblin – Rare (10.5% Chance)
Undead – Rare (9% Chance)
Orc – Rare (8% Chance)
Dwarf – Epic (7% Chance)
Shadow – Epic (6% Chance)
Minotaur – Legendary (1.75% Chance)
Dragonborn – Legendary (1.5% Chance)
Golem – Legendary (1.25% Chance)
Angel – Mythical (0.5% Chance)
Demon – Mythical (0.5% Chance)
How to Get Race Rerolls in The Forge
Currently, the only ways to get rerolls are to use codes (free method) and to buy them with Robux (paid method). Generally, there are solid races that you can get with just a few free rerolls, so buying rerolls with Robux isn’t recommended.
The Forge Roblox Race Tier List FAQ
What are the best races in The Forge?
The best main races are Demon, Angel, and Dragonborn. Demon and Angel are the strongest in the game, though extremely hard to obtain. Dragonborn is easier to get, but it’s not as strong as the other two. Dwarf and Goblin are also very strong races, especially before you get Angel.
What is the best low-rarity/beginner race?
Of the low-rarity races (Epic, Rare, Common, Uncommon), the best ones are Dwarf and Goblin, as both have insanely good utility. Other good options are Shadow and Orc, as those races give offensive stats, which you’ll need for combat.
How do you get Race Rerolls for free?
You can get Race Rerolls for free by using codes. There might be other ways to get Race Rerolls for free in the future, but for now, that’s it.
Volcano is one of the main areas in the Forgotten Kingdom (world 2) in The Forge, containing elite enemies, unique ores, and other things relevant for progression. Entering it isn’t easy, but there is a way to bypass the developer-set barrier. Here is everything you need to know about the Volcanic Depths (Volcano) area and how to enter it in The Forge Roblox experience.
How to Enter the Volcano (Volcanic Depths) in The Forge
Image by Gamepur
To enter the Volcanic Depths in The Forge, you’ll need to make your way to the cave in the 2nd world and then follow the path on the right (with the Danger sign above it) until you reach a fiery room on the right side. In that room is the Amber quest NPC and the Magma Pickaxe.
Image by Gamepur
On the right side of that room, you’ll see two Basalt Veins sticking out of the ground (with blazing spikes around them). These two Basalt Veins are actually blocking the entrance to the Volcanic Depths, and you or some other player on the server will need to destroy them to open it. You need a pickaxe with 78 base Mining Power in order to mine Basalt Veins. Once you’ve destroyed them, jump down into the hole to enter the Volcano.
All Enemies in the Volcanic Depths
In the Volcanic Depths, there are four types of enemies you can encounter, respawning ~10-15 seconds after one is killed. These enemies are essential for multiple quests, including ones from the main quest givers (Rowan and Sensei Moro), and they drop very strong runes. Here is everything you need to know about them:
Enemy
Possible Stats
Possible Dropss
Elite Rogue Skeleton
250-295 HP 45-114 DMG 1-10 Level $45-90 67.5-135 XP
Greater Essence [1/6] Superior Essence [1/10] Epic Essence [1/15] Rage Mark Rune [1/30] Dark Boneite Ore [1/6]
Elite Deathaxe Skeleton
300-570 HP 50-123.5 DMG 1-10 Level $60-120 90-180 XP
Superior Essence [1/4] Epic Essence [1/5] Flame Spark Rune [1/10] Drain Edge Rune [1/15] Dark Boneite Ore [1/6]
All Ores & Rocks in the Volcanic Depths
Some ores in World 2 are exclusive to Volcanic Rocks and can only be obtained from the Volcanic Depths. Here is the complete list of all rocks you can mine here, as well as all the ores that drop from those rocks:
There is a red door on the far end of the Volcanic Depths, and behind it is the location of the Demonic Pickaxe. You can’t open the door, but with the Demon race, you can phase through it with your dash. Check out our The Forge Demonic Pickaxe guide to learn more about its stats and how to get it.
The Forge Volcanic Depths FAQ
Can you enter the Volcano without destroying the veins?
Yes, if the veins spawn off to the side, there might be a gap where you can squeeze through. Also, you can wait for another player to destroy the veins, and then you can enter it.
Is the Volcanic Depths a good place for farming?
Yes, Volcanic Depths is a great place for farming, especially EXP, as most enemies give tons of it, and they aren’t hard to defeat, with the exception of the Reaper.
What is the recommended level to go to the Volcano?
Generally, you should try to have a full set of Dark Knights’ Armor and an Epic+ weapon before you go into the Volcano, which should be right about when you reach Level 45-50.