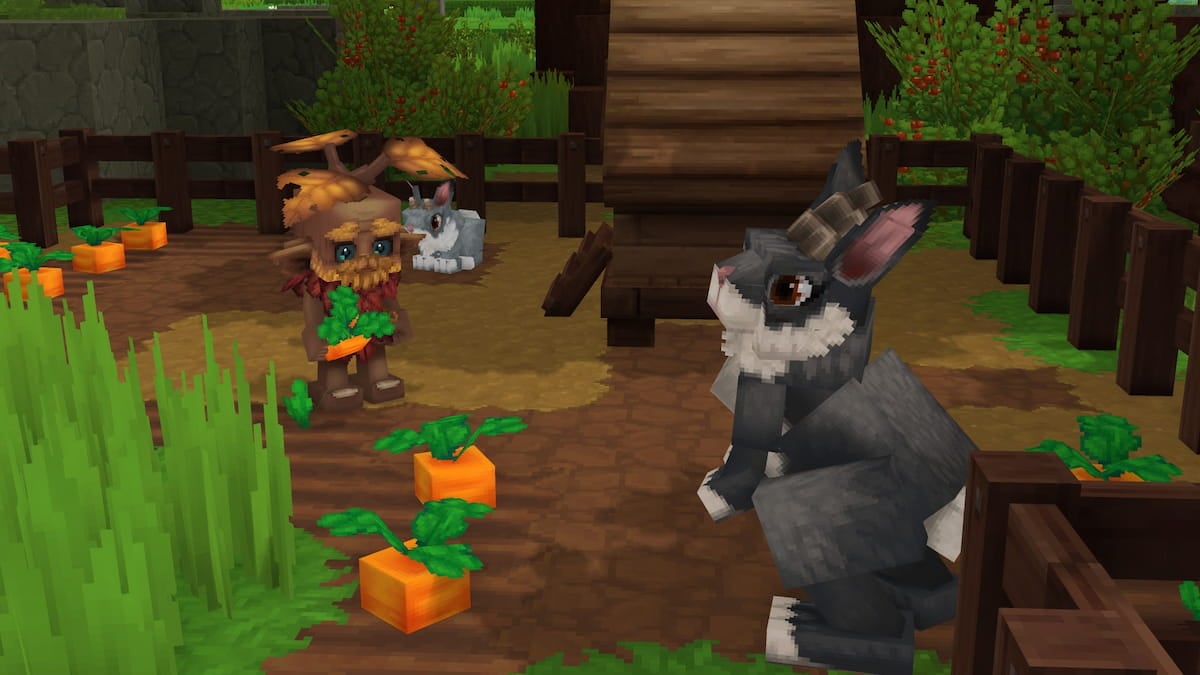
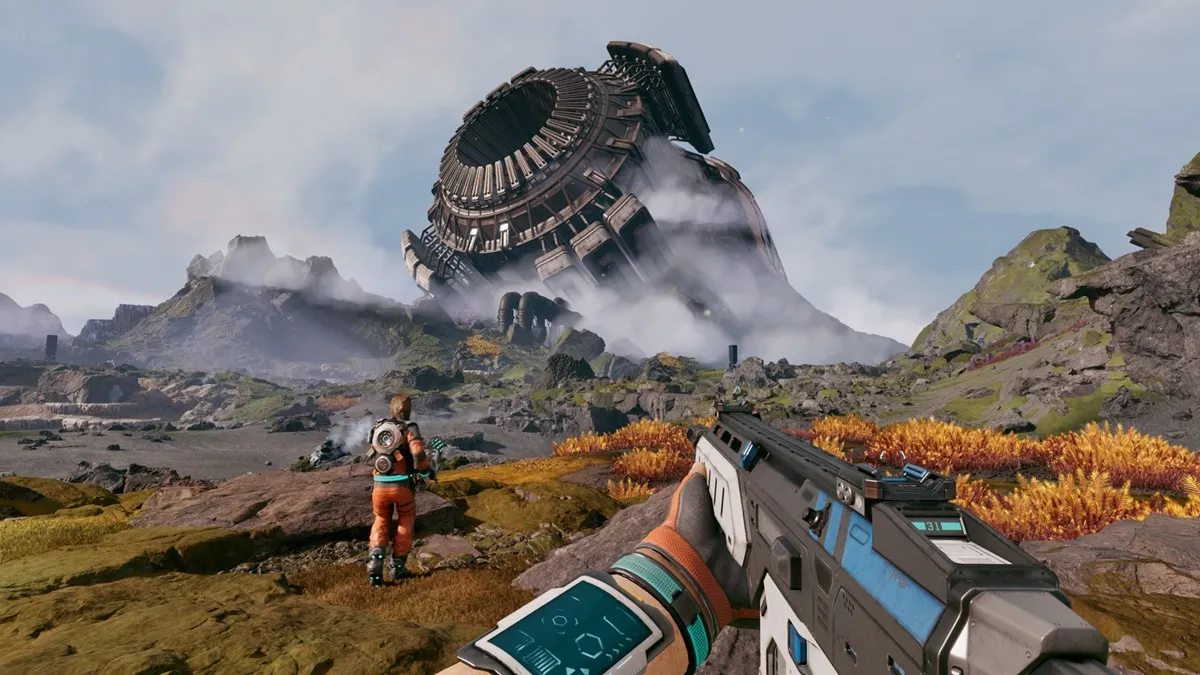
Expedition 20: Breach Redux is one of the many time-limited Expeditions in No Man’s Sky, and it’s a fairly lengthy one if you’re going in blind.
Since it’s time-limited, though, you no doubt want to clear it as fast as possible. Conveniently, you can actually finish it in around 2 hours if you know what to do! It’s not that bad, all things considered.
Read on, we’ll show and tell you everything you need to do to complete every Milestone for this Expedition quickly.
Starting the Expedition
As usual, there are two ways to start the Expedition. You either start a new Expedition save or use the Expedition terminal at the Space Anomaly on an old save.
We highly recommend using the Space Anomaly on an old save. Doing so will allow you to store away some resources that you can collect once the Space Anomaly becomes available during the Expedition itself. This can speed up progress quite a bit!
If you do this, here’s a shopping list of everything you should bring with you:
1 Warp Cell
5 Solar Mirrors
5 Quantum Computers
5 Metal Platings
100 Magnetized Ferrite
100 Oxygen
3 Di-Hydrogen Jellies
12 Radiant Shards
192 Polished Stones
Hazmat Gauntlet
Advanced Mining Laser
If you don’t have these materials, or at least not all of them, don’t worry! We’ll tell you how to get them when they become relevant. So, they’re not mandatory, they just help speed things up a bit.
Also, make sure to claim rewards from Milestones as soon as you complete them. They’ll give you the resources required for later Milestones, so don’t forget to pick them up.
On that note, don’t install Modules you get from Milestones unless they’re actually needed. If you keep them, you can sell them for Nanite later on.
Lastly, make sure to avoid black holes in the middle of the Expedition unless we tell you otherwise. They’ll take you far away from where you need to go, wasting your time.
With all of those basics laid down, it’s time to go over the Expedition itself!
Early Expedition
1. Farming the Basics
Gather the bare minimum required materials. If you brought everything we mentioned in the introduction, you’ll need the following:
30 Oxygen
150 Ferrite Dust
175 Quartzite
50 Carbon
If you’re starting with nothing at all, you’ll need the following instead:
60 Oxygen
400 Ferrite Dust
400 Quartzite
120 Di-Hydrogen
100 Carbon
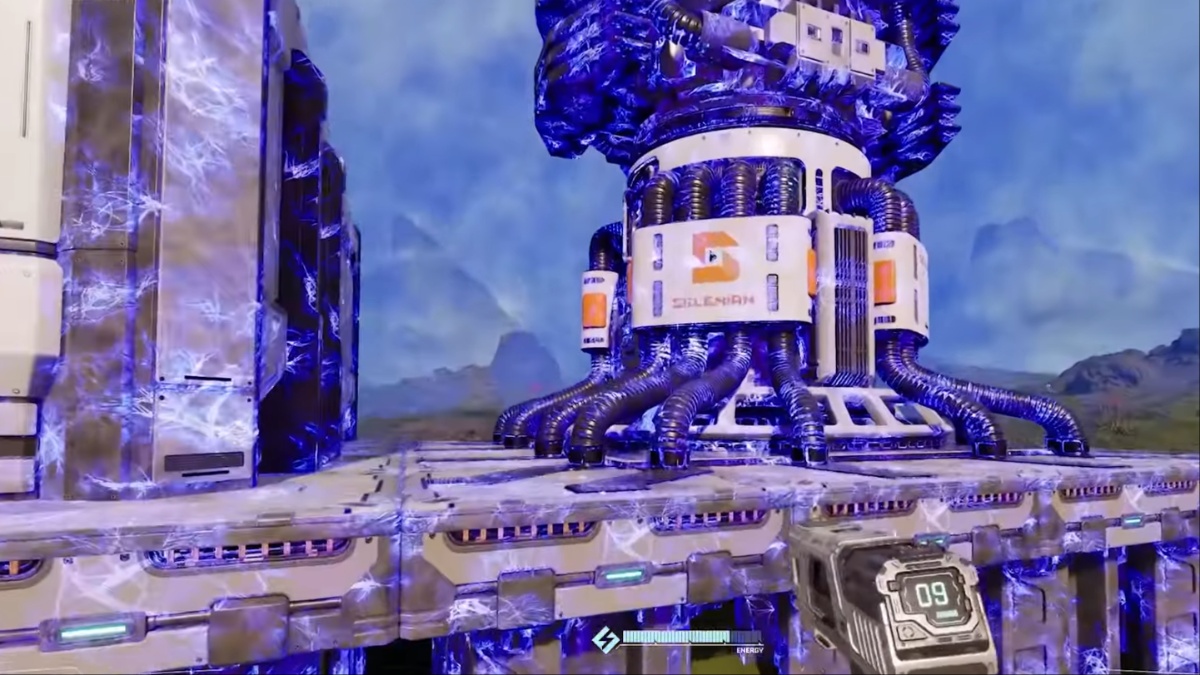
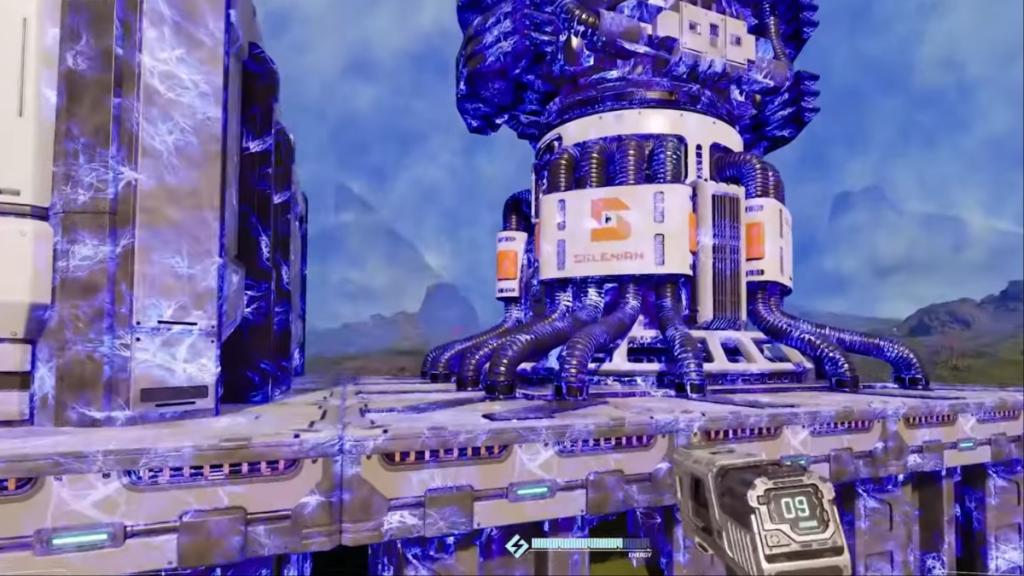
2. Find Your Ship
Follow the in-game marker to find your ship. Claim the Personal Refiner from this step and use it to turn 50 Ferrite Dust into 50 Pure Ferrite and all Quartzite into Chromatic Metal. Craft 1 Metal Plating.
Use the Repair Kit on your ship and the materials you’ve accumulated so far to repair it fully.
3. Shooting the Asteroids
Get on your Starship and fly off the planet, then shoot down 15 Asteroids.
4. Zuppa Desert +
Fly to the “Zuppa Desert +” planet and collect 5 Sulphide Crystals from underwater vents there. While you’re at it, scan and document any aquatic creature over 6kg. Install the Optical Drill you got as a reward.
5. Space Station Visit
Go to the nearest Space Station and sell the Crystal Sulphide at the main terminal, then buy all Carbon. Craft 5 Carbon Nanotubes and 5 Microprocessors. Refine your remaining Carbon into Condensed Carbon.
6. Leaving the System
Craft 1 Warp Cell if you already brought one via the Space Anomaly. If you didn’t, craft 2. Use this to make and fuel a Hyperdrive.
Once you’re done, go back out to space and warp to the Aitoig-Bifor system.
Between the Stars
1. Space Anomaly Unlocked
After your first warp, the Space Anomaly will become available. You can visit it to retrieve the materials you brought at the start, if you did.
2. Friends in Odd Places
Track the “Friends in Odd Places” milestone and follow it by warping to Rensayst XVIII. Visit the “Spicey” planet there. Feed and adopt any weird floating creature on the planet.
3. Dereliction
Use the Emergency Signal Scanner you got from the rewards so far until you find a Derelict Freighter. Approach it and explore it fully by getting the Security Credentials and interacting with the 3 main terminals.
If you didn’t bring materials via the Space Anomaly at the start, make sure you collect 40 Sodium and 100 Oxygen from floating capsules in the freighter.
Even if you did bring materials, though, try looting everything you can just in case.
Install the Hyperdrive module from the rewards here. Also craft and install a Hazmat Gauntlet.
4. Metamorphosis
Go back to space and fly to the “Nadleyvo” planet. Find and collect any Vile Larva (or Grub) there. Return to your Starship and activate the Pulse Engine once you do, then crush the Vile Larva from your inventory.
Yet Another System
1. Timestamp: 1
Track the “Timestamp: 1” milestone and follow its marker to another system and planet. Just reach the marked spot for the milestone.
2. Space Station Visit
Go to the nearest Space Station. Store the S-Class Hyperdrive from your Starship, transfer everything from the Starship inventory to your own.
If you didn’t bring materials via the Space Anomaly, sell all cooking-related rewards you got. Buy all Carbon and 5 Microprocessors. Also mine 200 Gold and 150 Silver from asteroids. Then craft 5 Solar Mirrors, 5 Quantum Computers, 3 Di-Hydrogen Jellies, and 5 Metal Platings.
Either way, craft a Debris Rangefinder with all of these materials.
3. Door to the Stars
Track this Milestone and use the Corvette Workshop at the Space Station to make a Corvette-class Starship. Install the Hypedrive on it, it’ll be your main Starship from now on.
4. Shipbreaking
Use the Debris Rangefinder to locate and explore a wreckage. Loot everything from it, especially its log. Install the Aqua Jets you get.
5. Katr Gamma (Optional)
If you didn’t bring materials via the Space Anomaly, stop by “Katr Gamma.” Use the Advanced Mining Laser to get 12 Radiant Shards for “Radiance” here.
Warping Around Some More
1. Timestamp: 2 and Diving
As before, track this milestone and simply follow it to the marked location. Build a Nautilon Platform on that planet, as well.
Install the Humboldt Drive from the previous rewards and dive 800u down for another milestone. While at the bottom of the sea, find and collect 3 Shards of Sea Glass.
2. Lost in Time
Craft 4 Debris Rangefinders and use one until you find another shipwreck. Loot it and collect its log for this milestone.
3. Timestamp: 3 and Cosmic Horrors
Same old, same old! Track the milestone and follow it to the marked location. On the planet it takes you to, fight against the Hungering Tendrils at the Titan Worm Burrow. Defeat 10 of the biological horrors they summon, then defeat 3 tendrils.
4. The Fate of the Stars
Activate yet another Debris Rangefinder to find another shipwreck, the 3rd so far. Loot it, making sure to collect its log, as usual.
Moons and Blackholes
1. Timestamp: 4
You’re tired of reading it by now, but it’s the same as before: track the milestone and follow the marker. Collect 5 Storm Crystals on the planet it takes you to for another milestone, as well.
2. Lunar Cluster
Visit all of the moons in the current system. Use the Discoveries tab to track the moons you haven’t discovered yet to make this a lot easier.
3. Frail Bodies
Use another Debris Rangefinder, find another shipwreck, and collect its log.
4. No Time for Caution
We told you not to go into black holes unless told otherwise, right? This is the “otherwise” we were hinting at! Track the “No Time for Caution” milestone and jump into the black hole it takes you to.
This will take you to the same system required for “Timestamp: 5”. So track that milestone and follow its marker to complete it, as well.
Finishing Up
1. Scanning and Gathering
On the same planet for “Timestamp: 5”, scan 5 different creatures and gather 192 Polished Stones to complete two more milestones. Refine some of the Polished Stones into Pure Ferrite.
2. Grave Robber
Track the milestone and collect all of the bone types it asks for to assemble a complete fossil. Place a Quadruped Fossil Display, fill it out, and package it to complete the milestone.
3. Reborn in Song
Same song and dance as some previous milestones here. Use a Debris Rangefinder to locate a shipwreck and collect its log.
4. Hooked and Jellyflesh
Install the Fishing Rig you got from the previous rewards and go back to the planet from before. Land near water and catch 3 fish for the milestone.
Then, continue fishing until you get the Spawn of Arcadia. Release it to summon a boss. Defeat the boss to complete the last milestone and finish the Expedition!
Claiming Rewards
Now that all milestones are done, you just need to finish the Expedition by visiting the Space Anomaly. You can end it on the same terminal that you started it, if using an old save.
You can also visit a Space Station to sell unwanted modules for Nanites at this point. Alternatively, you can just keep them and transfer them back to your main save when you finish.
Either way, you can also go pay the Quicksilver Synthesis Companion a visit on the Space Anomaly to claim rewards!
That’s everything you need to do Expedition 20: Breach Redux as quickly as possible in No Man’s Sky. It’s still a lengthy one, but this should be the fastest way.
First, it was the Rocketeers, now it’s the Bastions that you need to throw Snowballs at for the current Weekly Trial in ARC Raiders!
Thankfully, Bastions are a bit easier to hit with these snowballs. They are larger, slower, and they’re not flying all over the place. But they are also dangerous and threatening, so you need to be careful.
In this guide, we’ll tell you an easy method to complete this weekly trial safely.
The Trial Basics
For the most part, this weekly trial works similarly to the one for Rocketeers before it. We recommend checking out our guide on the Rocketeers trial too, as it tells you the best way to farm a lot of Snowballs in preparation!
Now, the upside here is that Bastions aren’t flying all over the place. So, they’re a lot easier to deal with than Rocketeers. The basics remain the same, though: find and disable a Bastion so that you can dump your loadout of Snowballs into it.
For this trial, the best map is Spaceport during the Cold Snap event. More specifically, you’ll want to go to the Rocket Assembly building on the northeastern part of the map.
Do note, the Cold Snap event isn’t really required to throw Snowballs. However, as the clip above shows, there are 3 snow piles inside the building while the event is on. This allows you to get some more Snowballs, which is quite convenient!
As for your loadout, you want to bring a solid weapon exclusively for damaging the Bastion’s legs. You don’t want too much damage, though, you only need to disable the legs!
We also recommend bringing a solid weapon for PvP, just in case you need to deal with other players. They’re likely to show up as they try this same method or are simply drawn in by the noise. A combination of Venator and Stitcher should work well here.
That aside, we recommend the Looting Mk. 3 (Cautious) Augment. It gives you more inventory space. Don’t bring too much ammo with your loadout either, try to fill your inventory with Snowballs instead.
With those basics down, it’s now time to go over the method itself!
The Method
Now, to complete the trial, you want to first go a bit southwest from the Rocket Assembly building. You can usually find a Bastion around the area. Try to safely get its attention by firing a couple of shots at it.
Once the Bastion is focused on you, start backing up into the Rocket Assembly building and kite the Bastion into it. In there, you want to use the tanks inside the building to hide from the Bastion.
This allows you to easily take shots at the Bastion while remaining relatively safe! At this point, you just need to shoot at its legs to disable it.
After you manage to disable the Bastion’s legs, you just need to start throwing Snowballs at it! That’s all that’s left at this point, just empty your inventory onto it.
Thanks to it being disabled and the tanks inside of the building, you can stay pretty safe while doing this. Plus, you can use the nearby piles of snow to get some extra Snowballs, if the Cold Snap event is active.
So, there you have it! That’s the gist of everything you need to do to complete the “Throw Snowballs at Bastions” Weekly Trial with ease in ARC Raiders. Now that you know the method, you just need to grind it out.
Wuthering Waves 3.0 gave us a lot of great content, but it also gave us something else entirely: confusion. If you’ve ever stared at your quest log wondering why Final Reverberation just refuses to progress, you’re not alone. For a while, this quest (and a few others) felt straight-up cursed, with vague objectives, missing dialogue, and NPCs that just… wouldn’t cooperate.
The good news is that Final Reverberation is absolutely completable now, and most of the issues players ran into either had hidden triggers or were quietly fixed in later patches. This guide walks you through how the Final Reverberation questline works, how to unlock it properly, what to do if it looks bugged, and how players actually managed to get past the infamous I.R.I.S. interaction.
How to Complete Final Reverberation 1 & 2
Before you even see Final Reverberation I, it’s important to know that Wuthering Waves absolutely loves conditional quest triggers. This quest does not reliably appear just because you finished the main story or hit 100% exploration. Plenty of players had everything cleared and still couldn’t get it to show up, so if you’re stuck, you’re definitely not alone.
Both Final Reverberation I and II are very short quests once they finally unlock. They mainly involve traveling to specific locations, using Utility: Sensor, interacting with discarded logs, and delivering medicine supplies to Lias in Fangspire Chasm. The objectives are straightforward, and the game marks the locations clearly on the map once the quests are active.
Completing Final Reverberation 1 & Medicine Supplies
Here’s a video on how to complete Final Reverberation 1 in Wuthering Waves, with a clear step-by-step walkthrough.Here’s a video on how to complete the Medicine Supplied quest in Wuthering Waves, showing how to start Final Reverberation 2.
For Final Reverberation I, the discarded log is located between Itching Plains and Startorch Academy, but not easy to miss even if you’re not actively looking for it. You’ll also have to wait for days to progress into the log.
As for the Medicine Supplies bit, you can find and deliver the medicine supplies to Lias in Fangspire Chasm.
Completing Final Reverberation 2
Here’s a video on how to complete Final Reverberation 2 in Wuthering Waves, including objectives, locations, and tips to finish it smoothly.
Final Reverberation II sends you to another discarded log found in the southwest area of Fangspire Chasm. After completing the first quest, progression flows directly into the second with no extra steps required.
If Final Reverberation doesn’t appear at all, your best bet is clearing as many remaining side quests and events as possible. Version 3.0 in particular locks certain quests behind unrelated content. Side quests like Urban Legend: The Anonymous Inviter and Hidden Childhood have been confirmed to block progression for some players until they’re completed, even if everything else looks finished.
Final Reverberation II and the I.R.I.S. Problem
This is where most players got stuck. Final Reverberation II updates your objective to “Return to I.R.I.S.”, which sounds simple enough. Except when you actually talk to her, there’s no quest-related dialogue option, and nothing progresses.
For a while, this step was genuinely bugged for many players. The issue appeared to be tied to handing over treasure parts, which simply wouldn’t trigger the next interaction. Some players found that completing other quests randomly fixed it, while others were completely locked out even after finishing everything else in the game.
Eventually, a small patch released on December 29 quietly fixed this issue, and players were finally able to complete the quest normally. If you’re playing on the latest version, this step should now work as intended.
Workarounds If the Quest Still Feels Bugged
Before the fix, players got creative, and some of those tricks are still useful if your quest behaves strangely.
One confirmed workaround involved teleporting above I.R.I.S. and using a teleport drop item to descend directly onto her location. After doing this, some players reported that the interaction suddenly worked and the quest progressed as normal.
Another important thing to note is that Wuthering Waves sometimes requires specific positioning or reloads to refresh NPC states. If dialogue doesn’t appear, teleporting away, reloading the area, or approaching from a different angle can genuinely make a difference.
If nothing works, reporting the issue to Kuro Games is still recommended, as multiple quests in 3.0 had soft-lock issues depending on player progression order.
Final Thoughts
Final Reverberation is one of those quests that perfectly captures both the mystery and the occasional frustration of Wuthering Waves’ quest design.
Between hidden triggers, previously bugged steps, and NPC interactions that don’t always behave the way you expect, it’s no surprise so many players thought their save was broken. Thankfully, with the right progression order and the fixes rolled out since 3.0, the quest is now fully completable and well worth seeing through to the end.
And if finishing this quest sends you straight back into exploration mode around Lahai Roi, you’ll probably run into route construction sooner rather than later. When that happens, check out our guide on How to Get Compressed Bedrock in Wuthering Waves, which breaks down where to farm it, which enemies drop it, and how to grind it efficiently without burning yourself out. Think of it as the practical follow-up after surviving one of the game’s most confusing questlines.
If you’ve been exploring Lahai Roi in Wuthering Waves v3.0, you’ve probably noticed something shiny, and not just the loot drops. Compressed Bedrock is one of the key materials for the Operation: Frontier Renewal permanent event, where players reconstruct routes, unlock shortcuts, and generally make the world a little easier to explore.
Unlike other crafting materials, Compressed Bedrock is mostly earned by fighting enemies and completing specific challenges, so it’s a little more “hands-on” than just mining rocks or clicking chests.
This guide walks you through exactly where to find Compressed Bedrock, which enemies drop it, how to farm it efficiently, and what to do with it once your inventory is full of these heavy, valuable chunks of rock.
How to Get Compressed Bedrock
Here’s a video on how to get the Compressed Bedrock and track enemies that drop it for their location in Wuthering Waves.
Farming enemies in Lahai Roi is the most straightforward way to collect Compressed Bedrock. After completing the quest Fire It Up! Route Constructor!
Rovers unlock the Operation: Frontier Renewal event tab. On the event page, select Compressed Bedrock to view target enemy groups: Exoswarm, Roya Outcasts, and Clamoring TDs. These groups are automatically highlighted on your map, making farming much easier.
Enemies that drop Compressed Bedrock include Twin Nova — Nebulous Cannon, Flora Reindeer, Mining Reindeer, Ironhoof, Spacetrek Explorer, Sabercat Reaver, Windlash Coleoid, Flora Drone, Geospider S4, Zip Zap, and Tremor Warrior. Simply roam the areas, defeat these enemies, and watch your stash of Compressed Bedrock grow.
Keep in mind, enemies in Tacet Fields and Tacet Discord Nests don’t drop this material, so focus on the overworld zones. Tacet Fields DO DROP Compressed Bedrock, but you’ll only receive it if you collect the rewards at the end of the encounter.
Challenge Void Storm Zones
Another reliable source is Void Storm Zones. These repeatable daily challenges reward Compressed Bedrock when you complete them, but be warned: the enemies are tough.
You can only claim rewards from two Void Storm Zones per day (only Void Storms II and IV drop bedrock), regardless of which ones you choose. Think of it as a daily high-stakes farm, get your best team ready, because skipping mechanics here means fewer rocks for your construction goals.
Re-Fight the Voidworm
After completing Chapter 3, Act 1: What Burns Beneath Frostlands, the Voidworm becomes a daily target in Mawburrow Desert. Fighting it provides a hefty chunk of Compressed Bedrock, making this encounter one of the fastest ways to boost your stockpile if you’re grinding materials for multiple route constructions.
Effects and How to Use Compressed Bedrock
Compressed Bedrock is classified as a valuable with rarity 4. Its primary purpose is to repair and construct routes in the Operation: Frontier Renewal permanent event. Using this material allows Rovers to expand pathways, open shortcuts, and make exploration of Lahai Roi much more manageable. Some routes need only a small amount of Bedrock, while others require thousands, so patience is key.
Approach any route construction point, check the materials required, and contribute your Compressed Bedrock. A short cutscene plays, showing your roads being rebuilt, which is both satisfying and practical. The best strategy is to farm steadily across multiple sessions rather than trying to clear everything in one marathon grind.
Farming Tips and Team Recommendations
Efficiency is everything when farming Compressed Bedrock. Use AoE-focused teams to clear enemy packs quickly, and consider including one ranged character to handle evasive enemies like Flora Drone. For F2P players, prioritize crowd-control skills to handle large groups without losing time. If you’ve got the luxury of high-level 5-star AoE units, coordinate buffs and debuffs for maximum multi-target damage.
Also, rotate your farming locations: if one enemy group is cleared and no new targets appear, teleport to another highlighted group or wait for daily respawns. This keeps your farming runs smooth and minimizes downtime.
Wrap-Up
Compressed Bedrock might look like just another crafting material, but in Wuthering Waves, it’s a key piece of the puzzle for unlocking the full exploration potential of Lahai Roi.
From defeating overworld enemies to daily Void Storms and the formidable Voidworm, there’s no shortage of ways to stockpile this essential resource. Use it wisely to rebuild routes, unlock new pathways, and make your exploration of the region as smooth as possible.
And hey, if you’ve had enough of grinding rocks and enemies for a while, why not switch gears, literally, and check out our All Motorbike Racing Challenges in Wuthering Waves guide? It covers every high-speed race in the Rebirth Uplands, tips for tight timers, and tricks to keep your Expedition Motorcycle flying past the finish line without losing your sanity.
It’s the perfect break from farming while still keeping your Wuthering Waves adventures action-packed.
If you thought Wuthering Waves was all about combat, exploration, and emotional side quests, Lahai-Roi says otherwise. Hidden across the Rebirth Uplands are motorbike racing challenges that test how well you can actually control the Expedition Motorcycle. These races are short, intense, and surprisingly strict with their time limits, especially if you’re aiming for full rewards.
There are three motorbike racing challenges in total, and while the objective is always the same, reach the finish line before time runs out, the routes, mechanics, and difficulty ramp up fast. I’ll walk you through where each race is, what makes it tricky, and how people are actually beating the tight timers without losing their sanity.
How Motorbike Racing Challenges Work
All three races require you to reach the finish line within a specific time limit. Clearing the challenge unlocks rewards like crafting materials and chests, but hitting the optimal time is what gets you everything. The game doesn’t do a great job explaining bike mechanics, which is why many players struggle at first, especially on the infamous 1:20 requirement.
Each race starts when you approach the starting line and interact with it. Once the timer begins, it’s all about managing boost energy, drifting efficiently, and not wiping out on corners.
Rebirth Uplands Race 1 – Ribcage Bends
Here’s a video on how to beat Rebirth Uplands Race 1 at Ribcage Bends in the Motorbike Racing Challenge of Wuthering Waves.
The first motorbike race is located in Ribcage Bends within the Rebirth Uplands. This is the introduction race and is fairly forgiving compared to the others, but it still teaches you an important lesson right away: speed alone isn’t enough.
Once you arrive at the starting line, interact with it to begin the challenge and push straight for the finish. One thing many players miss here is that there are three chests at the starting area. Make sure you grab them after completing the race so you don’t accidentally leave rewards behind.
This race is mostly about learning the flow of boost usage and corners, so don’t stress if you barely clear it on your first attempt.
Rebirth Uplands Race 2 – Roya Frostlands
Here’s a video on how to beat Rebirth Uplands Race 2 in Roya Frostlands for the Motorbike Racing Challenge in Wuthering Waves.
The second race takes place in Roya Frostlands, still within the Rebirth Uplands, and this is where most players hit a wall. To guarantee full rewards, you’re aiming for a finish time of around 1:14, and anything close to 1:20 can feel brutally tight.
This track has longer straightaways mixed with sharper turns, which means boost management suddenly matters a lot more. Players who try to brute-force it by holding boost the entire time usually run out of energy before the final stretch.
A lot of people struggled here until they realized drifting isn’t just for turning. Drifting and then reactivating boost actually helps recover energy. Some players also found it much easier after going into Settings > Gameplay and enabling all vehicle control toggles, allowing forward movement and boost to stay active without holding the buttons down.
Rebirth Uplands Race 3 – Golden Spiral
Here’s a video on how to beat Rebirth Uplands Race 3 at Golden Spiral in the Motorbike Racing Challenge in Wuthering Waves.
The final race is located near Golden Spiral, close to where the first race takes place, and it’s the most demanding of the three. This challenge requires you to complete two full laps, with an ideal finish time of roughly 2:12 if you want every reward.
Because of the lap requirement, stamina and boost efficiency matter more here than raw speed. If you burn all your energy early, the second lap becomes a slow, painful crawl. This is the race where mastering drift-boost recovery really pays off.
The track layout is familiar, but mistakes compound quickly over two laps, so clean turns matter more than risky shortcuts.
Tricks That Actually Work to Beat Motorbike Racing Challenges
A lot of players found creative ways to deal with the tight timers, especially for the second race. One commonly used trick is riding past the starting line first, turning around, and then hitting the start prompt while already at full speed. Because the bike continues moving during the countdown, you essentially get a rolling start and shave off precious seconds.
Others discovered that lightly drifting side to side when boost runs out helps recover stamina faster, allowing you to re-enter boost mode almost immediately. It’s not explained anywhere in-game, but once you get the rhythm down, the races feel far more manageable.
And yes, there’s also a semi-cheeky advantage if you have Lynae on your team. One of her talents increases the bike’s energy capacity, which makes maintaining boost significantly easier. It’s not required, but it definitely feels like cheating once you notice the difference.
Final Thoughts
The motorbike racing challenges in Wuthering Waves are deceptively tricky. On the surface, they’re just about hitting the finish line, but the boost management, tight turns, and lap requirements quickly turn them into a test of timing, stamina, and patience. Once you get the hang of drift-boost recovery, toggle your controls, and maybe even bring Lynae along for an energy advantage, they start to feel way more satisfying, and less like pure frustration.
And while you’re out in Lahai-Roi zipping through Rebirth Uplands, don’t forget there’s a quieter side to this world too. If you want to take a break from racing and experience a story that’s unexpectedly touching, check out our Return to Light Full Quest Guide in Wuthering Waves. It’s all about a little girl, and some stickers, pretty simple but rewarding!
Wuthering Waves has no shortage of flashy combat and big story moments, but every once in a while, it sneaks in a side quest that hits way harder than expected. Return to Light is one of those quests. On paper, it’s just about collecting stickers from a few camps. In reality, it’s a quiet, emotional side story tucked away in Fangspire Chasm that leaves you staring at your screen for a bit longer than planned.
This guide walks you through exactly how to unlock Return to Light, where to find every camp and sticker, what happens at the end, and all the rewards you’ll earn along the way.
How to Start the Return to Light Quest
Here’s a video on how to start the Return to Light quest in Wuthering Waves, showing Misha’s location.
To begin Return to Light, head to Fangspire Chasm, just west of Dawnship Fjord. You’ll find a small cluster of tents on elevated ground. Climb up the nearby stairs and look for a tent with a young girl named Misha inside. Talking to her immediately starts the quest, with no Union Level requirement at all.
Misha explains that she’s waiting for her mother and asks you to help collect Soliskin stickers scattered across nearby camps. That’s your cue that this “simple” side quest might not stay simple for long.
First Sticker Near Misha’s Tent
Here’s a video on the first Soliskin Sticker location near Misha’s tent to progress the Return to Light quest in Wuthering Waves.
Before heading anywhere else, circle around the left side of Misha’s tent. Lying on the ground is the first Soliskin sticker, which you can pick up immediately. This also subtly teaches you how the rest of the quest works: stickers don’t always show on the map unless you’re close enough.
First Camp: Two Stickers and Your First Fight
Here’s a video on where to find the two Soliskin Stickers at the first camp for the Return to Light quest in Wuthering Waves.
The first camp is located slightly northwest of Misha’s position, roughly between her tent and Ribcage Bends. As you approach, the sticker markers finally appear.
This camp is guarded by enemies, so you’ll need to clear them out first. One sticker is found on the ground-level camp area near a tent, while the second is higher up on the large central structure. Interact with the golden wall to scan it. Once you grab both, you’re free to move on.
Second Camp Near Ribcage Bends
Here’s a video on the Soliskin Sticker location at the second camp near Ribcage Bends for the Return to Light quest in Wuthering Waves.
The second camp sits just north of Ribcage Bends and is much simpler. After dealing with the enemies in the area, check the left side of the main tent to find the sticker. This one contains an important letter tied to Misha’s mother, hinting that the story is heading somewhere heavier than expected.
Third Camp Southeast of Startorch Academy
Here’s a video on the Soliskin Sticker locations at the third camp southeast of Startorch Academy for the Return to Light quest in Wuthering Waves.
This is where the quest ramps up a bit. Travel southeast of Startorch Academy, where the third camp is tucked under cliffs and higher structures.
One sticker is found on the roof of a large tent. Use the nearby grapple to launch yourself up and scan it. The second sticker is on a tall structure guarded by enemies. Climb around the back, and you’ll spot it near a bird’s nest. Once both stickers are collected, you’ll immediately be attacked by Outcasts, so be ready for a fight.
Fourth Camp Near Spacetrek Observatory
Here’s a video on the Soliskin Sticker location at the fourth camp near Spacetrek Observatory for the Return to Light quest in Wuthering Waves.
The fourth camp is located southeast of the Spacetrek Observatory in Giant’s Gaze. It’s positioned on elevated terrain, so you may need to use a combination of climbing and bike movement to reach it.
There’s only one sticker here, located on the right side of the tent. Two Outcasts guard it, so clear them out before scanning the sticker safely.
Fifth Camp and Final Sticker
Here’s a video on the fifth camp and final Soliskin Sticker location to finish the Return to Light quest in Wuthering Waves.
The final camp is found just north of the Spacetrek Observatory, very close to a Resonance Beacon. This one’s mercifully straightforward. Walk up to the tent, scan the sticker on its right side, and you’re officially done collecting all eight Soliskin stickers.
Returning to Misha and Passing Time
Here’s a video on returning to Misha and passing time to fully complete the Return to Light quest in Wuthering Waves.
Head back to Misha’s tent and give her all the stickers, along with the note you discovered earlier. She thanks you and asks you to come back one day later. Use the in-game time skip feature to pass a day, then return to her camp.
When you arrive, things feel… different. Four Soliskins are standing around, and Misha herself is nowhere to be found. Interact with the table to read Misha’s message, which reveals that she has passed on to reunite with her mother.
A short cutscene plays where two familiar Soliskins wave goodbye as Rover quietly comments that they look familiar. No combat, no dialogue choices, just a soft emotional gut punch to close the quest.
Quest Details and Rewards
Return to Light was introduced in Version 3.0 and takes place primarily in Fangspire Chasm. There’s no Union Level requirement, making it easy to miss early on if you’re rushing content.
Completing the quest rewards you with 300 Union EXP, 30 Astrites, 20,000 Shell Credits, and two Advanced Energy Cores. You’ll also receive the Studious Soliskin Sticker, which can be used to decorate your Expedition Motorcycle. Some versions of the reward pool also include the Paper Soliskin: Sweet Misha Trophy, making this quest both emotionally and cosmetically memorable.
Final Thoughts
Return to Light is one of those side quests that quietly sticks with you long after it’s over. It starts off feeling like a simple sticker hunt, then slowly turns into a soft, emotional story that reminds you Wuthering Waves isn’t just about combat and builds. If you’re the kind of player who enjoys environmental storytelling and bittersweet endings, this quest is absolutely worth doing at least once.
And once you’re done wiping away the emotional damage and heading back into combat-heavy content, it’s a good time to optimize your team again. If you pulled Lynae in Version 3.0 or are thinking about using her more seriously, check out our Wuthering Waves: Lynae Guide, including her best builds & more, where we break down how to get the most out of her Spectro kit, team buffs, and sub-DPS potential.
She pairs incredibly well with exploration-heavy gameplay like this quest, especially when you want smooth fights without slowing down your momentum.
Side quests for the feels, optimized builds for the grind, that’s the Wuthering Waves loop at its best.
The new weekly trials for ARC Raiders just dropped, and this one has already annoyed a lot of people: damaging Rocketeers with snowballs. On paper, it sounds goofy. In practice, it can be insanely time-consuming if you don’t know what you’re doing.
I managed to pelt Rocketeers with 177 snowballs as a solo Raider, which landed me a ridiculous 44,250 points in a single run. That’s more than enough to push leaderboard progress and actually make this trial worth the pain. This guide breaks down exactly how I did it, the safest locations, and two different methods depending on whether or not you have Showstoppers.
If you want points, efficiency, and fewer deaths to rockets, this is the way to do it.
How the Snowball Trial Actually Works
This trial only appears during Cold Snap conditions, and while you don’t technically need Cold Snap active to throw snowballs, you absolutely want a 2x modifier like Locked Gate to make the score worthwhile. Rocketeers are tanky, loud, and attract other Raiders, so the whole goal here is to disable one safely and dump as many snowballs into it as humanly possible before someone ruins your fun.
The secret is preparation. This is not something you want to wing in your scoring run.
Snowball Farming Setup (Do This First)
There are two methods for completing this challenge. One uses Showstoppers and is faster but riskier. The other only requires an Anvil or Renegade and a bit of patience. No matter which method you use, the prep work is the same.
You should dedicate one full raid purely to farming snowballs. Farming snowballs is slow, especially if you only have access to a single snow pile. You can farm one snowball every six seconds, which means filling an MK2 loot bag with around 100 snowballs takes roughly ten minutes. Once you factor in freezing and defrosting, you’re realistically looking at about fifteen minutes total.
Here’s a video on the best snowball farming setup in ARC Raiders, showing how to collect snowballs fast and score high in the “Throw Snowballs on Rocketeers” trial.
You can speed this up by running between multiple snow piles if they’re close together, but either way, this part is a grind. That’s why you should never try to farm snowballs in the same raid where you’re going for your high score.
There is a huge quality-of-life trick here too. Snow piles under roof overhangs let you farm without freezing at all. Ruby Residence on Dam Battlegrounds has one of these, and Pale Apartments might as well, though Ruby is the confirmed spot. You can sit there nonstop and fill your inventory without ever needing to defrost, which saves a ton of time.
Once your bag is full, extract, reset, and then go for your scoring run.
Best Map to Do This On
You can technically do this on any Cold Snap map, but avoid Buried City. There are fewer Rocketeers there, and the ones that do spawn are more likely to get blown up by other Raiders before you finish farming points.
Blue Gate is by far the best option. It consistently has three to four Rocketeers flying around, good cover, and Raider hatches close enough to let you leave at the last second. Dam Battlegrounds is also excellent, especially for the safer building method I’ll explain below.
Equipment You’ll Want
Best equipment (Showstoppers / Anvil or Renegade) to farm snowballs for the Throw Snowballs on Rocketeers trial in ARC Raiders.
If you have Showstoppers, bring more than you think you need. It usually takes multiple throws to properly disable a Rocketeer, and missed throws or partial hits happen more often than you’d expect.
If you don’t have Showstoppers, bring a heavy weapon. The Anvil is ideal, but the Renegade works just fine. Both are strong enough to destroy Rocketeer thrusters without killing the whole unit.
Healing items are mandatory. Even when played safely, you’re probably eating a rocket or two during setup.
Walkthrough: The Showstopper Method
Here’s a video on the Showstopper method in ARC Raiders, showing how to stun the Rocketeer and easily complete the “Throw Snowballs on Rocketeers” trial.
Once you spawn in, head straight to the nearest Rocketeer patrol area and find solid cover. You want a place where you can warm up, break line of sight, and avoid getting rocketed while frozen.
Clear out nearby enemies first, then aggro the Rocketeer. Stay in cover until it gets close, then start throwing Showstoppers. When done correctly, the Rocketeer will flip over, land upside down, and become fully paralyzed on the ground.
This is the ideal state. It can’t take off, it doesn’t reposition, and it’s basically a very angry snowball magnet. Just make sure you stay behind it, because it can still fire rockets from the front side.
Once it’s down, unload your entire inventory of snowballs into it. If you can pelt it while staying in cover, even better, since you won’t need to pause to warm up.
Time matters here. The longer a Rocketeer sits paralyzed, the higher the chance another Raider shows up and destroys it. Don’t be slow. Dump snowballs fast.
After you run dry, farm more snowballs nearby and move on to your second Rocketeer. The village houses on Blue Gate are perfect for this. Rocketeers patrol nearby, and there’s a Raider hatch close enough to extract at the very last second.
Walkthrough: No Showstoppers Required
Here’s a video on the no-Showstopper method in ARC Raiders, explaining how to shoot the Rocketeer’s two front thrusters to knock it down and complete the “Throw Snowballs on Rocketeers” trial.
If you don’t have Showstoppers, the goal is simple but precise. You need to destroy only the two front thrusters on the Rocketeer.
An Anvil will take a couple of cylinders per thruster. A Renegade will take a magazine or two. Once both thrusters are destroyed, the Rocketeer will fall and become paralyzed exactly like it does with Showstoppers.
Be careful not to overdamage it. If the Rocketeer takes too much damage beyond the thrusters, it can explode when it hits the ground, ending your run instantly.
Once it’s down, everything else plays out the same. Get behind or beside it and dump your remaining snowballs. Stay close to a Raider hatch so you can extract at the very end without risking your score.
The safest non-cheese method is using a small building with two exits. Aggro the Rocketeer from far away to get a short damage window, then rotate between exits. Peek, shoot the thruster, duck inside, rotate, repeat. The Rocketeer will fire every time you peek, so patience matters.
Once both thrusters are gone, it’s helpless. You can even finish it with a pickaxe if you really want to.
The Dam Battlegrounds Building Method
Here’s the Dam Battlegrounds Building Method location shown in map, so you can complete the Throw Snowballs on Rocketeers trial easily in ARC Raiders with high score!
On Dam Battlegrounds, there’s a specific building near the swamp that makes this trial absurdly easy. It has a snow pile right next to the entrance, so you can farm five to seven snowballs, run inside, defrost, and repeat without freezing.
Here’s a video on the Dam Battlegrounds building method in ARC Raiders, explaining how to safely and easily complete the “Throw Snowballs on Rocketeers” trial without getting overwhelmed.
Rocketeers almost always patrol the nearby swamp. If you see one in the distance, just shoot it once and it’ll come straight to you. The building also has holes in the roof, which means if the Rocketeer flies overhead, you can pelt it safely from inside.
There’s an extract nearby too, making it incredibly easy to finish the trial and leave immediately. Just be cautious of other Raiders, since this area sees a lot of activity. When I did this, I stayed stealthy and avoided unnecessary fights until the Rocketeer was disabled.
Extra Tips That Matter
To make sure a Rocketeer falls on its back when using Showstoppers, always target the front two thrusters. This massively increases the chance of a clean disable.
This week’s leaderboard is brutal. 300k+ is basically the requirement for 2x promo, and as usual, trios and sweat squads are clogging the top ranks. Honestly, these trials would feel way better with a solos-only leaderboard.
Cold Snap conditions rotate, so you may need to swap maps. The good news is that when Cold Snap hits Dam Battlegrounds or Blue Gate, it often sticks around longer than usual. One of my runs lasted nearly two hours, which gives you plenty of time to set up properly.
Wrap-Up
This trial looks dumb, sounds annoying, and turns out to be one of the best point farms of the week if you approach it correctly. Spend one run farming snowballs, come in prepared, disable Rocketeers safely, and dump everything you’ve got before anyone else shows up.
If you do it right, you’ll watch your score skyrocket as you head back to Speranza, wondering why throwing snowballs at military hardware is somehow peak ARC Raiders gameplay.
If this guide helped you finish the trial or save your sanity, you already know you did it right.
Silver Superstars League 4 is now live in FC 26, and you can grind the objective set for some amazing rewards.
The mode requires you to play with Silver cards, and you have to use at least three Silver World Tour Icons. Let's look at all the tasks and rewards you can get from completing the full objective.
FC 26 Silver Superstars League 4 objective guide
The Silver Superstars League 4 event has 13 tasks to complete. The table below contains all the information you need to complete the full set.
Task
How to Complete
Rewards
Play 1
Play 1 match in the World Tour Silver Superstars League 4
Rare Silver Players Pack
Score 2
Score 2 goals in one match in the World Tour Silver Superstars League 4
Stadium Theme
Score 6
Score 6 goals in the World Tour Silver Superstars League 4
3 81+ Rare Gold Players Pack
Assist 4
Assist 4 goals in the World Tour Silver Superstars League 4
7 83+ Rare Gold Players Pack
Score 10
Score 10 goals in the World Tour Silver Superstars League 4
Badge Item
Play 5
Play 5 matches in the World Tour Silver Superstars League 4
Stadium Item
Play 10
Play 10 matches in the World Tour Silver Superstars League 4
3 83+ Rare Gold Players Pack
Play 20
Play 20 matches in the World Tour Silver Superstars League 4
10 81+ Rare Gold Players Pack
Play 25
Play 25 matches in the World Tour Silver Superstars League 4
10 82+ Rare Gold Players Pack
Win 5
Win 5 matches in the World Tour Silver Superstars League 4
3 84+ Rare Gold Players Pack
Win 10
Win 10 matches in the World Tour Silver Superstars League 4
3 85+ Rare Gold Players Pack
Win 15
Win 15 matches in the World Tour Silver Superstars League 4
2 84+ Rare Gold Players Pack and CB++ Evolution
Win 20
Win 20 matches in the World Tour Silver Superstars League 4
Tiki Taka+ Evolution
Completing the full set will get you a 5x 86+ Rare Gold Players Pack. The guaranteed walkout pack could be great to pen when the TOTY promo goes live later this week. The Tiki Taka+ evolution is also strong as it's one of the best playstyles to use in the current meta.
However, the remaining rewards could have been better given the effort required to complete the set objective.
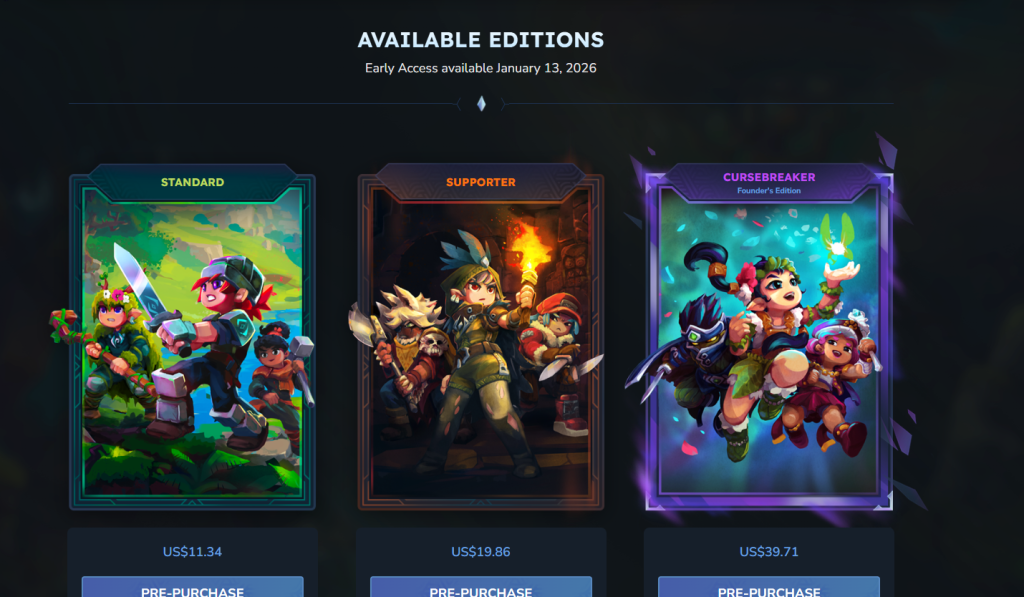
Hytale is about to go live on early access, and you can play the game if you're on a PC.
The upcoming game was on the chopping block last year when Riot Games canceled the project. Since then, things have improved for the better as Hypixel founder Simon Collins-Laflamme managed to secure the publishing rights.
While the early access isn't available for free, joining it is pretty simple.
Hytale's early access version won't be available on Steam. While the game could appear on Steam in the future, that's not going to happen anytime soon. If you want to start playing theearly access on Jan. 13, your only option is the game's official website.
Screenshot by Destructoid
There are three different editions available for purchase. All three editions guarantee you instant access to the game, along with a bunch of goodies. But that's pretty much all you need to do. Go to the website, select your edition, confirm your purchase, and you're good to go.
Hytale's early access release date
Hytale is releasing worldwide on Jan. 13 (in early access). It's only going to be available on PC, and you can only get your copy from the website. As of writing, there's no confirmation about Steam availability, likely because of the ongoing standalone early access process.
All Hytale editions and what they offer
Standard
Game access
Username Reservation Lock
Exclusive Standard Cape
Forest Guardian Set
Voyager Set
Savanna Scout Set
Supporter
Game access
Username Reservation Lock
Exclusive Standard Cape
Forest Guardian Set
Voyager Set
Savanna Scout Set
Exclusive Supporter Capes
Featherbound Set
Scavenger Set
Arctic Scout Set
Explorer Goggles
Cursebreaker
Game access
Username Reservation Lock
Exclusive Standard Cape
Forest Guardian Set
Voyager Set
Savanna Scout Set
Exclusive Supporter Capes
Featherbound Set
Scavenger Set
Arctic Scout Set
Explorer Goggles
Exclusive Cursebreaker Capes
Hope of Gaia Set
Void Hero Set
Pop Star Set
Voidbearer Set
All three editions are expected to receive more content in the days to come, but the exact items are yet to be revealed.
One of the essential aspects of the endgame in StarRupture is cooking different food items, and Sulheart is required for several recipes.
On its own, Sulheart has no use. However, you'll need it for the preparation of different food items. Finding the resource is pretty tricky, and this guide will make your life easier.
Sulheart is found in Sulfur fields spread across Arcadia-7, and you can farm both resources there. However, you'll need to be extremely careful.
Image via SRDB. Remix by Destructoid
The air around Sulfur fields is highly toxic, and they're corrosive in nature. If you stay around it for a few seconds, your health will start to deplete. Staying in the air will kill you. One strategy is to wait for Ruptures, when the surrounding conditions will make it easier for you to obtain Sulheart. However, that's not reliable.
Screenshot by Destructoid
Instead, carry items that can heal you and also raise your corrosion resistance. You'll want to then run into the Sulfur fields, grab Sulheart, and jump out. If your health drops significantly, you'll want to restore it and repeat the process. Do so a few times, and you'll have the Sulheart you need.
All Sulheart recipes in StarRupture
The table below lists all cooking recipes that require Sulheart.
Dreadmyst Online is now live on Steam, and you can try out different classes for your adventure.
Picking your class is the first task when you create your character. The current build offers four classes, and you can pick any of your choosing. While all classes have their respective pros and cons, some feel slightly better than the rest.
This guide will give you a brief idea about which class you should pick.
The four classes of Dreadmyst Online have different playstyles. They're Cleric, Mage, Paladin, and Ranger. I have used two tiers to separate the different classes.
S-tier classes are the best choices in the current meta due to their number of abilities, ease of play, and more.
A-tier classes are decent choices, but their in-game difficulty makes them a slightly weaker choice.
Image via dreadmyst.com
S-tier
Mage: The Mage class is the hardest class in the game. While you get a decent range, the Mage will take a lot of time to learn and master. However, its in-game abilities are powerful. Spells like Bind Spirit allow you to temporarily disable enemy targets, while Deep Freeze can trap them in a block of ice. Abilities like Inferno and Fireball will do direct damage, while Boon of Clairvoyance will raise the critical rating.
Paladin: The Paladin class might feel a bit 'boring' to master, but it's the best beginner-friendly choice. The Paladin has numerous abilities that either deal direct damage to enemies or provide heals. Hence, I like this class more than Cleric. While the Cleric heals better, the Paladin's balanced kit feels better to use in most situations. You can use the Paladin as a damage dealer, or you can play the role of a support with abilities like Blessing of Defense and Blessing of Champions.
A-tier
Ranger: If you like keeping a distance from your enemies but don't want to go through the complexities of the Mage class, the Ranger is a good alternate. In terms of attacking potential, I rate the Mage class higher. However, the Ranger is easier to learn and master. Its abilities are relatively more straightforward to understand. Your main job is to deal damage and clear as many enemies as you can. Most of the spells, like Aimed Shot, Arrow Flurry, Blindside, etc., either deal direct damage or debuff the enemies. You also get several moves that trigger elemental damage as a bonus.
Cleric: This class' usage potential goes up every time you're playing a group. Unless you're playing as a Paladin, you're going to need heals against harder enemies. Having a Cleric makes everyone's life easier as they can sustainably heal you when your health is low.
Quarantine Zone: The Last Check is expected to go live in the second full week of January, and it could be an interesting title to grab if you're into the undead.
Published by Devolver Digital, the game will put you in charge of a failing city on the brink of collapse.
Quarantine Zone: The Last Check will go live globally on Monday, Jan. 12. There's no console release as it will be a PC exclusive, as confirmed by Devolver. The following countdown will expire once the game goes live.
[hurrytimer id="1164047"]
The countdown is based on the following timings.
10am PT
12pm CT
1pm ET
6pm UTC
7pm CET
The timings are based on the information available on SteamDB, which was last updated on Jan. 10. This is the schedule I am expecting Devolver to follow for launch. If there are any changes, I will update the guide duly to reflect the new information.
What to expect from Quarantine Zone: The Last Check
Quarantine Zone: The Last Check puts you in charge of your own check post, which is arguably humanity's last hope. Your key job is to take in survivors and help them live past the horrors of the undead. However, the most challenging task is to segregate the infected from the innocent. One outbreak can potentially become an unfathomable disaster.
However, you can also use the freshly turned undead to harvest their parts and unlock different rewards. The survivor population will consistently grow, so you'll have to manage the available resources. A demo is already available on Steam for free if you're interested in checking out the core gameplay.
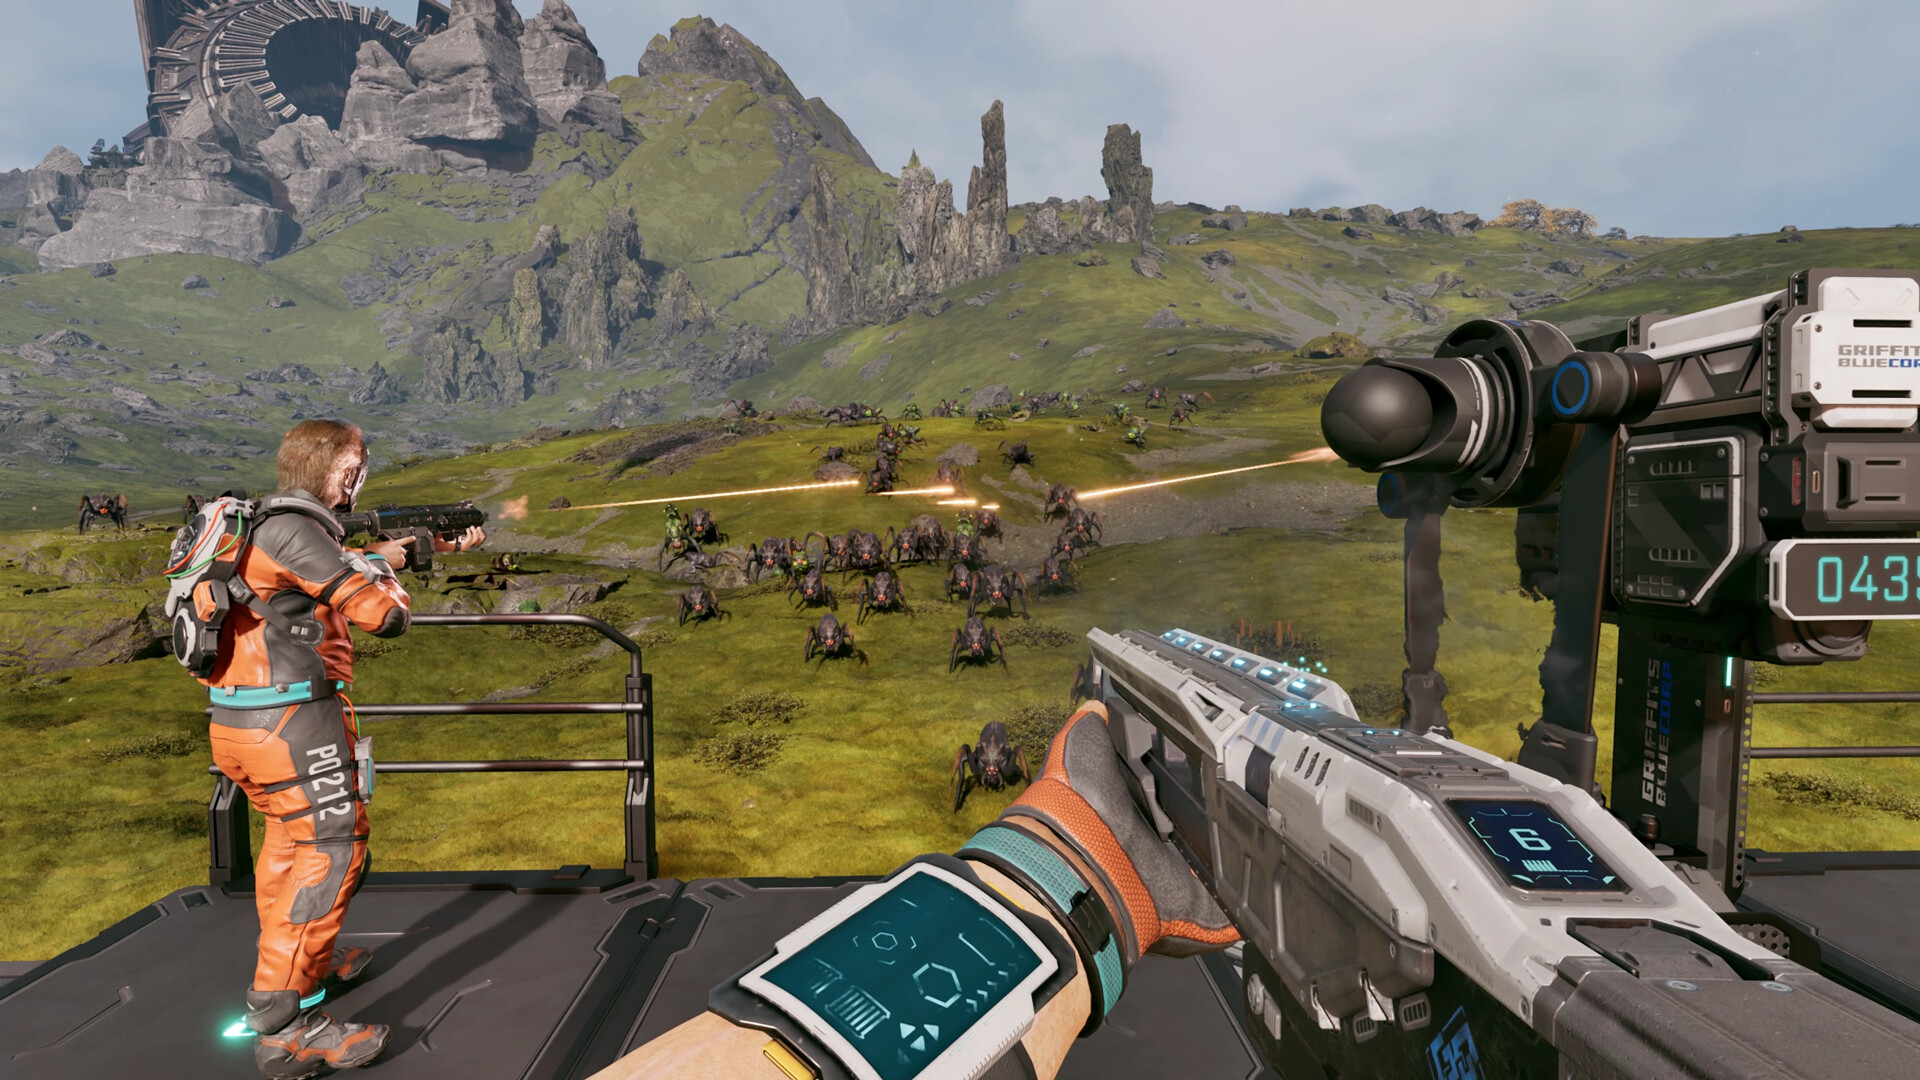
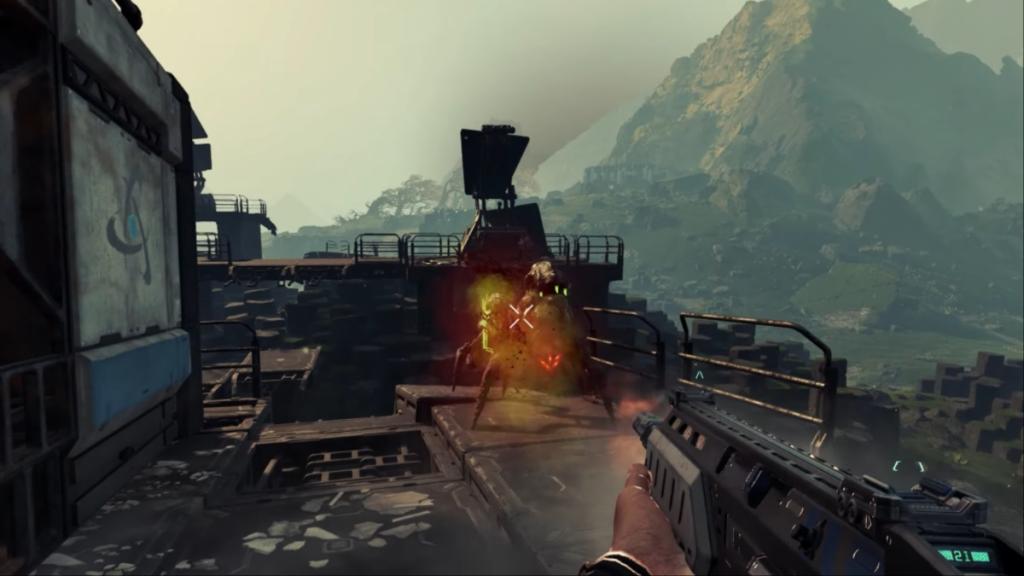
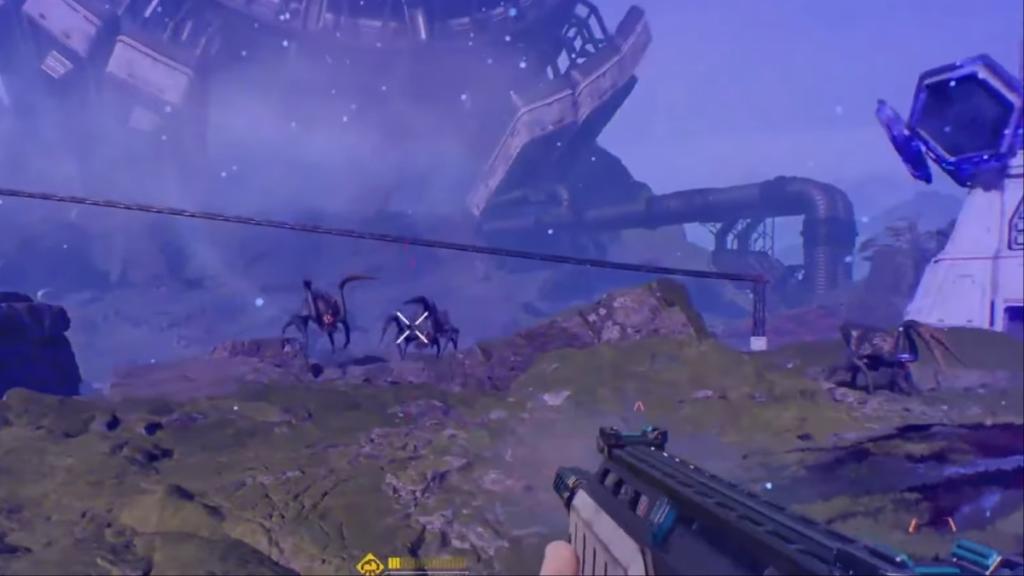
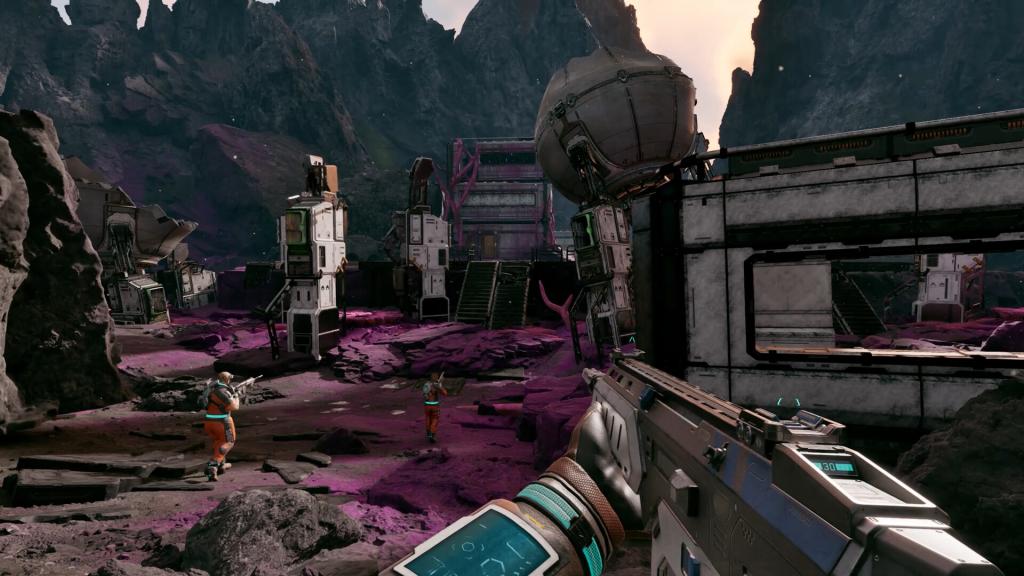
StarRupture's early access build has plenty of bugs in Arcadia-7, and I am not talking about software glitches.
You're not alone on the alien planet, as various bugs will aim to make your life miserable. They will attack your base, and you'll also find them when traveling from one point to another. Thankfully, every type of bug you encounter has specific weaknesses that you can exploit.
While all enemies currently available in StarRupture are bugs of some kind, they come in different shapes and sizes and require different approaches to handle. Most of them will appear in swarms, making it harder for you to take them down. All species come in different sizes, and most of them have separate movement speeds and attack patterns.
Flinger
Image via Creepy Jar
These are one of the nastiest bug types as they can attack you from a distance. You'll first need to keep track of the source of the blob that they shoot at you. Dodge the blob, and close the distance as much as you can.
They're really squishy, and a few bullets will usually take care of them. Try to have a steady aim since they move a lot. Once you're close, Flingers are pretty easy to take down. They're more dangerous when they appear in swarms.
Slashers
Screenshot by Destructoid
Slashers are aggressive bugs that resemble larger black-widows. They move rapidly and jump at you from a distance. An effective method is to dodge the jumps as much as you can.
Their mouth is their weak spot, but it can be tough to aim when you also have to dodge the attacks. If they latch onto you, they will deal plenty of damage. Hence, maintaining distance is paramount. Thankfully, their outer armors aren't the best.
Younger Slashers
Similar to Slashers but younger in age. They are smaller in size and have a grey trim around their bodies. You can shoot them as they're easy to take down.
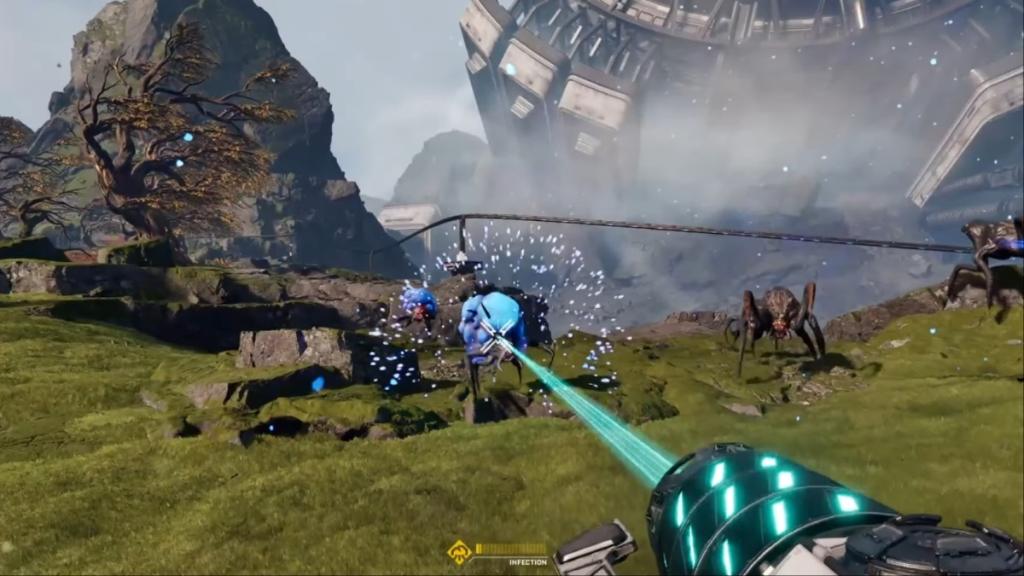
Exploder
Screenshot by Destructoid
These blue bugs have growing sacs that ultimately explode to deal plenty of damage. The explosion also stops your shields from working. You can guess when they're about to attack, as their sac will start glowing.
The first task is to stay away from the range of the explosion. If that's not possible, move out of the explosion's immediate radius. To take down the bugs, shoot the sac, but also maintain distance.
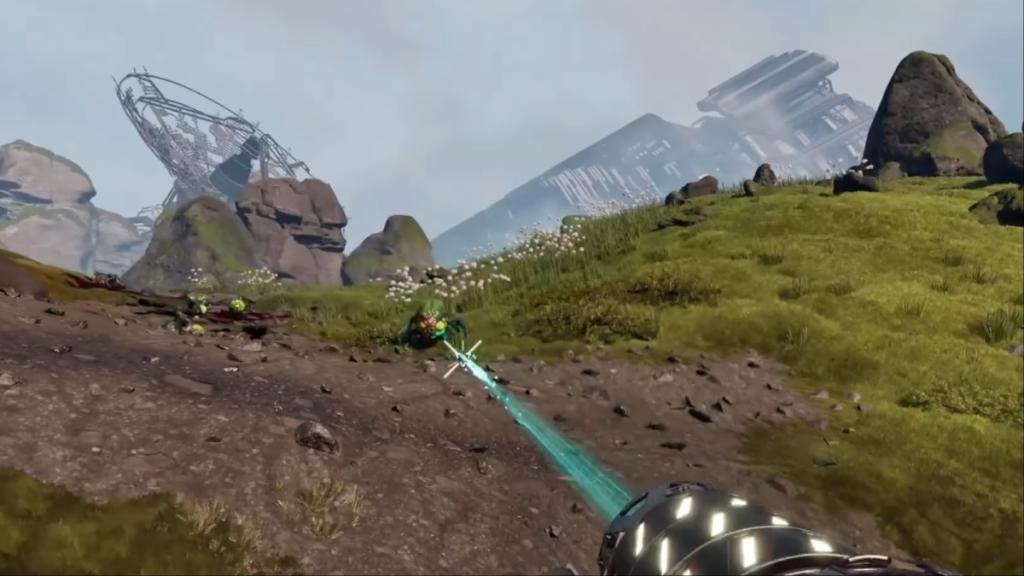
Spitter
Screenshot by Destructoid
Like Exploders, Spitters also have sacs, but green in color. Instead of exploding, the sacs grow, and the bug will spit the green matter on you. Be on the move to avoid the attack, and keep shooting at the sac.
Additionally, you can also come across the Goliath, which is the hardest enemy. A separate guide for it is in work. You can find it in areas with rare loot, like the Redleaf keycard spawn locations.
StarRupture is attracting plenty of attention from PC gamers since its early access debut, and many have been wondering about a potential console launch.
After all, StarRupture's built-in gameplay system appears to be quite feasible on a console, as most of its controls can be adapted to a controller. While the survival-slash-factory builder game isn't available on consoles at the time of writing, it could eventually arrive on Xbox and PlayStation.
StarRupture PS5 and Xbox Series X|S release explained
As of writing, there's no official confirmation on when, and if, we will have a console launch. However, we should eventually be able to play StarRupture on consoles. The game is developed and published by Creepy Jar, and some of their earlier titles, like Green Hell, were released on PC first and arrived on consoles later.
Moreover, StarRupture has also been released on early access. Games that launch this way tend to be PC-exclusive at first. Even bigger titles like Baldur's Gate 3 have followed the same pattern. It's almost certain that StarRupture, if it arrives on consoles, will do so after the end of the early access period has wrapped up.
Image via Creepy Jar
The game is expected to remain in early access for about a year. If Creepy Jar stays holds anticipated timeline, we could expect a console port in the early months of 2027, meaning it's doubtful that there will be a console port on old-gen, but this is speculation.
We should be getting more information down the line once StarRupture receives a few updates as part of the early access. For now, your only option to access Arcadia-7 is by having a PC that meets the requirements.
The Net Results Evolution brings a new goalie upgrade option for FC 26 players, and you can improve a chosen card for free.
The new evolution provides new playstyles, roles, and boosts to stats (overall included). There are plenty of great options to consider, so let's look at the best choices based on the requirements and the offered upgrades.
Here are the requirements for Net Results Evolution in FC 26.
Overall: Max 85
PlayStyle: Max 10
Not Rarity: World Tour Silver Stars
Position: GK
FC 26 Net Results Evolution upgrades
The Net Results has only two levels of upgrades. To obtain the boosts, you’ll need to complete specific tasks.
Level 1 upgrades
Overall: +7|86
Diving: +10|86
Handling: +7|85
Kicking: +7|84
PlayStyles: Footwork|7
Level 2 upgrades
Reflexes: +10|87
Speed: +7|60
Positioning: +10|86
PlayStyles: Far Reach, Deflector|7
Roles: Sweeper Keeper++
Level 1 upgrade requirements
Play 3 matches in Squad Battles on min. Semi-Pro difficulty (or Rivals/Champions/Live Events) using your active EVO player in game
Level 2 upgrade requirements
Play 2 matches in Squad Battles on min Semi-Pro difficulty (or Rivals/Champions/Live Events) using your active EVO player in game.
Win 1 match in Squad Battles on min Semi-Pro difficulty (or Rivals/Champions/Live Events) using your active EVO player in game.
Best players for Net Results Evolution in FC 26
You can include a wide variety of items in this evolution. Cards that can take benefits from the stat upgrades without hitting the cap have been considered.
Manuel Neuer
Ederson
Bounou
Chevalier
Svilar
Diogo Costa
Emiliano Martinez
David De Gea
Aaron Winter Wildcards
These are arguably some of the best options you can include in this evolution. Since they can’t go above the overall of 86, you can chain them in future goalkeeper evolutions.
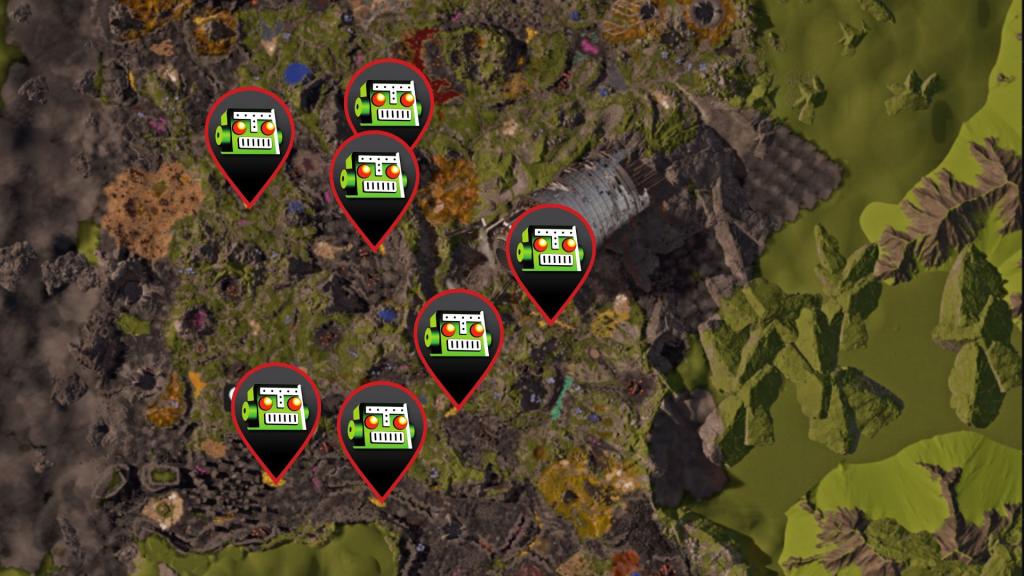
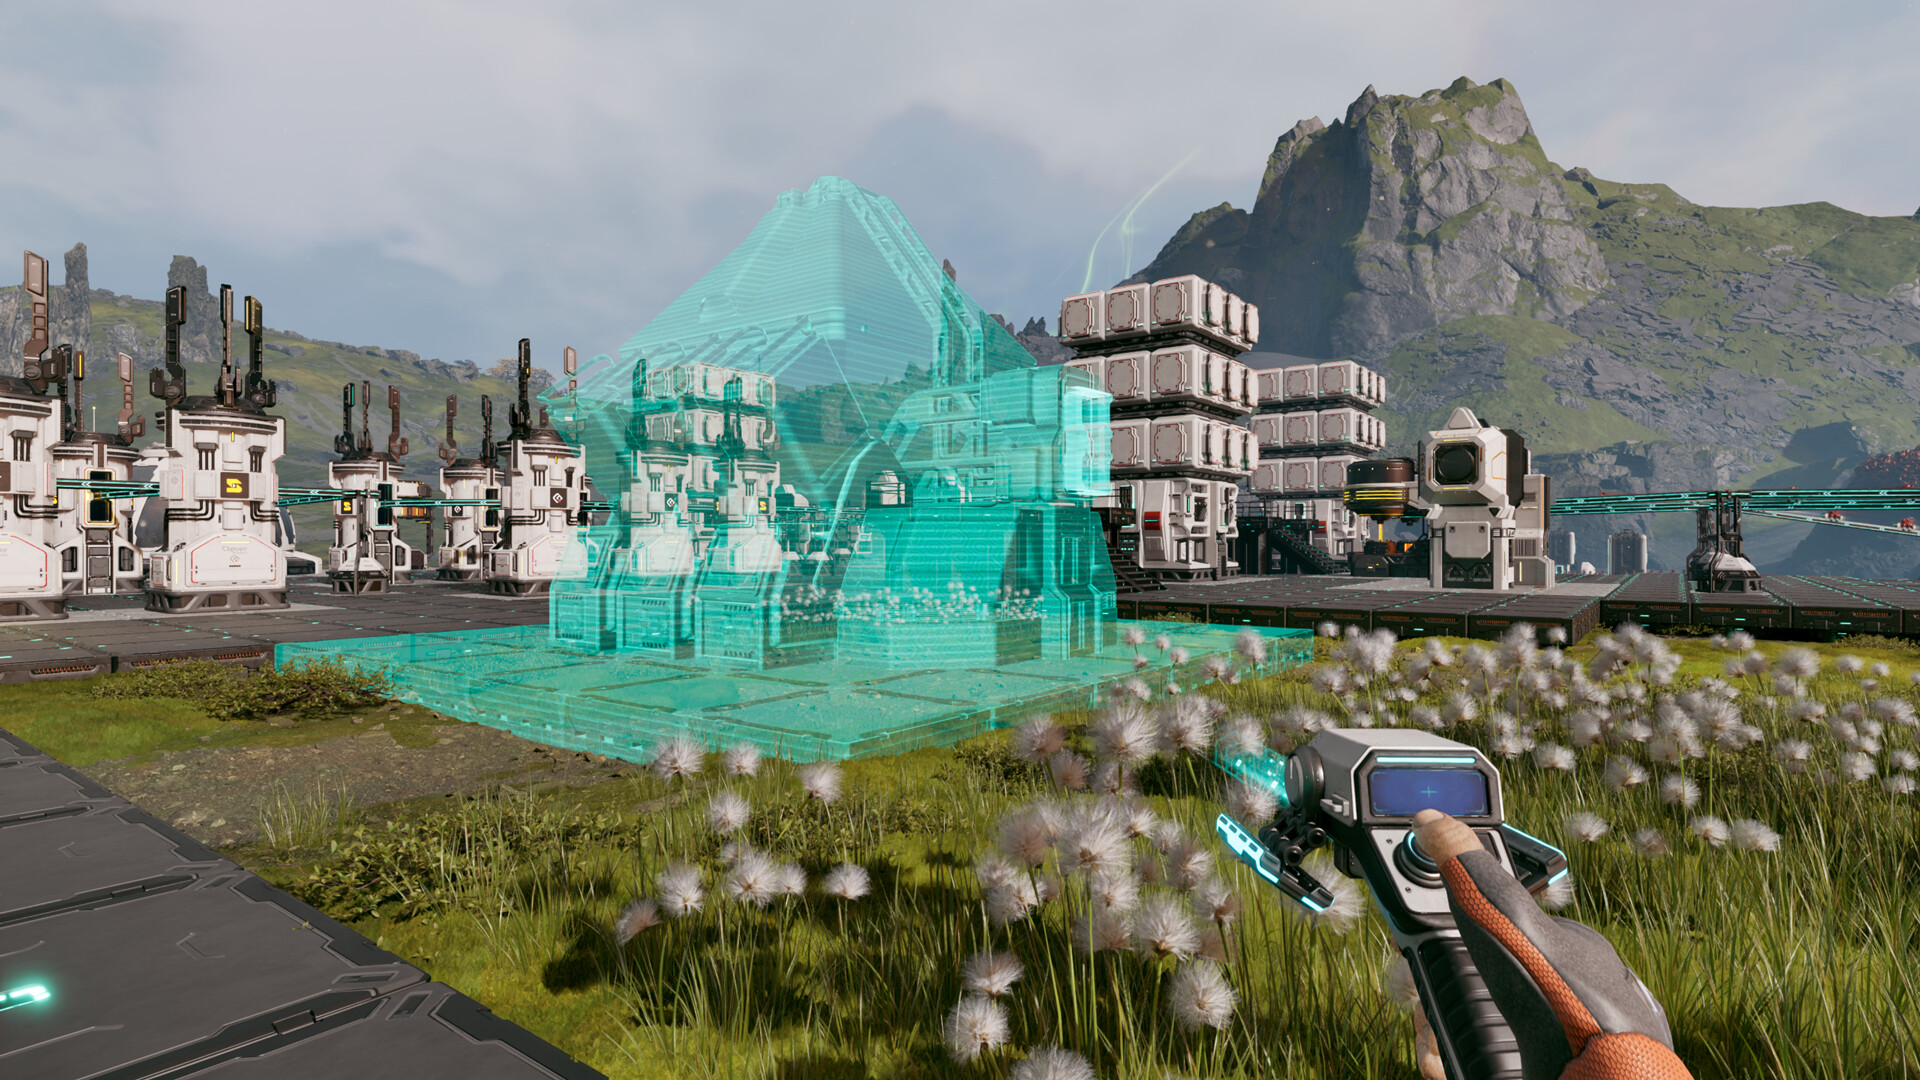
Having multiple bases in StarRupture is essential as you march on to access the Forgotten Engine, but they can also be taken away from you.
Once you have several bases, it's impossible to keep track of all of them. When aliens attack your base, and you can't protect it, the core gets infected. Thankfully, you can also fix infected base cores by repairing them.
To begin the process, you'll first have to identify the infected base core. This part is pretty easy since an infected base core will have a blue glow. The confusing part is that both the infection and the base core will appear identical.
Screenshot by Destructoid
Once you spot the infection, shoot at it until it's destroyed. I have yet to find an infected core with multiple infections on it. However, an infected core can have multiple infections (in theory). If that happens, you'll have to clear all the infections to restore your base.
Screenshot by Destructoid
Once the infection is clear, your base and all its parts will start to heal. Once they've healed completely, the base will resume its normal operations, and it will no longer have the blue appearance. Press the E button after approaching the base to complete the eradication process.
How to prevent infected base cores in StarRupture
Once you've removed the infection from a base, it can again get infected. Aliens will respawn and continue attacking it. If you can't defend your base while it's being attacked, it will become infected once again.
The only viable way to protect a base is by setting up automated defense systems. Once you upgrade the Griffits Blue Corporation, it will unlock the Defense Tower and the Defense Turret. While the Defense Turret is easier to build, it requires manual ammo refills. The Defense Tower is the only fully automated system that doesn't require any manual refills. Try to set them up in all your bases, unless you want to remove the infections manually (it becomes a chore after a certain point).
StarRupture becomes a different proposition when you're aiming to survive Arcadia-7 together with your buddies.
The current system of the early access build allows you to play in co-op lobbies of up to four players (including yourself). The multiplayer relies on the classic 'host-based' gameplay, but Creepy Jar has added a modern twist.
To play in co-op, one group member must be the host. The host is the person who creates the main world and sets up the game. Being the host doesn't have any in-game advantage, so you can relax on that part. Once they have created the save, the host has to choose between 'Friends Only' or 'Invite Only'.
The first option requires the host to manually invite every player to a session. The second option removes that requirement, but the other players must be on the host's Steam friend list. To invite a player, the host will have to open the menu. By pressing on the empty slots, they can invite other players via Steam.
Image via Creepy Jar
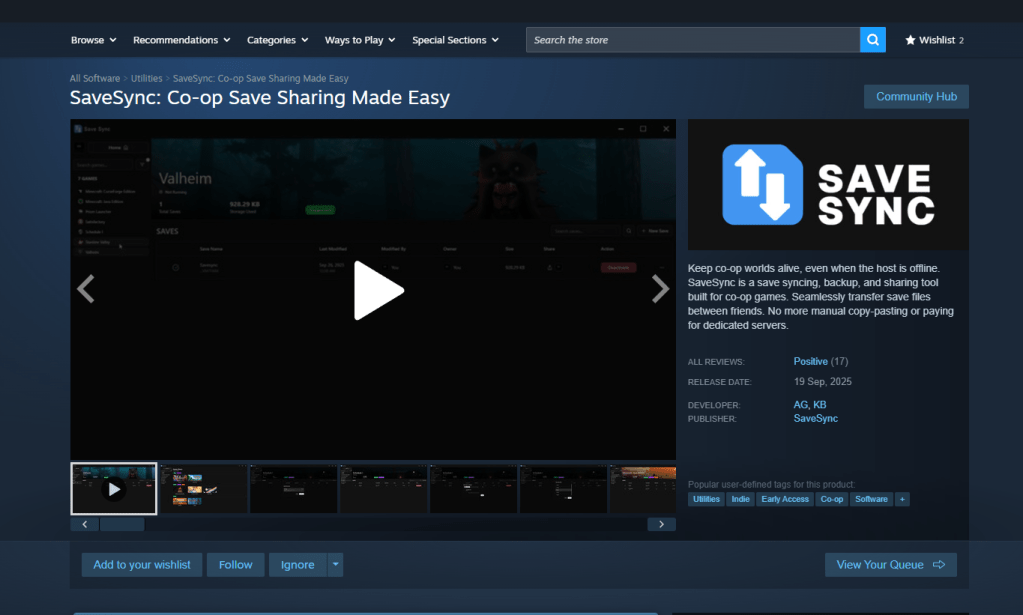
Once the other players have accepted the invite, they will be able to play together with the host. Usually, the host leaving the game would have meant the server shutting down. That can be prevented with the use of SaveSync (this is a third-party application that currently supports StarRupture and plenty of other co-op games).
How to use SaveSync in StarRupture
To use the software, both the host and other members in the group will need to own the software. SaveSync can be purchased and installed directly from Steam. Once done, you'll have to open the app and click New Save after selecting StarRupture. All the available saved sessions will appear. Pick one and click Create Save.
Screenshot by Destructoid
The process above has to be done by the host. Once the sync is complete, there will be a green tick. The host can now share the save with the rest of the group. To join, you'll have to open the SaveSync app. The shared file will appear automatically in your list of saves when you pick StarRupture. Choose Activate after selecting the saved file to make it available. Once done, you'll be able to play in the same co-op world irrespective of the host's presence.