FreshRSS

Normální zobrazení

Jsou dostupné nové články, klikněte pro obnovení stránky.
PředevčíremHlavní kanál
  • ✇Android Authority
  • Want to preserve your battery? Here’s a routine to stop your Samsung phone’s charging at 90%Andrew Grush
    Credit: Robert Triggs / Android Authority Limiting your battery life to 90% can actually help it last longer, though you’ll obviously get less battery life than normal but for many this may be more than adequate. Charging 20% to 90% is a lot less hard on a phone than charging from 0 to 100%. You’ll want to set up two easy routines to make it so your phone stops charging when it reaches 90%. Many of the latest Samsung devices support seven years of OS and security updates, which means th
     

Want to preserve your battery? Here’s a routine to stop your Samsung phone’s charging at 90%

19. Srpen 2024 v 23:36

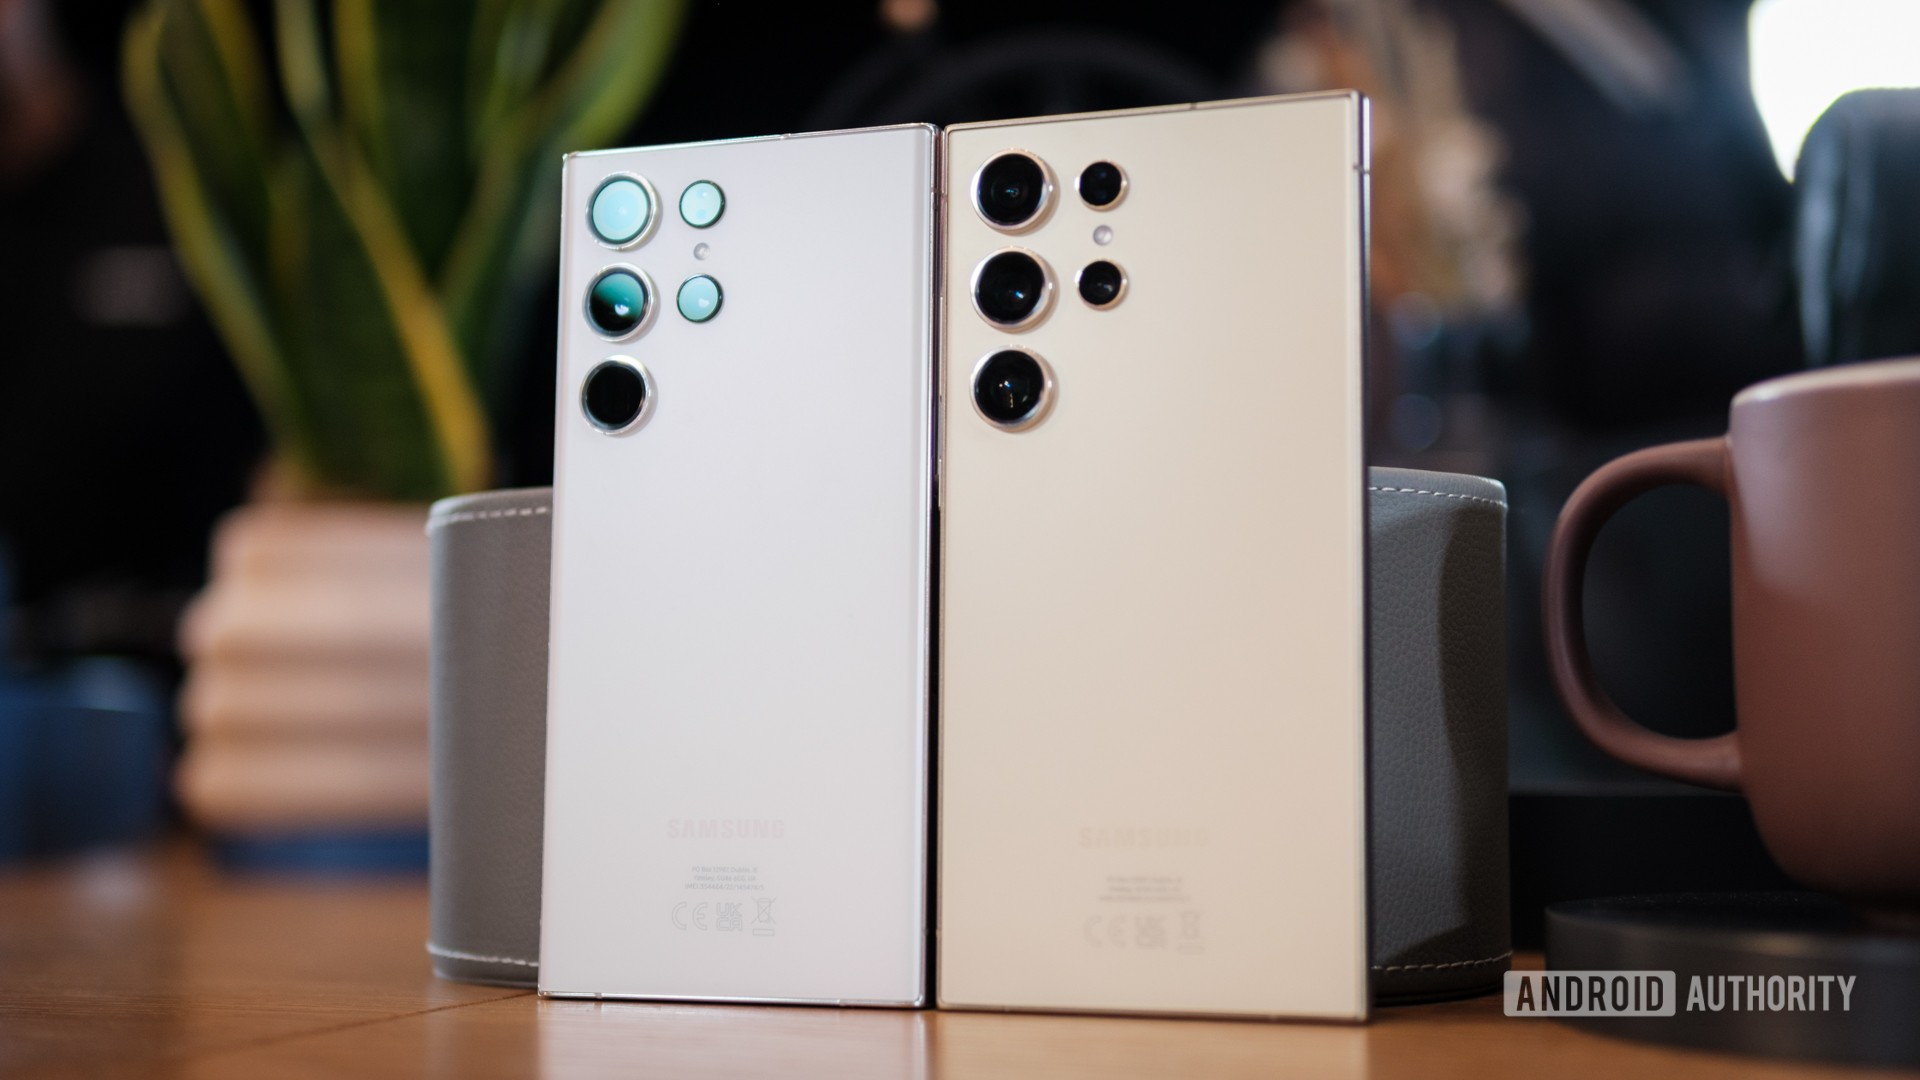
Samsung Galaxy S24 Ultra vs Samsung Galaxy S23 Ultra backs

Credit: Robert Triggs / Android Authority

  • Limiting your battery life to 90% can actually help it last longer, though you’ll obviously get less battery life than normal but for many this may be more than adequate.
  • Charging 20% to 90% is a lot less hard on a phone than charging from 0 to 100%.
  • You’ll want to set up two easy routines to make it so your phone stops charging when it reaches 90%.


Many of the latest Samsung devices support seven years of OS and security updates, which means the phones will still be safe to use and feature all the best new software improvements for a long time to come. There’s just one issue: there’s a good chance your battery won’t make it that long before you run into serious degradation. Is there anything you can do to slow this process down? Actually yes, and there’s a simple routine to help you do it, as first suggested on Reddit.

What we want to do is limit your phone from charging past 90%, or 80% (or even lower) if you prefer. Why does this help?  Simply put, charging a battery from zero to 100 percent is pretty hard on a phone. There are many who recommend never letting your phone drop below about 20% and never charging it more than 80 to 90%, such as sources like Battery University. In fact, charging your phone multiple times from 20 to 80% is just as detrimental to battery life as charging from zero to 100 once.

I always try to get my phone onto the charger when it gets about below 2, personally, though I admit I tend to fully charge to 100% most of the time. To limit your charging to 90% you’ll need to actually set up two different routines. And yes, we tested this ourselves to ensure it works as it should.

Let’s jump in and show you how to limit your battery life using Samsung routines:

1. To set up the first routine, you’ll start by going to Settings > Modes and Routines > Routines.

2. Next, you’ll want to click on the Plus symbol at the top to create a new routine.

3. A new window will pop up with If and Then fields. Click the Plus on If, and in the search box enter Charging Status. Make sure you select the wired and wireless options under charging if they aren’t already on. Select done.

4. Next, we’ll hit the Plus symbol next to If once more. Search for Battery Level and set the interval to 90 (or whatever you wish to cap your battery at) and ensure the Below option is selected. Hit the Done button on your touchscreen.

5. Go to the Then column in your Routine and hit the Plus button. You’ll want to select the action Battery Protection by typing it into Search.

6. Set Battery protection to On, and Maximum. This will ensure your battery will stop charging at the specified percentage. Hit Done.

Now it’s time to set up the second routine:

Follow the same steps as before to start creating a new routine:

1. Start by clicking the Plus symbol on the If section.

2. Put Charging Status into the search box. Just like before, you’ll want to make sure you set the Charging status for both wired and wireless.

3. Next you’ll want to add the condition battery level as well, setting it to above or equal to 90%.

4. Finally, you’ll want to go to the If set and select the action Battery Protection. Set the action to Max and ensure Battery Protection is set to On.

If you were successful you should now have two different charging routines. In the example above we used the Green and Red power symbols and Charging Protection on/off to identify them, but again you can use whatever works best for you.

Let’s be honest here: Even with careful planning it’s still very likely you won’t make it a full seven years without noticeable battery impact, but limiting your charge capacity can potentially buy you a few more years with it than you’d have otherwise. Of course, the best move is to replace the battery yourself or through a professional repair service after a few years.

  • ✇Android Authority
  • How to run Meta’s Llama 3 on your PCGary Sims
    Meta, the company formerly known as Facebook, has recently unveiled Llama 3, the latest iteration of its large language model. This advanced model is available in two versions: an eight billion (8B) parameter version and a 70 billion (70B) parameter version. In this article, we will explore how to run the 8B parameter version of Llama 3 locally, a more feasible option for standard desktops or laptops that may struggle to run the larger 70B version. Llama 3’s performance overview Llama 3 is a
     

How to run Meta’s Llama 3 on your PC

Od: Gary Sims
3. Květen 2024 v 12:33

Meta, the company formerly known as Facebook, has recently unveiled Llama 3, the latest iteration of its large language model. This advanced model is available in two versions: an eight billion (8B) parameter version and a 70 billion (70B) parameter version. In this article, we will explore how to run the 8B parameter version of Llama 3 locally, a more feasible option for standard desktops or laptops that may struggle to run the larger 70B version.

Llama 3’s performance overview

Llama 3 is an impressive large language model. The 8B parameter version, trained using 1.3 million hours of GPU time, outperforms its predecessor, Llama 2, in several ways. For instance, it is 34% better than the 7 billion parameter version of Llama 2 and 14% better than the 13 billion parameter version. Remarkably, the 8B parameter version of Llama 3 even surpasses the performance of the 13 billion parameter version of Llama 2. It only falls short by 8% when compared to the 70B parameter version of Llama 2, making it an impressive model for its size.

  • ✇Android Authority
  • How to delete old emails in GmailMatt Horne
    It’s easy to delete all of your emails in Gmail, but it’s more likely that you just want to clear out the older ones that are no longer relevant. we’ll guide you through how to delete old emails in Gmail and keep your inbox streamlined. You can even make it automatic. QUICK ANSWER
     

How to delete old emails in Gmail

3. Květen 2024 v 11:06

It’s easy to delete all of your emails in Gmail, but it’s more likely that you just want to clear out the older ones that are no longer relevant. we’ll guide you through how to delete old emails in Gmail and keep your inbox streamlined. You can even make it automatic.

QUICK ANSWER

  • ✇Android Authority
  • Samsung Galaxy Z Fold 5 problems and how to fix themAnkit Banerjee
    The Samsung Galaxy Z Fold 5 is one of the best Android foldables around, with impressive improvements from its predecessor, including a redesigned hinge and a more durable build. However, like any phone, the latest Samsung foldable suffers from its fair share of bugs and glitches. We look at some common Samsung Galaxy Z Fold 5 problems and how to fix them. Problem #1: Delayed notifications
     

Samsung Galaxy Z Fold 5 problems and how to fix them

2. Květen 2024 v 10:59

The Samsung Galaxy Z Fold 5 is one of the best Android foldables around, with impressive improvements from its predecessor, including a redesigned hinge and a more durable build. However, like any phone, the latest Samsung foldable suffers from its fair share of bugs and glitches. We look at some common Samsung Galaxy Z Fold 5 problems and how to fix them.


Problem #1: Delayed notifications

Samsung Galaxy Z Fold 5 app drawer

  • ✇Android Authority
  • Can you turn off Meta AI on Facebook, Instagram, and WhatsApp?Haroun Adamu
    If you’ve recently found yourself staring at unfamiliar buttons and prompts on your favorite Meta apps, you’re not alone. The recent rollout marks the debut of Meta AI’s latest large language model, Llama 3, promising more personalized interactions but also potentially more intrusive AI suggestions. Still, this is the closest it has ever been to ChatGPT. But what if you’re not ready to embrace the AI revolution? What if you find the integration more cumbersome than helpful? Maybe you hate that
     

Can you turn off Meta AI on Facebook, Instagram, and WhatsApp?

30. Duben 2024 v 14:39

If you’ve recently found yourself staring at unfamiliar buttons and prompts on your favorite Meta apps, you’re not alone. The recent rollout marks the debut of Meta AI’s latest large language model, Llama 3, promising more personalized interactions but also potentially more intrusive AI suggestions. Still, this is the closest it has ever been to ChatGPT.

But what if you’re not ready to embrace the AI revolution? What if you find the integration more cumbersome than helpful? Maybe you hate that the answers are not completely reliable. But is there any way to turn off the new Meta AI integration and regain some semblance of your pre-AI browsing experience?

  • ✇Android Authority
  • How to set up and activate SiriRoger Fingas
    If you’ve got an Apple device like an iPhone or Apple Watch, you’ll probably want (or even need) Siri, the company’s voice assistant. Here’s how to set up Siri for the first time and activate Siri on any Apple product. Read more: The best Siri commands for productivity and more
     

How to set up and activate Siri

21. Duben 2024 v 05:53

If you’ve got an Apple device like an iPhone or Apple Watch, you’ll probably want (or even need) Siri, the company’s voice assistant. Here’s how to set up Siri for the first time and activate Siri on any Apple product.

Read more: The best Siri commands for productivity and more

  • ✇Android Authority
  • How to delete old emails in GmailMatt Horne
    It’s easy to delete all of your emails in Gmail, but it’s more likely that you just want to clear out the older ones that are no longer relevant. we’ll guide you through how to delete old emails in Gmail and keep your inbox streamlined. You can even make it automatic. How to delete old emails in Gmail To delete all old emails in Gmail, you can follow these steps: Search for old emails. You can use two general methods. To find all emails older than a certain amount of time, use older_than:[
     

How to delete old emails in Gmail

21. Duben 2024 v 03:57

It’s easy to delete all of your emails in Gmail, but it’s more likely that you just want to clear out the older ones that are no longer relevant. we’ll guide you through how to delete old emails in Gmail and keep your inbox streamlined. You can even make it automatic.

How to delete old emails in Gmail

To delete all old emails in Gmail, you can follow these steps:

  • Search for old emails. You can use two general methods. To find all emails older than a certain amount of time, use older_than:[time period]. To find all emails received before a certain date, use before:[date].
  • You only need a number and a single letter to denote the time period. d is day, w is week, m is month, and y is year. For the date, you input using the format YYYY/MM/DD.
  • For example, if you wanted to find all of the emails older than two years, you would put older_than:2y into the search bar.
  • If you wanted to find all emails received before March 2023, you would search before:2023/03/01.
  • Add the search criteria you want and then press enter. The emails matching your search will appear.


  • Now to delete all of the emails appearing in your search. Select them all by clicking on the checkbox in the top left.
  • Note that if you have more than one page of results (more than 50 emails) you will see a message at this stage telling you that clicking this checkbox has only highlighted all of the emails on that page. It will also give you the option to Select all conversations that match this search in the results. Press this if you want to delete all of them.
  • Finally, hit the Trash can icon to move all of these emails to the trash.
  • They will be deleted from the trash folder automatically after 30 days. But you can remove them completely right away by emptying the trash in Gmail.

How to automatically delete old emails in Gmail

As easy as the above process is, you don’t need to go through it periodically. You can set up a filter to automatically delete old emails in Gmail. It’s really easy to do now that you have the search terms you need.

  • Start by clicking on the Show search options button. It’s at the far right of the search bar and is represented by an icon of some dials.
  • You’ll see various fields that you can use to filter the emails. You need to use the search terms from the section above in the Has the words field.
  • In this example, I want to delete all of my emails that are more than five years old. So in the Has the words field I have inputted older_than:2y.
  • Next, press Create filter.
  • You now get a second menu of options to decide what happens to the emails to which your filter applies. Click on the checkbox next to Delete it.


You’ll return to the inbox with a message in the bottom left corner confirming that your filter was created. Old emails matching the filter criteria will be deleted automatically. Just be sure that you’re sure, as you may not be able to recover deleted emails.


FAQs

Can I delete emails by date range?

Yes. Follow the steps in the first section above, but use two search criteria in the search bar instead of one. For example, you could search for all of the emails in the first week of April 2023 using the term after:2023/4/1 before:2023/4/8 then delete the results.

  • ✇Android Authority
  • How to voice type in Google DocsCurtis Joe
    Credit: Edgar Cervantes / Android Authority Your microphone, be it one you plug into your computer or the one built into your phone, can be used for more than voice calls and recording. Over the last ten years, many applications have started adopting the microphone as an input device for text-based solutions. Speech-to-text has gained a great deal of relevance in many different programs, and Google Docs is no different. Let’s go over how to type with your voice in Google Docs. Read more: Ho
     

How to voice type in Google Docs

18. Duben 2024 v 08:43

Google Docs website stock photo 2

Credit: Edgar Cervantes / Android Authority

Your microphone, be it one you plug into your computer or the one built into your phone, can be used for more than voice calls and recording. Over the last ten years, many applications have started adopting the microphone as an input device for text-based solutions. Speech-to-text has gained a great deal of relevance in many different programs, and Google Docs is no different. Let’s go over how to type with your voice in Google Docs.

Read more: How to use subscript and superscript in Google Docs

How to use voice typing in Google Docs

You can use your voice to type in Google Docs, but only on the Chrome desktop browser. You can always use the Google keyboard on your smartphone to voice type into any field. However, the actual voice typing tool built into Google Docs only works on the platform’s desktop version.

Additionally, you will need a working microphone plugged into your computer. If you use a webcam, a microphone may be built into your webcam. Alternatively, many USB microphones and XLR mics work great with Google Docs voice typing.

  • To start using your voice to type, open a Google Doc in Chrome and click Tools >Voice typing. Alternatively, you can use the keyboard shortcut Ctrl + Shift + S.
  • A pop-up window will appear on your Google Doc with a grey microphone button in the middle. Click it.

If you haven’t done so already, allow Google Docs to access your microphone.

allowing google docs to access your hardware

Credit: Curtis Joe / Android Authority

When you have granted Google Docs access to your microphone, you will enter voice typing mode. If you don’t say anything for a while, the microphone icon on the left will go from red back to grey. If that happens, reactivate the voice typing function by clicking the grey microphone button in the pop-up window.

voice typing test on google docs

Credit: Curtis Joe / Android Authority

How to use Google voice punctuation commands

You can use different phrases to add punctuation to your text. Punctuation might not be available in every language:
  • Period
  • Comma
  • Exclamation point
  • Question mark
  • New line
  • New paragraph

Google Docs also allows you to make voice commands using your microphone. When you are in voice typing mode, you can use voice commands to select words, format your document, edit your document, add and edit tables, move around your document, and more.

For example, you can say select [word], and Google Docs will select the word you just said. It isn’t always the most intuitive function, and Google Docs prioritizes typing out what you say more than anything. Sometimes, you will need to try multiple times to get Docs to correctly identify and carry out the voice command.

select testing test on google docs

Credit: Curtis Joe / Android Authority

All voice commands must be in English, and “the account language and document language must both be English,” according to Google. For a complete list of voice commands, check the Google support doc under Use voice commands.


Read more: How to search for a word in Google Docs

  • ✇Android Authority
  • How to set up and activate SiriRoger Fingas
    If you’ve got an Apple device like an iPhone or Apple Watch, you’ll probably want (or even need) Siri, the company’s voice assistant. Here’s how to set up Siri for the first time and activate Siri on any Apple product. Read more: The best Siri commands for productivity and more
     

How to set up and activate Siri

21. Duben 2024 v 05:53

If you’ve got an Apple device like an iPhone or Apple Watch, you’ll probably want (or even need) Siri, the company’s voice assistant. Here’s how to set up Siri for the first time and activate Siri on any Apple product.

Read more: The best Siri commands for productivity and more

  • ✇Android Authority
  • How to delete old emails in GmailMatt Horne
    It’s easy to delete all of your emails in Gmail, but it’s more likely that you just want to clear out the older ones that are no longer relevant. we’ll guide you through how to delete old emails in Gmail and keep your inbox streamlined. You can even make it automatic. QUICK ANSWER
     

How to delete old emails in Gmail

21. Duben 2024 v 03:57

It’s easy to delete all of your emails in Gmail, but it’s more likely that you just want to clear out the older ones that are no longer relevant. we’ll guide you through how to delete old emails in Gmail and keep your inbox streamlined. You can even make it automatic.

QUICK ANSWER

  • ✇Android Authority
  • How to voice type in Google DocsCurtis Joe
    Credit: Edgar Cervantes / Android Authority Your microphone, be it one you plug into your computer or the one built into your phone, can be used for more than voice calls and recording. Over the last ten years, many applications have started adopting the microphone as an input device for text-based solutions. Speech-to-text has gained a great deal of relevance in many different programs, and Google Docs is no different. Let’s go over how to type with your voice in Google Docs. Read more: Ho
     

How to voice type in Google Docs

18. Duben 2024 v 08:43

Google Docs website stock photo 2

Credit: Edgar Cervantes / Android Authority

Your microphone, be it one you plug into your computer or the one built into your phone, can be used for more than voice calls and recording. Over the last ten years, many applications have started adopting the microphone as an input device for text-based solutions. Speech-to-text has gained a great deal of relevance in many different programs, and Google Docs is no different. Let’s go over how to type with your voice in Google Docs.

Read more: How to use subscript and superscript in Google Docs

How to use voice typing in Google Docs

You can use your voice to type in Google Docs, but only on the Chrome desktop browser. You can always use the Google keyboard on your smartphone to voice type into any field. However, the actual voice typing tool built into Google Docs only works on the platform’s desktop version.

Additionally, you will need a working microphone plugged into your computer. If you use a webcam, a microphone may be built into your webcam. Alternatively, many USB microphones and XLR mics work great with Google Docs voice typing.

  • To start using your voice to type, open a Google Doc in Chrome and click Tools >Voice typing. Alternatively, you can use the keyboard shortcut Ctrl + Shift + S.
  • A pop-up window will appear on your Google Doc with a grey microphone button in the middle. Click it.

If you haven’t done so already, allow Google Docs to access your microphone.

allowing google docs to access your hardware

Credit: Curtis Joe / Android Authority

When you have granted Google Docs access to your microphone, you will enter voice typing mode. If you don’t say anything for a while, the microphone icon on the left will go from red back to grey. If that happens, reactivate the voice typing function by clicking the grey microphone button in the pop-up window.

voice typing test on google docs

Credit: Curtis Joe / Android Authority

How to use Google voice punctuation commands

You can use different phrases to add punctuation to your text. Punctuation might not be available in every language:
  • Period
  • Comma
  • Exclamation point
  • Question mark
  • New line
  • New paragraph

Google Docs also allows you to make voice commands using your microphone. When you are in voice typing mode, you can use voice commands to select words, format your document, edit your document, add and edit tables, move around your document, and more.

For example, you can say select [word], and Google Docs will select the word you just said. It isn’t always the most intuitive function, and Google Docs prioritizes typing out what you say more than anything. Sometimes, you will need to try multiple times to get Docs to correctly identify and carry out the voice command.

select testing test on google docs

Credit: Curtis Joe / Android Authority

All voice commands must be in English, and “the account language and document language must both be English,” according to Google. For a complete list of voice commands, check the Google support doc under Use voice commands.


Read more: How to search for a word in Google Docs

  • ✇Android Authority
  • Adding NVMe storage to your Raspberry Pi 5: What you should knowGary Sims
    The Raspberry Pi 5 arrived with the potential promise of compatibility with NVMe solid state storage, specifically M.2 SSDs. However, this feature was not immediately available upon its release. The Pi 5’s access to a PCI connector made this possible, but official Raspberry Pi solutions are still unavailable. Nevertheless, third-party solutions have emerged. In this article, I explore the NVMe Base by Pimeroni, which allows you to connect an M.2 NVMe drive to your Pi 5 and boot from it, effe
     

Adding NVMe storage to your Raspberry Pi 5: What you should know

Od: Gary Sims
8. Březen 2024 v 11:49

The Raspberry Pi 5 arrived with the potential promise of compatibility with NVMe solid state storage, specifically M.2 SSDs. However, this feature was not immediately available upon its release. The Pi 5’s access to a PCI connector made this possible, but official Raspberry Pi solutions are still unavailable. Nevertheless, third-party solutions have emerged. In this article, I explore the NVMe Base by Pimeroni, which allows you to connect an M.2 NVMe drive to your Pi 5 and boot from it, effectively saying goodbye to SD cards.

SD cards or NVMe drives?

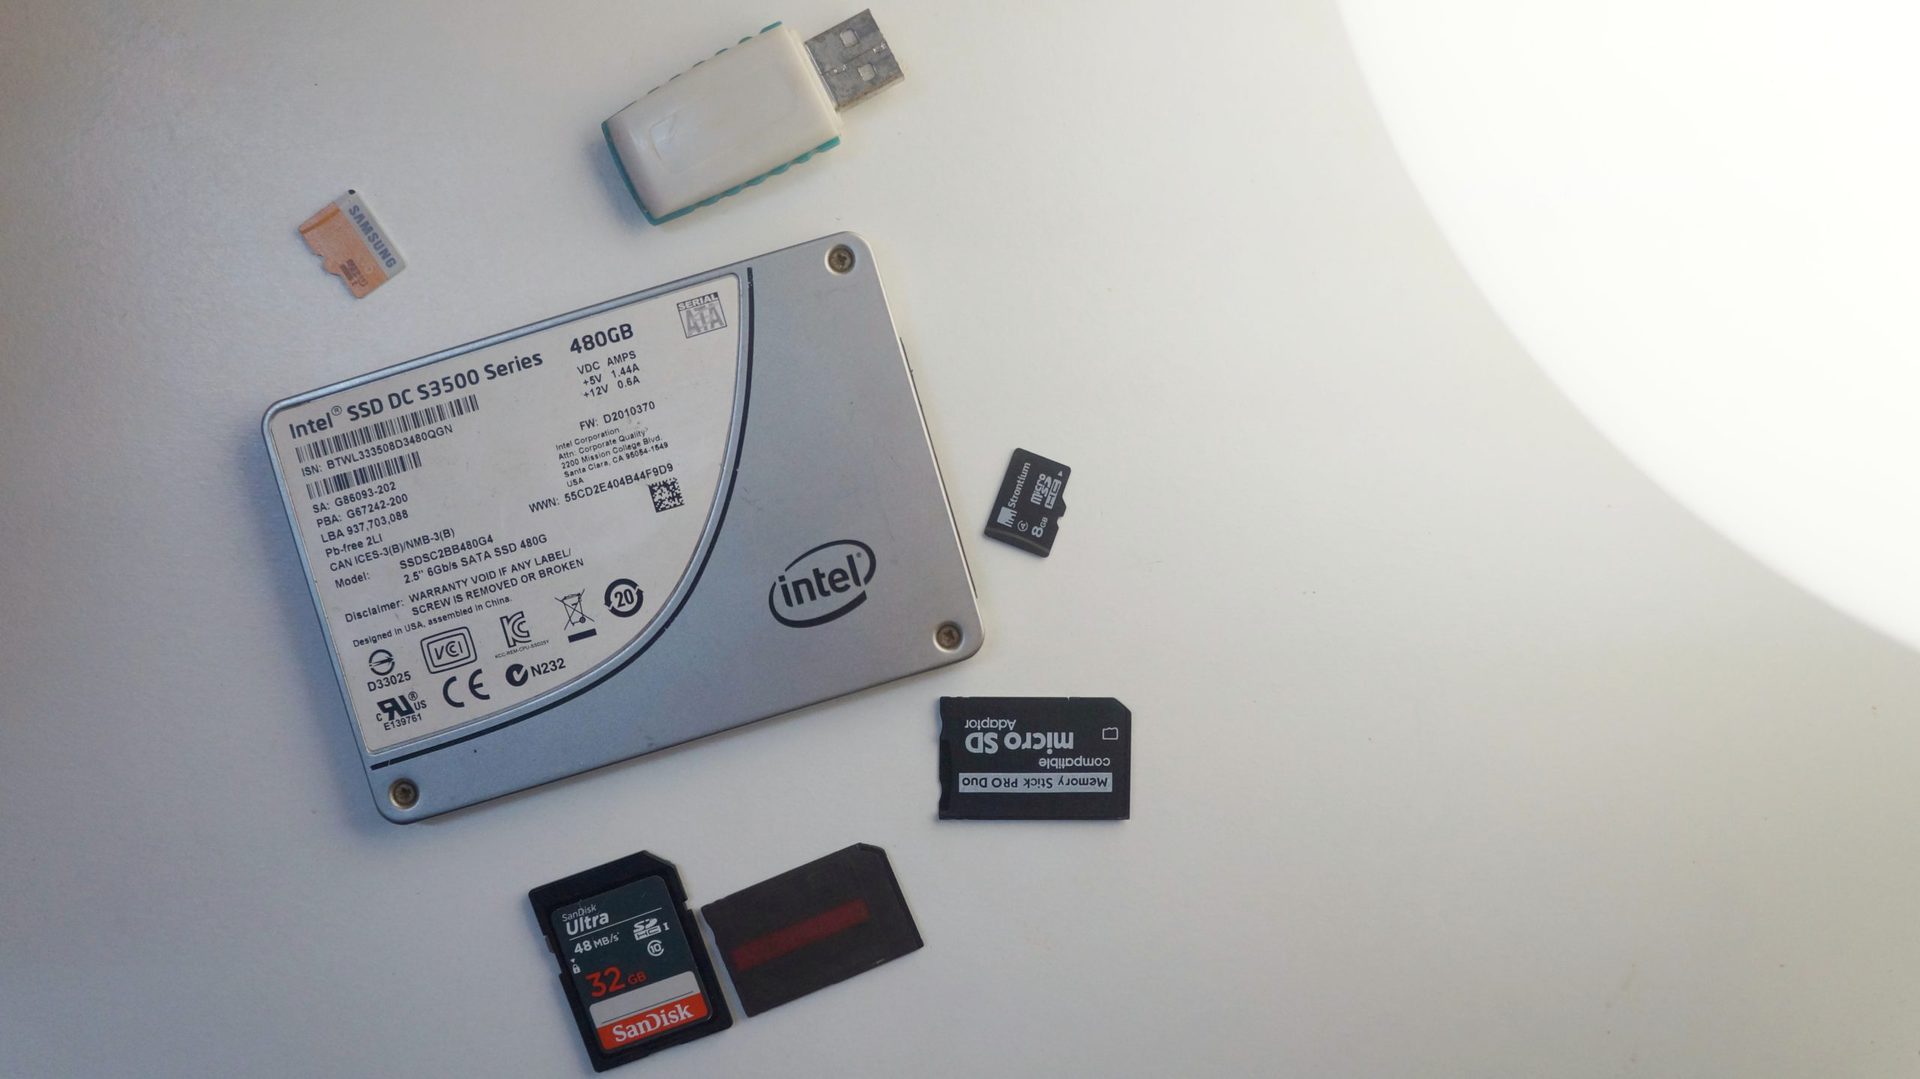
flash memory ssd stock

  • ✇Android Authority
  • Here’s how to turn on Instagram’s dark modeAdam Birney
    Like many other popular apps, Instagram includes a dark mode you can enable to make the majority of its interface black. You might want to turn on the option for a couple of reasons. One of the more practical ones is that using dark mode across your apps can help your device save on battery life. It also happens to look very cool! Regardless, we’re here to show you how to turn on Instagram dark mode. Related: How to turn on dark mode in Google apps
     

Here’s how to turn on Instagram’s dark mode

7. Březen 2024 v 10:37

Like many other popular apps, Instagram includes a dark mode you can enable to make the majority of its interface black. You might want to turn on the option for a couple of reasons. One of the more practical ones is that using dark mode across your apps can help your device save on battery life. It also happens to look very cool! Regardless, we’re here to show you how to turn on Instagram dark mode.

Related: How to turn on dark mode in Google apps

  • ✇Android Authority
  • Can you change your Spotify username?Curtis Joe
    Your Spotify username is the key to many features on Spotify. It is one of the ways to log in to Spotify. It’s for you and your friends to find and follow each other, to listen to something together. However, is it something you can alter? Just like how you can change your profile picture, can you change your Spotify username? THE SHORT ANSWER You cannot change your Spotify username. However, you can change your Spotify display name, which replaces your username on your user profile. To change
     

Can you change your Spotify username?

6. Březen 2024 v 11:05
Your Spotify username is the key to many features on Spotify. It is one of the ways to log in to Spotify. It’s for you and your friends to find and follow each other, to listen to something together. However, is it something you can alter? Just like how you can change your profile picture, can you change your Spotify username?

THE SHORT ANSWER

You cannot change your Spotify username. However, you can change your Spotify display name, which replaces your username on your user profile. To change your display name, go to your profile > Edit profile > Enter your desired name > Save.

  • ✇Android Authority
  • How to delete all your Facebook posts without deleting your accountAdam Birney
    With Facebook being one of the oldest social media platforms around, we are all bound to find some old posts that embarrass us. Therefore, you might want to turn over a new leaf and remove all your posts, especially when applying for a new job. Here’s how to delete all your Facebook posts without deleting your account, allowing you to start fresh. Additionally, before deleting these posts, you may be interested in downloading them using a third-party app. How to delete all your Facebook pos
     

How to delete all your Facebook posts without deleting your account

28. Únor 2024 v 03:00

With Facebook being one of the oldest social media platforms around, we are all bound to find some old posts that embarrass us. Therefore, you might want to turn over a new leaf and remove all your posts, especially when applying for a new job. Here’s how to delete all your Facebook posts without deleting your account, allowing you to start fresh. Additionally, before deleting these posts, you may be interested in downloading them using a third-party app.

How to delete all your Facebook posts on desktop

If you’re using a desktop computer, open your Facebook profile page and click the three-dot button on the right-hand side to open menu options.

  • From there, click on “Activity log.”
  • On the next page, navigate to Your Activity Across Facebook > Posts > Your Posts in the left-hand menu. You can specify the types of posts you want to see, such as photos, videos, or posts from other apps.
  • Select All and then Recycle Bin to delete all your posts. Please note that if you have a long history of using Facebook, you may need to scroll down multiple times for all your posts to load.
  • Alternatively, you can choose Activity You’re Tagged In and then click All followed by Remove Tags to remove any embarrassing posts in which your friends or family have tagged you from your profile.

How to solve the “Technical Error” message when deleting posts on Facebook

If you encounter a technical error doing the Activity Log method, there is another way to delete Facebook posts via the Manage Posts function.

  • From your profile page, click on the Manage Posts button.

  • Click Select All then Next.
  • Tick the Delete Posts option.
  • Click Done.

How to delete all your Facebook posts on mobile

The process is pretty much the same using the mobile app.

  • First, navigate your profile and tap the three-dot icon on the left.
  • From there, select Activity Log from your Profile Settings.

  • On the next page, select Your Activity Across Facebook to sort through the things you’ve already posted such as your own posts on your own timeline, your posts on other people’s timelines, check-ins and other hidden posts.
  • Tap All and then the Recycle Bin button at the bottom right of the screen to delete all posts or tags.


Deleting all your Facebook posts is as simple as that. It’s almost like you are a whole new person.


FAQs

What is Archive on Facebook?

Archiving a post is a way to hide it from your profile while keeping its likes and comments. In other words, only you will be able to see a post you have archived. You can Archive photos by clicking on the Archive button instead of the Recycle Bin button at the Manage Posts page.

Can I delete a shared album on Facebook?

Yes, photos in an album you created and shared with others can be archived or deleted. However, for albums other people created and was shared with you as a contributor, your only option is to leave it. Any photos you’ve shared in that album will remain there unless you delete it from your account.

Can I delete posts I am tagged in on Facebook?

No, posts can only be archived or deleted by the person who created them. However, you can remove the tag, so the post doesn’t appear on your profile.

  • ✇Android Authority
  • How to turn off Emergency SOS on an iPhoneRoger Fingas
    Apple’s Emergency SOS feature is meant to save critical time reaching emergency services and contacts — devices in the iPhone 15 and iPhone 14 lineups can even send alerts via satellite. But if the feature is being triggered accidentally, say via Crash Detection, children, or your pocket, you can disable it (almost) entirely. Here’s how. QUICK ANSWER
     

How to turn off Emergency SOS on an iPhone

22. Únor 2024 v 12:29

Apple’s Emergency SOS feature is meant to save critical time reaching emergency services and contacts — devices in the iPhone 15 and iPhone 14 lineups can even send alerts via satellite. But if the feature is being triggered accidentally, say via Crash Detection, children, or your pocket, you can disable it (almost) entirely. Here’s how.

QUICK ANSWER

  • ✇Android Authority
  • How to install Android 15 on your Pixel phone right nowC. Scott Brown
    We hope you’re ready for the next version of Android because Android 15 is finally here! Although it will be quite a while before the software becomes stable enough for daily use, that doesn’t mean you can’t give it a shot. Below, we have instructions on how to install the first developer preview of Android 15 on a supported Pixel device. Should I install Android 15? Credit: Edgar Cervantes / Android Authority For now, the releases of Android 15 we have are very, very early versions. Dev
     

How to install Android 15 on your Pixel phone right now

16. Únor 2024 v 20:00

We hope you’re ready for the next version of Android because Android 15 is finally here! Although it will be quite a while before the software becomes stable enough for daily use, that doesn’t mean you can’t give it a shot. Below, we have instructions on how to install the first developer preview of Android 15 on a supported Pixel device.

Should I install Android 15?

Android 15 logo on smartphone with light strip in background stock photo (16)

Credit: Edgar Cervantes / Android Authority

For now, the releases of Android 15 we have are very, very early versions. Developer previews, as the name suggests, are designed for developers to test out their apps. They are not intended for typical users. Being so early on in the development cycle essentially guarantees certain features won’t work at all, and significant bugs could be present.

With all that in mind, two types of people should install an early version of Android 15: developers and Android enthusiasts with access to a secondary Pixel phone or tablet. We strongly advise against installing a developer preview or even an early beta on your main Pixel. It’s not worth it.

That all being said, we’re not here to stop your passion for Android. Google’s tools are open to anyone, so as long as you’re willing to accept the consequences, you can install Android 15 on whichever device you choose!

What devices can install Android 15 today?

Google Pixel 8 in hand

Credit: Robert Triggs / Android Authority

Google makes developer previews and betas available to the Pixel devices that will eventually get a stable launch. Unfortunately, that means quite a lot of older Pixels are not eligible, including the Google Pixel 5 and all previous models. The complete list of Pixel products that can install Android 15 is here:

  • Google Pixel 8 Pro
  • Google Pixel 8
  • Google Pixel Fold
  • Google Pixel Tablet
  • Google Pixel 7a
  • Google Pixel 7 Pro
  • Google Pixel 7
  • Google Pixel 6a
  • Google Pixel 6 Pro
  • Google Pixel 6

If you don’t see your Pixel on that list, you’re stuck on Android 14 (or earlier) indefinitely. Keep in mind that we expect to see new Pixels launch before the stable rollout of Android 15. These devices — including the rumored Google Pixel 8a — should also be able to grab Android 15 once they launch. We will update the list when these devices become official.

How do I install Android 15 DP1?

Android 15 on pixel 8 pro

Credit: Adamya Sharma / Android Authority

There are three ways to install Android 15. The first is the assisted method, which we recommend to pretty much everyone. This uses the Chrome browser to automate most of the steps and is most useful if you are moving to Android 15 from any prior version.

There are also non-assisted methods using ADB and Fastboot. These are more complicated but give you a bit more freedom. These methods are also helpful if you are already on a version of Android 15, as you’ll be able to install a newer version of Android 15 without needing to wipe your phone first.

Remember that in all cases, moving from Android 14 to Android 15 requires a complete wipe of your phone’s data. If you don’t want to do this, you should not install Android 15 on your phone.

If you’re ready, it’s time to prepare!

Prepare to install Android 15

You will need the following materials and prerequisites to get started:

  1. A Windows, macOS, Chrome OS, or Linux computer with access to the internet and the latest Chrome browser.
  2. A short, thick USB cable for connecting your phone to the computer. The original USB cable that came with the phone is best for this.

Before you move on to the next steps, double-check that you have everything you need. You don’t want to get into the process of installing Android 15 and discover you aren’t fully prepared! Once you’re ready, continue on by using either the assisted or manual installation methods below.

Install Android 15 using the assisted method

FINAL WARNING: This process will unlock your bootloader and completely erase all your phone’s data.

  1. Ensure your computer has the proper drivers for your phone, which you can grab from Google’s Pixel drivers page. This is an essential step — if you skip this, flashing will not work!
  2. Plug your phone into your computer using the USB cable.
  3. In your phone’s Settings, go to System > Developer options. If you don’t see Developer options, go to Settings > About phone and scroll all the way down to the Build number. Tap on the Build number seven times until your phone says you are a developer. Developer options should be available now.
  4. In Developer options, enable OEM unlocking and USB debugging.
  5. Visit the Android Flash Tool page for installing Android 15.
  6. Select the version of Android 15 you’d like to install. For some models, there’s a 64-bit-only version and a version that also supports 32-bit software. Either one works. If you don’t know which one to pick, choose the one that just says “(signed),” which supports both 64-bit and 32-bit software.
  7. Follow along as the flashing tool takes care of everything for you. Simply follow the instructions and remember not to touch your phone unless specifically instructed to do so by the flashing tool.

That’s it! You should now have Android 15 installed on your Pixel smartphone.

Install Android 15 using the manual method

If the more straightforward assisted method mentioned above does not work for you, you can try the manual methods. Primarily, there are two manual methods:

  1. Flashing Factory Images through Fastboot: This requires an unlocked bootloader but is the recommended path for upgrading from Android 14 to Android 15 without the assisted method. Unlocking the bootloader will completely wipe your device. The Fastboot installation will wipe your device again, but you can alter this behavior.
  2. Sideloading OTA packages through ADB and Recovery: This method is useful for Pixel devices with a locked bootloader and for users who want to preserve data moving from Android 15 to Android 15. This is not recommended if you are moving from Android 14 to Android 15.

Irrespective of the method you choose, there are some common steps that you need to get in place:

  • Install ADB on your computer by following our guide. The process also installs Fastboot on your computer, as Fastboot is part of the Android SDK Platform Tools alongside ADB.
  • Ensure that you have USB Debugging enabled on your smartphone:
    • On your smartphone, go to Settings > About Phone.
    • Locate the Build Number entry. Tap seven times on it. You will see a toast popup saying, “You are now a developer” or “No need, you are already a developer.” This means that Developer Options has been unlocked on your device, and you will see a new entry in your Settings menu.
    • Now navigate to Settings > Developer Options > Enable USB Debugging. Confirm your selection when prompted in the warning.
  • Ensure your computer has the proper drivers for your phone, which you can grab from Google’s Pixel drivers page.
  • Connect your phone to the computer. Presuming this is the first time you are connecting your phone to your computer, you will get a prompt on your phone requesting authorization for the connection. Grant it.

With this, you will have your common steps in place. You can now move forward with the rest of the tutorial, depending on the install path that you choose.

Flashing Factory Images through Fastboot

FINAL WARNING: As part of this process, your phone will be completely wiped. Please ensure you have taken adequate backups before proceeding.

  • Download the official Factory Images on your computer for your phone. Ensure you download the file for your specific phone only, as flashing the file intended for a different phone model may mess with the installation process and render your device useless.
  • Optional but recommended: Verify the SHA-256 checksum of the file you have downloaded. This reassures you that the file has been downloaded completely and correctly. Google mentions the SHA-256 checksum next to the download link.
  • Unzip the file to a convenient location. For ease of installation, you can copy the contents to the directory where ADB and Fastboot are located on your computer.
  • Connect your phone to your computer.
  • Open up a command prompt on your computer and run the command adb reboot bootloader. This will reboot your phone to Fastboot mode.
  • Unlock the bootloader of your phone: You do this by running the Fastboot command fastboot flashing unlock. Note that this will erase all data on the device.
    • If your device reboots into the OS after a data wipe, you will need to skip all the setup steps and enable USB Debugging again. Once you do, reboot back into the Fastboot mode.
  • On a Windows PC, double-click on the flash-all.bat file. This will run the batch installation file and execute all the necessary commands by itself. On a Mac/Linux PC, you will need to run flash-all.
    • In case you want to preserve your system and app data between installations, you will need to open the flash-all script in a text editor program and delete the “-w” attribute from the command. This attribute denotes a wipe, so remove it if you do not want a wipe.
  • Once the script finishes, your device will reboot into the new OS.
  • Optional but recommended: Relock the bootloader of your phone by rebooting your phone into Fastboot mode and running the command fastboot flashing lock.

Sideloading OTA packages through ADB

FINAL WARNING: This process should only be used if you’re already on Android 15. If you are on any other version, use the assisted method or Fastboot.

  • Download the official OTA update zip file on your computer for your phone. Ensure you download the file for your specific phone only, as flashing the file intended for a different phone model may mess with the installation process and render your device useless.
  • Optional but recommended: Once the file has finished downloading, rename it to a simpler name, like abc.zip, for example. This will save you from typing out the long name that the file initially downloaded with.
  • Optional but recommended: Verify the SHA-256 checksum of the file you have downloaded. This reassures you that the file has been downloaded completely and correctly. Google mentions the SHA-256 checksum next to the download link.
  • Place the file in the directory where ADB is located on your computer.
  • Connect your phone to your computer.
  • Open up a command prompt on your computer and run the command adb reboot recovery. This will reboot your phone to recovery mode.
    • In case your phone does not reboot into recovery, you can also manually reboot into recovery by shutting down your device and then pressing and holding the power button and volume up button.
  • Use the volume keys to navigate to the Apply Update from ADB option in the Recovery menu. Press the power button to select it.
  • On the command prompt on your computer, run the command adb devices. This will return a device serial number with “sideload” written next to it. This indicates that your phone is connected in sideload mode and is ready to receive further installation commands.
  • On the command prompt on your computer, run the command adb sideload abc.zip. You will need to replace “abc.zip” with the filename that you have chosen.
  • ADB will install the update zip file on your phone.
  • Once installation is complete, choose the Reboot system now option on your phone, and your device will reboot into the freshly installed Android 15 build.

That’s it! You should now have Android 15 installed on your Pixel smartphone.


FAQ

When will Android 15 release as stable?

According to Google’s own estimates, Android 15 should land as stable in the late summer of 2024. However, it could be early fall instead, as last year showed us.

When will my phone get stable Android 15?

If you have a recent Pixel phone, you should get Android 15 the same day it goes stable. If you have a non-Pixel, you will need to wait for a time. The amount of time depends on your manufacturer. Generally, if you have a recent Samsung flagship or the most recent OnePlus flagship, you should see Android 15 before the end of 2024.

Can I install early versions of Android 15 on a non-Pixel?

In a word, no. Google only makes developer previews available to Pixels. However, once we get into the open beta stage, other manufacturers will start promoting their own beta programs. You’ll need to check with your phone manufacturer to find out if and when that will happen.

Will installing Android 15 erase my phone?

As of right now, yes: installing Android 15 will factory reset your phone. Eventually, Google will release a public beta of Android 15 that you can install without wiping your device. For now, though, a factory reset is necessary.

Can I force Android 15 to update on my phone?

There is no way to get the Android 15 update before the stable launch without joining the DP/beta programs. Once you are in the developer preview or beta program, your phone will automatically get new over-the-air (OTA) updates. When Android 15 lands as a stable release, you will also automatically get that update.

❌
❌