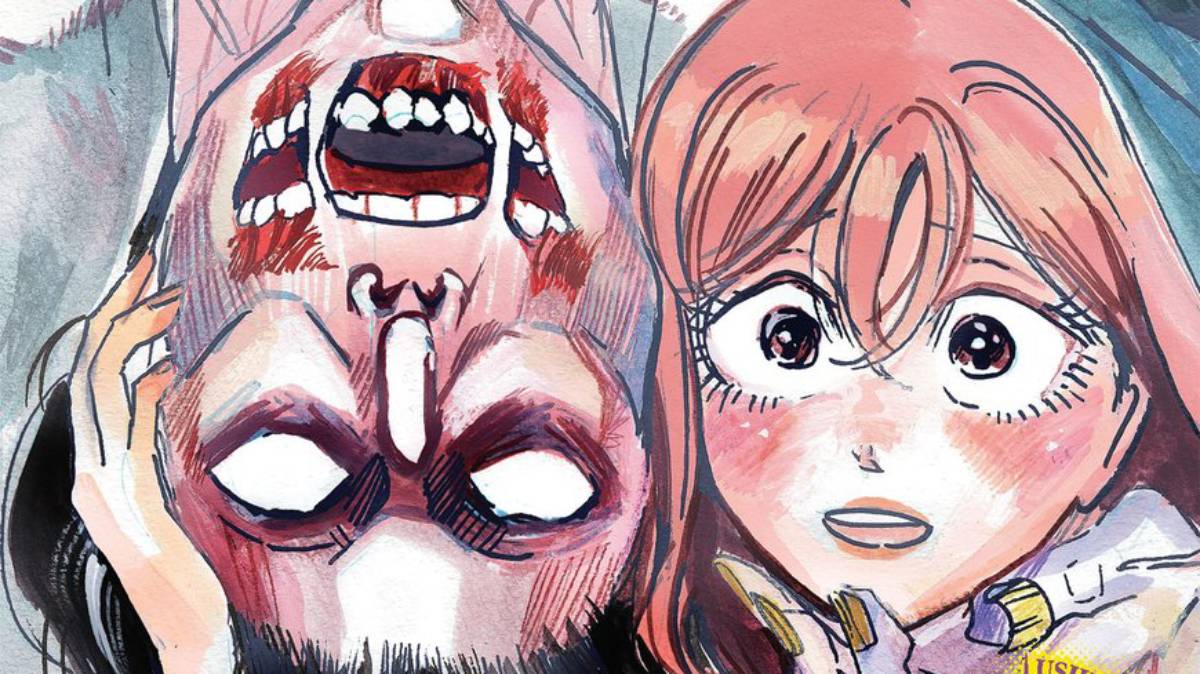
Okay. So, a staple in shojo manga series is to eventually introduce some sort of love triangle conflict. The goal is to add a little drama to possibly add a “will they or won’t they” element to the story. Does it get annoying? Absolutely! Especially when it’s dragged out. Volume 4 of The Small-Animallike Lady is Adored by the Ice Prince manga continues that type of plot line from the third one, but Hisui doesn’t drag the situation out and instead introduces the mature and realistic approach of Lily and Prince William actually talking to work it out.
Editor’s Note: There will be some spoilers for volume 4 of The Small-Animallike Lady is Adored by the Ice Prince manga below.
The conflict in the third volume of The Small-Animallike Lady is Adored by the Ice Prince manga stemmed from a visit by the princess of the kingdom of Belluno, Marianne. She came to the kingdom of Zavanni for a visit and, throughout much of that installment monopolized Prince William’s time so his fiance Liliana was left to her own devices. When secretly exploring outside of the palace in disguise with guards, Lily ran into the two of them together, with Marianne hanging on Will’s arm. This led to mistaken impressions of the situation, which carried over to the initial issue in this volume. However, instead of dragging it out, things are handled in an actually mature manner.
Image via Yen Press
While the outset of this volume offers are first view of the situation from Marianne’s perspective, confirming she did come to the country to drive a wedge and become Will’s new fiance as some suspected and Lily assumed after seeing them together, it quickly gets into practical advice and proper communication. When Will is lamenting Lily’s behavior and anger, his guard and even Princess Marianne both say he needs to talk to her. Though it is awkward between the engaged couple when they do come together in the next scene, both of them don’t drag out this mistaken situation. Will apologizes and explains, as does Lily. (Though she does freak out a bit momentarily thinking his apology is because he intends to break their own engagement.)
As a result, we get to see how productive conversations between a couple we know love each other works out. The two of them explain themselves. The set a time for another date, which shows their commitment to each other. Then when they go out, which also involves scouting a location for a school Lily wants to build for children in the city, they’re completely focused on the task and each other.
What’s interesting, however, is volume 4 of the The Small-Animallike Lady is Adored by the Ice Prince manga also shows how communication helps the situation between Lily and Princess Marianne too. After the “crisis” is over, it still seems the foreign royal isn’t entirely giving up on her plan, since she at the time sees it as the only recourse to aid her own country during a salinity crisis. When the two of them get a chance to properly talk upon the opening of the finished school and classroom, it leads to new revelations between them and a possible positive relationship.
Which is great, as it all comes back to The Small-Animallike Lady is Adored by the Ice Prince being a shojo manga that focuses on positivity. It’s sweet! It’s funny! The leads generally care for and respect each other! Now with this volume, we see they handle issues responsibly and with clear communication. It’s lovely to see.
Volumes 1-4 of The Small-Animallike Lady is Adored by the Ice Prince are available now, and Yen Press will release volume 5 of the manga on July 28, 2026.
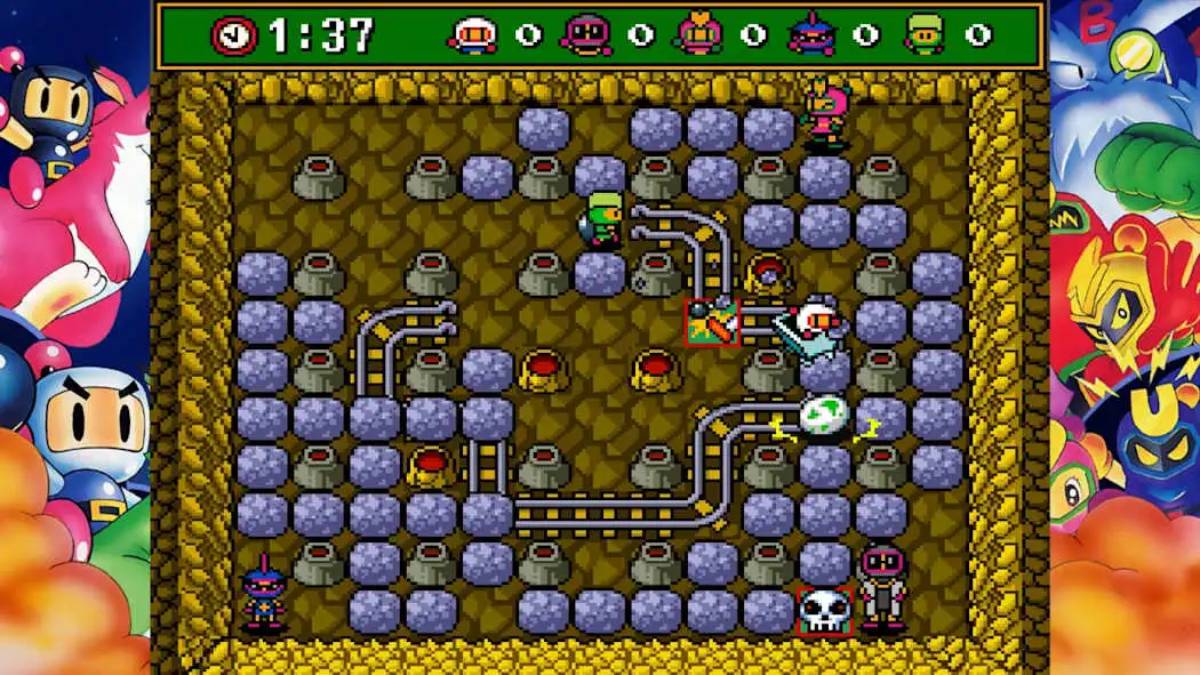
Recent shadowdrop release Super Bomberman Collection brings back some classic Bomberman games, some for the first time outside Japan, and we’re happy to see it! But if we’ve learned anything from modern retro compilations, the quality is extremely dependent on execution. So how does this one do?
The package contains the five Super Bomberman games, all originally released on the Super NES and Super Famicom, as well as two bonus Famicom games. The later Super titles didn’t originally release outside Japan and have received localizations here, which is a nice touch! Frankly, though, these are fairly language-agnostic games and you probably would have been fine.
Putting these five games together in one collection might feel a bit redundant! And it is, to a degree. The advantage is in two ways. The first? Historical value. The game makes it easy to look at what power-ups are added in each one, and preserving all five is good regardless. The second is that you can choose your favorite variant. Each of these changes does color the experience, and through either taste or nostalgia, you’ll likely have a favorite.
Image via Konami
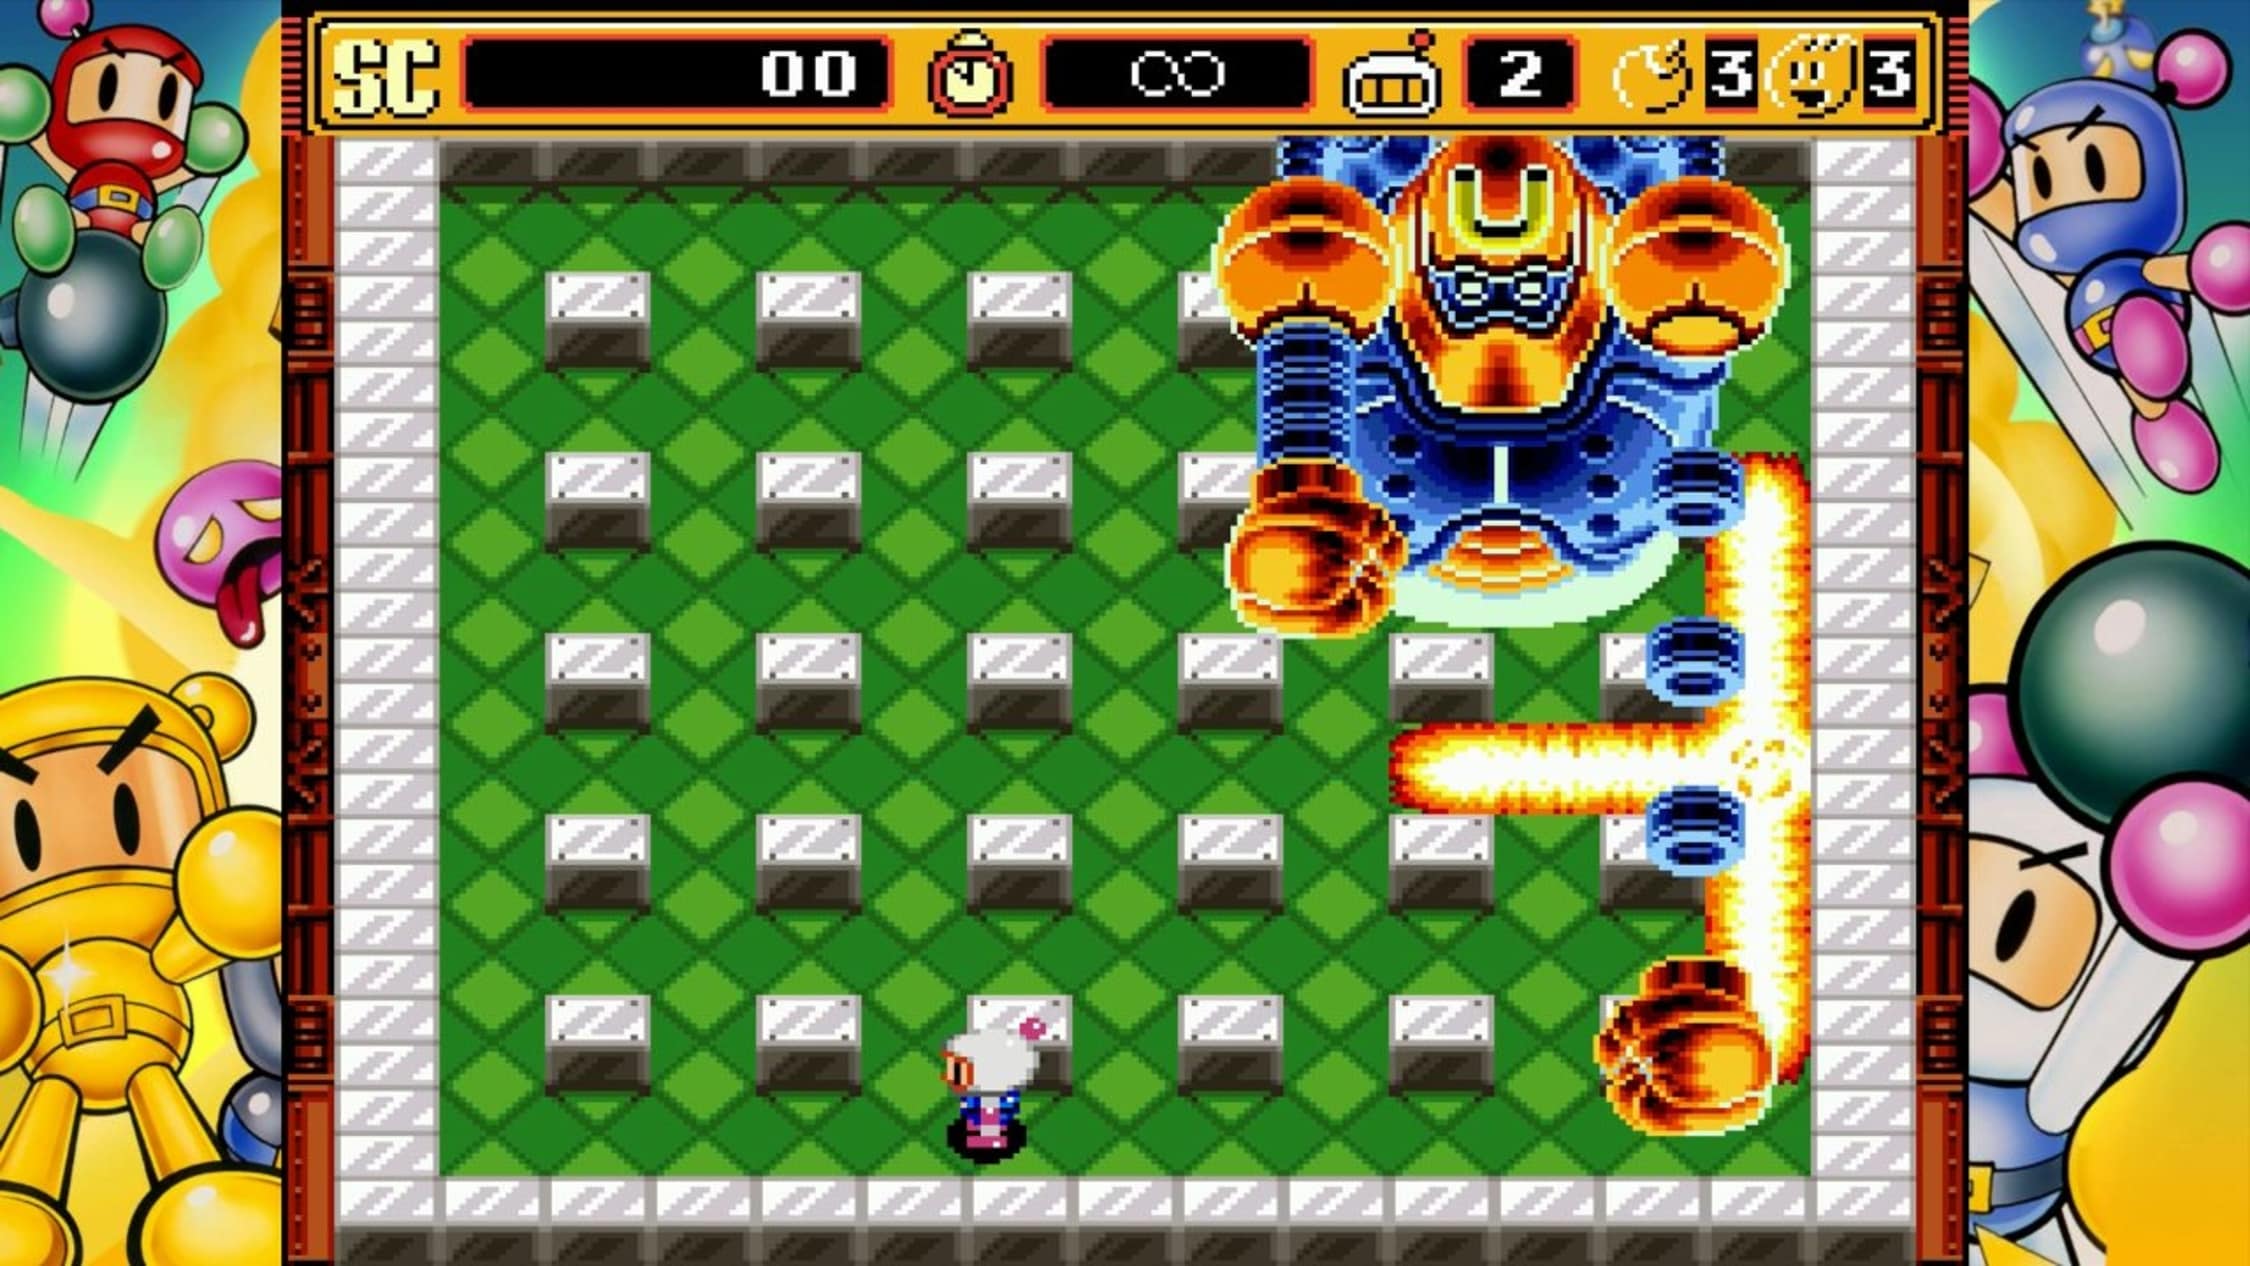
If you’re having trouble deciding, though? We’d recommend going straight to 5. It has almost all the things from the other games, and there are options to configure it however! And as such a late Super Famicom game that other staff at Hudson were probably already working on Mario Party during development, it really takes advantage of the hardware. If it drops the ball on anything? Maybe it’s aesthetics. It’s trying really hard to do a robot/sentai thing in a way that a lot of the selectable characters feel same-y.
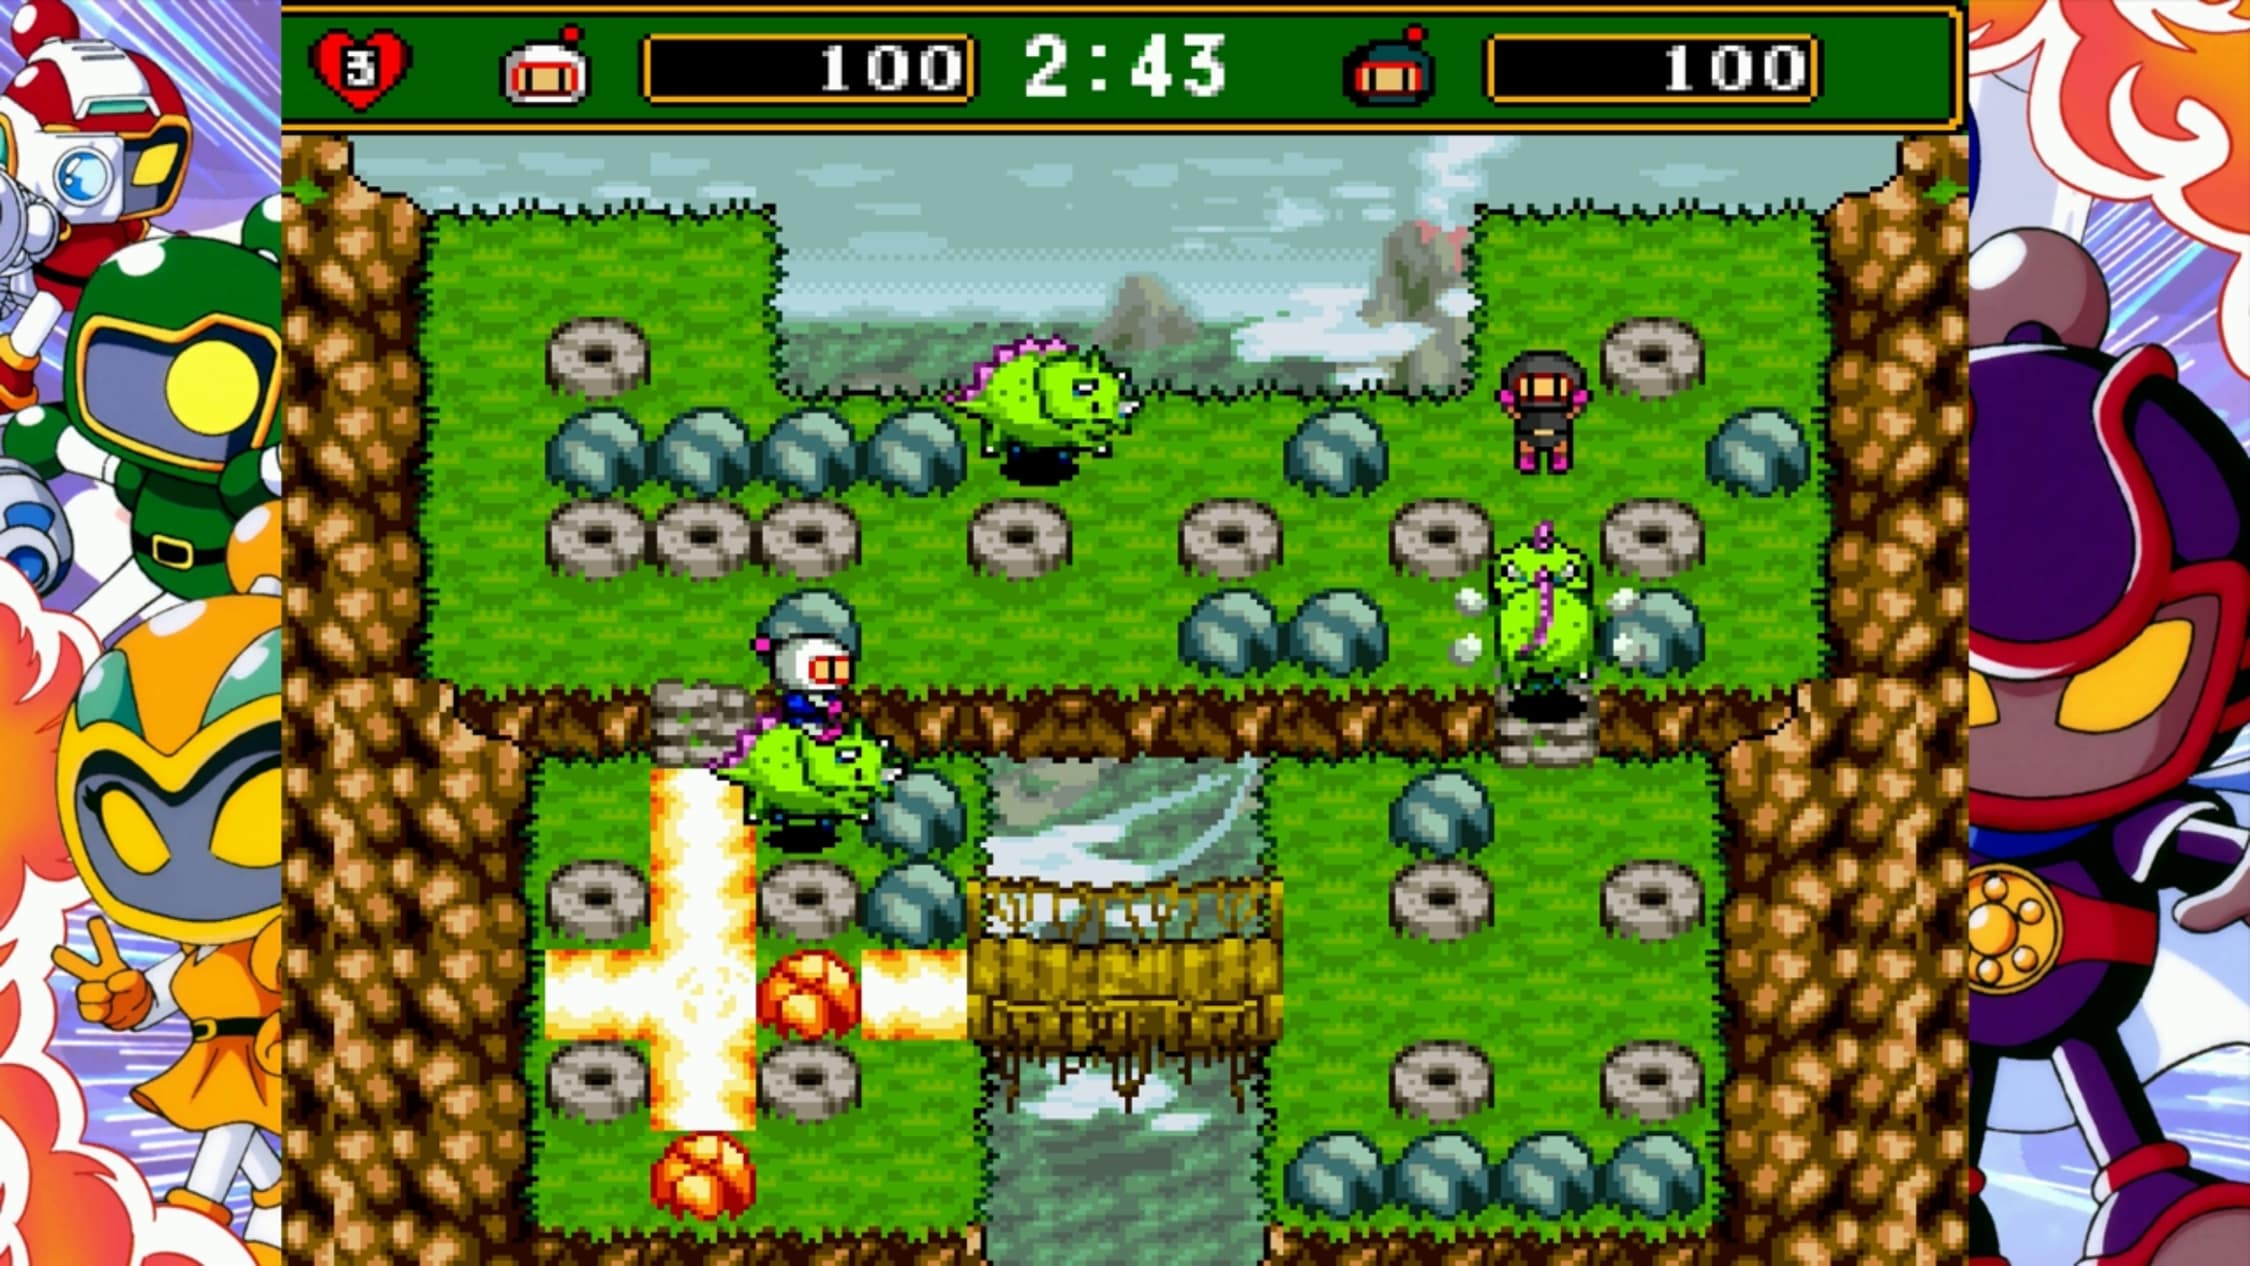
It’s also true that each of these games has a solo campaign. The franchise’s bread and butter is its competitive play, but there’s a dedicated group of people who really embrace the single-player arcade levels. And these are good ones! We’ve spent a while playing, and we are undeniably bad at them but there’s a puzzly element to taking on risky opponents in an optimal order.
When it comes to gallery modes in retro compilations, our usual stance is that it’s a great effort of preservation! But we don’t spend a lot of time with that stuff. Super Bomberman Collection’s “unbox” mode feels a lot more robust, though. With the detail and ability to virtually open the box and pull out the manual, it captures a bit more of the nostalgia of the originals.
Image via Konami
While it doesn’t have built-in functionality for this sort of thing, Super Bomberman Collection takes advantage of system-level multiplayer features like Switch 2’s GameShare and Steam’s Remote Play Together. How well does it work? Better than you’d think! We spent our time testing it out on Switch 2, and didn’t experience any of the frequent connection issues we usually get. What’s more, it’s the sort of game that can weather some minor hiccups if you get them, and it also doesn’t look too bad in the windowed GameShare screen.
Super Bomberman Collection, developed by Red Art Games and published by Konami, is out now on Switch 2, Switch, PS5, Xbox Series and Steam. Physical editions of the game will launch on August 25, 2026.
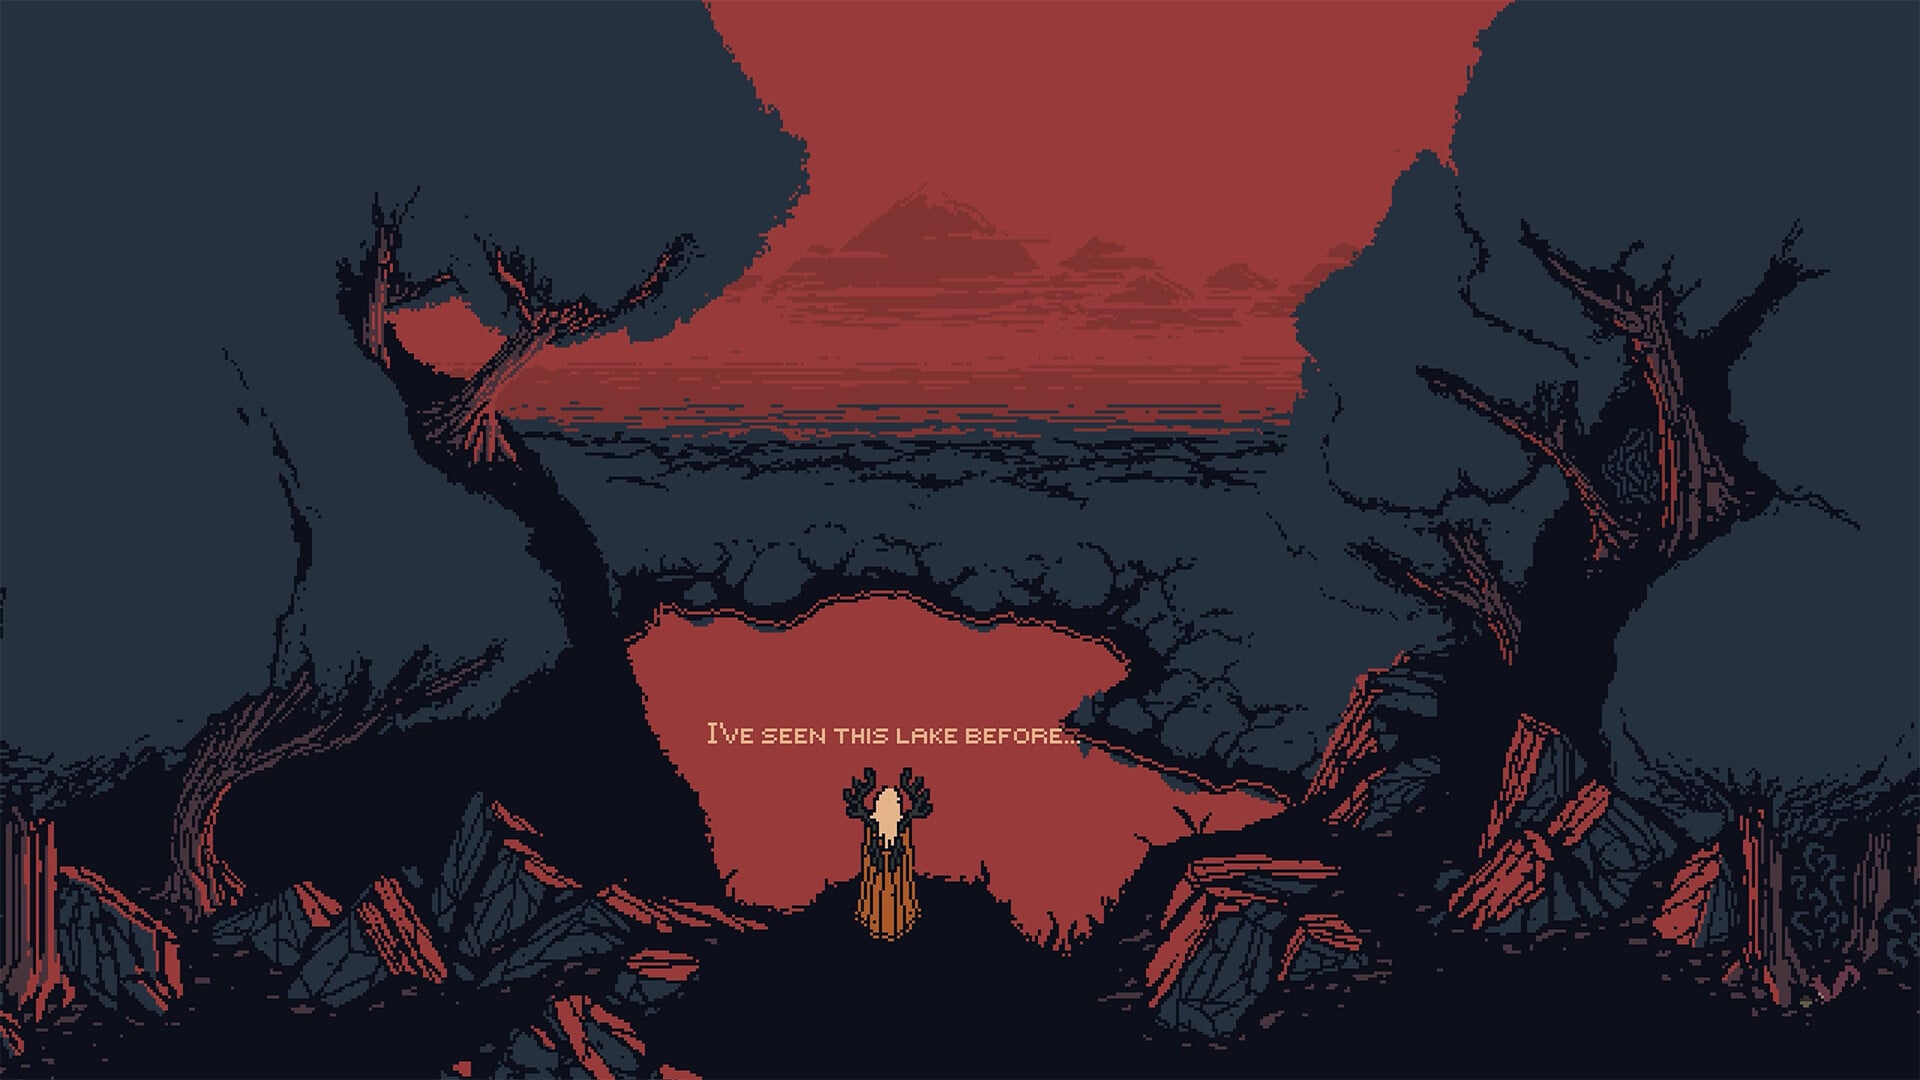
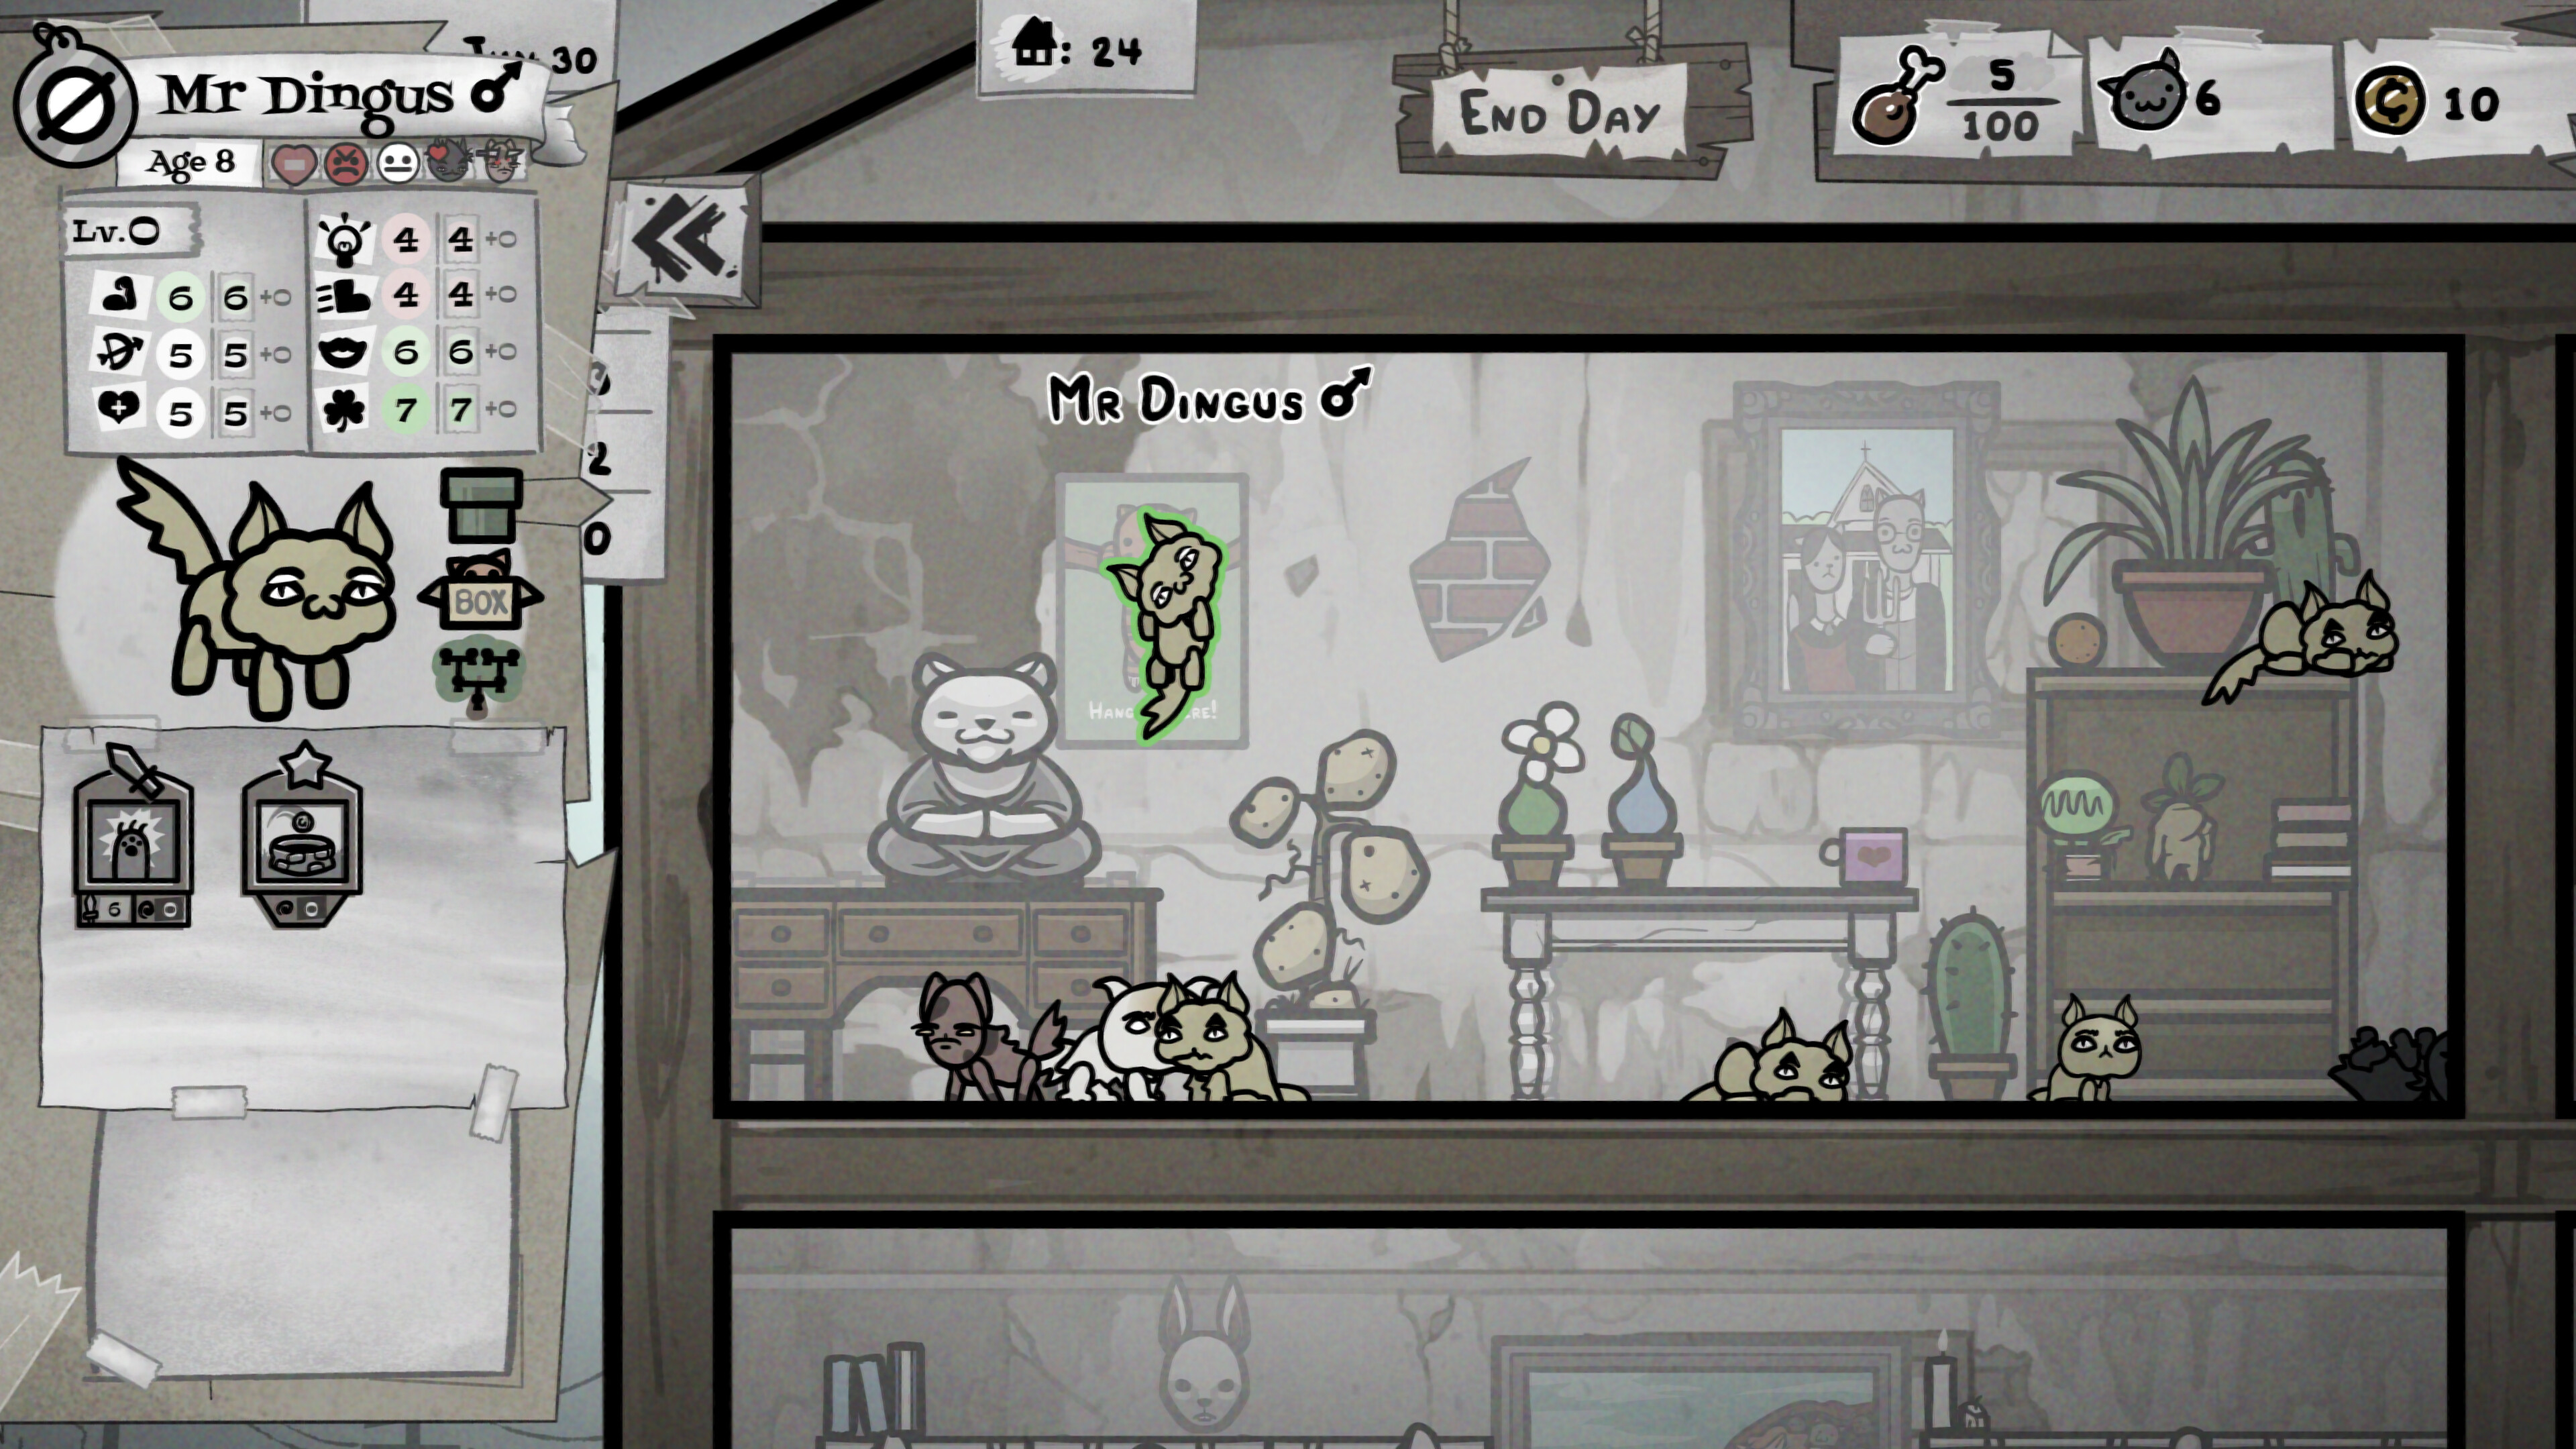
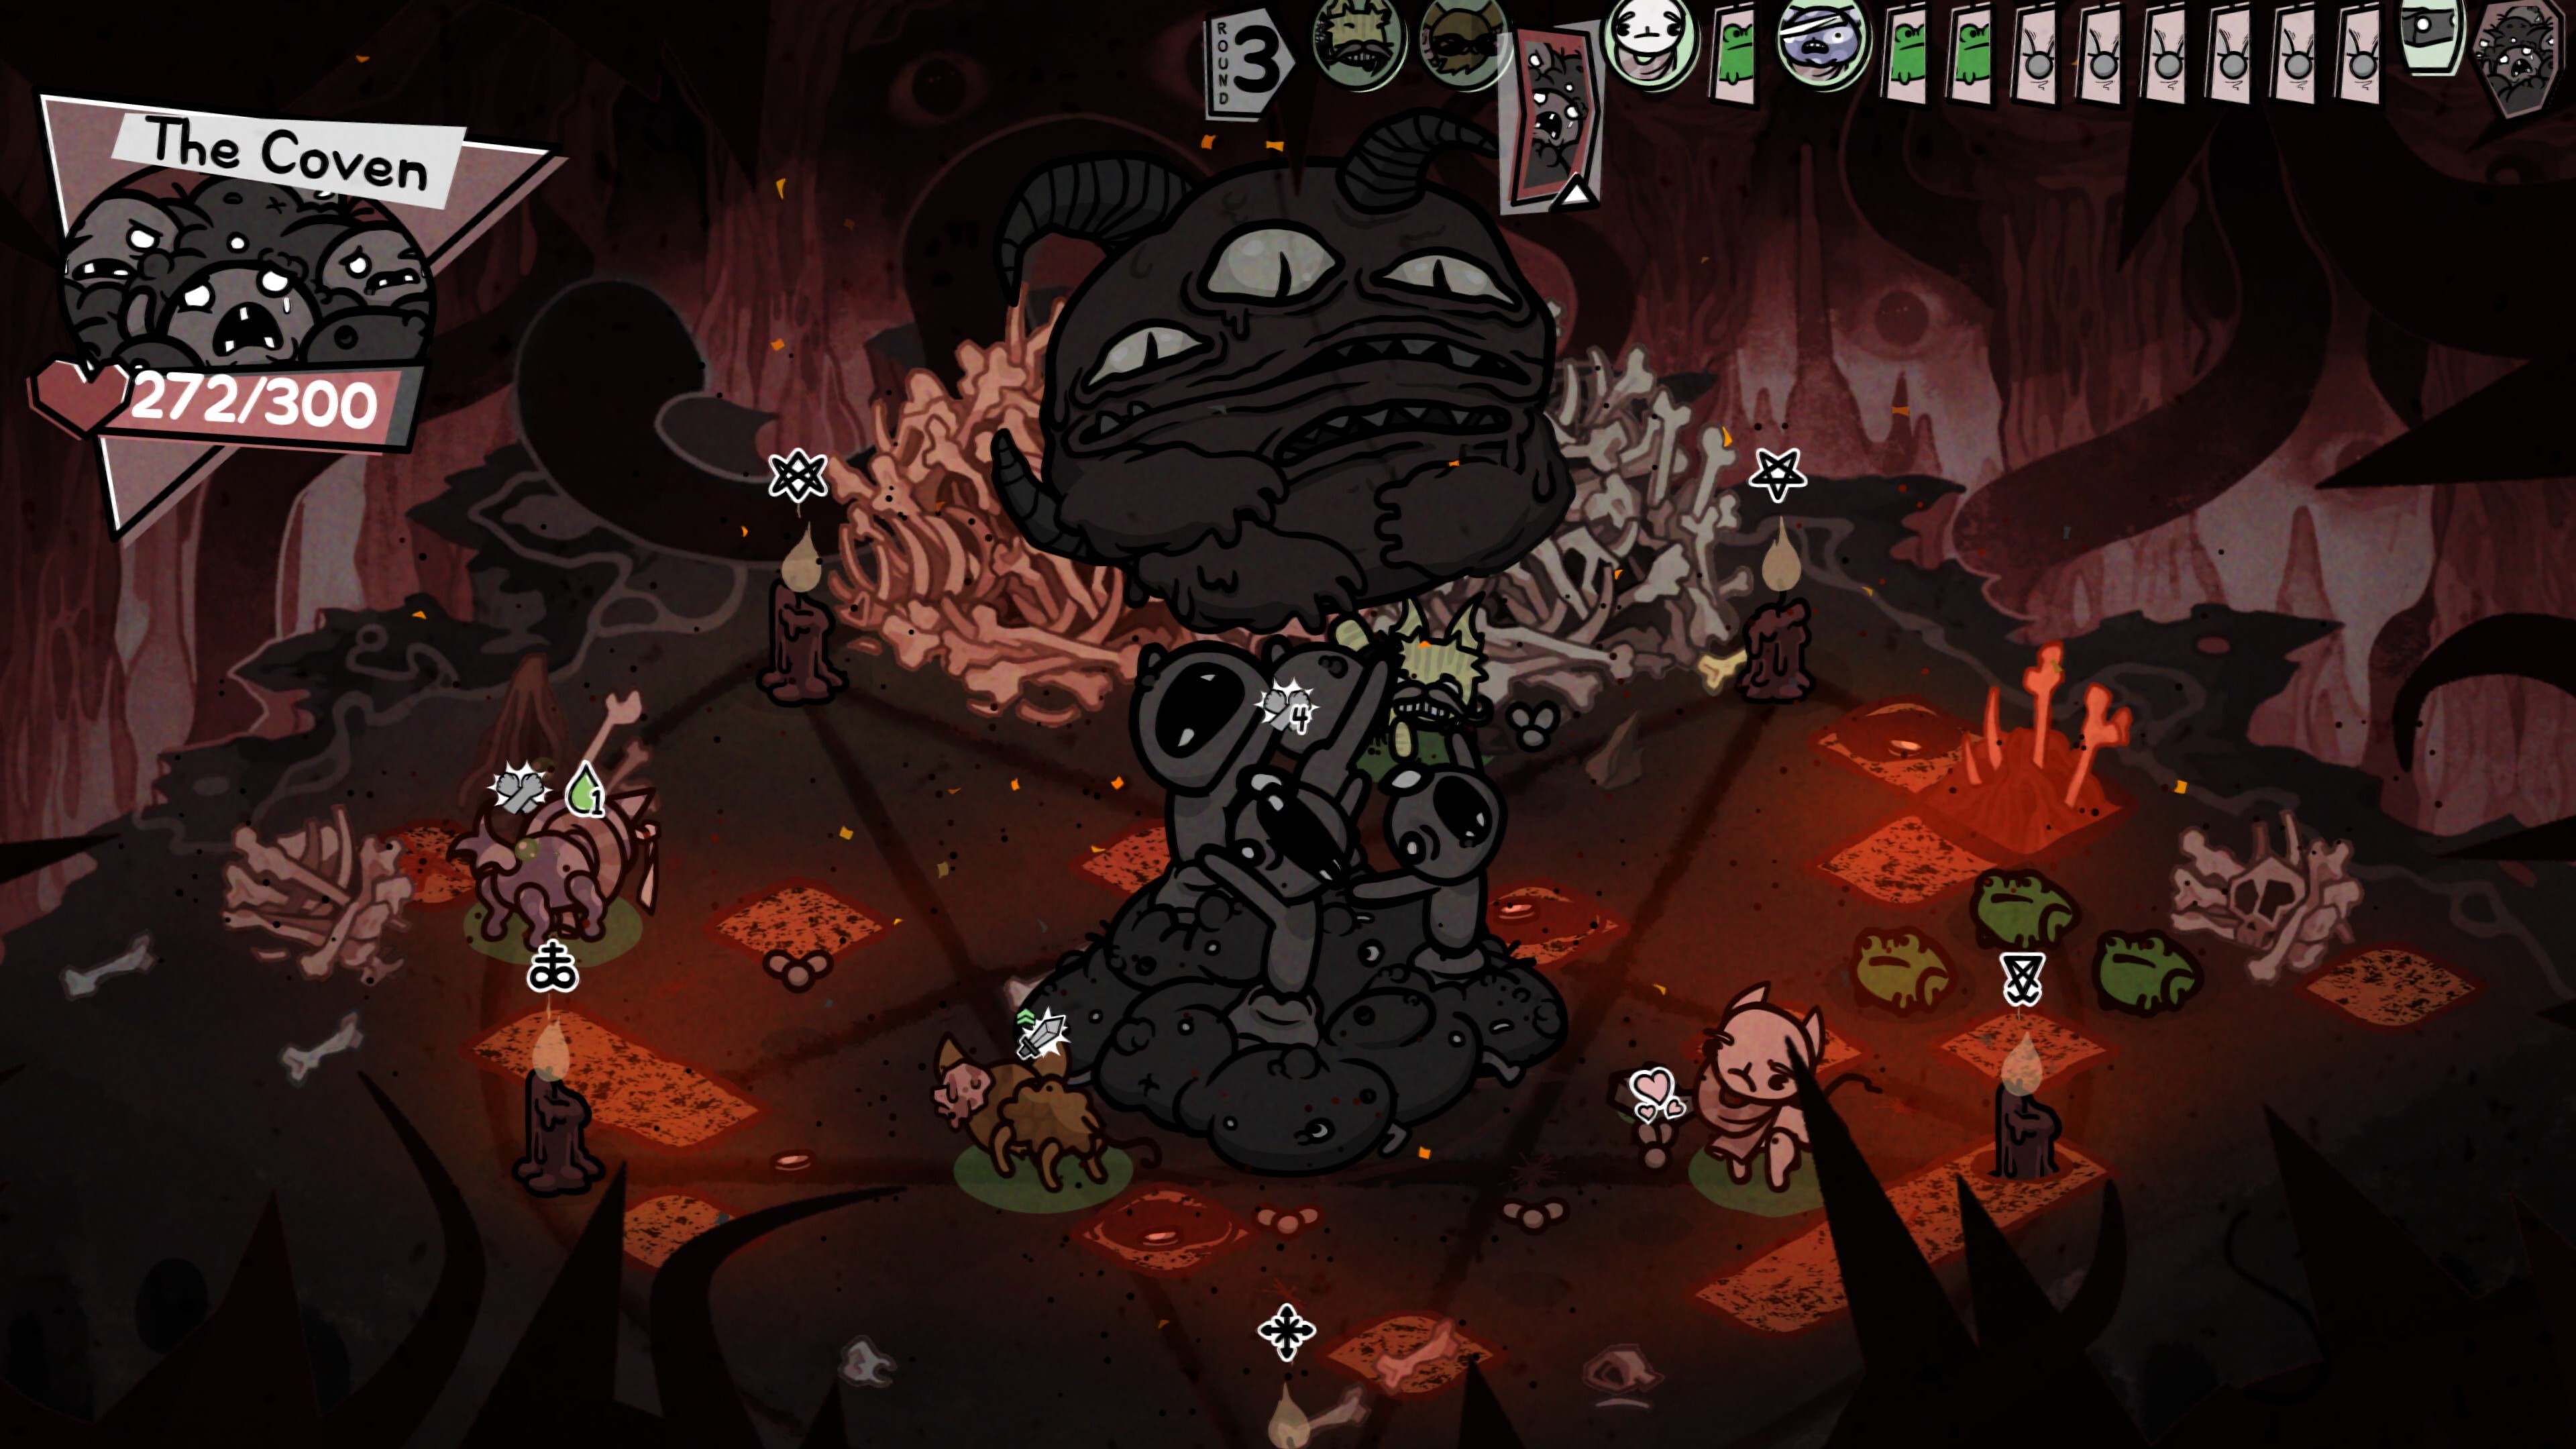
Death Howl is one of those unique strategic roguelikes that someone could play for 15 minutes for five hours straight, and it means the Switch version couldn’t come soon enough. I thoroughly enjoyed this brutal game when I played it on the PC. But there’s something about the nature of it that makes the gameplay loop and narrative beats feel highlighted so well here.
As a quick refresher, Death Howl is a strategic roguelike with a nearly monochromatic kinds of color palettes and melancholy story. Based on Scandinavian folklore, we follow a grieving mother named Ro searching the other side for her dead son Olvi who was stolen away from her. This means traversing different areas, facing all sorts of entities and beasts with abilities she gathers.
https://www.youtube.com/watch?v=FGF-v--wGhk
The narrative is fantastic. There are so many themes running through it. Revenge is a critical one, since there’s a central stag figure associated with her son’s death and apparent abduction. Not to mention she’s angry with Death itself over the loss. Coming to terms with the situation is another, since this is a journey about grief and clearly she’s going through the bargaining and depression stages while also being angry about everything and denying that this is a situation that can’t be undone. But there’s also this veil of uncertainty over everything. Due to the use of symbolism and design choices, Ro is an unreliable narrator and there are gaps in our knowledge as players. Which means part of the motivation that keeps us going is to finally know the truth of it all. Having the game on the Switch makes it easy to keep going so we can absorb the information and take in what possible truths could be hinted at as we play.
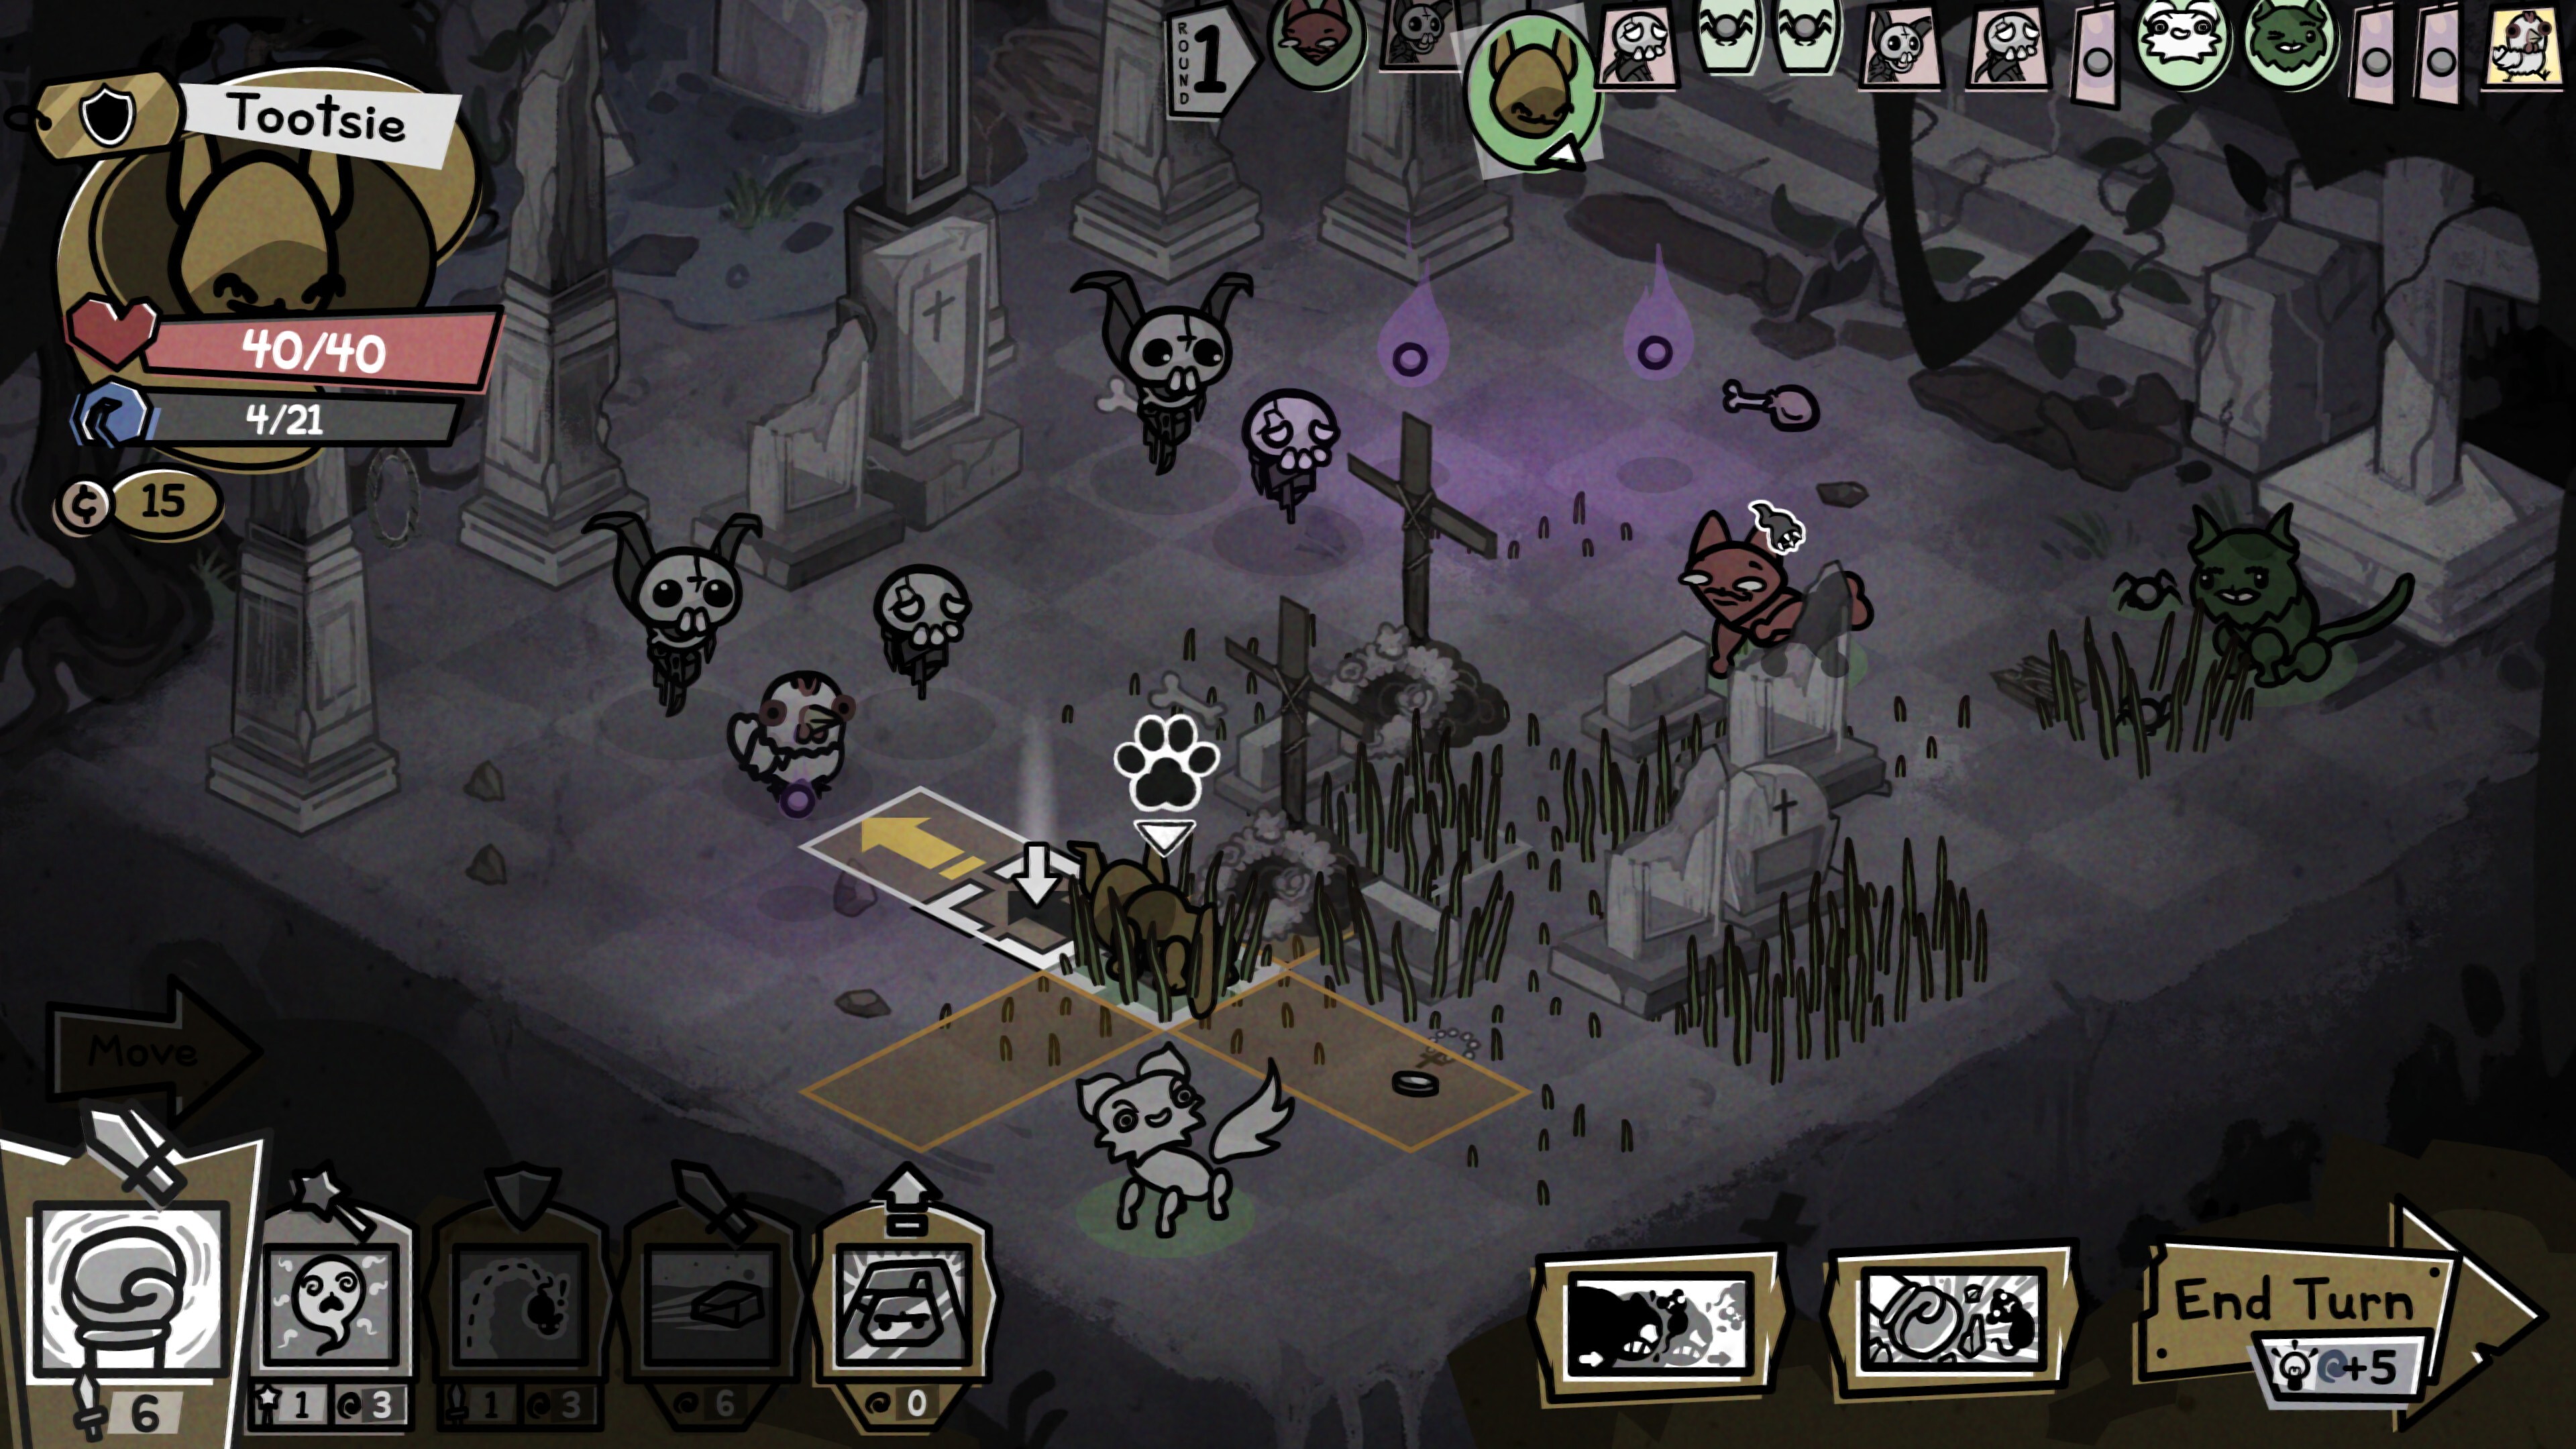
The Switch also makes for a good way to appreciate the art direction in Death Howl in the same way that the Steam Deck and other handheld gaming PCs do. This is a strategy game with sprite-based designs, an isometric perspective of the board, and limited color palettes for each region. Actual spirit designs play with shading and color options to depict details that wouldn’t otherwise be possible with the limitations. When there are effects from actions and spell usage, we see intricate animations. While it is possible to view these and take away the excellence, I feel like having it in handheld mode where you could really take a moment to look closer at details.
Image via The Outer Zone
It also helps that the Switch port is a great version of Death Howl. Given how text-heavy it is for cards and combat, the color and font choices make it clear even when the lettering is little. It’s almost always clear and legible. Pair that with the great controller-based scheme carried over from the PC release, and it is quite comfortable to play.
Handhelds are a good fit for roguelike games, and the artistic direction, narrative, and gameplay of Death Howl make it feel especially strong on the Switch. It’s a great port that plays well on the system. The nature of the storyline makes it a perfect game to play in a darkened room. Since the gameplay encourages deck experimentation and strategic decisions, you can really get cozy and experience it. It feels exceptionally at home here.
Death Howl is available on the Switch, PS5, Xbox Series X, and PC.
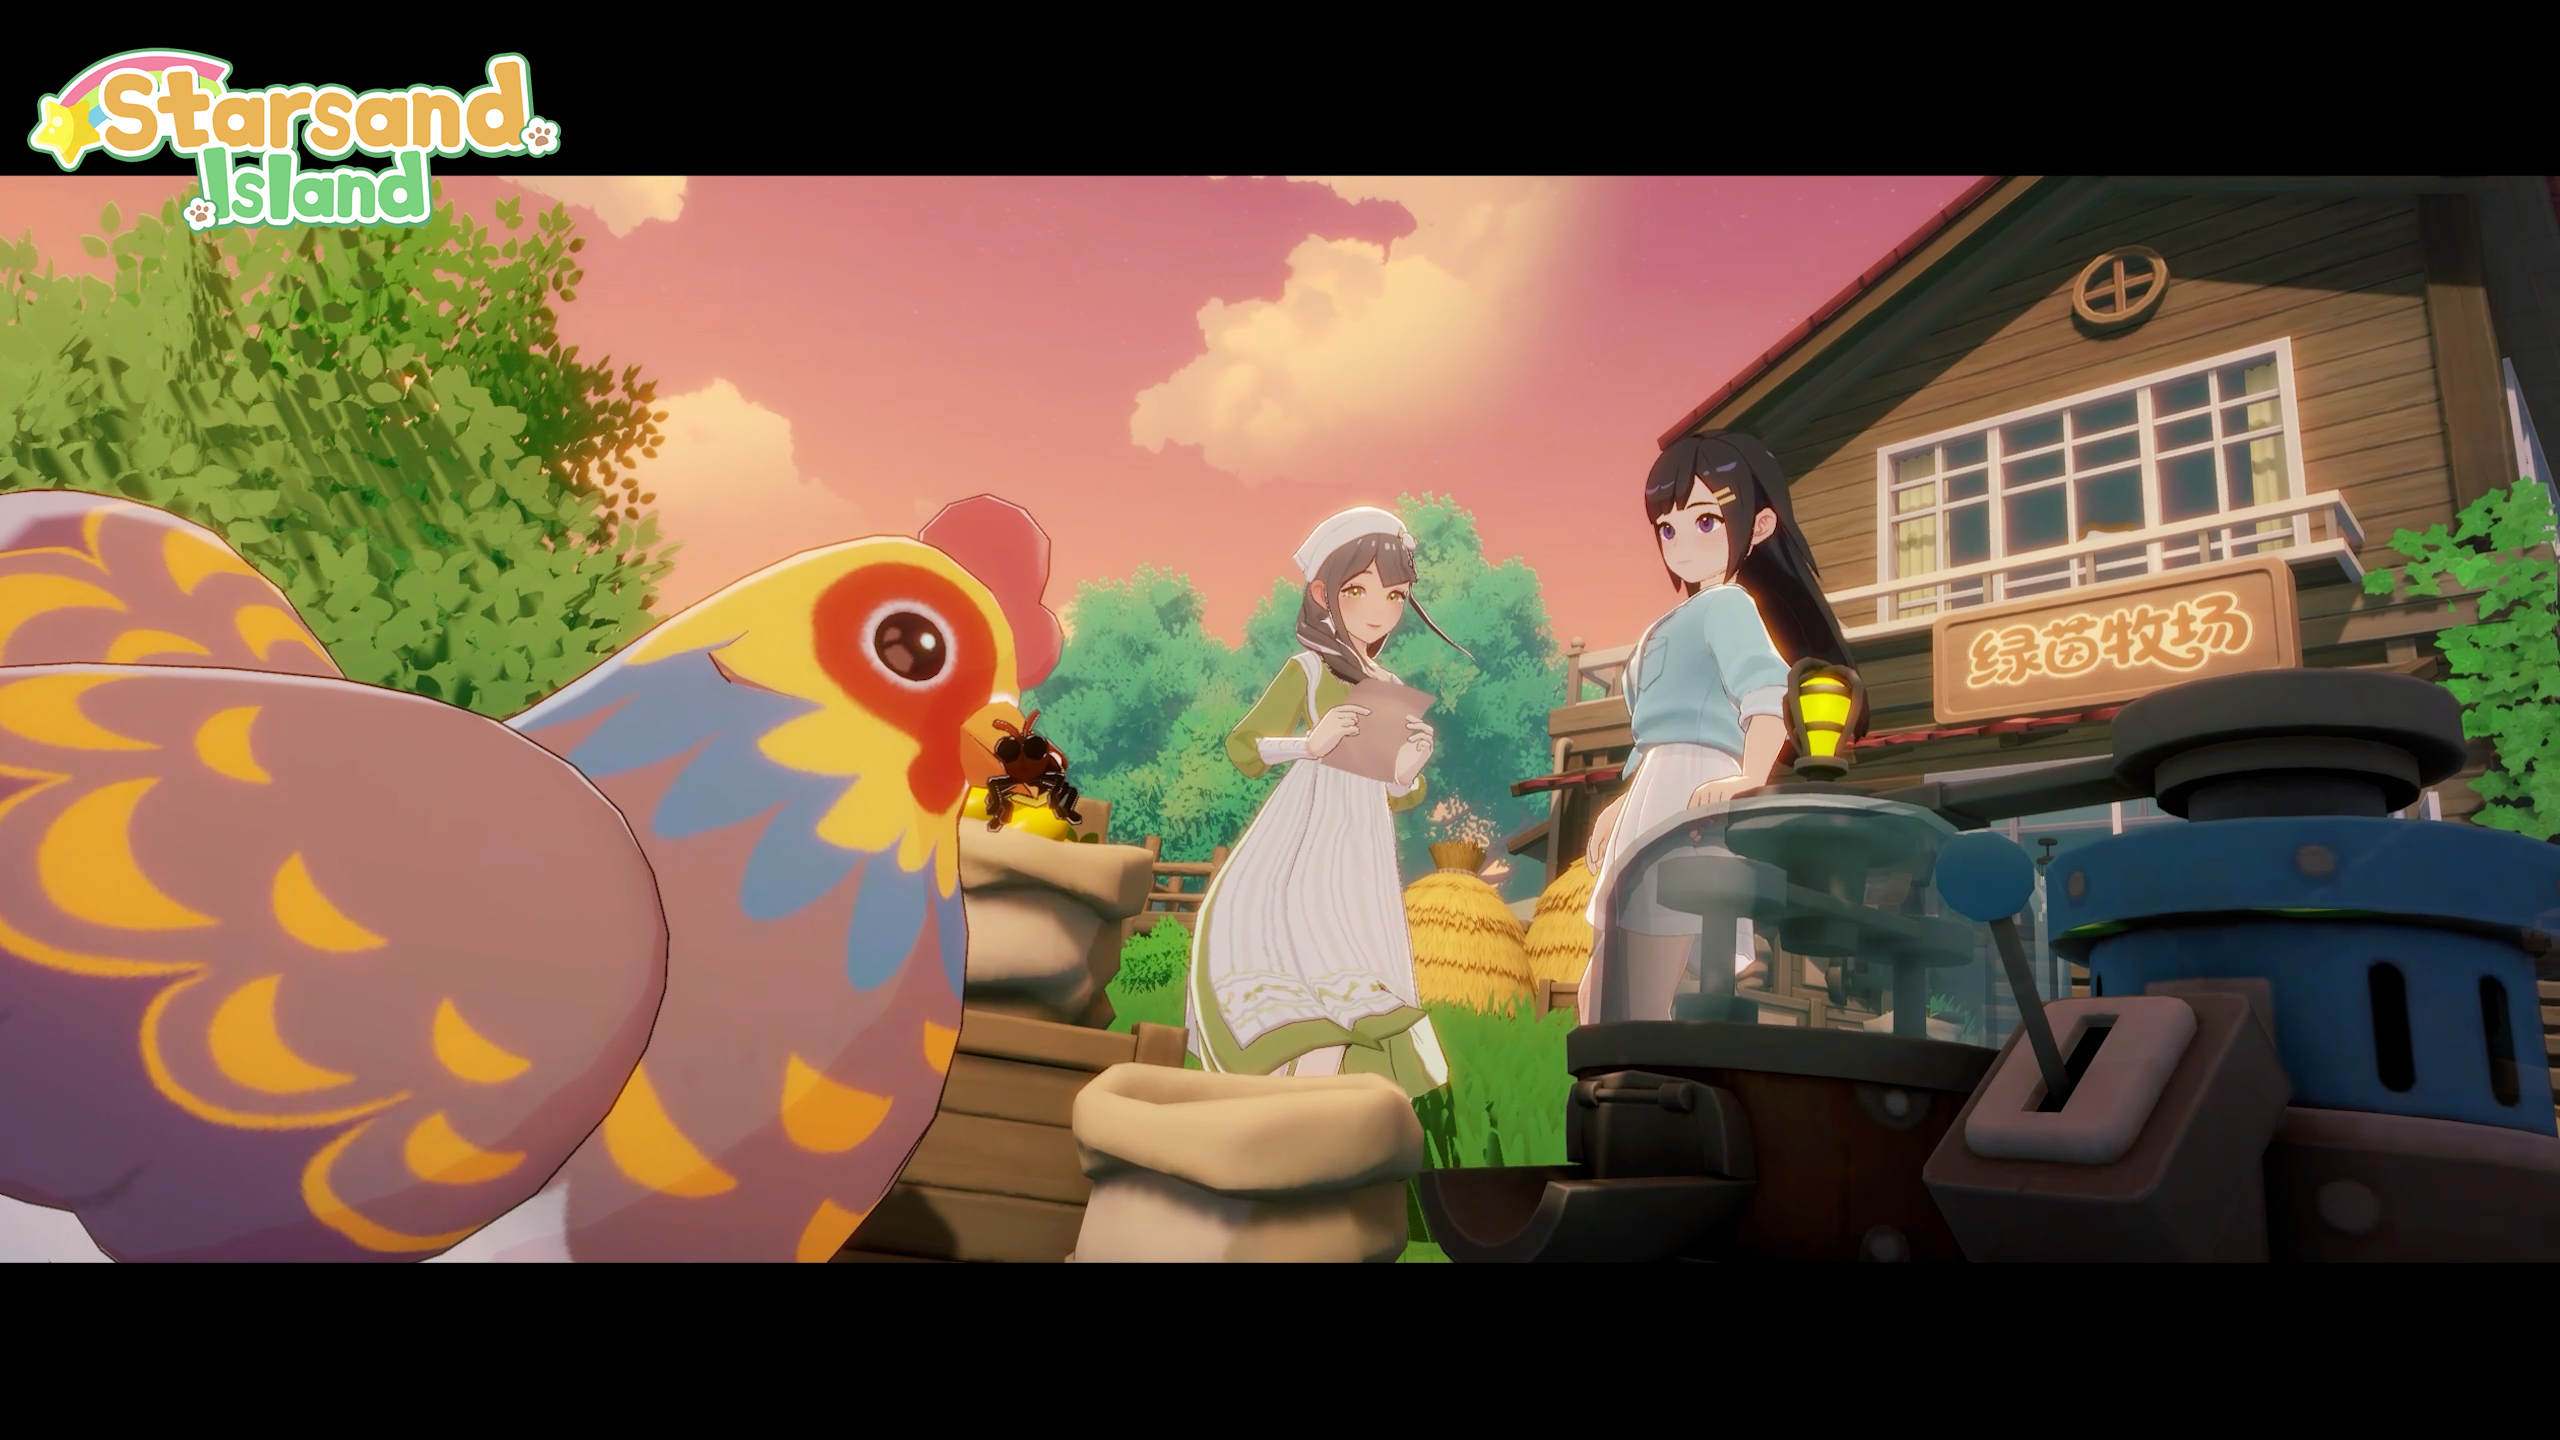
When I first played Starsand Island, it was early in development, not all the different types of professions were ready, and the build felt like a work in progress. Now that the game is properly in early access, it feels far more cohesive. Yes, not everything is there yet and I can’t live my virtual life to the fullest. Some balancing definitely needs to be done. But it does feel more pulled together and ready to go than it originally did.
As a quick refresher, Starsand Island is about moving to a rural community your character is already loosely connected to in order to start a new life. Previously, they’d only visited due to their grandpa living there. Now they inherited the home and, after a friend named Solara helps them settle in, they work on becoming part of the community.
https://www.youtube.com/watch?v=P5h-VhOriYs
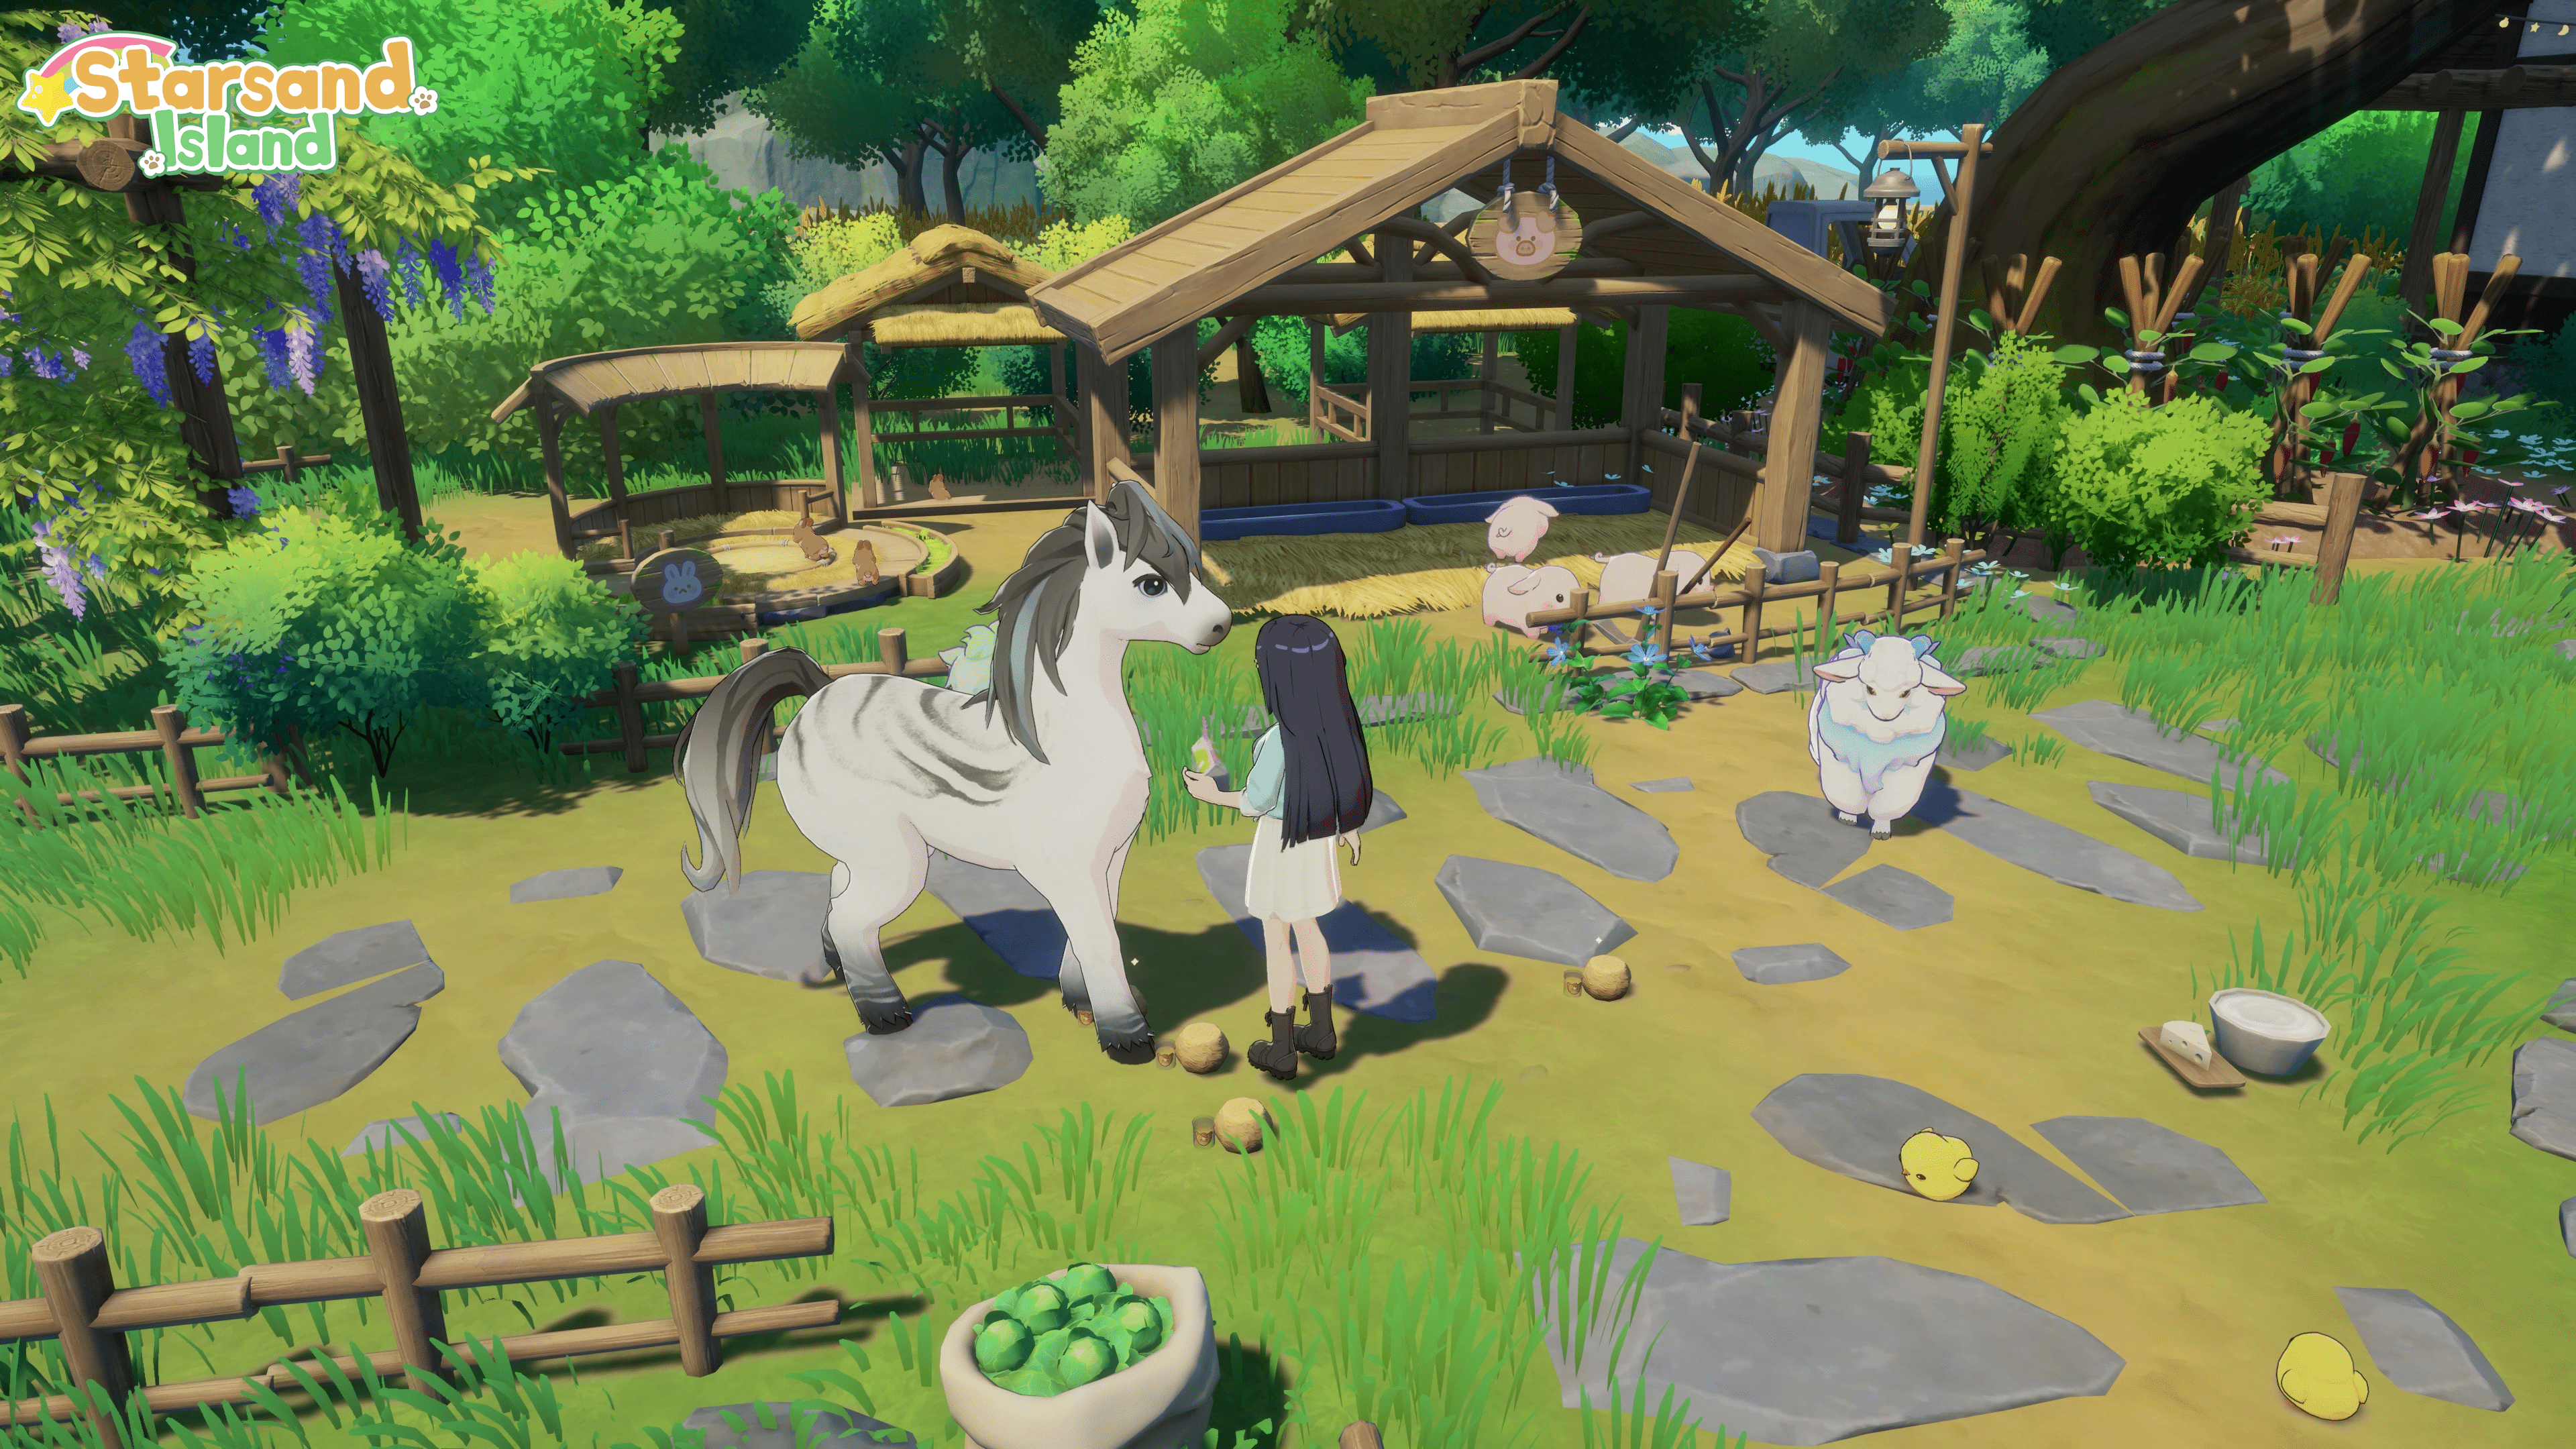
The biggest change I noticed between my initial Starsand Island experience and this return to the early access build is that there’s substantially more here. The Crafting, Exploration, Farming, Fishing, and Ranching professions feel much more fleshed out than before, with especially farming and fishing offering more variety in terms of yields, ranching adding more animal husbandry options, and many more recipes available when it comes to making things. These feel pretty full right now, though admittedly I haven’t completed any of the professions at this point. All of these seem advanced enough that I suspect I wouldn’t miss too much in 1.0 if I try and go ahead and do as much as possible now.
Some professions did really hook me in now in this build. Especially with the Farming and Ranching lines. It seems very easy to get settled, and the range of crops and animal is great right now. There are hybrids possible, if you spend enough time playing, and greenhouses are already present. Like getting to Expert Rancher and accessing the alpaca and ostrich are helpful for the extra eggs, feathers, and wool, not to mention riding them is quite cute. And the DNA element to it is helpful for breeding purposes, should someone focus on that lifestyle. However, I will note that exploration’s combat does seem to still need work. While bows are present as a weapon, adding a nice ranged option, there’s still not much there. We could use more enemies, as well as mechanics like dodging.
While the profession changes in Starsand Island probably the first and most obvious area to get a glow-up in early access, the relationship element feels pretty good right now too. This applies to both animals and people. The pet system reminds me a bit of Harvest Moon: Animal Parade, in that you aren’t just buying a new buddy. I mean, yes, Woof and Wow Pets does offer them. But we also adopt wild animals by befriending them and reaching basically three hearts. This means you’re going to need to work to get the fox or squirrel to be a friend.
Images via Seed Sparkle Lab
As for the human relationship element, it does feel pretty fleshed out even now in Starsand Island. There’s a decent number of love interests at 15 total (8 bachelorettes and 7 bachelors). These feature voice acting, though there’s not much yet, and there are more appearances in quests and interactions with folks that made me want to give gifts and check in daily. In some cases though, I felt like some of the folks were just pretty faces. There isn’t enough to them yet to make them lovable. However, it does seem like that could change. The team stated there will be more to the dating system come April 2026. I would like and hope to see marriage and kids in the endgame too.
However, I will say some stuff doesn’t feel completely balanced or 100% set yet. This is an issue acknowledged on the Steam product page and in the roadmap. I would like a little better performance when really racing through on mounts or on an item like a skateboard. Some character models could be adjusted a little. Getting your house and land built up does take a lot of time, and it doesn’t feel like it’s quite designed for us to get to the point of a massive complex with a home we could have a romance option move into yet. I do wonder if we might see rebalancing progression and development updates, since the crafting part does feel stronger than the pre-launch build I played and the team did mention that’s in the roadmap.
Starsand Island is essentially coming along, with the early access version showing a lot of progress from the initial build I played. There’s a lot more to every profession in the game, though exploration could use a bit more additions and adjusting. Romance is starting to seem more viable, and pet adoption is enjoyable. Some rebalancing would be great, but the foundation for the 1.0 version later this year seems pretty stable.
Starsand Island is in early access on the PC and Xbox Series X on February 11, 2026, and a full launch that also includes Switch 2 and PS5 versions is set for Summer 2026.
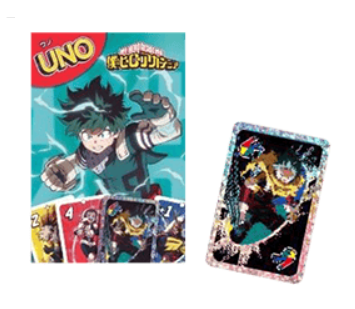
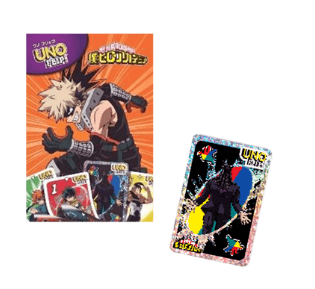
McDonald’s Japan will includeSpy x Family and My Hero Academia Uno decks in its Happy Meals from February 27, 2026. They will be available for about three weeks.
https://www.youtube.com/watch?v=hUnKaP1daAM
There are two parts to the anime Uno collaboration. From February 27 to March 5, 2026, you can get the Anya, Loid, and Todoroki decks. Anya’s is Uno Flip, while Loid’s is just normal Uno. Todoroki's is Uno All Wild. Then, from March 6 to March 12, 2026, McDonald’s will launch the second half of the collaboration. During this period, you can get the Yor, Bakugou, and Deku decks. Yor’s deck is Uno All Wild, Bakugou’s is Uno Flip, and Deku’s is normal Uno. From March 13, 2026, you can get any deck from the above six.
Images via McDonald's, Mattel
These Uno anime decks are actually available on their own, so you don’t have to get a McDonald’s Happy Meal for them if you don’t want to. They’re more expensive that way, though. It should also be noted that Japan isn’t the first or only country to get these Uno decks. Canadian McDonald’s announced this collaboration in January 2026, along with Boruto decks.
The Spy x Family and My Hero Academia Uno decks will be available in McDonald’s Happy Meals in Japan from late February 2026.
Viz Media announced its new Fall 2026 manga and book acquisitions, and among them are Beastars mangaka Paru Itagaki’s Witching Hour and manga versions of The Apothecary Diaries light novel and anime and The Amazing Digital Circusweb series. It also confirmed it will publish the biography Nobuo Uematsu: On the Record.
In the cases of The Apothecary Diaries and The Amazing Digital Circus manga adaptations, both are taking work from the original authors and productions. They each have new mangakas assisting in telling the tales for these adaptations. In the case of The Apothecary Diaries: Maomao’s Notes on the Inner Palace, Touko Shino’s character designs from the original light novel are still used, but Minoji Kurata is the mangaka. For The Amazing Digital Circus, Sakura is listed as the artist.
Here’s the full list of new Viz Media manga and book reveals. All of them have Fall 2026 release windows, but there are no exact dates for any of the releases.
Albus Changes the World manga volume 1
The Amazing Digital Circus manga volume 1
And Then There Were None manga volume 1
The Apothecary Diaries: Maomao’s Notes on the Inner Palace manga volume 1
Black Torch Complete Box Set
Call of the Night: Paradise Arc manga
Dorohedoro Illustrations: Mud and Sludge art book
Heroes, with Interiors manga
Horror Picture Book: A Bad Book by Miyuki Miyabe with Hisanori Yoshida art
Horror Picture Book: Is It There or Not by Natsuhiko Kyogoku with Naoko Machida art
Horror Picture Book: Looking at Me book by Soshichi Tonari with Junji Ito art
Jujutsu Kaisen Complete Box Set with double-sided poster
Kiki's Delivery Service: The Official Cookbook
My Hero Academia Box Set 2with double-sided poster and booklet
My Hero Academia: Ultra Artworks art book
Nobuo Uematsu: On the Record biography
One Piece manga volume 91-111 box set with One Piece Card Game play mat
Sakamoto Days: Assassin’s Blues manga
The Seaside Where Dragon Boys Dwell manga volume 1
Infiniteloop teased the next DLC character for the application Desktop Mate on social media, and it looks like Sanrio mascot Hello Kitty is on the way. There’s no release date for the add-on yet. The image also didn’t show how she’ll look in-app when hanging out on our desktops.
The image is vague. It shows a silhouette of Hello Kitty sitting against a white and grey-striped background, so there’s no screenshot from Desktop Mate used. At the top is the Sanrio trademark, helping to confirm that this is her. Across the front is the text “coming soon.” This statement appears in Japanese and English, just like all past add-on reveals, so the DLC will show up everywhere.
Here’s the official teaser image.
Image via Infiniteloop and Sanrio
This comes after multiple Vocaloids appeared in Desktop Mate. In December 2025, Kagamine Rin and Len showed up. Those were sold separately, but have special interactions if both are owned. More versions of Hatsune Miku showed up after that. Both Snow Miku 2026 and JR Tower versions launched. The official roadmap on Steam only shows two more “coming soon” spots.
Desktop Mate is available on Steam, and Hello Kitty will be the next DLC character to be added to the application.
Back at the beginning of November 2025, we announced our ad-free Siliconera+ subscription would be back. Now that we’ve gotten things situated, we’d like to announce a free-trial. Starting immediately, anyone joining Siliconera+ will get a two month (60-day) free trial if recurrent payment is enabled. So if someone would join on November 17, 2026, then the $1.99 subscription fee would kick into effect on January 16, 2026.
As a reminder, here is everything you get with a Siliconera+ subscription:
No ads appear on the site.
Automatic monthly entries in our contests for a free game. Each month, we’ll give away one PC game to one random Siliconera+ subscriber. (The one for December 2025 will be the PC version of UNBEATABLE.) People who don’t subscribe are also able to enter via a form found in our free monthly newsletter, which you can sign up for at any time. The link to enter for free will appear in that email that shows up on the last Friday of every month.
Monthly survey access to help suggest future news and feature coverage. On the last day of each month, the members-only article that announces the free game contest for the next month and winner of the previous month's game will include a survey that allows you to help weigh in on what we could cover. This will also include an open-ended “any other feedback” short answer portion for additional outreach. While we will still prioritize some topics we know bring in traffic (like Hatsune Miku, Sanrio, and some figure and anime stories), this will allow you to offer additional insight into things we might have otherwise missed.
We’d really love to expand what we offer and keep serving the community as we did before, and we hope the support from Siliconera+ will allow us to run more news, reviews, previews, interviews, and playtests each month. If you have any further questions, comments, or concerns, please let us know in the comments below.
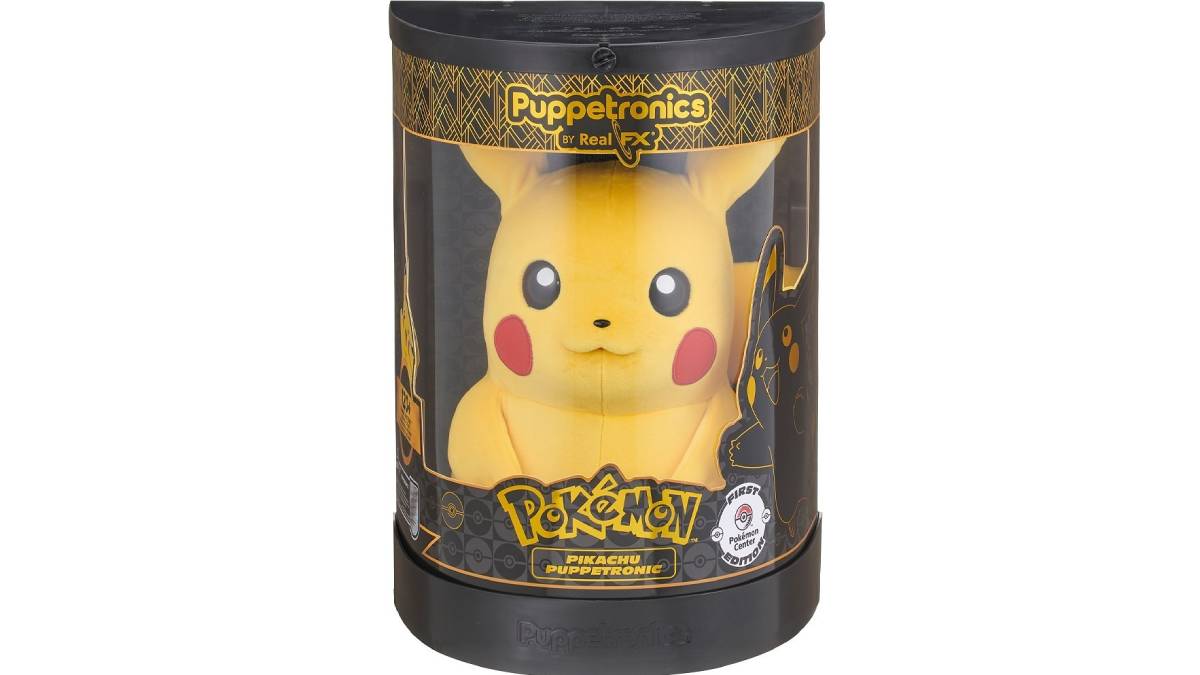
The Wow Stuff First Edition Pikachu Puppetronic by RealFX toy launched on the UK Pokemon Center storefront and immediately sold out. The £89.99 pre-orders only opened in that region at the moment and are expected to ship in Spring 2026 there. The North American and Japanese storefronts are not showing listings at the moment. Note that this only applies to just one version of the item, as a wider release is planned.
All versions of the Pikachu Puppetronic by RealFX toy will behave the same way, regardless of the edition. Touching its head, nose, and stomach can cause different reactions, with the character able to make noises, move its ears, blink its eyes, open and close its mouth, and light up the red cheeks. The product page noted “more than 120 sounds and actions.” There’s also a trailer showing its behavior, though the one on The Official Pokemon YouTube channel is region-locked.
The only difference between the First Edition version of the toy from the Pokemon Center and ones that will appear after involves altered additions that show it was one of the first to market. The box will have a “First Edition” badge on it to show it was purchased via The Pokemon Center. Inside the box is a certificate of authenticity. However, the certificate doesn’t mention a number to show how many of this release were produced and which “one” you got.
This Pikachu toy did show up at the 2026 Toy Fair in New York City, so there is other footage of it online in case you can’t see the region-locked trailer. For example, the KirbyGCN17 YouTube Short before showed someone demonstrating it at the event.
https://www.youtube.com/shorts/RIu3vwBnRBI
The Pikachu Puppetronic by RealFX toy will release in 2026, with the Pokemon Center UK First Edition one releasing in Spring 2026. We might learn more about the worldwide release during the Pokemon Day Pokemon Presents on February 27, 2026.
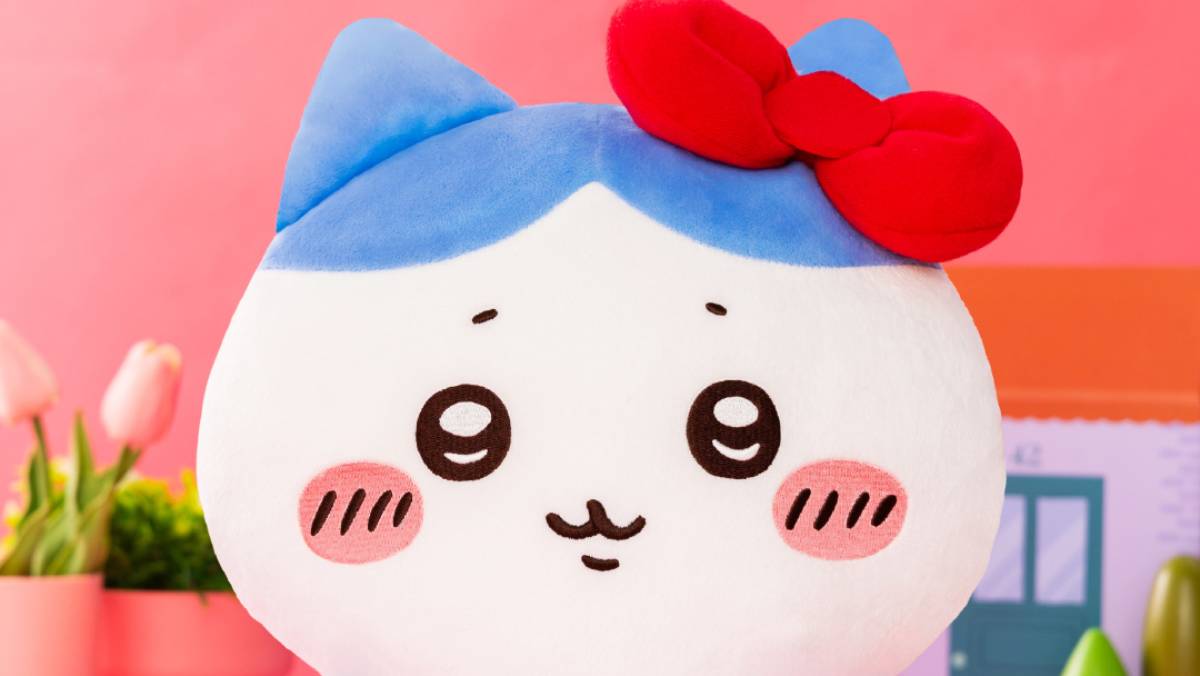
Parade announced that, at the end of February 2026, Chiikawa Sanrio plush of characters from the anime and manga dressed as mascots like Hello Kitty will appear. There will be three varieties. They will appear in actual arcades as prizes in Japan and in many online crane games. There’s no word on if we’ll see them eventually everywhere.
While three characters appear in this Chiikawa Sanrio lineup, they only feature two of the main characters from the series. Chiikawa is present, wearing a hood that looks like My Melody’s. Hachiware is there too with a Hello Kitty ribbon on the left ear. However, the third is the side character Kuri-Manju in a full Hangyodon costume. All of them are just under a foot tall at 11 inches (30cm).
Here’s how all three of these plush will look. One of the photos Parade shared shows the Chiikawa My Melody one being held, to offer a sense of scale.
Image via Parade, Kodansha, and Sanrio
We’ve seen this kind of crossover happen before. Gray Parka Service featured a similar plush collection that included six characters from the series dressed as Sanrio mascots. Those launched in Japan in December 2025. Chiikawa was My Melody, Hachiware was Hello Kitty, and Kuri-Manju was Hangyodon for that line too.
The Chiikawa Sanrio plush will appear in Japanese arcades at the end of February 2026, Kodansha handles the manga, and the anime isn’t streaming on any platforms in North America at the moment. Chiikawa the Movie: The Secret of Mermaid Island will air in Japan in 2026.
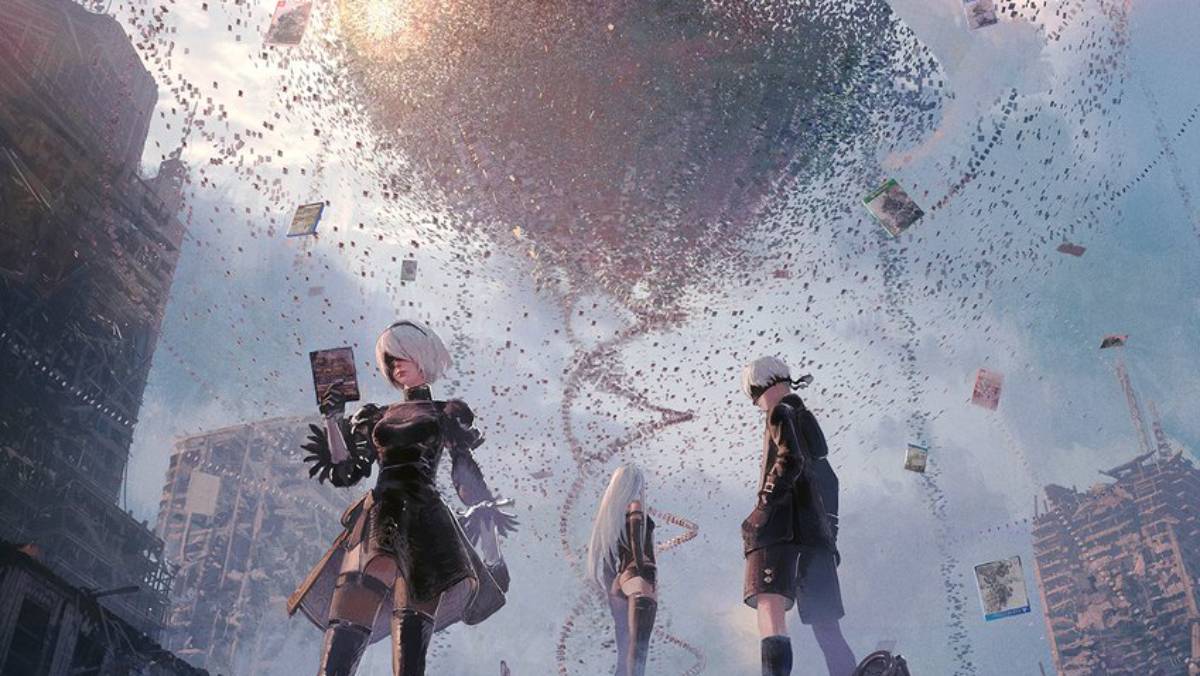
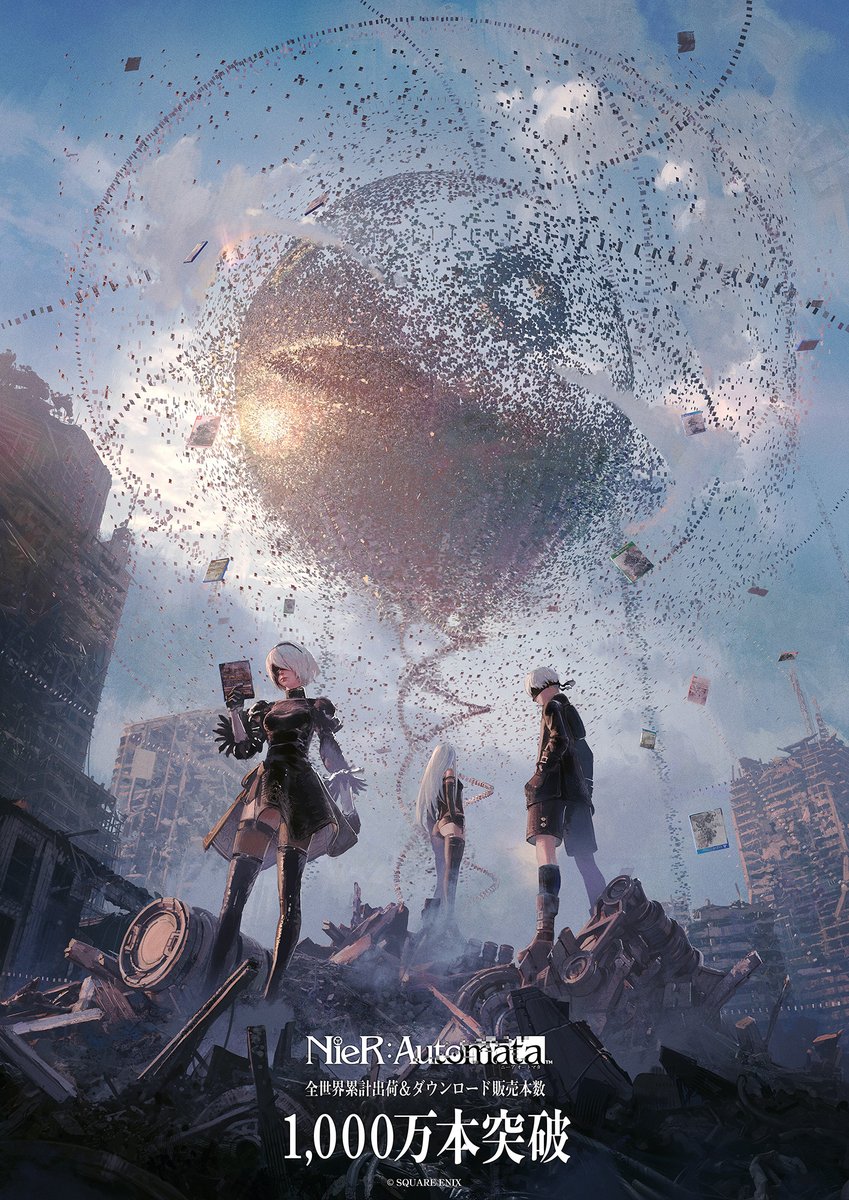
Square Enix shared a special PV video on YouTube that ended with the phrase “NieR: Automata to be continued.” This suggests we could see a new NieR: Automata project, though the vagueness means it is uncertain if it could be related to the anime adaptation, a game, or book. Additional statements also confirmed current sales figures for that game and NieR Replicant.
First, here’s the “NieR: Automata to be continued” announcement video suggesting a new project like a game or other form of media is in the works. It’s specifically designed to honor the fact that this game passed 10 million units sold physically and digitally worldwide. That applies to the Switch, PS4, Xbox One, and PC versions of the game. At the 5:48 mark of the PV, the screen scrambles and the ominous text suggesting more is in development shows up.
https://www.youtube.com/watch?v=Wyn1b_5bw-M
Square Enix also shared new key art on social media honoring the sales milestone. That features 2B at the forefront, with 9S right behind her and A2 at the back.
Image via Square Enix
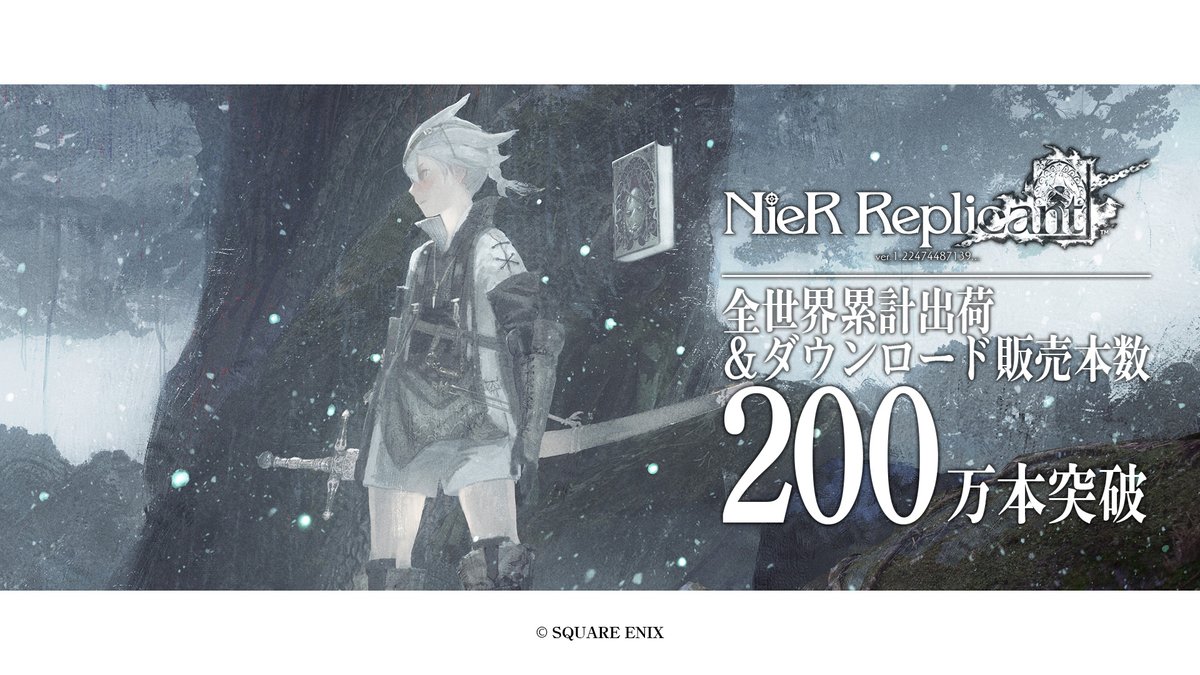
As for the new sales figure update for NieR Replicant ver.1.22474487139, that wasn’t accompanied by a special video. Square Enix just took to social media to share the update. It’s now at two million copies sold worldwide digitally and physically. That takes into account the PS4, Xbox One, and PC copies.
There is a piece of art shared to commemorate that, however.
Image via Square Enix
NieR: Automata is available on the Switch, PS4, Xbox One, and PC, the anime is on Crunchyroll, and Square Enix’s books division handled a number of spin-off books worldwide.
Capcom has announced that it is working with Yume Group and S.Ride to hold collaboration campaigns celebrating the release of Resident Evil Requiem in Japan. The former will particularly release a special bundle that combines a physical copy of Resident Evil Requiem with its own hanging fitness equipment.
Buyers can choose between a PlayStation 5 Blu-ray disc package or a Nintendo Switch 2 game key card to be bundled in the same box as the fitness equipment. Capcom has also provided a render of Grace trying out the equipment to help Yume Group promote the product.
The Resident Evil Requiem hanging fitness equipment bundle is priced at ¥19,800 (~$127.50), and Yume Group opened pre-orders on its website at 8 AM JST. However, it could only prepare 50 copies of the bundle, and all of those were already sold out in less than half a day.
Yume Group has also published a trailer promoting the bundle on its YouTube channel:
https://www.youtube.com/watch?v=8QGs52iPj9A
In the same press release, Capcom also revealed that S.Ride will temporarily launch ten taxis sporting the Resident Evil Requiem promotion livery from February 23 until March 1, 2026. These taxis will run around the cities of Tokyo, Musashino, and Mitaka.
During the above campaign period, the S.Ride app on iOS and Android will feature an Umbrella Corporation icon that users can tap to find and call the specially branded taxi.
Image via Capcom and S.Ride
Resident Evil Requiem will be available simultaneously worldwide for PlayStation 5, Nintendo Switch 2, Xbox Series X, and PC on February 27, 2026. Yume Group will also release its hanging fitness equipment bundle on the same day.
Some Pokemon Day 2026 reveals appeared ahead of the actual event on February 27, 2026, and it involves Switch releases of Pokemon FireRed and LeafGreen and a Pokemon Presents showcase stream. The presentation will air first at 6am PT/9am ET/3pm CET, and the digital GBA games will show up on the eShop after.
In the case of the Pokemon FireRed and LeafGreen Switch releases, there are a few details about these versions. They will be $19.99 each, and the eShop pages for both are live. These will be the exact JRPGs we remember. However, if you want different languages, like English, French, or Spanish, those will be separate purchases instead of an option you select from a menu in-game. (Italian and Japanese aren’t available in the North American eShop.) The Sevii Islands will be present in-game. If you want to battle or trade other people, it is only going to be possible via local multiplayer, and there is no Pokemon Home support at launch. They are both confirmed Switch 2 compatible.
Here’s the official trailer:
https://www.youtube.com/watch?v=k8c_C4vfUMo
As for the Pokemon Presents 2026, there are fewer details about that. We know the time and date. We know it will be on Twitch and YouTube. Presumably, these two Switch versions of the GBA JRPGs will also appear in a spot during it as a reminder of their release after the stream as well.
Pokemon FireRed and LeafGreen will come to the Switch and be playable on the Switch 2 on February 27, 2026, and they are also available on the GBA.
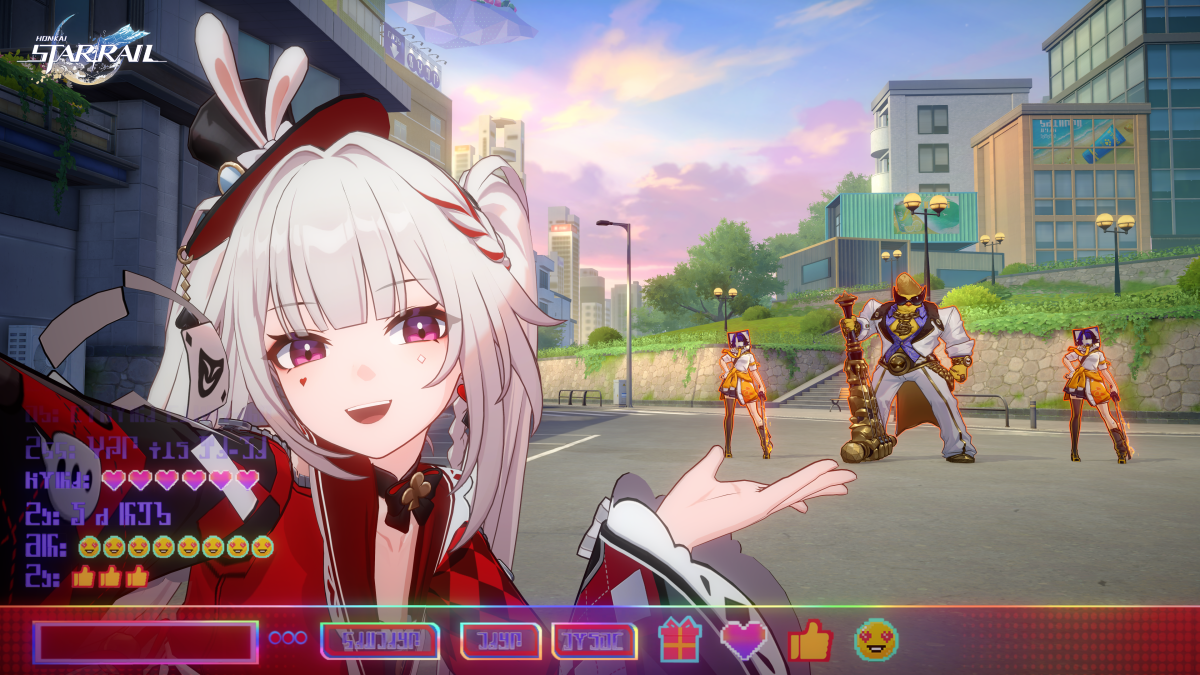
Whenever a major update arrives in Honkai: Star Rail, it always brings with it tons of new additions and gameplay features, and 4.0 is no exception. However, it seems like this version is building up with its first patch, and that we might see the real major benefits and changes once 4.1 and 4.2 arrive. Keep in mind, 4.0 is still a big deal! Especially when it comes to Sparxie and Cosmicon Collective. But I get the impression we’ll see the full weight of Planarcadia’s Trailblaze Missions and Elation’s power once we get more into it.
With the new Planarcadia Trailblaze Missions in Honkai: Star Rail 4.0, it reminds me more of the early Xianzhou Luofu and Penacony storylines than something like Jarilo-VI and Amphoreus. We’re welcome guests to the planet, with Sparkle acting as a host. It’s a very bright space that feels modern, with lots of games and activities. Now, there is the setting for something more and growing stakes, since there is the Phantasmoon Games competition. The winner gets to meet Aha and wield the power of an Aeon for a minute. Given Trailblazer, Sunday, Sparxie, and Silver Wolf are all competing, there’s a lot of potential for how this all could go.
https://www.youtube.com/watch?v=2hH0hILcWPs&t=1s
However, I’m more excited about 4.0 for another reason. That’s because Himiko is tied to Planarcadia. We’ve seen recent versions with members of the Astral Express tied to areas including eventual revelations about the characters. Dan Heng came up during the 1.0 Xianzhou Luofu storyline. March 7th ended up featured in 3.0 at Amphoreus. This feels like Himiko’s turn, and I’m excited by the initial teasers and hints we get so far.
One of the best parts of Honkai: Star Rail 4.0 is the new Elation path, though I think most people won’t get to really appreciate it until Sparxie’s banner arrives on March 3, 2026. The new path might feel a bit like the DOTs in Nihility characters or Remembrance Memosprites since Aha could chime in for additional effects and you want to set things up for Punchlines and Elation DMG. It’s most evident with Sparxie, who I got to test out, since her Boom! Sparxicle's Poppin Skill enhances her Basic into Bloom! Winner Takes All for an attack with splash AOE damage and makes her Skill briefly Engagement Farming for a DMG multiplayer and more Punchline points. She can do big numbers even without Yao Guang, especially if Sparkle is on the same time, though she is best when paired with her fellow Elation character.
The thing is, Yao Guang herself isn’t as exciting or useful without Sparxie. Her Decalight Unveils All Skill’s zone is best for Elation stat boosting, which only applies to Sparxie at the moment. While her Hexagram of Feathered Fortune is a more generic one that helps get Aha acting again and boosting Punchline, due to it helping all-type Res Pen for the party, she’s ideally a buffer for a type of team that probably won’t be possible until 4.2 or 4.3. I’m a bit surprised she’s the first banner for Honkai: Star Rail 4.0, in fact, given the focus Sparxie/Sparkle has in the story and the general usefulness of the other character.
https://www.youtube.com/watch?v=JekiKSvtSCw
What I especially liked about the 4.0 update for Honkai: Star Rail is the Cosmicon Collective card game, which feels like the equivalent of Genius Invokation in Genshin Impact. It’s of course its own beast, with elements like weather influencing matches to offer boosts, and us using Prismatic Dice and collected character cards to fight matches. It’s standard TCG fare in many ways, with attack level determining dice selected and used, defense level determining your defense based on rolls, and us knowing how many D6s and D4s would be used and if a Prismatic Die could be used. We roll dice, select which ones to use to determine damage dealt and defenses set. It goes really quickly, and there being the “Cosmicon, Roll On” event around at launch helps make it more inviting.
The fact that Yao Guang won’t probably be all that exciting until her rerun aside, it feels like HoYoVerse is building something with Honkai: Star Rail 4.0. Planarcadia’s plot is leaving all sorts of threads to follow and hints of things to come, even though the initial quests are more about getting acquainted with the premise. Sparxie feels like a great example of what Elation could be capable of with the right supports. Cosmicon Collective is a lot of fun. It’s like we’re at the foundation now, and I’m excited for what’s next.
Honkai: Star Rail is available for the PS5, PC, and mobile devices, and the 4.0 update is live now.
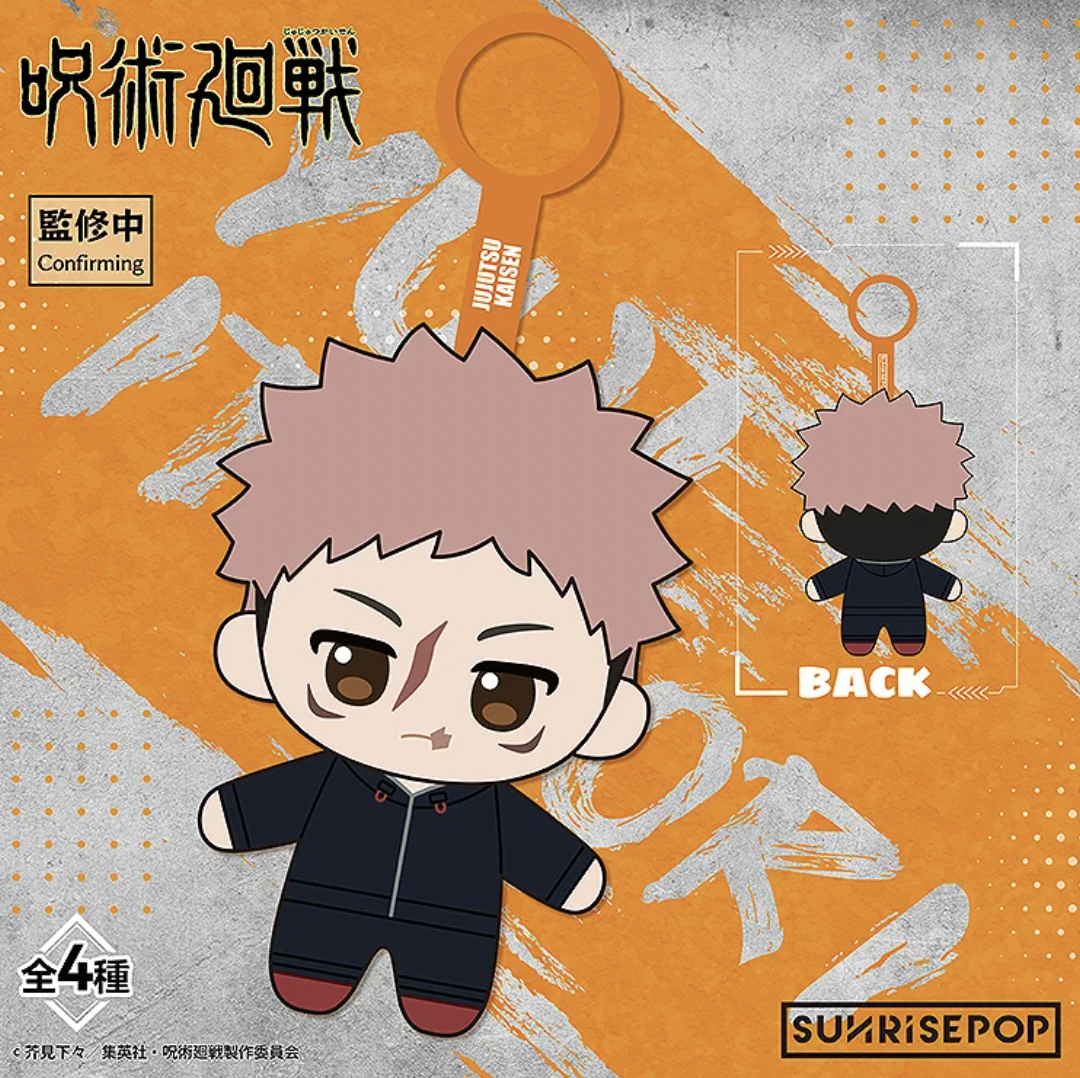
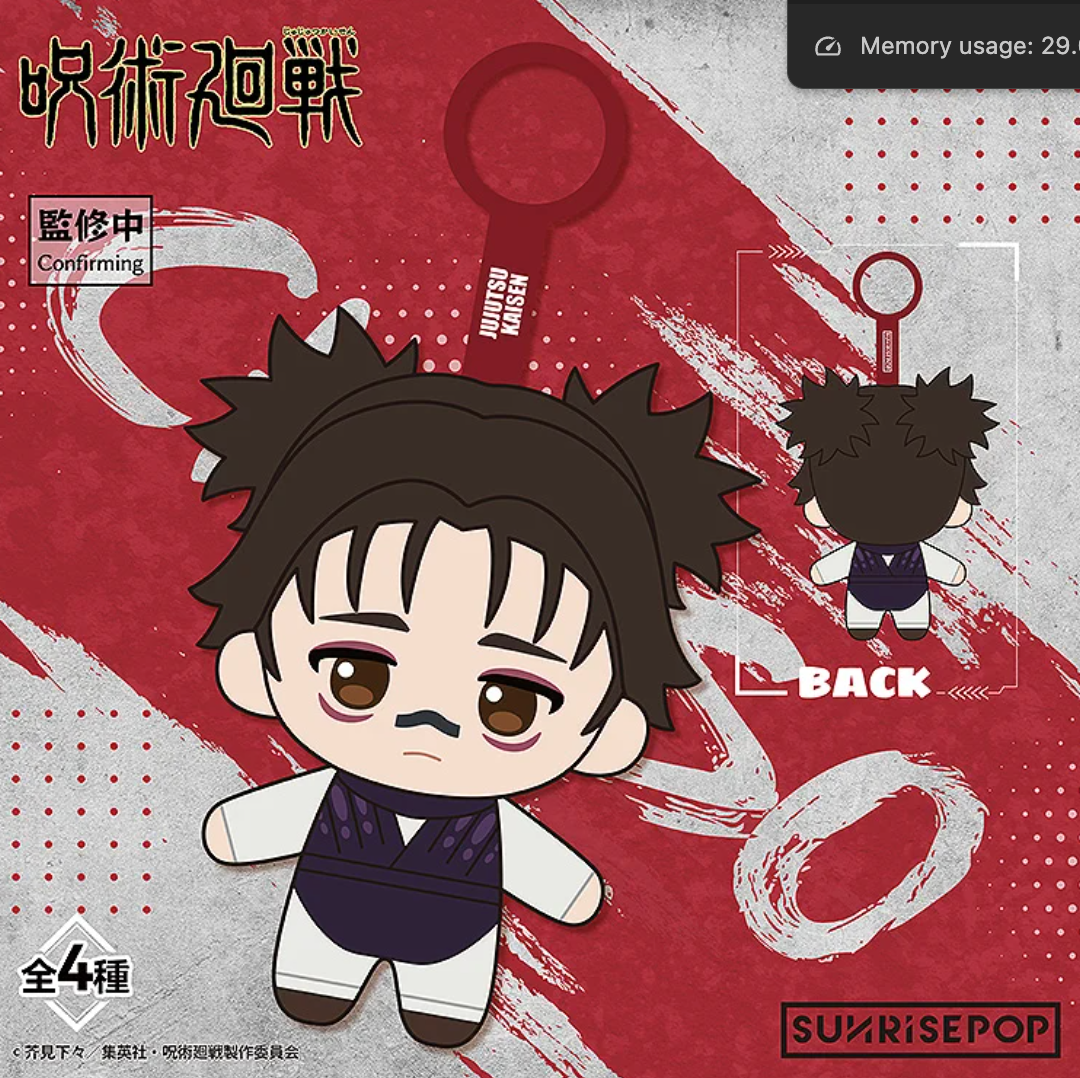
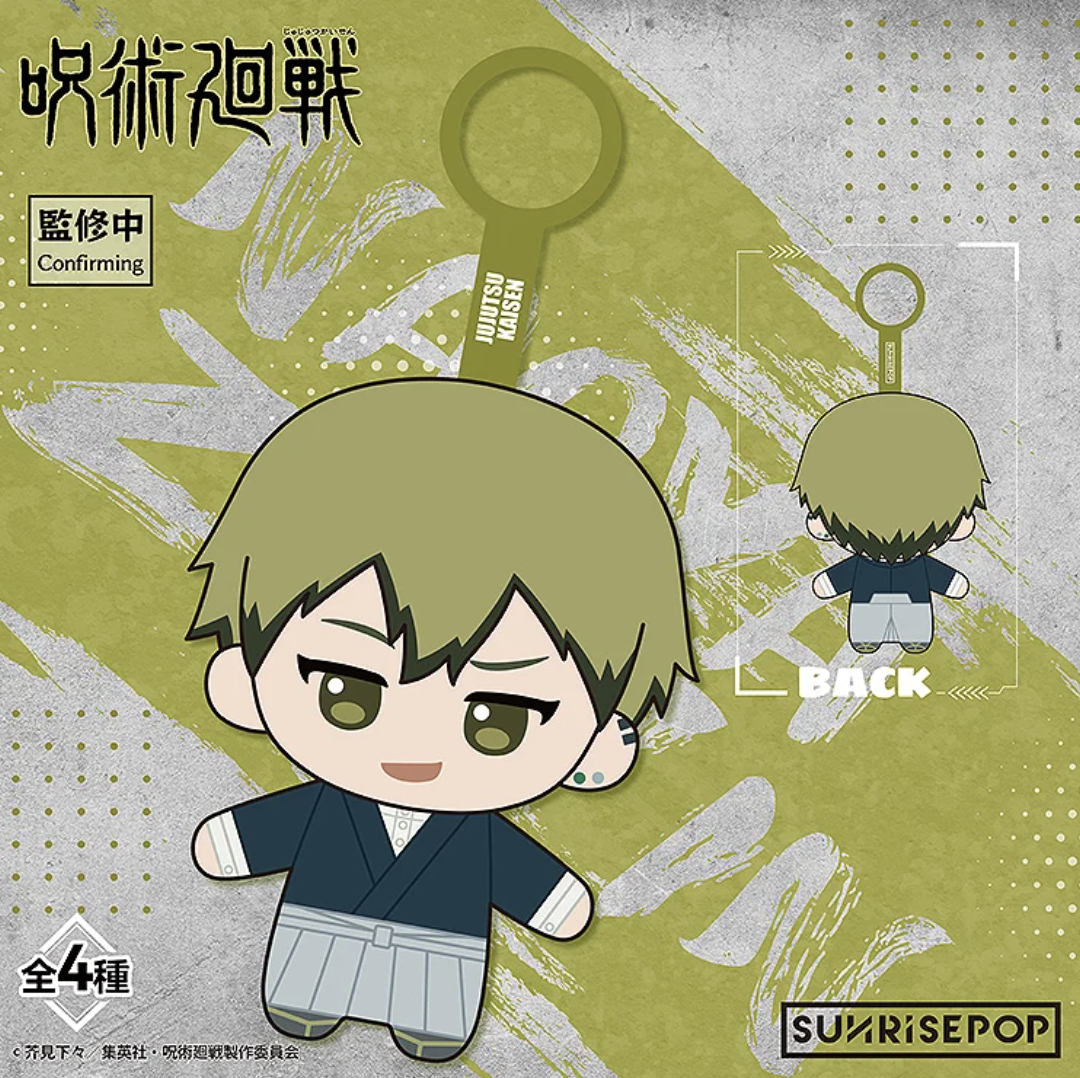
Good Smile Company opened orders for the new Sunrise Pop Jujutsu Kaisen blind box plush pendants that are about the same size as Pop Mart’s Labubu and feature characters from the Culling Game arc. It will be ¥2,156 (~$14) for a single blind box with a random accessory inside or ¥8,624 (~$55.70) for a set of all four. These will ship in June 2026, and Good Smile Company will ship worldwide.
Actual photo examples of the plush pendants aren’t available yet. Only concept art of the four designs appeared. Yuji Itadori, Yuta Okkotsu, Choso, and Naoya Zenin are all options. As this is inspired by the later parts of the series, Yuji will feature two scars on his face. The Yuta one will also include a sword. All of them will feature a keyring at the top, for displaying them on bags, which features the logo for the series on the fabric portion.
Here’s the concept art for the four options.
Images via Good Smile Company and Sunrise Pop
These aren’t the only plush pendants based on the series. The other one features characters from the flashback Gojo’s Past Arc in cat costumes, with Satoru Gojo, Suguru Geto, Shoko Ieiri, Kento Nanami, Yu Haibara, and Toji Fushigoro as options. There is a secret character in that batch, which is Gojo with no sunglasses.
The new Jujutsu Kaisen Sunrise Pop character plush pendants from Good Smile Company will ship in June 2026, and pre-orders close on March 18, 2026. Viz Media handles the manga, while the anime is streaming on Crunchyroll.
Set dungeons represent your primary source for acquiring the legendary set items that define endgame builds, with each dungeon containing specific set pieces in its loot table. Understanding which dungeons drop which sets, mastering efficient clear routes, and optimizing your farming strategy dramatically accelerates set completion compared to random grinding.
This comprehensive set dungeon guide provides detailed walkthroughs for every dungeon in the game, reveals the most efficient farming routes and group strategies, explains difficulty optimization for maximum drops per hour, compares solo versus group efficiency, and identifies exactly which set items drop from each location to eliminate wasted farming time.
Understanding Set Dungeon Mechanics and Loot Tables
Set dungeons function as instanced content where you fight through enemy-filled corridors toward a final boss that drops guaranteed equipment upon defeat. The predictable loot structure makes dungeons the most reliable method for targeted set farming compared to random world drops.
Each dungeon has a predetermined loot table containing specific set items that can drop from enemies and the final boss. These loot tables remain constant regardless of difficulty level, meaning the same sets drop from a dungeon whether you run it on Hell 1 or Hell 5. Understanding which dungeon drops which sets prevents wasting time farming incorrect locations.
Drop rates increase at higher difficulty levels, providing more frequent set item drops per run without changing which sets are available. The relationship between difficulty and drop quantity isn’t perfectly linear, with each difficulty tier providing moderate improvements rather than exponential increases. This scaling creates optimization decisions about whether higher difficulties with slower clear times provide better returns than lower difficulties cleared quickly.
Set items drop as random pieces from their respective sets rather than in any particular order, meaning you might receive three chest pieces before seeing a single helm from the same set. This randomness requires patience and volume of attempts to overcome bad luck streaks. Completing sets typically requires 15-30 dungeon runs depending on luck, though extreme outliers exist in both directions.
The final boss guarantees at least one legendary item drop which has a chance to be a set piece from the dungeon’s loot table. Regular enemies throughout the dungeon can also drop set items, making complete clears more rewarding than rushing directly to bosses. However, the time investment for full clears versus boss rushes creates efficiency trade-offs.
Difficulty unlocks occur progressively as your Combat Rating increases, with each Hell difficulty tier requiring substantially higher power levels than the previous. You cannot enter difficulties above your qualification threshold, preventing undergeared players from being carried through content far beyond their capabilities. This system ensures players farm appropriate difficulties for their progression level.
Party size affects enemy health and damage scaling, with larger groups facing tougher enemies but benefiting from combined damage output and faster clear times. The scaling isn’t perfectly proportional, meaning four-player groups clear content faster than solo players despite enemies having more health. Group farming provides superior efficiency for players willing to coordinate with others.
Temple of Namari – Issatar Imbued Set Location
The Temple of Namari drops pieces from the versatile Issatar Imbued set that enhances mobility-based abilities for multiple classes. This dungeon features relatively straightforward layouts that enable quick clear times once you’ve memorized the paths.
The dungeon entrance sits in the Bilefen zone, accessible after completing the main story campaign. Navigate to the western portion of Bilefen and look for the distinctive temple structure that marks the dungeon entrance. Fast travel to the nearest waypoint and follow the main path west to minimize travel time between runs.
The initial corridor contains scattered enemy groups that you should pull together for efficient area damage elimination. Classes with strong area abilities can group these enemies into dense packs before unleashing burst damage. The corridor opens into a larger chamber with a central platform surrounded by elevated walkways where ranged enemies spawn.
Priority targets in the first major room include the ranged enemies on elevated platforms who chip away at your health while you fight melee enemies below. Either eliminate them with ranged attacks or use movement abilities to reach the platforms quickly. The room also spawns a mid-dungeon elite enemy that drops additional loot chances.
The path continues through winding corridors with moderate enemy density that shouldn’t challenge geared characters but can overwhelm undergeared players who pull carelessly. Pace your progression to avoid pulling multiple groups simultaneously unless your power level allows handling the increased damage. The corridors eventually open into the boss arena.
The final boss uses telegraphed area attacks that require positioning awareness to avoid. Red circles indicate upcoming damage zones that you should immediately exit. The boss periodically summons add waves that should be eliminated quickly to prevent being overwhelmed. Focus adds first before returning damage to the boss.
Efficient farming routes involve pulling enemy groups strategically to minimize backtracking and movement between packs. The relatively linear layout makes routing straightforward compared to more complex dungeons. Groups can assign roles with tanks pulling while damage dealers follow, creating smooth progression through the dungeon.
Issatar Imbued serves Crusaders, Barbarians, and Monks particularly well, making Temple of Namari one of the most frequently farmed dungeons. The high traffic means finding groups rarely proves difficult, as many players need these sets simultaneously. Join or create farming groups through clan chat to chain multiple runs efficiently.
Destruction’s End – Windloft Perfection Set Farming
Destruction’s End contains the highly sought Windloft Perfection set that Demon Hunters and Wizards require for optimal damage builds. This dungeon sees heavy traffic from damage dealers farming their best-in-slot sets.
Located in the Frozen Tundra zone, Destruction’s End entrance appears in the northern section of the map. Fast travel to the Frozen Tundra waypoint and head north through the icy landscape. The distinctive ruined fortress marks the dungeon entrance from a distance.
The opening area features frozen pathways with crumbling sections that don’t actually affect gameplay despite appearing dangerous. Enemy groups spawn in clusters along the main path, with some groups positioned on side platforms requiring brief detours. Pull these side groups to the main path to consolidate kills.
The first major chamber contains a large central area with enemies spawning from multiple doorways around the perimeter. Position centrally to intercept enemy groups as they funnel toward you rather than chasing them individually. The convergent spawn pattern allows efficient area damage if you position correctly.
Mid-dungeon elites appear at specific checkpoints throughout Destruction’s End, telegraphing their spawns through environmental cues. These enhanced enemies drop additional loot chances making them valuable to prioritize. The elite spawns occur at consistent locations allowing you to anticipate and prepare for their arrival.
The boss arena features environmental hazards including ice patches that don’t slow movement but create visual clutter during combat. The boss alternates between ranged ice attacks and melee rushes, requiring you to maintain medium range for optimal reaction time. Add waves spawn at health thresholds requiring temporary target switching.
Speed farming Destruction’s End involves pulling aggressively through the linear sections while being careful in the multi-doorway chamber to avoid simultaneous pulls from multiple spawns. Experienced farmers develop routes that minimize time between enemy groups while maintaining safety.
Windloft Perfection’s popularity for top-tier damage dealers creates abundant group opportunities. Demon Hunters and Wizards farming this dungeon find compatible farming partners easily through server chat or clan recruitment. The shared goal of set completion creates natural cooperation.
Kikuras Rapids – Vithu’s Urges Set Location
Kikuras Rapids drops Vithu’s Urges, the cooldown reduction focused set that enables ability-spam builds across multiple classes. This dungeon features water-themed environments with some backtracking that slightly reduces farming efficiency compared to more linear alternatives.
The dungeon entrance hides in the Ashwold Cemetery zone, tucked into the southeastern corner near water features. Navigate to Ashwold Cemetery’s waypoint and follow the river south until you locate the cave entrance that leads to Kikuras Rapids. The somewhat hidden entrance catches new players off guard.
Initial sections wind through cave passages with water flowing along the dungeon floor. Enemy groups spawn in the wider cavern sections with narrow passages connecting different chambers. The layout forces some backtracking after clearing dead-end branches that contain enemy groups and potential loot.
The main challenge area features multiple levels with enemies spawning on upper and lower tiers. You’ll need to navigate ramps and platforms to reach all enemy groups, creating opportunities to miss enemies if you rush carelessly. Thorough clears require checking all elevation levels before proceeding.
Environmental hazards include water currents that push your character if you stand in flowing sections, though the effect is minor and rarely impacts combat. The visual effect creates more distraction than actual mechanical challenge. Focus on enemy positioning rather than environmental navigation.
The boss chamber sits at the deepest point of the rapids system, accessed after clearing the multi-level sections. The boss uses water-based attacks with area denial zones that limit your positioning options. Adaptability in positioning matters more than perfect execution of predetermined patterns.
Farming efficiency in Kikuras Rapids suffers slightly from the backtracking required to clear all branches thoroughly. However, the time difference compared to linear dungeons amounts to 1-2 minutes per run, negligible over extended farming sessions. The quality of Vithu’s Urges justifies the minor efficiency loss.
Cooldown reduction builds appeal to players seeking active gameplay with constant ability usage rather than auto-attack focused builds. The specialized nature means Kikuras Rapids sees less traffic than universal sets like Issatar Imbued. Finding groups requires more effort but remains viable through dedicated recruitment.
Cavern of Echoes – Shepherd Set for Necromancers
Cavern of Echoes provides the Shepherd set pieces that enhance summon-focused gameplay for Necromancers and other classes with summoning abilities. This relatively compact dungeon allows quick clear times making it pleasant to farm repeatedly.
Located in the Dark Wood zone, Cavern of Echoes entrance sits in the central-western area accessible from the main zone waypoint. Travel west from the waypoint through the forest until you reach the distinctive cave opening marked by environmental storytelling elements.
The initial cave sections feature tight corridors that funnel enemies into favorable positions for area damage abilities. Necromancers particularly benefit from the natural chokepoints that allow their summons to create defensive lines. The confined spaces sometimes create targeting difficulties for precision abilities.
The main cavern opens into a larger space with elevated platforms around a central depression. Enemy groups spawn both at floor level and on the surrounding platforms, requiring awareness of threats from multiple elevations. Ranged enemies on platforms should be prioritized to prevent them from freely attacking while you engage melee enemies.
Echo mechanics in this dungeon involve ghost-like enemies that phase in and out of visibility, creating brief invulnerability windows. These enemies don’t represent serious threats but require slight patience to damage during their vulnerable phases. The mechanic adds minor complexity without substantially slowing progression.
The final boss summons add waves more frequently than most dungeon bosses, testing your ability to manage multiple threats simultaneously. Necromancers excel at this encounter through their natural add-clearing capabilities with area damage and summons. Other classes should prioritize adds before focusing the boss.
Efficient Cavern farming involves pulling aggressively through the corridor sections while being more measured in the multi-elevation main cavern to avoid overwhelming pulls. The compact layout means even cautious players clear runs quickly compared to sprawling dungeons.
Shepherd’s popularity among Necromancers creates steady group availability despite the class-specific nature of the set. Mixed-class groups work fine as other classes can need different sets from the same dungeon or simply help clan members. Social connections often matter more than optimal efficiency.
Mad King’s Breach – Feasting Baron’s Set for Barbarians
Mad King’s Breach contains Feasting Baron’s set pieces that transform Barbarian Whirlwind into a devastating primary ability. This dungeon features dense enemy packs that ironically make it ideal for testing your completed Whirlwind build.
The dungeon entrance sits in Ashwold Cemetery’s northern section, accessible from the main zone waypoint. Head north through the graveyard areas until you reach the distinctive castle ruins that mark Mad King’s Breach. The gothic architecture makes the entrance unmistakable.
Initial sections navigate through ruined castle corridors with enemies spawning in throne rooms and guard chambers. The enemy density rivals the highest in any dungeon, providing constant combat that Whirlwind builds absolutely excel at clearing. Barbarians farming their own set get to showcase the playstyle they’re building toward.
The main throne room features a large open area with enemies flooding from multiple entrances around the perimeter. This encounter type favors mobile area damage builds while challenging single-target focused characters. Position centrally to intercept enemy waves as they converge on your location.
Environmental storytelling includes ghostly apparitions and spectral effects that create atmospheric immersion without affecting gameplay mechanics. The visual effects can create some target selection difficulty in chaotic combat, though experienced players adapt quickly to identifying real threats among the visual noise.
The final boss represents a buffed version of a story campaign enemy with enhanced abilities and health pools. Pattern recognition from the campaign encounter helps, though the difficulty scaling creates substantially more dangerous versions of familiar attacks. Previous experience provides advantages without trivializing the encounter.
Farming Mad King’s Breach efficiently requires embracing the dense enemy packs rather than trying to avoid them. The high enemy count means thorough clears generate exceptional loot volumes compared to dungeons with sparse enemy placement. Speed comes from killing quickly rather than avoiding combat.
Feasting Baron’s dominance for Barbarian builds creates consistent farming groups seeking the same set pieces. The shared goal of Whirlwind optimization bonds farming groups through common purpose. Many Barbarians form long-term farming partnerships while completing their sets.
Tomb of Fahir – Untouchable Mountebank Defensive Set
Tomb of Fahir drops Untouchable Mountebank pieces for players prioritizing survivability over pure damage. This dungeon sees less traffic than damage-focused alternatives but provides valuable defensive sets for players struggling with content difficulty.
Located in the Shassar Sea zone, Tomb of Fahir entrance appears in the southwestern desert region. Fast travel to the Shassar waypoint and navigate southwest through the sandy terrain. The pyramid structure housing the dungeon stands prominently against the desert landscape.
The initial tomb corridors feature classic dungeon aesthetics with sarcophagi lining the walls and undead enemies shambling toward you. Enemy density remains moderate allowing measured progression without overwhelming undergeared players. The defensive set’s natural audience benefits from the forgiving encounter design.
Trap mechanics appear throughout Tomb of Fahir with pressure plates triggering arrow volleys and spike walls. These environmental hazards deal modest damage that experienced players largely ignore while learning players might find threatening. The traps add flavor without creating serious obstacles.
The main burial chamber contains a large central sarcophagus surrounded by smaller tombs that spawn waves of undead enemies. The encounter tests your sustained damage and survivability as enemy waves continue until you’ve eliminated all spawners. Players farming defensive sets get to test their improved survivability during this extended fight.
The boss encounter emphasizes survival mechanics over burst damage checks, appropriate for the defensive set theme. The boss deals heavy sustained damage requiring you to balance offensive output with defensive positioning. Players testing Untouchable Mountebank builds find this encounter validates their gear choices.
Farming efficiency in Tomb of Fahir favors methodical clears over aggressive rushing, as the trap mechanics punish careless sprinting while rewarding measured progression. The slightly slower pace feels appropriate given the defensive nature of the set being farmed.
Untouchable Mountebank’s niche appeal means finding dedicated farming groups requires more effort than popular damage sets. However, the reduced competition means less pressure to rush through runs or compete for loot. Solo farming remains perfectly viable given the encounter design.
Forgotten Tower – Grace of the Flagellant Healing Set
Forgotten Tower provides Grace of the Flagellant set pieces that enhance healing and life steal for sustainable solo play. This dungeon attracts players seeking independence from healer support through self-sufficient builds.
The dungeon entrance hides in the Darkwood zone’s eastern section, tucked among dense forest that obscures sight lines. Navigate east from the Darkwood waypoint through increasingly thick foliage until you locate the tower ruins. The overgrown appearance makes the entrance blend into surroundings.
Initial tower sections climb through crumbling staircases and collapsed floors that create vertical progression unusual among Diablo Immortal dungeons. The elevation changes don’t create platforming challenges but add variety to the typical horizontal dungeon navigation. Enemy groups spawn on landings and in side chambers.
The main tower chamber features a circular room with enemies spawning from doorways around the perimeter. The encounter design mirrors other dungeons with similar layouts, creating familiarity that experienced farmers appreciate. Position centrally to intercept enemy groups efficiently.
Environmental hazards include crumbling floor sections that appear dangerous but don’t actually create death pits or fall damage. The visual threat without mechanical danger creates atmospheric tension without punishing exploration. Focus on enemy threats rather than environmental navigation.
The final boss uses life-drain attacks that heal the boss while damaging you, creating thematic opposition to the healing set you’re farming. The encounter tests whether your existing gear provides sufficient damage to overcome the boss’s self-healing. Players with completed Grace sets trivialize this mechanic through superior healing.
Farming Forgotten Tower efficiently involves pulling aggressively on the staircase sections where enemies can’t surround you easily. The vertical layout creates natural chokepoints that favor defenders over attackers. Experienced farmers exploit these terrain advantages.
Grace of the Flagellant’s specialized focus on sustainability over burst damage creates a specific player audience seeking this playstyle. Finding like-minded farmers builds community among players who value independence over pure efficiency. The shared philosophy creates strong social bonds.
Difficulty Optimization and Drop Rate Scaling
Choosing appropriate difficulty levels dramatically impacts your farming efficiency by balancing clear speed against drop quality improvements from harder content.
Hell difficulty tiers scale from Hell 1 through Hell 5 and beyond, with each tier requiring progressively higher Combat Rating to enter. Your effective farming difficulty depends on your current power level and should be the highest tier you can clear quickly rather than the highest you can barely complete.
Drop rate increases at higher difficulties provide more frequent set item drops without changing which sets are available. The exact scaling remains somewhat opaque, but community testing suggests each Hell tier provides approximately 20-30% more legendary drops than the previous tier. This moderate scaling means dramatically slower clear times often don’t justify the marginal drop improvements.
The efficiency breakpoint occurs where increasing difficulty one tier reduces your clear speed by more than 30%, at which point the additional drops don’t justify the time investment. Most players find their optimal farming difficulty 1-2 tiers below their maximum accessible difficulty to maintain comfortable clear speeds.
Combat Rating requirements gate higher difficulties, preventing undergeared players from entering content far beyond their capabilities. This system protects players from wasting time in difficulties where they’d struggle to clear efficiently. Always farm at your appropriate power tier rather than being carried through content you can’t meaningfully contribute to.
Group composition affects optimal difficulty selection, as balanced groups with tanks and healers can comfortably farm higher difficulties than glass cannon groups of pure damage dealers. Coordinate with your group to select appropriate difficulties that challenge without frustrating.
Time per run matters more than drop quality per run when optimizing long-term farming efficiency. Completing three Hell 2 runs in the time one Hell 4 run takes often provides more total loot despite lower individual drop rates. Track your actual runs per hour rather than optimizing individual runs.
Solo vs Group Farming Efficiency Comparison
Choosing between solo and group farming involves trade-offs between convenience, clear speed, and social enjoyment that vary based on personal preferences.
Solo farming provides complete control over pacing, route selection, and session duration without requiring coordination with others. You can start and stop farming sessions instantly without waiting for group formation or feeling obligated to continue when you want to break. The convenience factor makes solo farming appealing for players with unpredictable schedules.
Clear speed in solo farming depends entirely on your personal power level and class capabilities. Some classes clear dungeons efficiently solo while others struggle with sustained damage or survivability. Necromancers and Barbarians generally solo farm more effectively than Monks or support-built Crusaders.
Group farming accelerates clear times through combined damage output and role synergy, with balanced four-player groups clearing dungeons significantly faster than solo players. The time reduction often reaches 40-50% faster clears than solo despite enemy health scaling, providing superior efficiency for players willing to coordinate.
Loot distribution in groups means you see more total set items but only receive items randomly assigned to you. A four-player group might see 6-8 set items per run but each player only receives 1-2 of them. The increased volume partially compensates through trading possibilities when you receive items your groupmates need.
Social benefits of group farming include building relationships with regular farming partners and accessing clan resources through cooperative play. Many long-term Diablo Immortal friendships form through repeated dungeon farming sessions. The social fulfillment often outweighs pure efficiency considerations.
Finding farming groups requires investment in social systems like joining active clans or using server chat recruitment. Shy players or those with social anxiety might prefer solo farming despite efficiency losses. Your comfort and enjoyment matter more than marginal efficiency gains.
Hybrid approaches where you solo farm during off-peak hours and group farm when your regular partners are online provides flexibility without committing exclusively to either method. Most experienced farmers naturally develop mixed habits based on circumstances.
Looking for More Diablo Immortal Guides?
Master every aspect of Diablo Immortal with our complete guide collection:
New to the game? Start with our Complete Beginner’s Guide to Diablo Immortal covering class selection, core systems, and essential tips to avoid common mistakes that cost new players weeks of progress.
Building your character? Check out our Complete Sets and Legendary Items Guide for best-in-slot recommendations, essence transfer strategies, and complete breakdowns of every set bonus in the game.
Optimizing your gems? Our Legendary Gems Guide ranks all gems, explains awakening mechanics, and provides class-specific recommendations to maximize your power without wasting precious upgrade materials.
Playing free-to-play? Don’t miss our Free-to-Play Progression Guide with realistic expectations, efficient resource management, and strategies to compete effectively without spending money.
FAQ: Set Dungeon Farming and Optimization
How many dungeon runs does it take to complete a set?
Completing a four-piece set typically requires 15-30 dungeon runs depending on luck with duplicate drops. Extreme outliers exist with some players completing sets in 10 runs while others struggle through 50+ attempts. The randomness requires patience and volume of attempts to overcome bad luck.
Should I farm solo or in groups?
Groups provide 40-50% faster clear times than solo farming despite enemy scaling, making them more efficient for players willing to coordinate. However, solo farming offers convenience and flexibility that some players value over pure efficiency. Choose based on your schedule and social preferences.
What difficulty should I farm for best results?
Farm the highest difficulty you can clear quickly and comfortably, typically 1-2 tiers below your maximum accessible difficulty. Struggling through harder content usually wastes time compared to efficiently clearing easier difficulties. Speed matters more than individual drop quality.
Can I get set items from dungeons I’m not supposed to farm?
No, each dungeon has a fixed loot table containing specific sets regardless of difficulty level. Farming the wrong dungeon wastes time as you’ll never receive the sets you need. Verify loot tables before investing hours of farming time.
Is it faster to full clear or rush bosses?
Full clears provide more total drops through regular enemies while boss rushes complete runs faster. Community consensus suggests full clears provide better returns for most players, though the difference is modest. Personal preference and clear speed capabilities should guide your choice.
How do I find farming groups?
Join active clans that organize regular farming sessions or use server chat to recruit compatible players. Many players form long-term farming partnerships that persist across weeks of progression. Social investment pays dividends through reliable group availability.
Should I farm multiple sets simultaneously or focus one at a time?
Focus on completing one set at a time through dedicated farming of appropriate dungeons. Spreading attempts across multiple dungeons dilutes your volume per set and delays any completions. Complete your priority set before diversifying to alternatives.
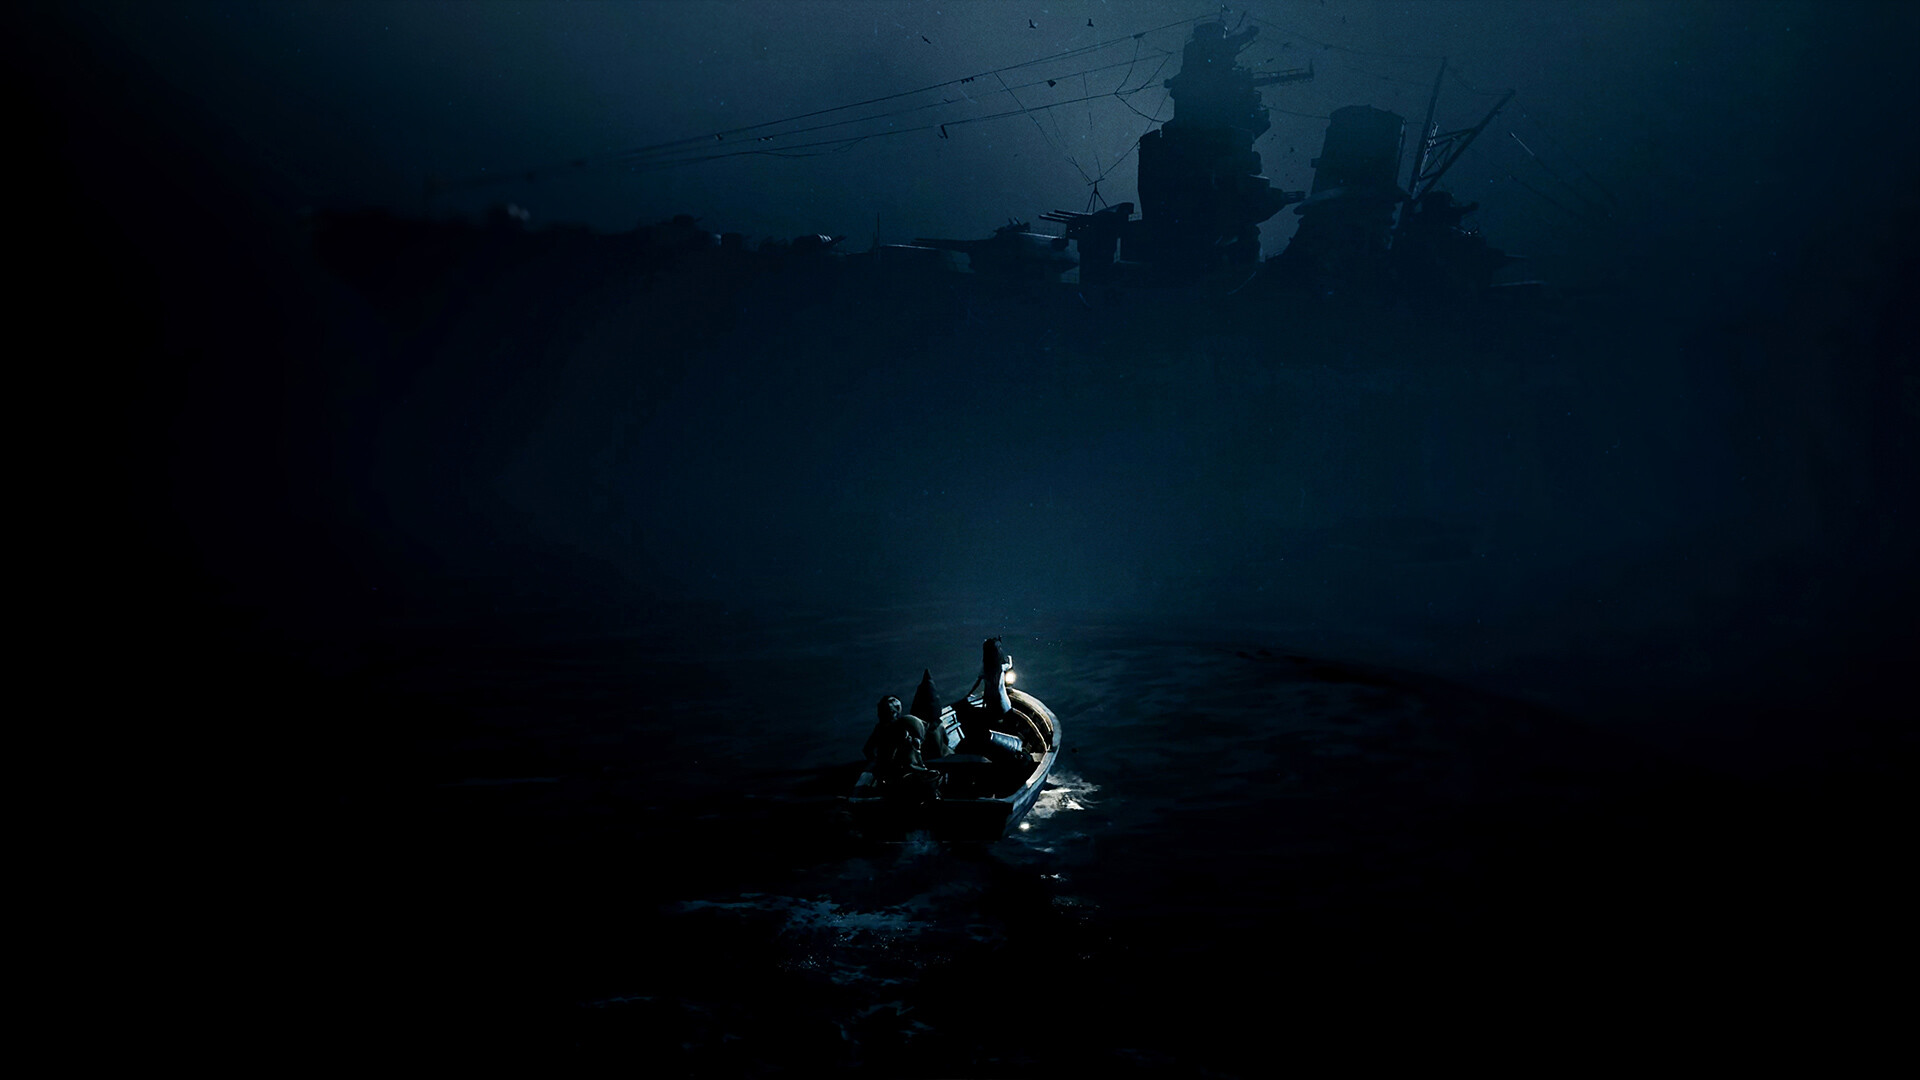
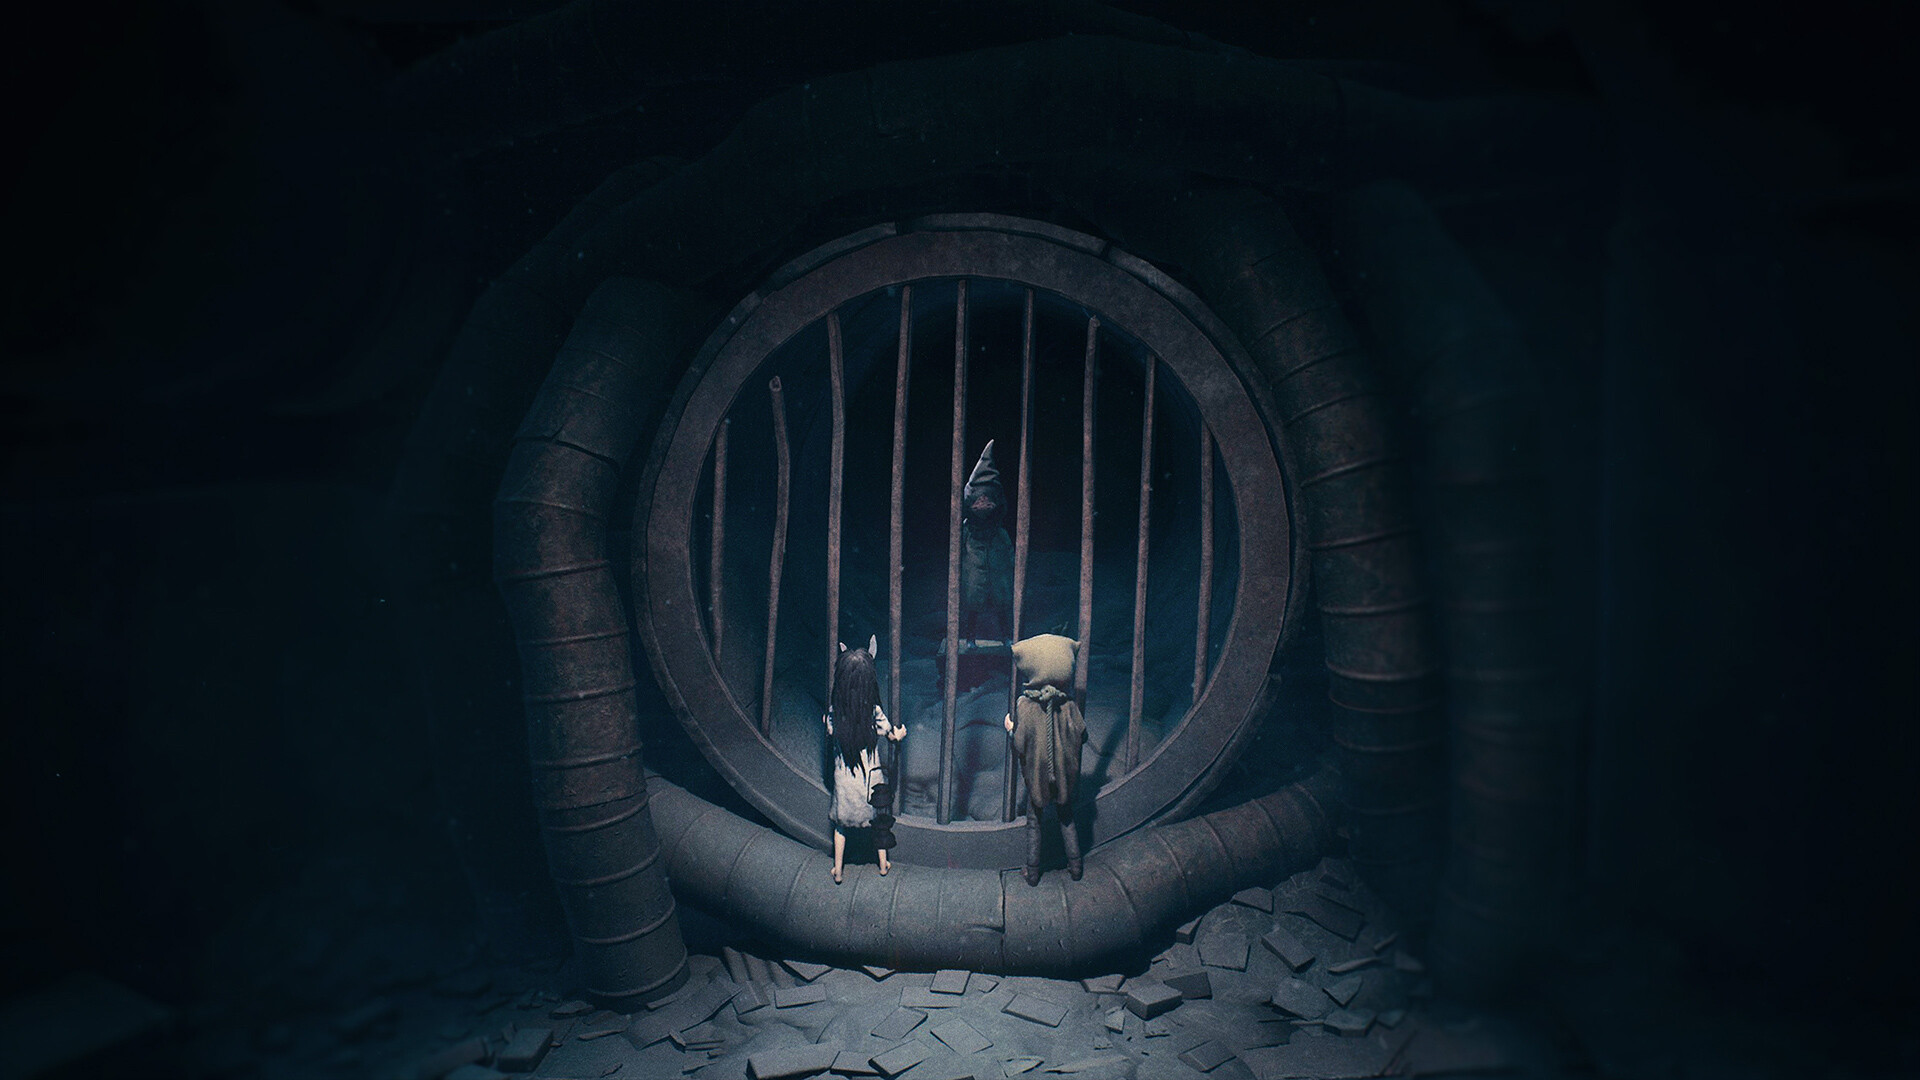
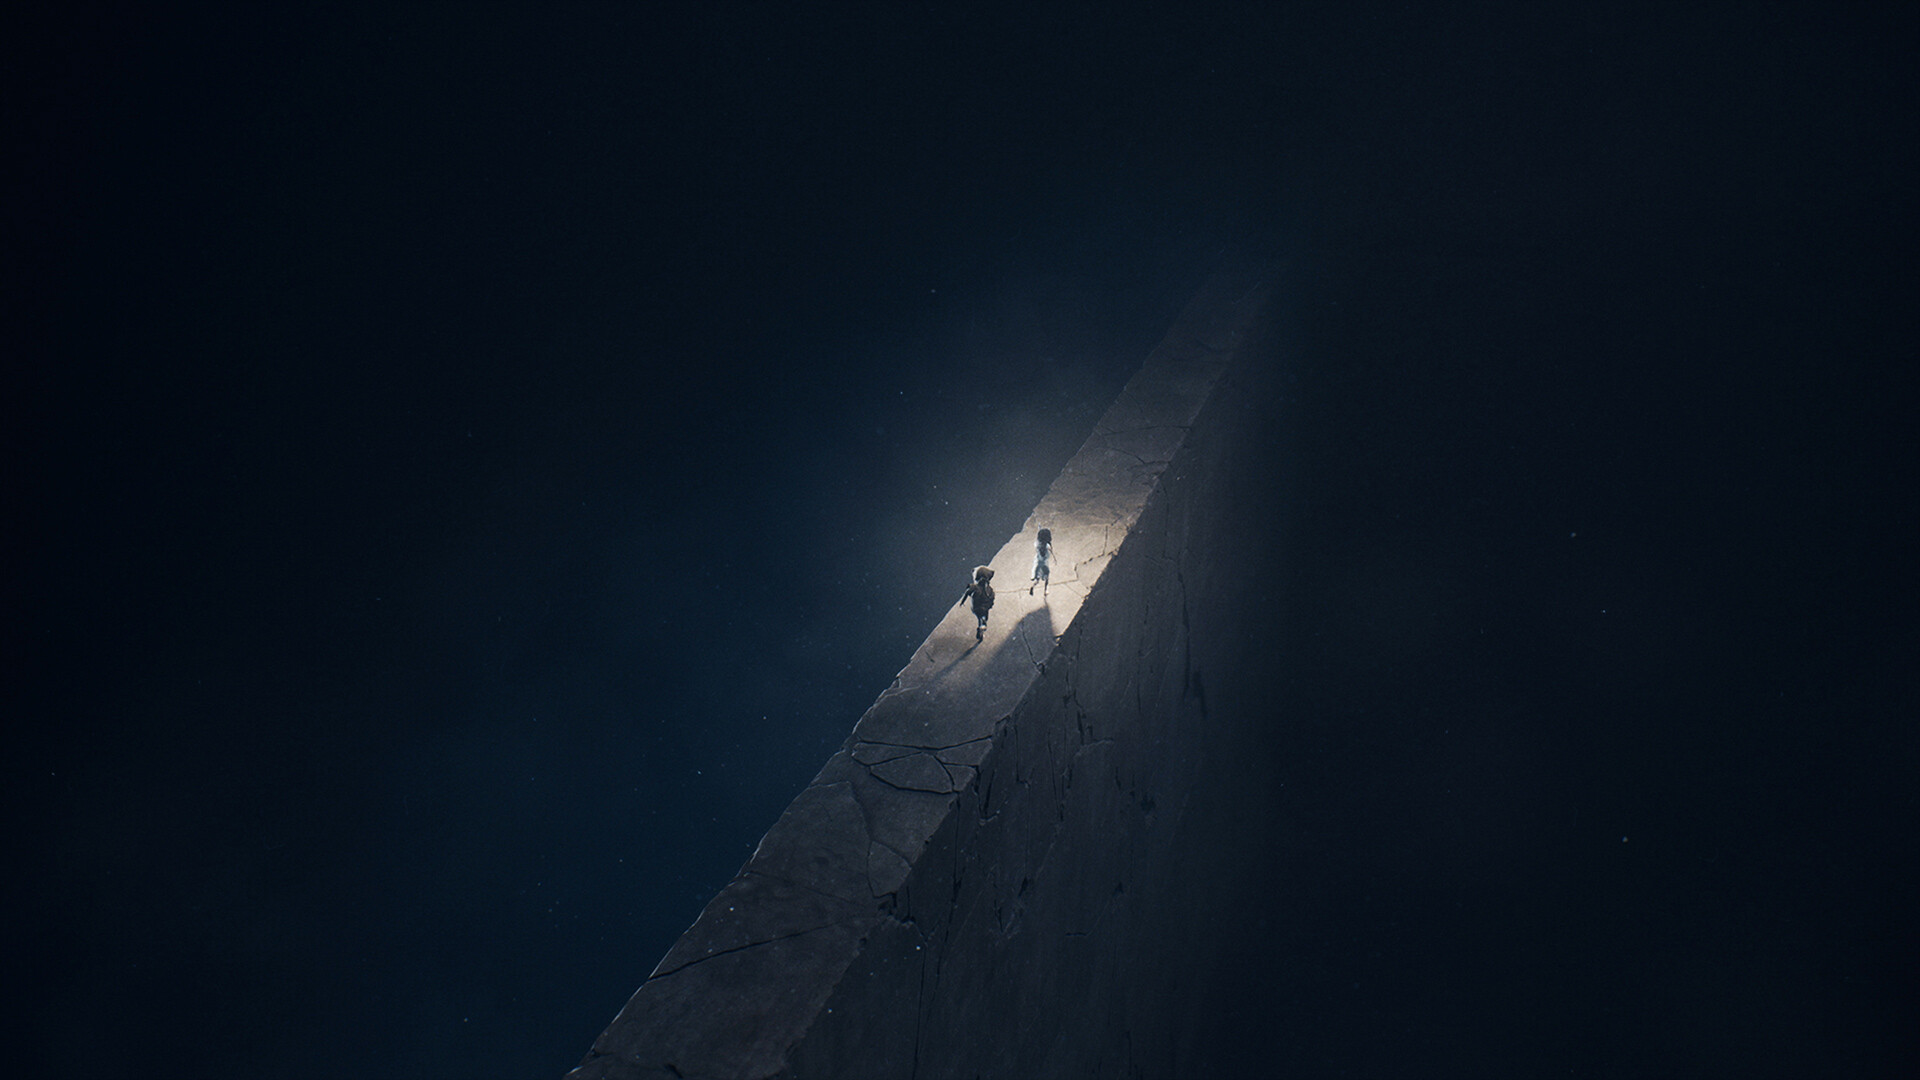
REANIMAL is the terrifying new horror adventure from Tarsier Studios – the team that brought you Little Nightmares. Released on February 13, 2026, the game follows two orphaned siblings fighting to survive and rescue their friends from grotesque monsters across a dark, post-war world. If you’re stuck, overwhelmed, or just want to make sure you don’t miss anything, this complete REANIMAL walkthrough covers all 9 chapters, key puzzle solutions, enemy encounters, and essential tips to get you through to the end.
A full playthrough takes 3 to 6 hours. Coffins and Hidden Statues are missable and must be collected in a single playthrough – they cannot be obtained via Chapter Select. Keep that in mind before you start.
Before You Start: Essential Controls and Tips
REANIMAL is best played with a controller, even on PC. The two controls you’ll use the most are crouch (LT on Xbox / L2 on PlayStation) and sprint (RT / R2). To interact with objects or pick up items, press Y (Xbox) or Triangle (PlayStation). In solo play, press LB / L1 to command your AI companion to interact with nearby levers and co-op objects.
The game has automatic checkpoints, so if an enemy catches you, you’ll respawn close to where you died. You can also manually load your last checkpoint from the pause menu at any time.
There are 110 total collectibles across the game – 47 secrets, 18 masks, 20 posters, 5 hidden statues, 5 critters, 5 coffins, 10 rest spots, and more. Explore every corner of each chapter before moving on.
Chapter 1: Dead in the Water
The game opens with you controlling the brother on a small wooden boat in the middle of a dark lake. Hold RT (or R2) to move forward and follow the red-glowing buoys. A short cutscene plays when you reach the buoy surrounded by seagulls – your sister is pulled from the water, and she’ll be your companion from this point forward.
Continue following the buoy path, steering around sea mines as you go. When you reach the beach, open the chest in the back-left corner to find a key and use it to unlock the door on the right. Head through the sewage tunnel until you hit a section with a fan blade and a switch. Use the switch to stop the fan, then sprint through before it starts again. If your partner doesn’t make it in time, use the switch on the other side to help them through.
Key Enemy – Sniffer
Sniffer is the first major enemy you’ll encounter in the train yard. This creature hunts primarily by sound, so crouch to stay quiet and move slowly around it. When it leaves the area, follow it outside and use stacked briefcases as cover. Proceed through the abandoned train carriages, pull the lever at the end, and sprint back out through the left door. Climb the ladder and keep running to reach the chapter’s end.
The chapter closes when the two orphans escape but are forced to watch a friend get taken. Push forward and don’t look back.
Chapter 2: The Cleaning House
After a bus ride, you arrive at a forest town. The moment you step in, the floor gives way. Lock the car trunk on your left, climb over it, and squeeze through. Open the shutter and work with your sibling to push it. Inside, go through the crack in the wall behind the counter.
This chapter involves a lot of environmental puzzle-solving and stealth. The town is full of mannequins – push them down and use one of their heads to smash through a glass window to create new paths. Move through the cinema and the cleaning house, always looking for alternate routes through cracks, vents, and crawl spaces.
Key Event: The Ice Cream Truck Chase
One of the game’s most intense sequences happens here. You find a saw in a tree stump – work with your partner to cut down a tree and use it as a bridge. When the ice cream truck starts chasing you, run down the path and make the jump to safety. Your third companion is captured by the monster inside the truck. Chapter 2 ends when the truck eventually falls off a cliff onto the beach below.
Chapter 3: After the Flood
You’re back on the familiar beach from Chapter 1, but things have changed. Now armed with a crowbar, you can pry open a fence door on the right that was previously locked. Follow the path, climb the ladder, and enter. Collect the wheel inside and attach it to the right side of a mechanism outside to open the gate.
You’ll need a second wheel – head into the building on the right through a gap in a bathroom wall. Collect a plunger from the dead monster inside, use it on the fourth toilet from the left to get a key, and use the key to access a locked door leading to the second wheel. Retrieve it quickly and avoid the enemies on your way back.
Once both wheels are attached, work with your partner to push the cart down the track. The chapter revisits early locations with new access routes unlocked by your crowbar.
Chapter 4: No Shelter
After the bus ride away from the pig farm, you arrive at a run-down clock tower. Before entering, grab the poster off the pylon on your left – it’s easy to miss. Climb the stairs, then hoist your partner up the ladder to check inside the front door. Your actual route is to the right.
Climb the ladder and approach the large broken clock outside. Push the minute hand all the way to the right. This moves the hour hand and opens a gap in the clock face on the right side. Boost your partner up and through the broken glass to access the clock tower.
The Spider Kids and the King
Inside the clock tower, you’ll find children turned to stone. Pull the crowbar from one of the petrified children and use it to pry open closet doors to progress. These spider kid enemies attack in groups – defeat them using your crowbar. The trickiest encounter is the King, who sits on a throne but quickly hides when you enter the room. Clear out his followers and watch the upper-right corner of the room behind the throne – the King tries to slip away quietly. Take him out fast before he escapes. Missing him means reloading the checkpoint.
After the throne room, head upstairs, cross the theater room with the pig hanging on a rope, and continue through the chapter. There are sleeping enemies in one corridor – crouch, don’t step on them, and pry the back door open with the crowbar without waking anyone up.
Coffin 4 is hidden behind a secret door in this chapter – hug the left wall after pushing a bookcase across a gap and look for the hidden entrance.
Chapter 5: Down in a Hole
The chapter starts with you hanging from a rope. Work your way down and through the underground section. This chapter leans heavily into dark, tight corridors where sound-sensitive enemies patrol.
Move slowly and crouch often. Use distractions – throwing objects past enemies is a great way to redirect their attention. The minecart sequence introduces a new traversal mechanic; use the flashlight to spot the hidden path on the left side after this section.
The flooded basement area contains a mask behind a broken wall near the boat dock – you need to solve the water valve puzzle to access it. This chapter also contains one of the five coffins, found in the dark tunnel section.
Chapter 6: Nobody Left Behind
Chapter 6 takes the action onto open water. You’re back on the boat, navigating through mines and hunting down a massive sea monster. Clear sea mines with throwable objects before driving through them. Use the cannon on shore to take down the large bird monster – load the cannon with a shell, then aim and pull both levers when the creature is in range. It takes two shots.
After sinking the sea monster, head to the shipwreck by following the buoys. Climb the anchor to board the ship. Inside, insert an eye you find into the whale’s eye socket – it moves and clears your path forward. Don’t forget to pick up the diving masks as they count as collectibles.
Before driving into the dark tunnel at the end of the chapter, turn right and explore the path between the cliffs to find a hidden statue. This chapter also has a distance-driving achievement – if you’re tracking it, drive around the open water longer before docking for the final time.
The chapter ends when you follow the sheep and climb over the wall.
Chapter 7: The Spoils
This is where REANIMAL’s story deepens significantly. The atmosphere gets heavier and the enemies more unpredictable. Move carefully and use cover consistently. This chapter contains the final hidden statue – but you can only find the last mask tied to it if you’ve lit all the candles on the previous statues in a single playthrough.
Keep tracking your collectibles before exiting each room. The chapter also introduces the corrupted farm animal enemies, which patrol in aggressive groups. Separate them from their herd using distractions before engaging.
Chapter 8: Into the Abyss
The second-to-last chapter ramps up the pressure. Enemy patrols are denser and the environments are more maze-like. One of the five coffins is hidden here – look carefully in side rooms before progressing forward.
The long-range enemies with laser sights appear more frequently in this chapter. Keep walls and cover between you and their line of sight. You’ll also encounter explosive soldier-type enemies – listen for a beeping audio cue before they charge, and trigger them from a safe distance using thrown objects.
This chapter is the last chance to grab any coffins or hidden statues you may have missed from earlier chapters. If you’ve collected all five coffins across Chapters 3, 5, 6, 7, and 8 – you’re on track for the secret ending.
Chapter 9: The End
The final chapter brings both endings into play. If you collected all five coffins in a single playthrough, the secret ending will unlock here, revealing the deeper truth behind the nightmare world and the siblings’ connection to it. If you didn’t collect all five coffins, you’ll get the standard ending – the siblings escape the nightmare together, but questions linger.
Take your time in this final chapter. There’s no rush, and making sure you’ve grabbed any remaining collectibles here will lock in your completion percentage. The true ending is emotionally striking and well worth the effort of the coffin hunt.
REANIMAL Tips to Remember Throughout the Game
Getting through REANIMAL is a lot easier if you keep a few key principles in mind from the start. Crouch early and crouch often – enemies in this game are highly reactive to noise and movement, and crouching breaks their line of sight faster than running ever will. Use tall grass and stacked objects strategically to stay hidden during patrol zones.
In co-op, stay close to your partner at all times. The shared camera means that if you drift too far apart, the game will force you back together or create problems with visibility. And before leaving any chapter, take one last pass through the area – many collectibles are tucked in side rooms or behind destructible walls, and several are chapter-exclusive.
Finally, always back up your save at the start of each chapter if you’re going for the secret ending. This gives you a recovery point if you miss a coffin.
REANIMAL Chapter List at a Glance
Here’s a quick reference for all 9 chapters and what to watch for in each:
Chapter 1 – Dead in the Water: Boat intro, train yard, escape Sniffer
Chapter 3 – After the Flood: Beach revisited, two-wheel cart puzzle
Chapter 4 – No Shelter: Clock tower, spider kids, the King boss
Chapter 5 – Down in a Hole: Underground tunnels, minecarts, water valve puzzle
Chapter 6 – Nobody Left Behind: Open water, sea monster, shipwreck
Chapter 7 – The Spoils: Deep lore, farm animal enemies, final hidden statue
Chapter 8 – Into the Abyss: Dense patrols, explosive enemies, final coffin
Chapter 9 – The End: Both endings – standard and secret
Frequently Asked Questions (FAQ)
How many chapters does REANIMAL have? REANIMAL has 9 chapters in total. A full playthrough takes around 3 to 6 hours depending on how much you explore.
How do I get the secret ending in REANIMAL? You must find all 5 coffins in a single playthrough. The coffins are found in Chapters 3, 5, 6, 7, and 8. Collecting them via Chapter Select after the fact will not count toward the secret ending.
Can you play REANIMAL solo? Yes. REANIMAL supports solo play with an AI companion controlling the second character. You can also play online co-op or local split-screen co-op with two players.
Does REANIMAL have crossplay? Yes, REANIMAL supports crossplay across PC, PlayStation 5, and Xbox Series X/S.
What are the missable collectibles in REANIMAL? The 5 coffins and 5 hidden statues are missable and must be found in a single playthrough. All other collectibles can be obtained via Chapter Select.
How long is REANIMAL? The main story takes roughly 3 to 5 hours. A 100% completionist run with all collectibles takes around 6 to 10 hours. Speedruns can be done in about 2 hours.
Is REANIMAL related to Little Nightmares? REANIMAL is made by Tarsier Studios, the same developer behind Little Nightmares 1 and 2. It shares similar mechanics and tone but is a separate game set in a different world.
Looking for more help? Check out our REANIMAL secret ending guide (coming tomorrow), all collectible locations, and our full enemy breakdown for everything you need to conquer this haunting adventure.
Fishing in Stardew Valley provides one of the best early-game money sources, supplies ingredients for cooking and bundles, and offers a relaxing activity during rainy days when you can’t water crops. Mastering the fishing mechanics, understanding where and when each fish spawns, and successfully catching the five legendary fish transforms fishing from a frustrating mini-game into a profitable and enjoyable skill. This comprehensive guide covers fishing basics, optimal locations by season, and detailed strategies for landing every legendary fish in the game.
Mastering the Fishing Mechanics and Leveling Up
The fishing mini-game challenges many new players because it requires timing, precision, and understanding of the underlying mechanics. Each fish has different behavior patterns, and your fishing level dramatically affects success rates. Learning how the system works before diving into specific fish locations saves hours of frustration and wasted energy.
When you cast your line, you wait for a bite indicated by an exclamation mark and controller vibration. Click immediately when you see the bite notification to hook the fish. This triggers the fishing bar mini-game where a green rectangle appears with a fish icon bouncing inside. Your goal is to keep the fish icon inside the green bar by clicking to raise the bar and releasing to lower it. A progress meter on the right fills when the fish is inside your bar and drains when it escapes. Fill the meter completely to catch the fish.
The green fishing bar starts very small at fishing level 0, making catches extremely difficult. Each fishing level increases the bar size by approximately 8 pixels, with dramatic improvements in catchability around levels 3-4. By fishing level 10, your bar is nearly twice the starting size, making even difficult fish manageable. This means your first priority should be leveling up fishing as quickly as possible rather than targeting specific valuable fish.
Fishing experience comes from any successful catch, with more difficult fish providing more experience. You also gain experience from catching trash items like broken glasses, driftwood, and soggy newspapers. While trash gives minimal experience, it still contributes to leveling, so don’t ignore trash catches early on. You gain experience when hooking fish even if you fail to catch them, though successful catches provide significantly more.
The fishing rod progression matters enormously for success rates. You start with a Bamboo Pole that cannot use bait or tackle, severely limiting your effectiveness. At fishing level 2, purchase the Fiberglass Rod from Willy’s shop for 1,800g – this allows bait attachment, which makes fish bite 50% faster. At fishing level 6, purchase the Iridium Rod for 7,500g – this allows both bait and tackle attachments. Tackle provides various benefits like larger fishing bars, slower fish escape, or increased treasure chest chances.
Bait significantly improves fishing efficiency by reducing wait times between bites. Regular Bait costs 5g each from Willy or can be crafted from Bug Meat. Wild Bait crafted from fiber, bug meat, and slime provides better catch quality chances. Magnet increases treasure chest spawn rates. Always use bait once you have the Fiberglass Rod or better – the speed increase pays for itself many times over.
Tackle becomes available with the Iridium Rod and provides powerful bonuses. The Trap Bobber slows fish escape speed by 66%, making it the single best tackle for beginners and for catching legendary fish. Cork Bobber increases fishing bar size by 24 pixels. Dressed Spinner reduces minimum fish size. Lead Bobber prevents fish from escaping the bar during downward movement. Treasure Hunter increases treasure chest spawn rates to 20%. Barbed Hook prevents fish from escaping the bar when you’re not clicking, essentially giving you brief rest periods.
Perfect catches occur when you catch a fish without the progress meter ever decreasing – meaning the fish never escapes your bar throughout the entire catch. Perfect catches grant double experience and better fish quality. Achieving perfect catches becomes easier as your fishing level increases and with better tackle. They’re nearly impossible at low levels but become routine at level 10 with good tackle.
The treasure chest mechanic adds complexity to fishing. Occasionally a treasure chest icon appears behind the fish during the mini-game. If you keep the chest icon inside your fishing bar long enough, the chest opens and you receive items after catching the fish. Treasure chests contain geodes, resources, artifacts, and rarely very valuable items like Neptune’s Glaive or Ancient Seeds. However, focusing on treasure chests while catching fish increases difficulty substantially. Beginners should ignore chests until higher fishing levels.
Spring Fishing Locations and Target Fish
Spring offers excellent fishing opportunities for building your fishing skill and earning early-game money. Understanding which fish spawn in which locations during Spring helps you target valuable catches and complete bundles efficiently.
The mountain lake provides the easiest fishing location for beginners because many Spring fish here have simple behavior patterns. Smallmouth Bass spawn year-round in this lake from 6am to 7pm, making them reliable catches at any time. They have moderate difficulty and sell for 50g. Carp also spawn here year-round and are extremely easy to catch due to slow, predictable movement – perfect for practicing at low fishing levels. Carp sell for only 30g but provide essential early experience.
Bullhead appear in the mountain lake during Spring, Summer, and Fall at any time of day. They’re moderately difficult and sell for 75g. Largemouth Bass spawn from 6am to 7pm year-round and have moderate difficulty with a 100g sale price. The Rainbow Trout appears only during Spring and Summer in the mountain lake, spawning from 6am to 7pm on sunny days. Rainbow Trout are moderately difficult and sell for 65g. Shad spawn during rainy weather in Spring, Summer, and Fall from 9am to 2am in rivers and lakes, selling for 60g.
The river running through town offers different fish varieties than the lake. Catfish spawn exclusively during rainy Spring and Fall days from 6am to midnight, making them weather-dependent targets. Catfish are moderately difficult and sell for 200g, making them excellent money when available. Sunfish appear in rivers during Spring and Summer from 6am to 7pm on sunny days. They’re extremely easy to catch and sell for 30g, making them perfect beginner fish despite low value.
Bream spawn in rivers during all seasons at any time of day or night. They’re easy catches selling for 45g. Chub also spawn year-round in rivers at any time and are very easy to catch, though they sell for only 50g. Smallmouth Bass and Shad also appear in the river with the same spawn conditions as the mountain lake.
The ocean accessible from the beach provides saltwater fish varieties. Sardines spawn during Spring, Fall, and Winter from 6am to 7pm and are very easy to catch, selling for 40g. Anchovies appear in Spring and Fall from 6am to 2am and are extremely easy catches at 30g each. Herring spawn in Spring and Winter from 6am to 8pm, are very easy to catch, and sell for 30g. Red Mullet spawn only during Summer and Winter from 6am to 7pm in the ocean, so they’re not available in Spring.
Flounder appear in the ocean during Spring and Summer from 6am to 8pm and are moderately difficult, selling for 100g. Halibut spawn in Spring, Summer, and Winter from 6am to 11am and 7pm to 2am, are quite difficult to catch, and sell for 80g. Eel spawn in the ocean during Spring and Fall from 4pm to 2am when it’s raining, making them weather and time-dependent. Eels are moderately difficult and sell for 85g.
The Secret Woods pond accessed by cutting the large log with a Steel Axe or better contains exclusive fish. Woodskip spawn here year-round at any time and are moderately difficult, selling for 75g. This location also spawns Carp and Catfish during their normal seasons. The Woodskip is needed for the Specialty Fish Bundle, making the Secret Woods essential to visit.
The optimal Spring fishing strategy focuses on the mountain lake during sunny days to catch Largemouth Bass, Rainbow Trout, and build fishing levels with Carp. Switch to river fishing during rainy days to catch Catfish for excellent profits at 200g each. Ocean fishing works well for completing the Ocean Fish Bundle with Sardines, Anchovies, and Flounder. Save at least one of each fish type for Community Center bundles rather than selling everything.
Summer and Fall Fishing Opportunities
Summer and Fall expand fishing opportunities with new seasonal fish and continued access to many year-round species. These seasons provide the best fishing income potential as your fishing skill reaches higher levels.
Summer ocean fish include several valuable targets. Tuna spawn from 6am to 7pm and are moderately difficult, selling for 100g. Red Mullet appear from 6am to 7pm, are easy to catch, and sell for 75g. Octopus spawn from 6am to 1pm, are quite difficult, and sell for 150g. Super Cucumber appear from 6pm to 2am in Summer and Fall, are difficult to catch, and sell for 250g – making them one of the most valuable regular fish. Tilapia spawn from 6am to 2pm in Summer and Fall, are moderately easy, and sell for 75g.
Red Snapper appear in the ocean during Summer and Fall when it’s raining from 6am to 7pm. They’re moderately difficult and sell for 50g. Pufferfish spawn only during Summer from 12pm to 4pm on sunny days, are quite difficult to catch, and sell for 200g. The Pufferfish is needed for the Specialty Fish Bundle and has a narrow spawn window, making it easy to miss.
Summer river and lake fishing continues many Spring fish while adding new varieties. Pike spawn in rivers during Summer and Winter from 6am to 2am, are moderately difficult, and sell for 100g. Dorado appear in rivers during Summer from 6am to 7pm, are quite difficult to catch, and sell for 100g. Rainbow Trout continue spawning in the mountain lake during Summer with the same conditions as Spring. Sturgeon appear in the mountain lake during Summer and Winter from 6am to 7pm, are very difficult to catch, and sell for 200g. Sturgeon are needed for the Lake Fish Bundle and represent one of the harder bundle fish to catch.
Fall brings unique seasonal fish to all locations. Walleye spawn in rivers and the mountain lake during Fall and Winter from 12pm to 2am when it’s raining. They’re moderately difficult and sell for 105g. Walleye are required for the Night Fishing Bundle. Tiger Trout appear in rivers during Fall and Winter from 6am to 7pm, are quite difficult to catch, and sell for 150g. Salmon spawn in rivers during Fall from 6am to 7pm, are moderate difficulty, and sell for 75g.
Midnight Carp appear in the mountain lake and forest pond during Fall and Winter from 10pm to 2am. They’re moderately difficult and sell for 150g. Sea Cucumber spawn in the ocean during Fall and Winter from 6am to 7pm, are quite difficult to catch, and sell for 75g. Super Cucumber continue spawning with the same Summer conditions. Albacore appear in the ocean during Fall and Winter from 6am to 11am and 6pm to 2am, are difficult to catch, and sell for 75g.
The mines offer unique fishing opportunities when you fish in the underground lake on floors 20+. Ghostfish spawn year-round in the mines from 6am to 8pm, are easy to catch, and sell for 45g. Ghostfish are needed for the Specialty Fish Bundle. Stonefish spawn on floors 20+ year-round from 6am to 8pm, are difficult to catch, and sell for 300g. Ice Pip spawn in the mines on floors 60+ during all seasons from 6am to 8pm, are quite difficult, and sell for 500g. Lava Eel spawn on floor 100 of the mines year-round from 6am to 8pm, are extremely difficult to catch, and sell for 700g – making them the most valuable regular fish.
The Summer fishing strategy prioritizes the ocean for Tuna, Pufferfish, and Super Cucumber. Fish in the mountain lake for Sturgeon needed for bundles – this may take multiple attempts due to difficulty. Rainy Summer days offer excellent ocean fishing for Red Snapper. Fall strategy focuses on completing the Night Fishing Bundle by catching Walleye during rainy evenings, plus targeting valuable Super Cucumber and Ice Pip if you’ve reached the deeper mines.
Winter Fishing and Year-Round Locations
Winter eliminates many fish species but introduces winter-exclusive fish and forces strategic fishing during limited windows. This season is perfect for deep mine fishing since you can’t grow crops anyway.
Winter ocean fish include several returning species plus new additions. Sardines, Anchovies, Herring, Red Mullet, Halibut, Tuna, Sea Cucumber, Albacore, and Squid all spawn during Winter. Squid appear from 6pm to 2am during Winter only, are difficult to catch, and sell for 80g. The Nautilus Shell can be found on the beach during Winter, selling for 120g. Spook Fish spawn in the ocean during Winter from 6pm to 2am on the Night Market submarine ride only, are difficult to catch, and sell for 220g.
The Night Market runs from Winter 15-17 each year and features a submarine ride that takes you to new fishing areas. The submarine offers three different fishing zones with exclusive fish like Spook Fish, Blobfish, and Midnight Squid. This limited-time event provides unique fishing opportunities unavailable elsewhere.
Winter river and mountain lake fish focus on cold-water species. Pike, Walleye, Tiger Trout, Midnight Carp, Perch, and Lingcod spawn during Winter. Perch appear in rivers during Winter from 6am to 2am, are easy to catch, and sell for 55g. Lingcod spawn in rivers during Winter from 6am to 2am, are quite difficult to catch, and sell for 120g. Sturgeon continue spawning in the mountain lake from 6am to 7pm.
Crab Pots become especially valuable during Winter when regular fishing options decrease. Crab Pots placed in ocean water catch Lobster, Crab, Shrimp, Oyster, Cockle, Mussel, Clam, and Snail. Freshwater Crab Pots catch Crayfish, Snail, Periwinkle, and Mussel. The Mariner profession at fishing level 10 (choosing Fisher at 5) prevents trash catches in Crab Pots, making them purely profitable passive income sources.
Calico Desert fishing becomes accessible after completing Vault bundles and repairing the bus. The desert oasis pond contains Sandfish year-round from 6am to 8pm. Sandfish are moderately difficult and sell for 75g. They’re needed for the Specialty Fish Bundle. Scorpion Carp also spawn in the desert from 6am to 8pm, are quite difficult to catch, and sell for 150g.
The Winter strategy emphasizes mine fishing for Ghostfish, Stonefish, Ice Pip, and potentially Lava Eel if you’ve reached floor 100. Set up 10-20 Crab Pots in various water sources for passive income. Visit the Night Market during Winter 15-17 for exclusive submarine fish. Fish in the ocean for Squid and complete any remaining Ocean Fish Bundle requirements.
The Five Legendary Fish: Locations and Catching Strategies
Legendary fish represent the ultimate fishing challenge with extreme difficulty, unique spawn conditions, and one-catch-only availability. Each legendary fish can only be caught once per save file, sells for substantial gold, and provides significant satisfaction upon successful capture. Attempting legendary fish before fishing level 10 with good tackle is nearly impossible.
The Legend spawns in the mountain lake during Spring only when it’s raining. The spawn window is 6am to 8pm. The Legend has the most erratic movement pattern of any fish, darting rapidly up and down with sudden direction changes. Without preparation, catching The Legend is almost impossible. The fish sells for 5,000g and provides 5 gold star fish when caught, making it the most valuable single fish.
The strategy for The Legend requires fishing level 10, the Iridium Rod with Trap Bobber tackle, and preferably a Dish O’ The Sea food buff that gives +3 fishing. Wait for a rainy Spring day, go to the mountain lake, and cast into the deeper water areas. When you hook The Legend, remain calm and use small, controlled clicks to keep the bar near the fish. The Trap Bobber slows escape speed by 66%, giving you crucial reaction time. Expect to spend 30-60 seconds on the mini-game with the progress bar moving very slowly.
Crimsonfish spawns in the ocean east of Pelican Town during Summer from 6am to 8pm. You must fish from the eastern pier area – standing on the wooden pier that extends into the ocean east of Willy’s shop. Crimsonfish has extremely fast, aggressive movement patterns that challenge even skilled players. The fish sells for 1,500g.
The strategy for Crimsonfish is similar to The Legend but requires positioning on the eastern pier. Use Trap Bobber tackle, maximize your fishing level to 10, and consider food buffs. Crimsonfish moves faster than The Legend but slightly more predictably once you recognize its pattern. It tends to make rapid upward or downward charges followed by brief pauses. Anticipate these charges and position your bar accordingly.
Angler spawns in the river north of Jodi’s house during Fall from 6am to 8pm. The specific location is the wooden bridge area north of town. Angler has moderate-to-high difficulty with relatively smooth movement compared to other legendaries. The fish sells for 900g.
The Angler strategy requires fishing from the bridge or riverbank just north of the wooden bridge. This legendary is considered the “easiest” of the five, though still extremely difficult compared to regular fish. Use Trap Bobber tackle and fishing level 10. Angler moves in longer, smoother patterns rather than erratic darting, making it slightly more predictable. You still need excellent timing and concentration.
Glacierfish spawns at the south end of Arrowhead Island in Cindersap Forest during Winter from 6am to 8pm. You must fish from the specific island area accessible by crossing the bridge south of Marnie’s ranch. Glacierfish has very difficult movement with sudden direction changes and fast swimming. The fish sells for 1,000g.
The Glacierfish strategy requires reaching the island location first – cross the bridge south of Marnie’s ranch and position yourself on the southern tip of the forested island area. Glacierfish behavior resembles Crimsonfish with rapid movements but slightly less aggressive. Use Trap Bobber, maintain fishing level 10, and consider Cork Bobber if you struggle with bar size. This fish often surprises players with sudden downward plunges followed by rapid upward movements.
Mutant Carp spawns in the sewers year-round from 6am to 8pm. Accessing the sewers requires obtaining the Rusty Key from Gunther after donating 60 items to the museum. Mutant Carp has difficult but manageable movement patterns compared to other legendaries. The fish sells for 1,000g.
The Mutant Carp strategy is unique because it’s available year-round once you access the sewers, removing seasonal pressure. Fish anywhere in the sewer water. Mutant Carp moves in jerky, unpredictable patterns but slower than Crimsonfish or The Legend. Use Trap Bobber tackle. Many players consider this the second-easiest legendary after Angler, though it still requires solid fishing skills and level 10.
General legendary fish tips apply to all five catches. First, always save your game the night before attempting a legendary fish – if you fail the catch, you can reload and try again since legendaries only spawn once. Second, use Trap Bobber tackle exclusively for legendaries – the 66% slower escape speed is more valuable than any other tackle effect. Third, maximize your fishing level to 10 before attempting any legendary – the larger fishing bar makes a massive difference. Fourth, consider food buffs like Dish O’ The Sea (+3 fishing), Seafoam Pudding (+4 fishing), or Lobster Bisque (+3 fishing and +50 magnetism) to further increase bar size and catch likelihood.
Fifth, perfect your clicking technique – use rapid small clicks to make tiny adjustments rather than long holds that overshoot the fish position. Sixth, stay calm and patient – legendary catches often take 45-90 seconds of sustained concentration. Don’t panic when the progress bar seems stuck or moving backward. Seventh, practice on difficult regular fish first – catch Octopus, Lava Eel, and Sturgeon successfully before attempting legendaries to build confidence and skill.
Frequently Asked Questions
What fishing level do I need to catch legendary fish? Fishing level 10 is strongly recommended for all legendary fish. Technically you can attempt them at lower levels, but success rates are extremely low. The larger fishing bar at level 10 combined with Trap Bobber tackle gives you the best chance. Some players have caught easier legendaries like Angler or Mutant Carp at level 8-9, but it requires exceptional skill and luck.
Can I catch legendary fish more than once? No, each legendary fish can only be caught once per save file. Once caught, they never spawn again in that save. This makes legendary catches permanent achievements. However, if you have multiple save files or start a new game, you can catch them again in the new save.
What’s the best tackle for fishing? Trap Bobber is the best all-purpose tackle, especially for difficult fish and all legendaries. It slows fish escape speed by 66%, giving you crucial reaction time. Cork Bobber increases fishing bar size and helps at lower fishing levels. Treasure Hunter is useful when specifically farming treasure chests. Lead Bobber prevents escape during downward bar movement, helping with fish that dive frequently.
Where can I fish in Winter when most fish are gone? Winter is perfect for mine fishing since crops aren’t growing. Fish in the mines on floors 20+ for Ghostfish, Stonefish, and Ice Pip. Floor 100 offers Lava Eel, the most valuable regular fish at 700g. The ocean still has Squid, Tuna, and several other species. Set up Crab Pots for passive income. The desert oasis remains accessible if you’ve unlocked the bus.
How do I increase my chances of finding treasure chests while fishing? Treasure chests spawn randomly but can be increased with Magnet bait (doubles treasure chest spawn rate) and Treasure Hunter tackle (increases spawn rate to 20%). The Pirate profession at fishing level 10 doubles treasure chest spawn rates. Combining these methods maximizes treasure finds. Fish in areas with higher difficulty ratings, as treasure chests appear more frequently in challenging fishing spots.
I need to be honest with you right from the start – Mewgenics is absolutely unhinged, and I mean that as the highest compliment I can give. Edmund McMillen and Tyler Glaiel have crafted something that sounds completely ridiculous on paper: a tactical RPG mixed with cat breeding simulator wrapped in roguelite mechanics. Yet somehow, this bizarre combination works far better than it has any right to.
After sinking about 35 hours into building mutant cat armies, I’m still discovering new mechanics and laughing at the sheer absurdity of it all. This isn’t your typical strategy game – it’s a weird, gross, surprisingly deep experience that manages to balance juvenile humor with genuinely complex tactical gameplay.
The Core Loop: Breeding Warriors and Watching Them Fight
Here’s how Mewgenics works at its most basic level. You manage a house full of cats who breed to produce new generations of fighters. These cats go on turn-based tactical adventures across three acts, battling through areas like alleys, sewers, deserts, and boneyards. Once a cat completes a run, they retire from combat duty and become dedicated to making more kittens. It sounds simple, but there’s massive depth hiding beneath this structure.
Combat happens on 10×10 isometric grids where positioning matters, environmental effects can completely change your strategy, and every action has consequences. Your cats have equipment slots, class-specific abilities determined by collars they wear, passive traits that can fundamentally alter how they function, and stats that influence everything from damage output to how likely they are to succeed at random events.
What sets Mewgenics apart from other tactics games is the sheer freedom it gives you. You can use almost any ability on allies or enemies. Got a skill that confuses a character but buffs their strength? Use it on an enemy to make them attack themselves, or risk using it on your own tank to deal massive damage if the confusion roll fails. Skills that petrify can protect your cats from incoming attacks or lock down dangerous foes. This flexibility creates scenarios I’ve never seen in other tactical RPGs.
The environmental systems add another layer of chaos. Puddles conduct electricity, grass can be frozen into damaging spikes, desert heat prevents natural healing between battles unless you have water-based abilities. I’ve had fights completely turned around by random lightning strikes during storms or rubber tire obstacles bouncing around the battlefield. The game constantly throws curveballs at you, and learning to adapt on the fly is essential.
Breeding Mechanics and Long-Term Progression
Between runs, you’re managing your cat house and hoping the right pairs breed to create superior offspring. You can’t directly control who mates with whom – instead, you influence breeding through furniture that affects house stats like comfort and stimulation. Too little stimulation and cats might fight each other instead of breeding. Make the house too unappealing and quality strays won’t show up at your door.
The randomness here is simultaneously frustrating and delightful. I’ve spent entire evenings trying to breed the perfect tank bloodline, only to end up with a bunch of half-cleric-half-fighter hybrids instead. But sometimes these accidents turn into happy surprises, like when I got a cat with incredible charisma and defensive stats who became an unkillable support unit.
Mutations add even more unpredictability to the breeding process. These genetic quirks provide mixed bonuses and penalties – my favorite was a mouth mutation that gave gills, providing constant health regeneration while wet. Combined with water-based abilities, this became incredibly powerful in certain environments. The game encourages experimentation and embracing the chaos rather than trying to perfectly min-max everything.
One minor frustration I’ve encountered is the cat management interface. Once your house fills up with dozens of cats across multiple generations, sorting through them to find specific traits or stats becomes tedious. I wish there was better filtering to highlight cats I need for particular runs rather than clicking through each one individually. It’s a small complaint in an otherwise excellent system, but it does slow down the pace between adventures.
Combat Depth and Class Combinations
The class system offers incredible variety through collar assignments. Tanks absorb damage and control space, necromancers summon minions and leech life, druids shapeshift into different forms, clerics heal and support. Each class has distinct ability trees that you build through level-ups after every battle, and the random nature of which abilities appear keeps each run feeling fresh.
What really makes combat shine is discovering broken ability combinations. I had a fighter with a passive trait that gave extra turns after killing enemies face a boss that split into multiple smaller units. I watched in amazement as he autonomously took eight consecutive turns, mowing through the entire enemy formation. Another time, I created a necromancer build that could multiply leech effects across the entire battlefield, dealing hundreds of damage per turn to enemies with barely 50 health.
The game actively wants you to break it. With around 1,000 items and countless ability combinations, finding overpowered synergies is part of the fun rather than something to avoid. That said, death is always lurking nearby. Cats can permanently die if their corpses get hit three times while downed, taking their equipped items with them. The brutality keeps you engaged even when you think you’ve created an unstoppable team.
The Edmund McMillen Aesthetic
You can’t talk about Mewgenics without addressing its distinctive style. This game features copious amounts of poop, weird mutations, gross-out humor, and sexual content that some players will find off-putting. It’s the same aesthetic McMillen brought to The Binding of Isaac, just applied to cats instead of crying children in basements.
Personally, I find the humor juvenile but charming in its commitment to being ridiculous. Ability descriptions that just say “he go” for movement, the absurd boss designs, the random events that can give your cats parasites or disorders that make them eat poop – it’s all so deliberately over-the-top that it loops back around to being funny. Your tolerance for this style will significantly impact your enjoyment of Mewgenics.
Verdict: A Weird Masterpiece of Strategic Chaos
Mewgenics isn’t for everyone. The learning curve is steep, the humor is polarizing, and the randomness can feel overwhelming at first. But if you embrace the chaos and dive into its systems, you’ll find one of the most unique tactical RPGs in recent memory.
The combination of meaningful tactical decisions, long-term breeding strategy, and absurd humor creates something special. I’m 35 hours in and still encountering new enemy types, items, and mechanics. McMillen estimates there’s 200 hours of content here, and I absolutely believe him.
This game rewards experimentation, adaptation, and creativity rather than perfect execution of optimal strategies. Every run tells a story – sometimes of triumph, sometimes of hilarious disaster. That’s exactly what makes Mewgenics so compelling. It’s messy, chaotic, occasionally frustrating, and absolutely brilliant.
Beating Nioh 3’s main story unlocks Shogun’s Journey, the New Game Plus mode transforming your playthrough with tougher enemies, Divine rarity equipment, Grace sets, and powerful endgame systems designed for build perfection. Understanding what carries over, how Divine gear works, the restoration mechanics using Sands of Recollection and Scarlet Sands, Soul Core transformation options, Sudama Blessing for targeted farming, and preparing for the dramatic difficulty spike separates casual completionists from dedicated endgame grinders. This comprehensive guide explains how to unlock Shogun’s Journey, what transfers to NG+, Divine rarity weapons and Grace sets, all restoration systems, and optimal preparation strategies.
How to Unlock Shogun’s Journey New Game Plus
Shogun’s Journey unlocks automatically after defeating the final boss across all four time periods in Nioh 3. Once you clear the campaign, a pop-up notification confirms Shogun’s Journey is available. Access it anytime by opening your map and pressing L2 to select between Heir’s Journey (your original save) and Shogun’s Journey (New Game Plus).
Your original Heir’s Journey save remains intact and accessible, allowing you to switch freely between difficulties without losing progress. This lets you farm easier content in Heir’s Journey or revisit uncompleted collectibles before diving into Shogun’s Journey’s heightened challenge.
When starting Shogun’s Journey, the game offers to skip the introductory Edo period prologue, jumping directly to Escape from Hitokoto Slope in the Warring States era. This skip saves approximately thirty minutes for players who completed the prologue during their first playthrough and want immediate access to open field exploration.
What Carries Over to New Game Plus
Shogun’s Journey carries over everything meaningful from your first playthrough, ensuring you enter the harder difficulty with all hard-earned progress intact. Your character level, stat distribution, equipment loadout, Soul Cores, Guardian Spirits, unlocked skills, and Amrita all transfer directly.
Exploration Level progress carries over completely, meaning regions where you achieved Exploration Level 4 retain that status in Shogun’s Journey. Fast travel to previously unlocked shrines becomes available immediately, and Kodama you found during Heir’s Journey remain collected, maintaining your increased Elixir count. This eliminates tedious re-exploration for basic collectibles and lets you focus on new challenges.
All equipment including weapons, armor, accessories, and Soul Cores transfers to Shogun’s Journey. Your optimized build from the first playthrough provides the foundation for tackling tougher enemies right from the start. Blacksmith services remain accessible with all previously unlocked features, and your crafting materials carry over for immediate gear upgrades.
Battle Scroll missions unlock as you progress through the story again, with some training missions like Warrior, Ninja, and Onmyo becoming immediately available. However, rewards for these missions change to scale with Shogun’s Journey difficulty, providing Divine gear instead of Exotic rarity.
Certain progress does not carry over, creating fresh challenges. Main story missions must be completed again to unlock subsequent regions. Bodhisattva statues require re-activation by praying at them. NPC-related Myths like Fated Land and Abundant Evil reset and need completion again, though their objectives remain identical.
Divine Rarity Equipment and Grace Sets Explained
Divine rarity represents the new equipment tier exclusive to Shogun’s Journey, surpassing Exotic as the highest loot quality available. Divine weapons and armor feature green text coloring by default and unlock after defeating the final boss, with the first Divine drops occurring during the post-credits loot collection.
The defining feature of Divine equipment centers on randomized Grace effects replacing or supplementing traditional armor set bonuses. Grace sets function similarly to armor sets but activate when equipping multiple pieces sharing the same Grace regardless of specific item names. This flexibility enables mixing different armor pieces and weapons under one Grace, unlocking powerful scaling bonuses impossible through fixed armor sets.
Divine gear features four affixes compared to Exotic’s three, with one affix always being the Grace set bonus. This additional affix slot provides substantial stat improvements alongside the Grace effects. Familiarity caps at 999 points for Divine equipment versus lower caps on inferior rarities, and armor pieces gain defense stat increases as familiarity rises through combat use.
Popular Grace sets include Grace of Tsukuyomi regenerating Onmyo Magic uses on enemy kills, perfect for magic-heavy hybrid builds. Grace of Vaisravana emphasizes Martial Arts damage and Ki pressure, rewarding aggressive Samurai close-range combat. Grace of Amaterasu increases Close Combat Damage and provides bonuses against specific yokai types, benefiting pure physical damage dealers.
Grace sets activate through tiered bonuses based on equipped pieces. Two-piece bonuses grant minor stat increases, four-piece bonuses provide substantial passive effects, and seven-piece bonuses unlock build-defining abilities transforming your combat effectiveness. Building around a single Grace creates focused endgame loadouts outperforming scattered equipment choices.
Divine gear drops from all enemies in Shogun’s Journey but appears more frequently from bosses, Crucible Wraiths, and restored Enemy Bases using Scarlet Sands. The randomized Grace affixes mean farming specific combinations requires dedicated grinding, though Sudama Blessing helps target desired drops.
Restoration System – Sands of Recollection and Scarlet Sands
The restoration system introduces repeatable content by allowing you to reset Enemy Bases, Lesser Crucibles, Master duels, and Myth sidequests after completing them. When you clear an area, a spirit appears offering restoration using Sands of Recollection or Scarlet Sands of Despair as currency.
Sands of Recollection restore content to its base Shogun’s Journey difficulty, enabling you to reclear areas for additional rewards including Divine gear and Amrita. These items drop throughout open field exploration and reward from Battle Scroll missions, making them relatively common for standard farming loops.
Scarlet Sands of Despair create enhanced versions of restored content featuring significantly tougher enemies with increased health, damage output, and aggression. The elevated challenge comes with substantially better rewards including higher-level Divine gear, rare Grace combinations, and increased Soul Fragment drops for enhancement.
The game automatically restores conquered Enemy Bases when strong negative Ki grows rampant from defeating many open field enemies. After praying at a shrine following this message, one previously cleared Enemy Base restores itself without consuming restoration items. This automatic system encourages continuous exploration rather than exhausting all content immediately.
Restored Lesser Crucibles provide the most efficient method for farming specific Soul Cores at high levels. The wave-based combat format guarantees Crucible Wraith encounters dropping their associated cores, and using Scarlet Sands increases drop quality and quantity compared to standard restorations.
Strategic restoration focuses on high-density Enemy Bases containing multiple elite enemies or those guarding rare equipment chests. Restoring these locations repeatedly using Scarlet Sands creates efficient farming routes for Divine gear while maintaining engaging combat challenges.
Soul Core Transformation for Build Optimization
Soul Core Transformation unlocks after beating the main story, allowing you to change special effects on Soul Cores using Soul Fragments at any shrine. Access this feature through Manage Soul Cores, select Soul Core Transformation, and spend fragments to reroll random affixes on cores.
This system eliminates reliance on perfect core drops by letting you manually optimize existing cores. If a powerful Ibaraki Doji core drops with poor affixes, you can transform it repeatedly until receiving desired bonuses like increased Attack, Ki damage, or Anima generation matching your build requirements.
Each transformation attempt consumes Soul Fragments scaled to the core’s rarity and level. Higher rarity cores require more fragments per reroll, encouraging targeted optimization of your most critical cores rather than transforming everything indiscriminately. Farm Soul Fragments by dismantling duplicate cores through Resting Rites at shrines.
The transformation system pairs perfectly with the restoration mechanic. Repeatedly restoring and clearing Lesser Crucibles using Scarlet Sands generates duplicate high-level cores for dismantling into fragments, then transforming your equipped cores until achieving perfect affixes for your build archetype.
Rare-grade Soul Cores with blue coloring become available in Shogun’s Journey, featuring additional special effects compared to standard cores. These rare variants drop from restored content, particularly enhanced restorations using Scarlet Sands, and provide superior base stats before even considering transformations.
Sudama Blessing System for Targeted Farming
Sudama Blessing represents a shrine-based feature unlocked in Shogun’s Journey that increases drop rates for specific equipment categories by spending Ochoko Cups. This targeted farming system eliminates endless grinding for particular Grace sets or weapon types by biasing loot tables toward your desired items.
Access Sudama Blessing at any shrine after entering Shogun’s Journey. The interface displays equipment categories including weapon types, armor slots, and accessory types. Select your target category and spend Ochoko Cups to activate increased drop rates for a limited duration measured by enemy kills rather than real-time.
The blessing’s effectiveness scales with Tsukumo Fragments in your inventory. More fragments compound the drop rate bonus, dramatically improving your chances of receiving specific Divine gear pieces. Farm Tsukumo Fragments by exploring thoroughly and interacting with Tsukumo NPCs scattered throughout regions.
Strategic Sudama Blessing usage focuses on targeting the final missing pieces for Grace set completion. If you need Divine chest armor with Grace of Tsukuyomi to complete your seven-piece set, activate Sudama Blessing for chest armor then farm bosses or restored Enemy Bases until the desired piece drops.
Combine Sudama Blessing with Scarlet Sands restorations for maximum farming efficiency. The enhanced enemies from Scarlet Sands drop higher quality Divine gear, while Sudama Blessing biases those drops toward your specified equipment type, creating targeted loot acquisition impossible through random farming.
Level Sync Feature for Challenge Runs
Level Sync temporarily decreases your character level when accessing Battle Scroll missions, rewarding you with better loot for accepting additional challenge. This optional feature appears when selecting missions from shrines in Shogun’s Journey, allowing you to voluntarily handicap yourself for improved rewards.
The sync scales your level down to the mission’s recommended range, reducing your effective stats to match intended difficulty. Your equipment and skills remain functional, but raw stat advantages from overleveling disappear, forcing you to rely on mechanical execution rather than pure numbers.
Level Sync rewards include increased Divine gear drop rates, higher chances for rare Grace combinations, and bonus Amrita compared to completing missions at your natural level. This creates meaningful incentive for skilled players to engage with content they’ve outleveled rather than trivializing it through stat advantages.
Experienced players use Level Sync for deliberate practice against specific bosses. Syncing down to fight challenging encounters at intended difficulty hones combat skills applicable to even harder content like Scarlet Sands restorations where mechanical mastery determines success over stat advantages.
Difficulty Spike Preparation and Survival Tips
Shogun’s Journey enemies deal approximately fifty percent more damage than Heir’s Journey while possessing thirty percent larger health pools. Even early-game opponents like standard yokai can three-shot your character, demanding refined defensive skills and perfect Ki management compared to the more forgiving first playthrough.
Enemy placements change throughout Shogun’s Journey with additional yokai appearing in previously safe areas. Human enemies sometimes swap for yokai variants, and existing yokai upgrade to stronger versions like Oni-bi becoming Enenra. Bosses appear in unexpected missions, such as Enenra spawning during Crucible Manifested before you’d normally encounter them in Bakumatsu.
Defensive builds incorporating healing effects, damage mitigation, and Life recovery become significantly more valuable alongside pure damage setups. The Grace of Hotei provides health regeneration from talismans and deflects, creating sustain enabling extended encounters. Quick-Change Scrolls transform from optional insurance into mandatory survival tools providing second chances during boss attempts.
Maximize your Exploration Level to 4 in all regions before attempting their Shogun’s Journey story missions. The permanent stat bonuses from complete exploration compound with Divine gear, providing effective power equivalent to ten or more character levels. Combined with increased Elixir counts from Kodama, this preparation makes borderline impossible encounters manageable.
Focus builds around single Grace sets reaching seven-piece bonuses rather than mixing partial sets. The power spike from complete Grace activation far exceeds scattered two-piece bonuses from multiple sets. Farm Divine gear systematically using Sudama Blessing until achieving full seven-piece Grace, then tackle the most challenging content.
Summon co-op help liberally during early Shogun’s Journey progression until you’ve farmed sufficient Divine gear. The difficulty spike makes solo attempts frustrating before optimizing equipment, and allies provide breathing room to learn enhanced enemy patterns without constant death penalties.
FAQ
How do I unlock Shogun’s Journey New Game Plus?
Shogun’s Journey unlocks automatically after defeating the final boss and completing Nioh 3’s main story across all four time periods. A pop-up notification confirms availability. Access it anytime by opening your map and pressing L2 to select Shogun’s Journey. Your original Heir’s Journey save remains intact, allowing free switching between difficulties.
What carries over to New Game Plus in Nioh 3?
Everything meaningful carries over including character level, stats, equipment, Soul Cores, Guardian Spirits, unlocked skills, Amrita, Exploration Level progress, collected Kodama, and fast travel to shrines. Blacksmith services and crafting materials transfer completely. Main story missions must be replayed to unlock regions, and some Myths reset, but your build and progression remain intact.
What is Divine rarity and how do Grace sets work?
Divine rarity is the highest equipment tier exclusive to Shogun’s Journey, surpassing Exotic gear with green text coloring. Divine equipment features randomized Grace effects that activate when equipping multiple pieces sharing the same Grace, regardless of specific item names. Graces provide tiered bonuses at 2-piece, 4-piece, and 7-piece thresholds. Divine gear has four affixes versus Exotic’s three and caps familiarity at 999 points.
How does the restoration system work with Sands of Recollection?
The restoration system lets you reset Enemy Bases, Lesser Crucibles, Master duels, and Myths after completion using Sands of Recollection or Scarlet Sands of Despair. Sands of Recollection restore content to base Shogun’s Journey difficulty, while Scarlet Sands create enhanced versions with tougher enemies and better rewards. These items drop from exploration and Battle Scroll missions. The game also automatically restores Enemy Bases when defeating many open field enemies.
What is Sudama Blessing and how does it help farming?
Sudama Blessing is a shrine feature in Shogun’s Journey that increases drop rates for specific equipment categories by spending Ochoko Cups. Select your desired weapon type, armor slot, or accessory, activate the blessing, then farm enemies to receive more drops in that category. Effectiveness scales with Tsukumo Fragments in your inventory. Combine with Scarlet Sands restorations for maximum farming efficiency when targeting specific Divine Grace pieces.